

How to Thread a Needle: Step-by-Step Guide
How to Thread a Needle: Step-by-Step Guide for Perfect Stitching
Threading a needle might seem like a skill relegated to your grandmother’s sewing circle, but it’s actually the gateway to countless practical and creative projects. Whether you’re facing a loose button on your favorite jacket, tackling a small tear in your favorite jeans, or diving into embroidery as a new hobby, knowing how to thread a needle is non-negotiable. The frustration of fumbling with thread and a tiny eye can derail even the most enthusiastic DIY spirit, so let’s eliminate that obstacle once and for all.
The truth is, threading a needle doesn’t require magic or exceptional eyesight—it requires the right technique, the right materials, and maybe a touch of patience. Once you master this fundamental skill, you’ll unlock access to a world of mending, decorating, and creative expression that extends far beyond simple repairs. From sewing a button back onto a shirt to hemming pants to fit perfectly, this basic ability forms the foundation of all hand-sewing projects.
In this guide, we’ll walk you through multiple methods to thread a needle, troubleshoot common problems, and share insider tips that make the process smoother every single time. No more squinting at the eye of the needle or wasting thread—let’s make this simple and straightforward.
Why Threading a Needle Matters
Threading a needle is more than just a preliminary step—it’s the foundation of hand-sewing success. When you thread a needle properly, you ensure that your stitches will be even, your seams will hold strong, and your repairs will last. A poorly threaded needle can slip out mid-project, create uneven tension, or waste precious time as you restart your work.
Beyond the practical benefits, mastering this skill opens doors to mindfulness and creative expression. Hand-sewing has experienced a renaissance as people seek screen-free activities that produce tangible results. Whether you’re adjusting clothes after shrinking or simply maintaining your wardrobe, threading a needle becomes second nature once you understand the mechanics.
The skill also builds confidence. There’s something empowering about looking at a torn seam or a dangling button and knowing you can fix it yourself without a trip to the tailor. This self-sufficiency extends to bigger projects and encourages you to tackle home improvement challenges with greater assurance.
Materials You’ll Need
Before you even attempt to thread a needle, gather these essential supplies:
- Needles: Invest in a variety pack with different sizes. Fine needles work best for delicate fabrics and thread, while larger needles accommodate thicker threads and heavier materials.
- Thread: Quality thread makes a noticeable difference. Polyester and cotton threads are versatile for most projects; silk thread offers elegance for fine work.
- Scissors: Sharp, small scissors designed for thread cutting prevent fraying and give you clean cuts.
- Good lighting: Natural daylight or a bright lamp eliminates shadows and makes the needle eye visible.
- Magnifying glass (optional): A small magnifier or reading glasses can be invaluable if you have vision challenges.
- Needle threader (optional): This inexpensive tool transforms the threading process, especially for fine needles or poor lighting conditions.
Having quality materials isn’t about luxury—it’s about removing friction from the process. A dull needle fights against fabric; a sharp one glides through. Thin, weak thread breaks under tension; sturdy thread holds reliably.

The Basic Threading Method
Let’s walk through the most straightforward approach to threading a needle. This method works for standard sewing needles and most hand-sewing projects.
Step 1: Cut Your Thread
Start with a length of thread approximately 18 to 24 inches—roughly the distance from your fingertip to your elbow. This length is long enough to complete small repairs without constantly re-threading, yet short enough to avoid tangling. Use sharp scissors to cut at a slight angle, which naturally tapers the thread end and makes insertion easier.
Step 2: Prepare Your Needle
Hold the needle up to light and locate the eye. Position the needle so the eye is clearly visible and well-lit. Some people prefer holding the needle steady and bringing the thread to it; others do the reverse. Choose whichever feels more natural for your hand coordination.
Step 3: Moisten the Thread End
Pinch the thread end between your thumb and forefinger, then briefly touch it to your lips or tongue. The moisture helps the thread fibers cling together, creating a slightly stiffer point that’s easier to guide through the needle eye. This simple step dramatically increases your success rate.
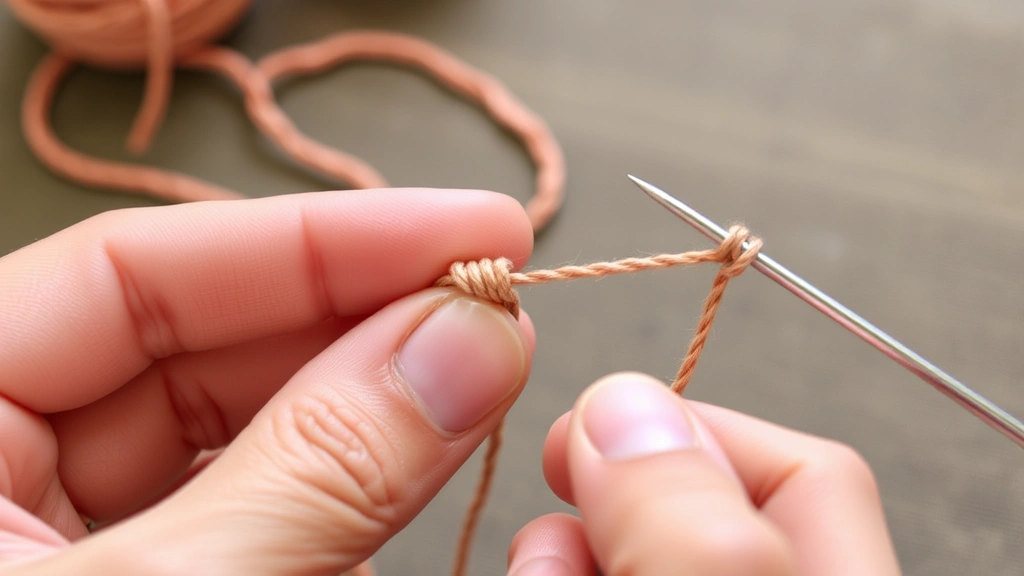
Step 4: Insert the Thread
With steady hands, bring the moistened thread end to the needle eye. Move slowly and deliberately—rushing is the enemy here. Thread the end through the eye in one smooth motion. If the thread catches on the edge of the eye, pull back slightly and adjust your angle rather than forcing it through.
Step 5: Pull the Thread Through
Once the thread passes through the eye, pull it through until you have equal lengths on both sides of the needle, or pull it so one end is longer if you prefer. The longer end is typically easier to work with.
Step 6: Knot the End
At the end of your thread length, tie a simple knot. Hold the thread end and wrap it around your index finger, then roll it between your thumb and forefinger to create a small loop. Push the needle through this loop and pull tight. This creates a knot that prevents your stitches from unraveling.
Congratulations—you’ve successfully threaded a needle! The entire process should take just 30 seconds once you develop a rhythm.
Advanced Threading Techniques
For those dealing with particularly challenging scenarios, these alternative methods can save frustration.
Using a Needle Threader
A needle threader is a small wire device that simplifies the process dramatically. Insert the wire loop through the needle eye, place your thread through the wire loop, then pull the threader back through the needle eye. The thread follows the wire and exits through the eye—no fumbling required. Needle threaders cost just a few dollars and are worth their weight in gold for anyone with vision challenges or arthritis.
The Folding Method
For very fine needles, try this technique: fold the thread in half to create a loop. Insert the loop through the needle eye, then pass the needle through the loop again. This creates a doubled thread that’s thicker and stronger, perfect for projects requiring extra durability. This method is particularly useful when sewing a button that receives heavy stress.
The Stiffening Method
If moistening doesn’t provide enough stiffness, try this: after cutting your thread, dab the end with a tiny amount of clear nail polish or fabric stiffener. Allow it to dry for a few seconds, and the thread end becomes rigid enough to pierce through even stubborn needle eyes. This works exceptionally well with delicate threads that tend to fray.
Threading Multiple Needles
If you’re working on a project requiring multiple colors or thread types, thread several needles at once and store them in a small pincushion. This saves time and keeps your workspace organized. Label each needle with a small piece of tape if the thread colors are similar.
Troubleshooting Common Problems
Even experienced sewers encounter threading challenges. Here’s how to solve the most common issues:
Thread Won’t Go Through the Eye
Problem: The thread keeps catching or fraying at the needle eye.
Solutions: First, ensure your thread is properly moistened. Second, check that your needle eye isn’t damaged—a burr or bent edge will catch thread every time. If the needle is damaged, discard it and use a fresh one. Third, try cutting the thread at a sharper angle or using a thinner thread appropriate for your needle size.
Thread Keeps Slipping Out
Problem: The thread slides out of the needle during stitching.
Solutions: Your knot may be too small or the thread too slippery. Tie a larger knot by wrapping the thread around your finger twice instead of once. Alternatively, use thread specifically designed for hand-sewing rather than machine-sewing thread, which is often too slick. You can also apply a tiny dot of fabric glue at the knot to secure it.
The Needle Eye is Too Small
Problem: Your needle eye is too tiny for the thread you’re using.
Solutions: Use a larger needle—needle sizes range from 1 (largest) to 12 (smallest). Match your needle size to your thread thickness. When in doubt, use a needle threader to manage the challenge, or switch to thinner thread. For embroidery work with thick threads, use embroidery needles specifically designed with larger eyes.
Your Eyes Are Tired
Problem: Eyestrain makes it difficult to see the needle eye.
Solutions: Invest in better lighting—a desk lamp with a magnifying lens attachment is transformative. Wear reading glasses if you use them. Take breaks every 20 minutes to rest your eyes. Consider a needle threader as your new best friend. There’s no shame in using tools that make tasks easier; that’s exactly what tools are for.
Pro Tips and Tricks
Experienced sewers have learned countless small tricks that make threading easier and faster:
- Thread in daylight: Natural light reveals the needle eye far better than artificial lighting. If possible, position yourself near a window or work during daylight hours.
- Use a white background: Place a white piece of paper or fabric behind your needle. The contrast makes the eye pop visually, making it easier to locate and thread.
- Keep your needles sharp: Store needles in a pincushion rather than loose in a drawer. Protect them from moisture and damage. Sharp needles are easier to thread and create better stitches.
- Thread multiple needles at once: When you’re in the threading zone, thread several needles and store them ready for use. This is more efficient than threading one at a time as you need them.
- Experiment with thread types: Different threads have different properties. Silk thread is slippery but elegant; cotton thread is matte and traditional; polyester thread is strong and colorfast. Find what works best for your projects.
- Learn to re-thread mid-project: If your thread runs out during a seam, simply knot it off, cut it, and re-thread without starting over. This skill saves time and frustration.
- Keep your workspace organized: A small sewing kit with scissors, needles, thread, and a thimble keeps everything within reach. Clutter and searching for supplies interrupt your workflow.
These small optimizations compound over time, transforming threading from a frustrating chore into a quick, almost meditative step in your sewing process. Once you’ve threaded a needle hundreds of times, your hands will find the rhythm automatically.
Frequently Asked Questions
What size needle should I use for regular hand-sewing?
For most hand-sewing projects, use a needle size between 7 and 10. Size 8 or 9 is ideal for general-purpose sewing with standard thread. Smaller needles (10-12) work for fine, delicate sewing, while larger needles (1-6) accommodate thicker threads and heavier fabrics. When in doubt, match your needle size to your thread thickness—they should be proportional.
Can I use machine thread for hand-sewing?
Technically yes, but it’s not ideal. Machine thread is often too thin and slick, causing it to slip out of stitches. Hand-sewing thread is specifically formulated with a slightly rougher texture that grips fabric better. For best results, use thread labeled for hand-sewing, especially for projects that will receive heavy use or frequent washing.
How do I prevent my thread from tangling?
Keep your thread length to 18-24 inches maximum. Longer thread tangles more easily. Additionally, store your thread on spools or in a thread organizer rather than loose in a drawer. When working, occasionally twist your needle gently to unwind any twists that develop in the thread. If tangling persists, try using thread conditioner—a light wax coating that reduces friction.
Is a needle threader cheating?
Absolutely not. A needle threader is a tool designed to solve a specific problem. Using it is smart, not weak. Professional seamstresses and tailors use needle threaders regularly. The goal is to complete your projects efficiently and enjoyably, not to suffer unnecessarily. Use whatever tools make the process easier for you.
What’s the best knot for securing thread at the end?
The simple loop knot works well for most purposes. Wrap the thread around your finger, roll it between thumb and forefinger to create a small knot, then pass the needle through the loop and pull tight. For extra security on heavily-used repairs, tie two knots instead of one. Some sewers prefer a backstitch knot, which involves taking a small stitch and pulling the thread through the loop created—this creates an extremely secure knot.
Can I thread a needle with two different colored threads?
Yes, though it requires a needle with a large enough eye. Thread one color partway through, then thread the second color. Both threads will exit the eye together. This technique is sometimes used for decorative effects or when you want both colors in your stitching. However, most projects use one thread color at a time for cleaner results.
How do I thread a needle if I have arthritis or tremors?
A needle threader is your best solution. The wire loop does the precise work that hand tremors interfere with. Additionally, use larger needles with bigger eyes, which are easier to access. Consider using a magnifying glass to see the eye better. Take breaks to rest your hands. If threading remains difficult, consider having a friend or family member thread several needles for you to use throughout your project.
Related Posts

How Long to Boil Lobster Tails: Cooking Guide

How Long to Fly from New York to London? Travel Times
