
Create a Wired Ribbon Bow: Expert Tips Included
How to Make a Bow with Wired Ribbon: Expert Tips Included
Wired ribbon bows are a versatile and elegant decoration that can elevate any gift, wreath, or floral arrangement. Unlike standard ribbon, wired ribbon features thin wire sewn into its edges, allowing you to shape and manipulate it into beautiful, dimensional bows that hold their form perfectly. Whether you’re decorating for holidays, special occasions, or everyday home décor projects, mastering the technique of creating wired ribbon bows is an essential skill for DIY enthusiasts and crafters alike.
The beauty of wired ribbon lies in its flexibility and durability. Once you shape your bow, it maintains that shape without drooping or losing its structure. This makes wired ribbon ideal for creating professional-looking bows that can be reused season after season. In this comprehensive guide, we’ll walk you through everything you need to know about selecting materials, preparing your ribbon, and executing different bow styles with confidence and precision.

Understanding Wired Ribbon and Its Benefits
Wired ribbon comes in countless varieties, each offering unique aesthetic qualities and functional advantages. The wire embedded along the edges is typically made from flexible steel or aluminum, allowing the ribbon to maintain whatever shape you create. This is fundamentally different from standard ribbon, which tends to droop and lose its form over time, especially when used in decorative applications.
One of the primary advantages of wired ribbon is its superior hold and structure. When you create loops and curves with wired ribbon, they stay exactly where you position them. This is particularly valuable when you’re exploring DIY decorating projects that require your bows to maintain their appearance throughout display periods or multiple uses. The wire also makes it easier to adjust and reshape your bow after it’s been created, giving you flexibility if you want to modify the look or fix any imperfections.
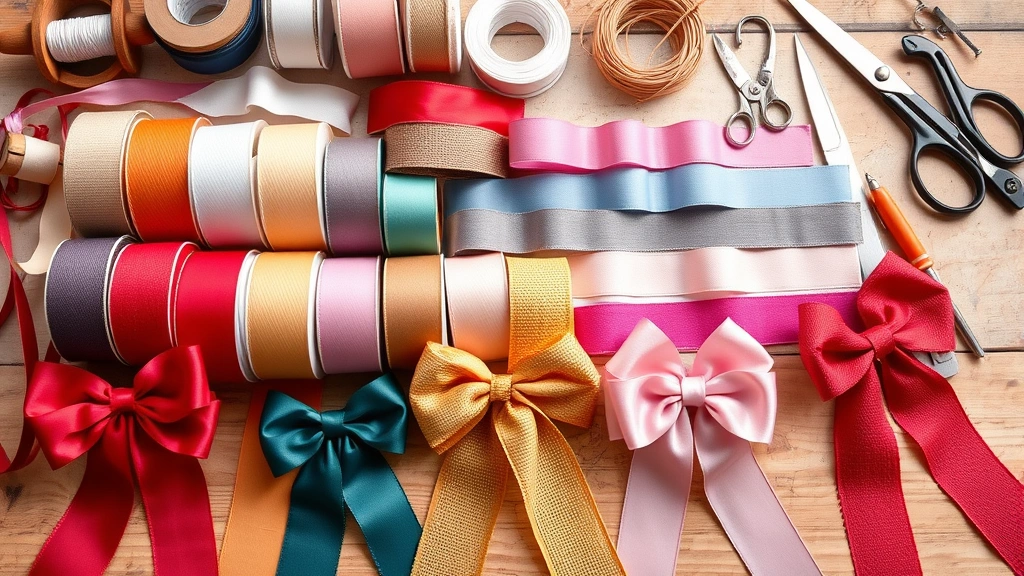
Wired ribbon is available in various widths, typically ranging from 1.5 inches to 4 inches wide. Wider ribbons create more dramatic, fuller bows, while narrower options work better for delicate, refined designs. The material composition varies as well—you’ll find wired ribbon in silk, satin, cotton, burlap, and synthetic blends. Each material offers different visual effects and durability characteristics. For DIY home improvement and decoration endeavors, choosing the right ribbon material ensures your finished bow matches your décor style and withstands environmental conditions.
Essential Tools and Materials You’ll Need
Before you begin creating your wired ribbon bows, gather the following supplies to ensure a smooth, professional crafting experience:
- Wired Ribbon: Choose your preferred width, color, and material. Most projects use 2.5 to 3-inch wide ribbon as a versatile starting point.
- Floral Wire or Paddle Wire: This holds your bow together and provides an anchor point for attachment. Green floral wire blends seamlessly with most projects.
- Wire Cutters: Essential for cutting both ribbon edges and floral wire cleanly. Sharp cutters prevent fraying and ensure neat edges.
- Scissors: High-quality fabric scissors make cutting ribbon cleaner than standard scissors and reduce damage to delicate materials.
- Ruler or Measuring Tape: Precision in measurements ensures consistent loop sizes and professional-looking results.
- Hot Glue Gun and Glue Sticks: Optional but helpful for securing elements and adding embellishments to your finished bow.
- Embellishments: Consider adding berries, sprays, ornaments, or complementary ribbons to enhance your bow design.
Having these tools organized and within reach before you start will make the bow-making process more efficient and enjoyable. Many of these supplies are readily available at craft stores, fabric retailers, and online home improvement suppliers.
Step-by-Step Guide to Basic Wired Ribbon Bow
Creating a basic wired ribbon bow is an excellent starting point for beginners. This fundamental technique forms the foundation for more complex bow designs and can be completed in just a few minutes once you understand the process.
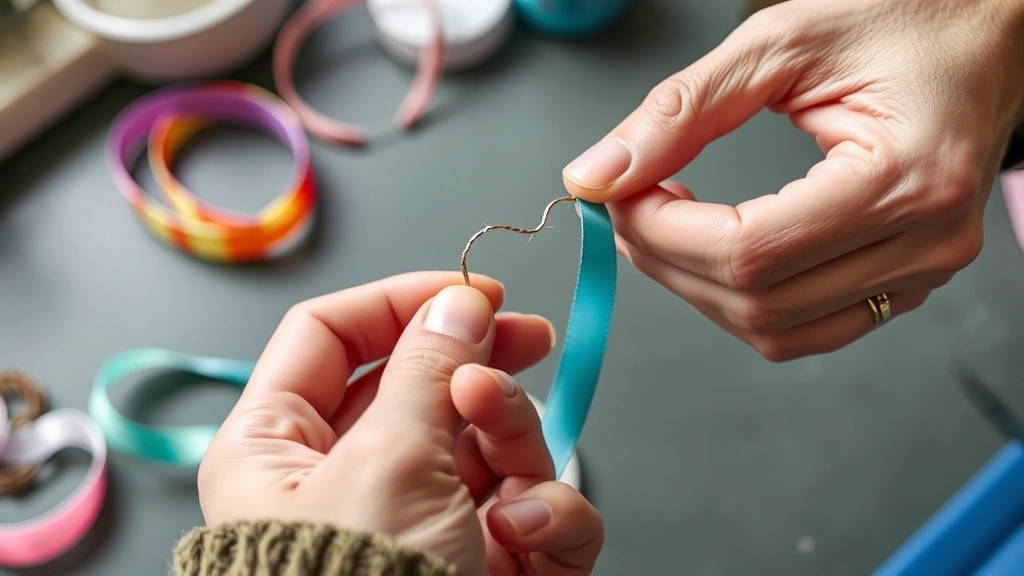
Step 1: Prepare Your Ribbon
Cut a length of wired ribbon approximately 24 to 30 inches long. This length provides enough material to create two substantial loops plus a center section. Lay your ribbon flat on your work surface, ensuring the wires run smoothly along the edges without kinks or twists.
Step 2: Create the First Loop
Form a loop with one end of your ribbon, bringing it back toward the center point. The size of your loop depends on your desired bow dimensions—typically 4 to 6 inches is ideal for most applications. Gently pinch the ribbon where it crosses, holding the loop firmly in place.
Step 3: Form the Second Loop
Create a matching loop on the opposite side of your ribbon length, mirroring the first loop’s size and shape. Cross this loop over the first one, creating an X pattern. The intersection point is where your bow will be secured, so hold it firmly.
Step 4: Secure with Floral Wire
Wrap floral wire around the center intersection point multiple times, creating a secure binding. Use approximately 12 to 18 inches of wire, wrapping it tightly at least 4 to 5 times around the bow’s center. The wire should compress the ribbon layers without cutting into the material.
Step 5: Adjust and Shape Your Loops
Once secured, gently manipulate each loop to ensure they’re symmetrical and properly positioned. You can pull the wires along the ribbon edges to create subtle curves or adjust the loop height. The wired edges make this shaping process simple and forgiving.
Step 6: Trim Excess Ribbon
Cut the remaining ribbon ends at an angle to create tails. These tails should be approximately 6 to 8 inches long, depending on your preference. Angled cuts prevent fraying and create a more polished appearance.
Creating Multi-Loop Bows for Maximum Impact
Once you’ve mastered the basic two-loop bow, you can expand your skills to create more elaborate multi-loop designs. These fuller bows make striking decorative statements and are particularly popular for wreaths, large gifts, and special event arrangements.
Understanding Loop Layering
Multi-loop bows work by layering loops of progressively different sizes, creating depth and dimension. The traditional approach involves creating 4 to 6 loops total, with the outer loops being larger and inner loops progressively smaller. This graduated sizing creates visual interest and a professional, florist-quality appearance.
Building Your Multi-Loop Bow
Begin by creating your first set of loops using the basic method described previously. Once these are secured, create a second set of loops from the same ribbon strand, positioning them slightly offset from the first set. Wrap additional floral wire around the center to secure these new loops. Continue this process, layering loops and adjusting their positions until you achieve your desired fullness and shape.
Adding Ribbon Trails and Embellishments
After securing all loops, you can enhance your multi-loop bow by adding decorative ribbon trails. These are longer pieces of ribbon that hang from the bow’s center, creating elegant vertical lines. Cut ribbon pieces approximately 12 to 18 inches long and secure them to the floral wire at the bow’s center. You can also attach embellishments and decorative elements at this stage, such as ornaments, berries, or complementary ribbon colors.
Multi-loop bows are particularly effective when displayed on wreaths or large packages. The layered construction allows light to play across the ribbon surface, creating dynamic visual effects. When preparing for seasonal celebrations and decorating your home, these fuller bows serve as impressive focal points that elevate your entire décor scheme.
For additional inspiration and techniques, consult This Old House’s collection of DIY decoration guides, which offers comprehensive resources for home improvement and décor projects.
Advanced Techniques and Professional Styling
Professional florists and decorators employ several advanced techniques to create bows that rival commercial products. Understanding these methods will elevate your bow-making skills and allow you to tackle more ambitious projects.
The Spiral Loop Technique
This advanced method involves creating loops that spiral outward from the center point, rather than crossing over each other. Begin by creating your first loop and securing it with wire. Create the next loop, positioning it slightly rotated from the first. Continue this process, rotating each subsequent loop approximately 45 degrees, until you’ve created a complete spiral pattern. This technique creates exceptionally full, dimensional bows that look professional and polished.
Combining Multiple Ribbon Types
Professional bows often incorporate multiple ribbon types and colors to create visual interest and complexity. You can use different ribbon widths, textures, and colors together, layering them to create sophisticated designs. Begin by securing your primary ribbon in place, then layer secondary ribbons on top, offset slightly to showcase both materials. This technique works particularly well when combining complementary colors or contrasting textures like satin with burlap.
Creating Bow Clusters
For large-scale applications like porch decorations or commercial displays, bow clusters combine multiple smaller bows into one impressive arrangement. Create 3 to 5 individual bows using different ribbon colors and widths, then group them together, securing them with floral wire to create a unified design. This approach allows you to use ribbon scraps and create custom color combinations tailored to specific décor schemes.
Weather-Resistant Applications
When creating bows for outdoor use, consider material durability and weather resistance. Synthetic ribbon materials withstand rain and UV exposure better than natural materials. Additionally, use waterproof floral wire and secure your bows with weather-resistant adhesives if necessary. For outdoor home maintenance and decoration projects, planning for environmental factors ensures your creations maintain their appearance throughout the season.
Troubleshooting Common Bow-Making Problems
Even experienced crafters encounter challenges when making wired ribbon bows. Understanding common problems and their solutions will help you overcome obstacles and improve your technique.
Loops Won’t Hold Their Shape
If your loops collapse or lose their form, the wire may not be properly positioned along the ribbon edges. Inspect your ribbon to ensure the wire runs continuously along both edges without gaps or breaks. Additionally, ensure you’re creating loops of appropriate size—extremely large loops may not hold shape without additional support. Consider using thicker gauge wire or double-wrapping the center section for better structure.
Ribbon Fraying at Cut Edges
Fraying occurs when ribbon fibers separate at cut edges. Prevent this by using sharp fabric scissors or wire cutters designed for ribbon work. For particularly delicate materials, apply a small amount of clear-drying fabric glue to cut edges before displaying your bow. Alternatively, create angled cuts rather than straight cuts, which reduces fraying and creates more polished edges.
Uneven or Asymmetrical Loops
Asymmetrical loops result from inconsistent loop sizing or uneven wire tension. Measure your ribbon carefully when creating loops, using a ruler to ensure consistent dimensions. Pull wire gently and evenly along ribbon edges to maintain uniform tension. Practice with less expensive ribbon first to develop consistent hand movements and pressure application.
Wire Cutting Through Ribbon
Excessive floral wire tension can cut through delicate ribbon materials. When wrapping wire around your bow’s center, apply firm but gentle pressure. For delicate materials, consider using softer wire or creating a protective layer by wrapping a thin piece of ribbon around the center before securing with floral wire.
Difficulty Attaching Embellishments
Hot glue works well for most embellishments, but test it on scrap ribbon first to ensure it doesn’t stain or damage your material. For particularly delicate items, consider using floral wire to secure embellishments rather than adhesive. Wire attachment is also more reversible if you want to modify your bow later.
Storage and Care for Your Wired Ribbon Bows
Proper storage and care extend the lifespan of your wired ribbon bows, allowing you to reuse them across multiple seasons and occasions. With appropriate maintenance, quality wired ribbon bows can remain beautiful for years.
Storing Bows Safely
Store finished bows in a cool, dry location away from direct sunlight, which can fade ribbon colors over time. Place each bow in an individual tissue paper envelope or small box to prevent crushing and tangling. Avoid stacking heavy items on top of stored bows, as this can permanently deform loops and affect their appearance.
Cleaning and Refreshing Bows
Dust accumulated on bows can be gently removed with a soft brush or clean cloth. For bows made from washable materials, you can carefully rinse them with cool water and mild soap, then air dry completely before storage. Avoid wringing or twisting the bow during cleaning, as this can damage the ribbon material and distort the wire structure.
Refreshing Flattened Loops
After extended storage, bow loops may appear slightly flattened. Gently reshape them by hand, carefully pulling the wires along the ribbon edges to restore their original form. The flexibility of wired ribbon makes this restoration process simple and effective, returning your bow to its original appearance.
Seasonal Rotation and Reuse
One of the primary advantages of wired ribbon bows is their reusability. Maintain a collection of bows in various colors and styles, rotating them seasonally or for different occasions. When managing household organization and home improvement projects, dedicating a storage container to your bow collection keeps these items organized and readily accessible for future use.
For additional resources on decorative techniques and home improvement, Home Depot’s DIY section offers comprehensive guides and material recommendations for various crafting projects.
FAQ
What width of wired ribbon is best for beginners?
A 2.5 to 3-inch width is ideal for beginners. This size is wide enough to create substantial, impressive-looking loops while remaining manageable to work with. Narrower ribbons can be more difficult to control, while wider ribbons may require more floral wire for secure fastening.
Can I reuse the same ribbon to make multiple bows?
Yes, absolutely. Wired ribbon’s durability allows you to unwind it and reuse it for new bows. Simply carefully remove the floral wire securing your bow, gently straighten the ribbon, and create a new design. This makes wired ribbon an economical choice for frequent crafters and decorators.
How long does it take to make a wired ribbon bow?
A basic two-loop bow takes approximately 5 to 10 minutes once you’ve developed your technique. Multi-loop bows may require 15 to 30 minutes depending on complexity. With practice, your speed will increase significantly as your hands become familiar with the motions.
What’s the difference between wired and unwired ribbon?
Wired ribbon has thin wire sewn into its edges, allowing it to hold shapes indefinitely. Unwired ribbon is flexible but doesn’t maintain its form without constant support. Wired ribbon is superior for bows and decorative applications requiring lasting structure and shape retention.
Can wired ribbon bows be used outdoors?
Yes, but choose materials carefully. Synthetic wired ribbons withstand outdoor conditions better than natural materials. Use waterproof floral wire and position bows where they’ll receive minimal direct rain exposure. Periodically inspect outdoor bows and refresh them as needed to maintain their appearance.
What’s the best way to attach a wired ribbon bow to a wreath?
Use the floral wire extending from your bow’s center to secure it directly to the wreath form. Wrap the wire around the wreath base multiple times, ensuring a secure connection. Alternatively, use hot glue or wire to attach the bow to a hook or anchor point on the wreath surface.
How do I prevent my ribbon from twisting while making a bow?
Keep your ribbon flat on your work surface and avoid rotating or twisting it during the loop-creation process. Work slowly and deliberately, ensuring each loop lies flat before creating the next one. Practice with your hands in a relaxed position rather than gripping tightly, which can cause unintentional twisting.
Can I use wired ribbon for gift wrapping?
Yes, wired ribbon works beautifully for gift wrapping. Its structure allows you to create elegant bows directly on packages, and it maintains its appearance throughout the gift-giving process. Consider using narrower widths for smaller gifts and wider ribbons for larger packages.
Related Posts

Superscript in Google Docs: Expert Tips

Strikethrough in Excel: Easy Steps for Beginners
