

How Long Does Jello Take to Set? A Quick Guide
How Long Does Jello Take to Set? A Quick Guide
There’s something almost magical about watching a bowl of jello transform from a shimmering liquid into a perfectly jiggly dessert. But if you’ve ever found yourself staring at your fridge, wondering whether your jello masterpiece will be ready in time for dinner, you’re not alone. The answer to “how long does jello take to set?” isn’t always straightforward, and understanding the variables involved can save you from dessert disasters and last-minute stress.
Whether you’re preparing a simple dessert for a weeknight family dinner, crafting elaborate jello shots for a party, or experimenting with layered creations that would make any home baker proud, timing is everything. The setting time depends on multiple factors beyond just tossing a packet into hot water and hoping for the best. Temperature, mold size, ingredient additions, and even your refrigerator’s efficiency all play crucial roles in determining exactly when your jello reaches that perfect wobble.
In this comprehensive guide, we’ll break down everything you need to know about jello setting times, from the basic timeline to advanced techniques that’ll make you a jello-setting pro.
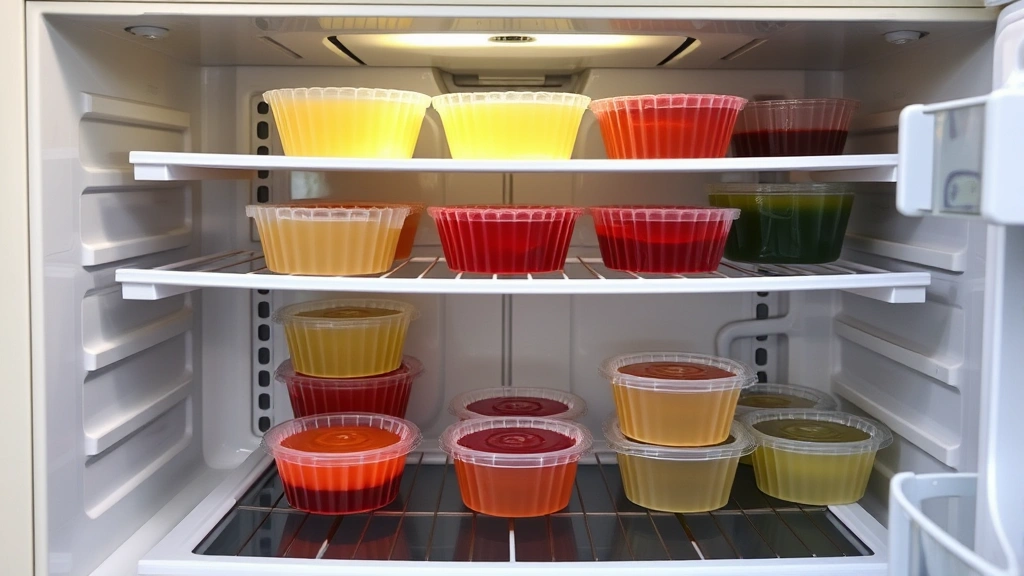
Standard Jello Setting Time
The most straightforward answer: standard jello typically takes 4 to 6 hours to set completely at normal refrigerator temperature (around 40°F or 4°C). This is the timeline you’ll find on most jello boxes, and it’s a reliable baseline for your planning.
However, there’s an important distinction between “set” and “completely set.” Your jello might feel firm enough to eat after 2 to 3 hours, but it won’t reach its ideal texture and structural integrity until that full 4 to 6 hours have passed. If you’re stacking layers or creating complex jello structures, patience really does pay off.
For overnight setting, which many recipes recommend, you’re looking at 8 hours or more. This ensures your jello reaches maximum firmness and stability, making it ideal for unmolding or serving at events where presentation matters.
Factors That Affect Setting Time
Not all jello is created equal, and several variables can dramatically alter how long your gelatin takes to set. Understanding these factors gives you real control over the process.
- Mold or container size: A shallow dish of jello sets faster than a deep bowl. Thin layers might be ready in 2 hours, while a deep mold could take 8 hours or more.
- Refrigerator temperature: A freezer set at 0°F will set jello in 1 to 2 hours, while a warmer fridge (45-50°F) might need 8+ hours.
- Gelatin concentration: Using more gelatin powder creates a firmer set in less time. Standard recipes use one packet per two cups of liquid, but you can adjust this ratio.
- Added ingredients: Fresh fruit, whipped cream, or other mix-ins can slow the setting process. Acidic fruits like pineapple contain enzymes that can prevent proper gelation.
- Room temperature exposure: Every minute your jello sits outside the fridge adds time to the setting process.
Temperature’s Role in the Process
Temperature is arguably the most influential factor in jello setting time, and it’s worth understanding the science behind it. Gelatin is a protein that forms a gel structure when cooled. The colder your environment, the faster this molecular transformation occurs.
Here’s a practical breakdown: At a standard refrigerator temperature of 40°F (4°C), you’re looking at that 4 to 6-hour window. If you lower the temperature to freezer conditions around 0°F (-18°C), you can reduce setting time to just 1 to 2 hours. This is why knowing how long it takes for water to boil matters—properly hot water helps the gelatin dissolve completely, which affects final setting time.
Conversely, if your kitchen is warm or your fridge is set warmer than normal, you could be waiting 8 hours or longer. Room temperature exposure is your enemy here. Every minute your prepared jello mixture sits on the counter before hitting the fridge adds to your total wait time.
Pro tip: If you’re in a hurry, use ice-cold water instead of boiling water (though you’ll still need some hot water to dissolve the gelatin properly). The colder the mixture when it enters the fridge, the faster it’ll set.
How to Speed Up Jello Setting
Sometimes you need jello ready faster than nature intended. Here are legitimate methods to accelerate the process without compromising quality:
- Use the freezer strategically: Place your jello in the freezer instead of the fridge. Check it every 15-20 minutes to prevent it from becoming icy or over-frozen. You can typically achieve a set in 1-2 hours this way.
- Use ice water instead of hot water: If you’re making a jello shot, use ice-cold water after dissolving the gelatin in hot water. This cools the mixture faster.
- Reduce the liquid: Using slightly less liquid than the recipe calls for creates a firmer gel more quickly, though this changes the flavor concentration.
- Increase gelatin concentration: Add an extra half packet of unflavored gelatin per two cups of liquid for faster setting.
- Pre-chill your mold: Place your serving dish in the freezer for 10 minutes before pouring in the jello mixture. This jump-starts the cooling process.
- Pour into individual cups: Smaller portions set much faster than large bowls. Individual servings can be ready in 2-3 hours.
When You Need More Time
Conversely, sometimes you need to slow down the setting process. Maybe you want to add multiple layers, or you need time to prepare garnishes and accompaniments.
- Keep it at room temperature briefly: After preparing your jello mixture, let it cool slightly on the counter (5-10 minutes) before refrigerating. This prevents premature setting and gives you time to add mix-ins.
- Use a warmer fridge setting: If your fridge allows temperature adjustment, setting it slightly warmer (around 45°F instead of 40°F) extends setting time by an hour or two.
- Add ingredients strategically: Whipped cream, yogurt, or other dairy products can slow setting. Adding these after partial setting creates interesting textures.
- Keep portions larger: Thicker layers of jello naturally take longer to set than thin ones, giving you more working time.
Common Jello Problems and Solutions
Jello won’t set: This usually means either the gelatin wasn’t dissolved properly in hot water, or the fridge isn’t cold enough. Re-melt the mixture (warm it gently), ensure complete dissolution, and place it in the coldest part of your fridge or use the freezer.
Jello is too soft/jiggly: You might have used too much liquid, not enough gelatin, or insufficient chilling time. For future batches, add an extra half packet of gelatin or reduce the liquid by a quarter cup.
Jello is rubbery or too firm: You’ve likely used too much gelatin or chilled it too long. Reduce gelatin by a quarter packet next time, or remove from the fridge after 4 hours instead of 6.
Cloudy appearance: This happens when you use boiling water that’s too hot or when you don’t properly dissolve the gelatin. Use water that’s around 200°F, and stir for at least 2 minutes to ensure complete dissolution.
Layers separating: When layering, ensure each layer is set enough to hold the next layer without sinking. Wait at least 2-3 hours between layers, and make sure the second layer’s mixture has cooled to room temperature before pouring.
Advanced Jello Techniques
Once you understand the basics, you can experiment with more sophisticated approaches. Creating suspended fruit looks impressive, but timing is critical. Similar to how freezing bananas requires understanding temperature dynamics, suspending fruit in jello requires strategic timing.
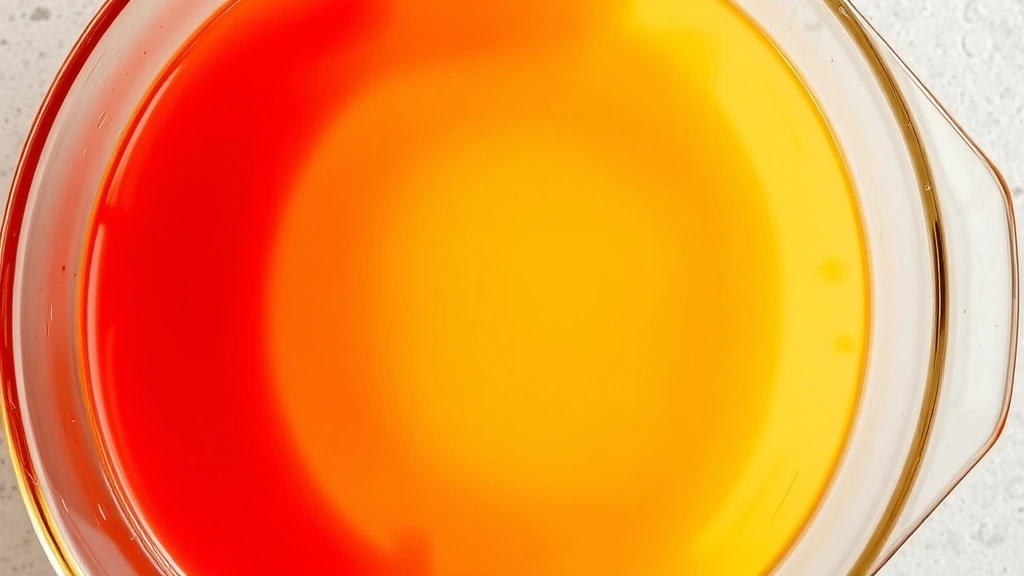
For suspended ingredients: Pour a thin layer of jello into your mold and let it set for 1-2 hours until tacky but not fully firm. Place your fruit or other items on this tacky layer, then carefully pour the remaining jello mixture around them. The partially set base holds everything in place while the fresh mixture incorporates around your additions.
Layered jello designs demand patience and precision. Each layer should be completely set before adding the next. This is where those 4-6 hour timelines really matter. Rushing between layers results in a muddy, mixed appearance rather than distinct color separation.
For creative presentation projects or experimental textures, understanding gelatin’s behavior opens possibilities. Some enthusiasts even combine jello setting principles with concepts similar to how materials solidify over time, creating elaborate displays.
Unmolding successfully requires that complete set time. A jello that’s only partially set will collapse when you try to flip it. Run warm (not hot) water over the outside of your mold for 10-15 seconds, place your serving plate on top, and flip confidently. If it doesn’t release, repeat the warm water step.
Frequently Asked Questions
How long does jello take to set in the freezer?
In a standard freezer (0°F or -18°C), jello typically sets in 1 to 2 hours. Check it periodically to prevent over-freezing, which creates an unpleasant icy texture. Most people find 1.5 hours ideal for a perfect set without ice crystals.
Can I speed up jello setting with ice?
Yes, but be careful. You can place your jello mold in a larger bowl filled with ice and water (an ice bath). This accelerates cooling to roughly 2-3 hours. Don’t use pure ice directly against the jello container, as uneven cooling can cause separation or crystallization.
Does jello set faster with cold water?
Partially. You still need hot water to dissolve the gelatin properly. However, using ice-cold water for the second portion of liquid (if your recipe calls for it) can speed things up. The key is complete gelatin dissolution first, then rapid cooling of the total mixture.
What if I add fresh fruit to jello?
Fresh fruit, especially tropical varieties like pineapple, mango, or papaya, contains enzymes that prevent gelatin from setting properly. If you want fruit in your jello, use canned fruit (the heat processing deactivates the enzymes) or add fruit after the jello is completely set. Alternatively, use frozen fruit, which works well without interfering with gelation.
How long does homemade jello take to set?
Homemade jello made from gelatin sheets or powder follows similar timelines: 4-6 hours in the fridge or 1-2 hours in the freezer. The main variable is the gelatin-to-liquid ratio. Most recipes use 1 tablespoon (or one packet) per 2 cups of liquid, but you can adjust based on desired firmness.
Is jello completely set after 4 hours?
It’s usually firm enough to eat after 4 hours, but for best results—especially if unmolding or layering—aim for the full 6 hours. Overnight setting (8+ hours) ensures maximum stability and ideal texture. The extra time makes a noticeable difference in structural integrity.
Why is my jello still liquid after 6 hours?
Several culprits could be responsible: your fridge might not be cold enough, the gelatin wasn’t fully dissolved, you used too much liquid, or you didn’t use enough gelatin. Check your fridge temperature (should be 40°F or below), verify complete gelatin dissolution, and ensure you followed the recipe’s liquid measurements. Re-melt and try again if needed.
Can I eat jello that’s only partially set?
Technically yes, but it won’t have the pleasant texture you expect. Partially set jello is overly soft and jiggly in an unappetizing way. It’s better to wait for complete setting, which typically takes 4-6 hours, for the best eating experience.
Related Posts

How Long to Boil Lobster Tails: Cooking Guide

How Long to Fly from New York to London? Travel Times
