
How to Thread a Needle: Expert Guide
How to Thread a Needle: Expert Guide to Perfect Stitching
Threading a needle seems like one of those skills that should be intuitive—just poke the thread through the hole, right? Yet somehow, this simple task has frustrated countless people, leaving them squinting at tiny openings and wondering why their hands suddenly feel twice their normal size. The truth is, how to thread a needle is both an art and a science, and once you master the technique, you’ll unlock the gateway to countless sewing projects that can transform your wardrobe and home.
Whether you’re preparing to sew a button back onto your favorite jacket, tackling your first hemming project, or diving into more ambitious embroidery work, knowing how to thread a needle properly will save you time, frustration, and countless expletives. This comprehensive guide walks you through proven techniques, troubleshooting tips, and pro tricks that make the process smoother than you’d ever imagine.
Let’s be honest—nobody gets excited about threading needles. But the relief you feel when that thread finally slides through on the first try? That’s pure satisfaction. And we’re here to make sure you experience that feeling consistently, not just by accident.
Why Threading a Needle Matters More Than You Think
Threading a needle isn’t just about getting thread into a tiny hole. It’s the foundation of any sewing project, and doing it correctly affects everything that comes after. A properly threaded needle ensures that your stitches are secure, your thread doesn’t fray prematurely, and your finished work looks professional rather than haphazard.
When you thread a needle correctly, you’re setting yourself up for success. The thread sits properly in the needle’s eye, tension remains consistent throughout your stitching, and you’re far less likely to experience broken threads or loose stitches. It’s the difference between a repair that holds for years and one that falls apart after a few washes.
Beyond the practical benefits, mastering this skill builds confidence. Once you realize that threading a needle isn’t actually complicated—just requires the right approach—you’ll feel empowered to tackle other sewing projects. That confidence extends to everything from quick repairs to more ambitious creative endeavors. It’s a small skill with surprisingly big implications for your DIY journey.
Gathering Your Supplies
Before you attempt to thread a needle, make sure you have the right materials on hand. This isn’t complicated, but having everything ready prevents frustration and ensures success.
Essential supplies include:
- Needles: Various sizes depending on your project (fine needles for delicate work, larger needles for heavier fabrics)
- Thread: Quality thread in your desired color (cheap thread tangles and breaks more easily)
- Good lighting: This cannot be overstated—proper illumination is half the battle
- Steady hands or a comfortable position: Sit somewhere stable where you can relax your shoulders
- Optional but helpful: Magnifying glass, needle threader tool, white paper or contrasting surface
The quality of your supplies matters significantly. A sharp needle with a properly sized eye makes threading exponentially easier than a dull needle with a tiny opening. Similarly, smooth, quality thread glides through much more readily than cheap, fuzzy thread that catches on everything.
The Basic Threading Method
Now for the moment you’ve been waiting for. Here’s how to thread a needle using the most straightforward, reliable technique:
Step 1: Prepare Your Thread
Cut a clean, straight edge on your thread using sharp scissors. Avoid tearing or biting off the end—a frayed edge makes threading nearly impossible. The cut should be at a 90-degree angle, creating a sharp point. If you’re using thread that’s been sitting for a while, trim off the first few inches to remove any damaged fibers.
Step 2: Position Yourself for Success
Sit in a well-lit area where you can relax. Hold the needle at a comfortable angle—usually between your thumb and forefinger—with the eye facing you at roughly eye level. Position the thread at approximately the same level. You want to eliminate as much strain as possible. Good lighting is genuinely non-negotiable here. If your current light source leaves shadows, move to a window or turn on an additional lamp.
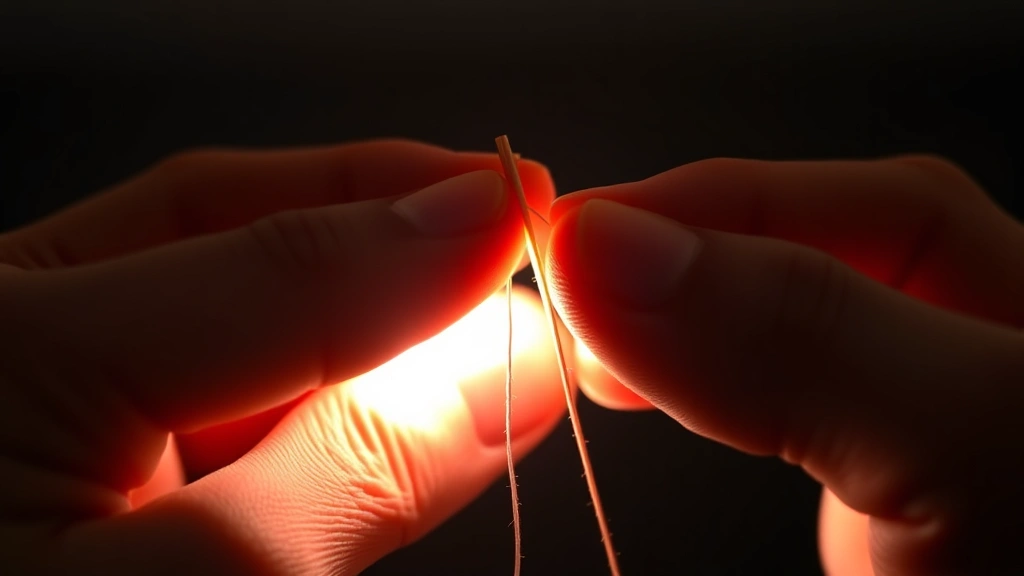
Step 3: Stiffen Your Thread
This is a game-changer that many beginners don’t know about. Pinch the end of the thread between your thumb and forefinger, then run it through your lips or dip it briefly in water. The moisture helps the thread hold its shape, and you can even let it dry for a moment. Alternatively, some experienced sewers lightly coat the thread tip with a tiny amount of wax or fabric stiffener. This prevents the thread from fraying and splaying, which is often why threading feels impossible.
Step 4: Guide Thread Through the Eye
Hold the needle steady with one hand and bring the thread toward the eye. Some people find it easier to move the thread toward the needle; others prefer moving the needle toward the thread. Experiment to discover which feels more natural for your hands. The key is keeping both steady—jerky movements cause the thread to miss the eye repeatedly.
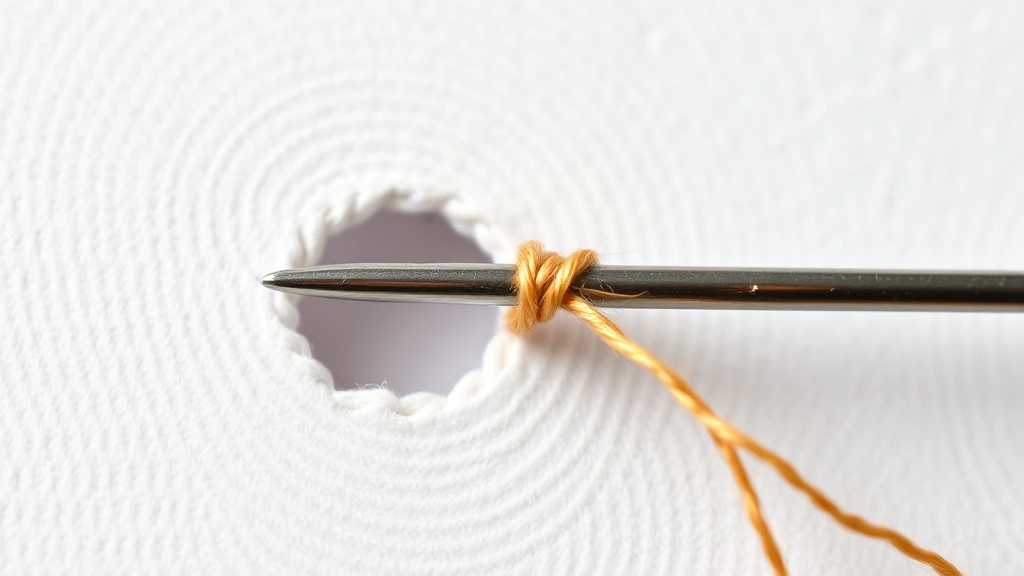
Step 5: Push Through and Secure
Once the thread passes through the eye, pull approximately 4-6 inches of thread through. This gives you enough length to tie a knot without the thread slipping back through the eye. If you’re working on a project where you want the thread anchored immediately, tie a small knot at the end right away.
Advanced Threading Techniques
Once you’ve mastered the basic method, these advanced approaches can help in tricky situations or with particularly challenging needles.
The Loop Method
Some sewers swear by creating a small loop with the thread, holding it between their fingers, and passing the needle through the loop rather than threading the thread through the needle. This inverts the traditional approach and can feel more intuitive for certain hand positions and needle sizes. It takes practice, but many find it less frustrating than the standard method.
The Folded Thread Technique
For projects requiring doubled thread (which provides extra strength), fold your thread in half and thread the fold through the needle. This ensures both strands go through simultaneously. It’s particularly useful when sewing a button or doing repairs that need maximum durability. The resulting knot at the fold creates an excellent anchor point.
The White Paper Trick
Place a piece of white paper behind the needle’s eye. The contrast between the paper and the needle makes the eye significantly more visible and easier to target. This simple environmental adjustment helps considerably, especially for people with vision challenges or when working with particularly fine needles.
Threading Multiple Needles
If you’re working on multiple items or want to have several needles ready, thread several at once during your setup phase. Wind each threaded needle onto a small piece of cardboard or cork, keeping them organized and ready to use. This prevents the frustration of threading needles repeatedly throughout your project.
Troubleshooting Common Problems
The Thread Won’t Stay in the Needle Eye
This happens when the thread is too fuzzy or the needle eye is too small. Solutions: trim the thread end more carefully, use a needle with a larger eye, or apply a tiny amount of thread stiffener. If the needle itself is damaged, replace it—a slightly bent or rough needle eye will reject thread repeatedly.
The Thread Keeps Fraying
Frayed thread is your enemy. Cut a fresh end at a perfect 90-degree angle, and consider applying a small amount of clear nail polish or fabric stiffener to the cut end. Some sewers even run the thread end through a candle flame (carefully!) to melt and seal the fibers, though this requires a delicate touch to avoid burning the thread.
You Can’t See the Needle Eye Clearly
Inadequate lighting is the culprit in most cases. Add more light sources, use a magnifying glass, or try the white paper contrast trick mentioned above. If you’re over 40 and having trouble focusing on the needle eye, reading glasses or magnifying lenses designed for detailed work are genuine game-changers. There’s no shame in using these tools—they’re professional-grade solutions.
The Needle Eye Is Bent or Damaged
A damaged needle is essentially useless for threading. Replace it with a fresh needle. Bent needles often come from being dropped or sat on accidentally. Always store needles carefully in a needle case or pincushion rather than loose in a drawer.
You’re Running Out of Patience
This is completely valid. Take a break, stretch your eyes, and come back to it in five minutes. Frustration makes threading harder because your hands tense up and your focus narrows. A brief pause genuinely helps.
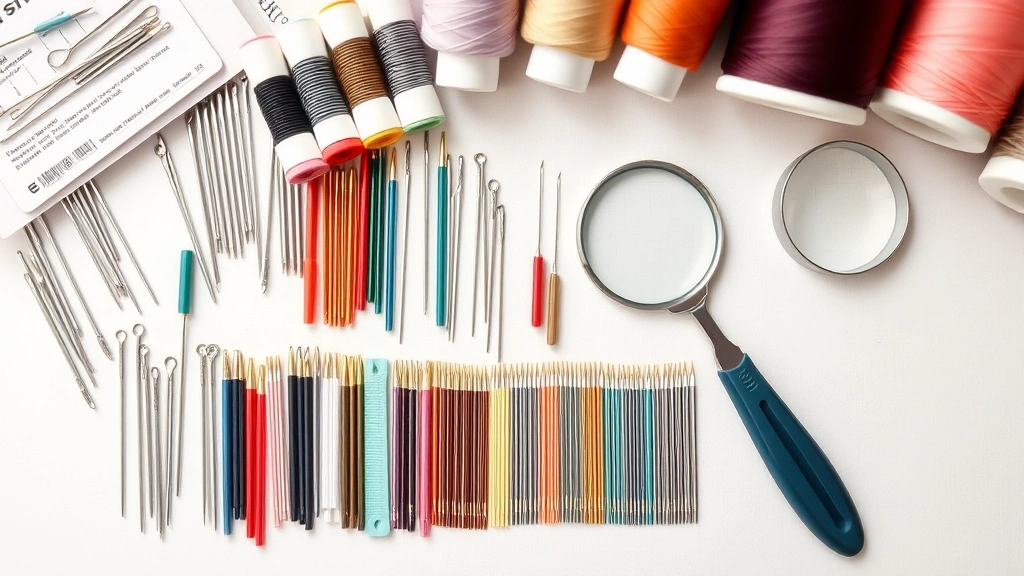
Tools That Make Threading Easier
If you find yourself struggling despite following perfect technique, several affordable tools can help:
Needle Threaders
These small, inexpensive devices have a tiny wire loop that slides through the needle eye more easily than thread. You thread your thread through the loop, then pull the threader (and thread) back through the needle. They cost just a few dollars and are absolutely worth keeping in your sewing kit. Many DIY resources recommend having at least one on hand.
Magnifying Glasses or Lighted Magnifiers
These provide both magnification and illumination, making the needle eye appear significantly larger and easier to target. Clip-on magnifiers that attach to your workspace are particularly convenient because they keep your hands free.
LED Task Lighting
A small LED light that focuses directly on your work area eliminates shadows and makes the needle eye clearly visible. Many cost under $20 and last for years.
Needle Cases with Organizing Systems
Keeping your needles organized and protected extends their life and ensures you always have the right size available. Cases that organize needles by size make it easy to select the appropriate needle for your project.
Quality Thread
This isn’t a tool, but it’s worth mentioning: investing in better thread makes threading easier. Premium thread is smoother, less prone to fraying, and glides through needle eyes more readily than budget options.
Pro Tips from Expert Sewers
We consulted with experienced sewers to gather insider knowledge that transforms your threading experience:
The Lip Test
Professional seamstresses often moisten the thread end between their lips before threading. The moisture stiffens the thread temporarily, prevents fraying, and makes the end slightly tacky so it grips better in the needle eye. It feels odd initially but genuinely works.
Always Cut Fresh Thread
Don’t reuse thread ends from previous projects. Always cut a fresh, clean end from the spool. The end of previously-used thread is often damaged and frayed, making threading significantly harder.
Store Needles Properly
Needles stored in proper cases last longer and maintain their sharpness. A dull needle makes threading harder and damages fabric more easily. Replace needles regularly, especially if you’ve dropped them or noticed difficulty threading.
Match Needle Size to Thread Weight
Thicker threads require larger needle eyes. Using a needle that’s too small for your thread is an exercise in frustration. Conversely, very fine threads need smaller needles to create proper stitches. Check your thread weight and select an appropriately-sized needle.
Thread in Consistent Lighting
Thread all your needles during daylight or when you have optimal lighting. Trying to thread at night with inadequate light sets you up for failure. Batch your threading during favorable conditions and store the threaded needles for later use.
Relax Your Grip
Tension in your hands makes threading harder. Take a deep breath, relax your shoulders, and hold the needle and thread with gentle confidence rather than a death grip. Nervous tension actually impairs your fine motor control.
For those working on more complex projects like hemming garments, having multiple needles threaded and ready prevents the need to repeat this process repeatedly. Similarly, understanding how to thread a needle opens doors to other textile skills. Once you’re comfortable with basic repairs, you might explore finishing touches and more refined techniques.
Frequently Asked Questions
How do I thread a needle if I wear glasses?
Keep your glasses on! Many people remove their glasses thinking it helps, but it actually makes focusing on the tiny needle eye harder. Your prescription glasses are designed exactly for this type of close-up work. If you’re still struggling, consider reading glasses with a higher magnification or clip-on magnifiers that work in combination with your regular glasses.
What’s the best type of needle for beginners?
Start with medium-sized needles (sizes 5-8) with reasonably large eyes. These are much easier to thread than tiny needles while still being appropriate for most basic sewing tasks. As you gain confidence, you can work with smaller needles for finer projects.
Can I use any thread with any needle?
Not ideally. Match your thread weight to your needle size. Fine threads work best with smaller needles, while thicker threads need larger needle eyes. Using mismatched combinations makes threading harder and can result in poor stitching quality. Home Depot’s sewing guide provides helpful charts for matching thread to needle sizes.
How long should the thread be when I start sewing?
Pull approximately 4-6 inches of thread through the needle eye before tying a knot. This gives you enough length that the thread won’t slip back through the eye while providing manageable length for comfortable stitching. You can always thread new needles as you work on longer projects.
Is there a trick for threading very fine needles?
Yes! Use a needle threader, apply magnification, ensure optimal lighting, and consider using slightly thicker thread if possible. If you’re working with extremely fine needles regularly, investing in a lighted magnifier becomes worthwhile. Some sewers also find that threading fine needles works better in natural daylight than artificial light.
What should I do if my needle keeps bending?
Bent needles usually result from dropping them or applying too much pressure while stitching. Use a fresh needle and be mindful of how much force you’re applying. If you’re consistently bending needles, you might be pushing too hard—let the needle do the work rather than forcing it through fabric.
Can I thread a needle with my eyes closed?
Technically yes, but why would you? Threading a needle requires visual precision. Even experienced sewers use their eyes. If you’re having trouble seeing the needle eye, that’s a sign you need better lighting or magnification, not that you should abandon your sense of sight.
How do I prevent thread from tangling while I’m sewing?
Use an appropriate thread length (4-6 inches), avoid pulling too hard on the thread, and work in smooth, controlled motions. If you’re using doubled thread, ensure both strands are properly threaded through the needle. Tangling usually results from either using too much thread length or pulling with excessive force.
Is there a difference between threading needles for hand sewing versus embroidery?
The threading process is identical, but embroidery thread is typically thicker and requires a larger needle eye. The technique remains the same—prepare the thread end, position yourself well, and guide the thread through the eye carefully. Some embroidery needles have particularly large eyes specifically to accommodate thicker threads.
What if I’m left-handed—does that change the threading process?
The process is the same, but you might find holding the needle and thread in opposite hands feels more natural. Experiment with different hand positions until you find what’s comfortable. Some left-handed sewers prefer threading the needle with their right hand while holding it in their left, while others reverse this. There’s no single correct way—find what works for your hands.
Threading a needle is genuinely one of those skills that transforms from impossibly frustrating to almost automatic once you understand the proper technique. Whether you’re preparing for a quick button repair or embarking on more ambitious sewing projects, mastering this foundational skill opens countless possibilities. The investment of a few minutes to learn proper technique pays dividends every single time you pick up a needle and thread.
Related Posts

How Long to Boil Lobster Tails: Cooking Guide

How Long to Fly from New York to London? Travel Times
