
How to Make DIY Candles? Expert Tips Inside
How to Make DIY Candles: Expert Tips Inside
Creating your own candles at home is a rewarding craft that combines creativity, aromatherapy, and practical home décor. Whether you’re looking to save money, customize scents, or simply enjoy a relaxing hobby, candle making offers endless possibilities for personalization. From selecting the right wax to mastering wick placement, this comprehensive guide will walk you through every step of the process.
DIY candle making has become increasingly popular among crafters and home enthusiasts. The process is surprisingly straightforward, requiring minimal equipment and investment to get started. Once you understand the fundamentals, you’ll be able to create professional-quality candles that rival store-bought options, all while enjoying the satisfaction of a handmade creation.
Essential Candle Making Supplies
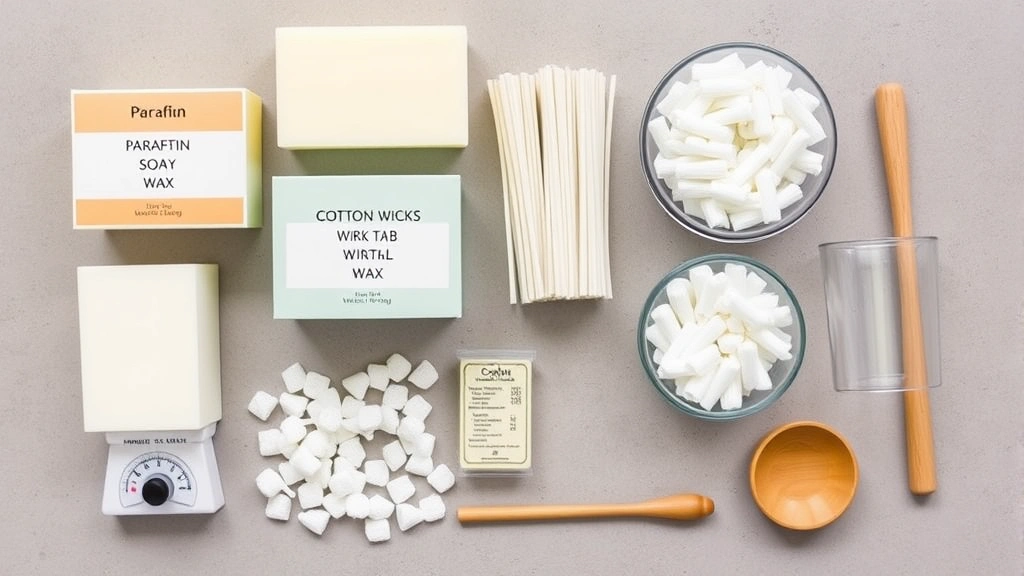
Before you begin your candle-making journey, gather the necessary supplies. The good news is that you don’t need an extensive collection of expensive tools. Most items can be found in craft stores, online retailers, or even your kitchen.
Basic equipment includes:
- Double boiler or heat-safe containers for melting wax
- Thermometer (preferably one that reads up to 200°F)
- Stirring utensils (wooden spoons or specialized pouring tools)
- Wick tabs and wick stickers for candle bases
- Candle containers or molds
- Measuring cups for precise ingredient ratios
- Wick holders or clothespins to keep wicks centered
- Scale for weighing wax and fragrance oils
Investing in quality supplies from reputable home improvement retailers ensures better results and a more enjoyable experience. Many beginners purchase starter kits that include pre-measured wax, wicks, and basic tools, which is an excellent way to learn without significant upfront costs.
Choosing the Right Wax Type
The wax you select forms the foundation of your candle-making project. Different wax types offer distinct advantages, and understanding their characteristics will help you choose the best option for your needs.
Paraffin Wax: This traditional candle-making material is affordable, widely available, and holds color and fragrance exceptionally well. However, it produces more soot than natural alternatives and has environmental concerns. Paraffin wax melts at approximately 130-150°F and works well for beginners.
Soy Wax: Made from soybean oil, this eco-friendly option burns cleaner and longer than paraffin. Soy wax is biodegradable and supports agricultural industries. It requires slightly higher pouring temperatures (around 170-180°F) and holds fragrance well, though color retention is slightly less intense than paraffin.
Beeswax: The premium option, beeswax produces a natural honey scent and burns longer than other waxes. It’s the most expensive choice and requires higher pouring temperatures (around 185°F). Beeswax candles purify air by releasing negative ions, making them ideal for health-conscious crafters.
Gel Wax: A rubber polymer combined with mineral oil, gel wax is transparent and allows for creative decorative elements. It holds fragrance powerfully and burns slowly, though it’s more expensive than traditional options.
For your first project, explore beginner-friendly guides that recommend soy or paraffin wax as ideal starting points due to their forgiving nature and availability.
Selecting and Preparing Wicks
Wick selection is critical to candle performance. The wick size must match your container diameter to ensure proper burning and fragrance throw. Using an incorrectly sized wick results in tunneling (where only the center burns) or excessive smoking.
Wick sizing guidelines:
- Container diameter 1-2 inches: Use 4-6 ply wicks
- Container diameter 2-3 inches: Use 6-8 ply wicks
- Container diameter 3-4 inches: Use 8-12 ply wicks
- Container diameter 4+ inches: Use 12+ ply wicks or multiple wicks
Wick types available:
- Paper-core wicks: Most common, economical, suitable for most candle types
- Cotton wicks: Premium option offering clean burns and excellent fragrance throw
- Wood wicks: Create a crackling ambiance and work well in wide containers
- Braided wicks: Provide consistent burning and better fragrance distribution
Prepare your wick by securing the wick tab to the bottom center of your container using a wick sticker. This prevents wax from seeping underneath and ensures the wick remains properly positioned during pouring. Use a wick holder or clothespin to keep the wick centered and vertical as you pour the wax.
Fragrance and Coloring Your Candles
Customizing scent and color transforms your candles into personalized creations. Understanding proper ratios and techniques prevents common issues like weak fragrance or uneven coloring.
Fragrance oil ratios: Most candle makers use fragrance oil at a 6-10% ratio by weight of the wax. For example, if you’re using one pound (16 ounces) of wax, add 1-1.6 ounces of fragrance oil. Never exceed 10% as this can prevent proper burning and create excessive smoking.
Adding fragrance oil:
- Wait until wax reaches 185-205°F before adding fragrance
- Stir thoroughly for 2-3 minutes to ensure even distribution
- Avoid overheating fragrance oil, as high temperatures destroy scent compounds
- Let the wax cool slightly before pouring to maximize fragrance retention
Candle dyes: Use only candle-specific dyes, never food coloring or regular craft dyes. Candle dyes are formulated to dissolve in wax and won’t affect burning performance. Popular options include:
- Solid dye blocks or chips (easiest for beginners)
- Liquid candle dyes (for precise color control)
- Crayon shavings (budget-friendly but inconsistent results)
Add dye at the same temperature as fragrance, around 185°F. Break dye blocks into small pieces and stir continuously until color is uniform throughout the melted wax. Start with small amounts—candle dye is highly concentrated, and a little goes a long way.
Step-by-Step Candle Making Process
Now that you understand the components, let’s walk through the complete candle-making process from start to finish.
Step 1: Prepare Your Workspace
Set up your work area with newspaper or craft paper to catch spills. Ensure your containers are clean and dry. Arrange all supplies within arm’s reach for efficiency. This preparation phase prevents accidents and ensures a smooth workflow.
Step 2: Measure Your Wax
Use a scale to measure the exact amount of wax needed. A general rule: one pound of wax fills approximately 15-20 ounces of container space, depending on container shape. Measure slightly more than you think you’ll need to account for settling.
Step 3: Set Up Your Double Boiler
Fill the bottom pot with water and bring to a simmer. Place your heat-safe container with wax in the top pot. Never heat wax directly over flame—this causes scorching and fire hazards. The double boiler method ensures gentle, even heating.
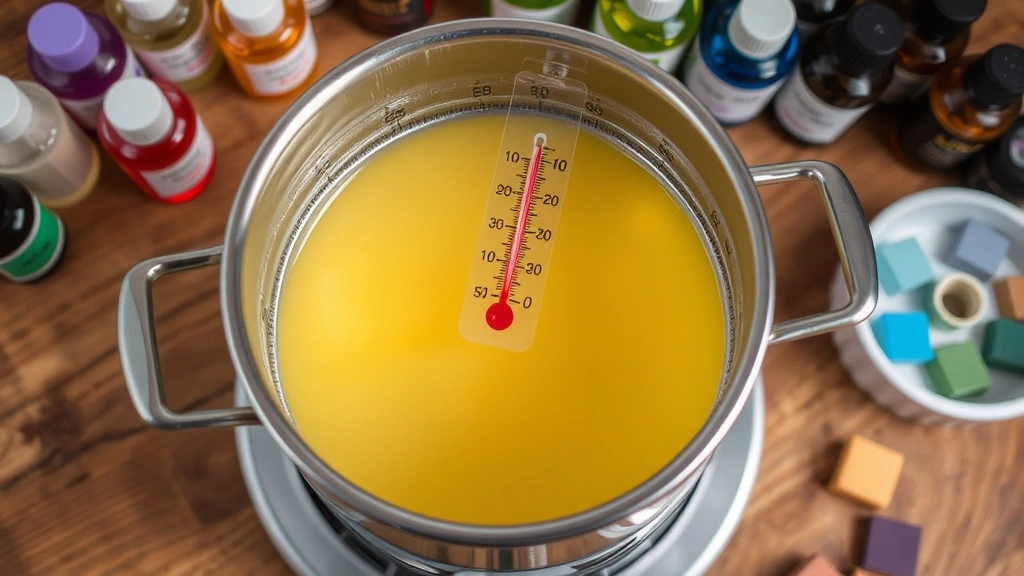
Step 4: Melt the Wax
Heat wax slowly to 170-180°F for soy wax or 160-170°F for paraffin. Use your thermometer to monitor temperature constantly. Stir occasionally to promote even melting. Avoid overheating, which damages fragrance and color vibrancy.
Step 5: Add Fragrance and Color
Once wax reaches proper temperature, add your fragrance oil and dye. Stir thoroughly for 2-3 minutes, ensuring complete incorporation. Let the mixture cool to 140-160°F before pouring—this temperature range promotes proper wax adhesion and reduces surface imperfections.
Step 6: Prepare Your Container
Secure the wick tab to the container’s bottom center using a wick sticker. Position the wick holder or clothespin to keep the wick centered and vertical. Double-check that everything is properly aligned before pouring.
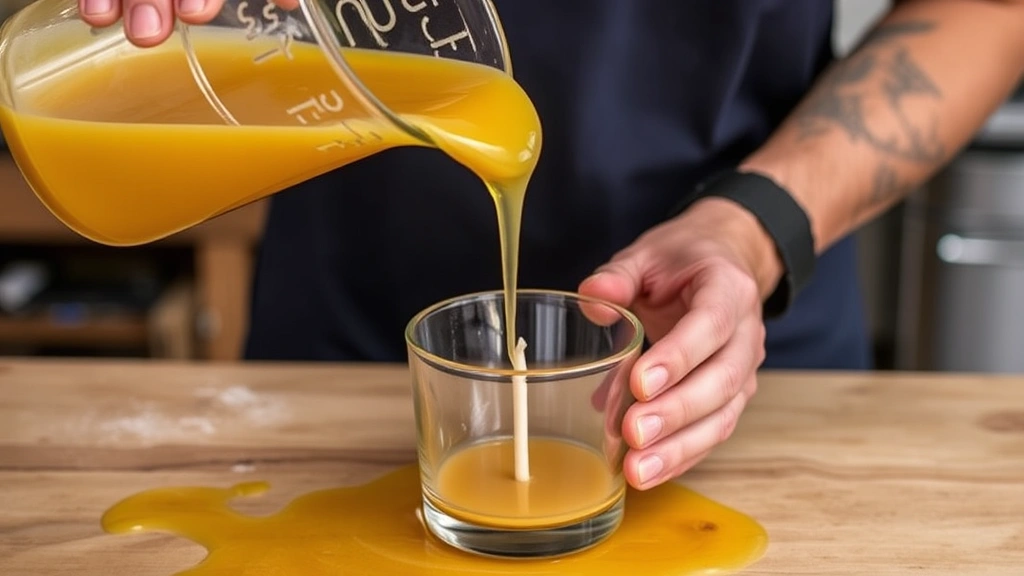
Step 7: Pour the Wax
Slowly pour melted wax into your prepared container, maintaining the wick’s centered position. Pour steadily without stopping to avoid air bubbles. Leave approximately 0.5 inches of space at the top for the final layer.
Pouring and Setting Your Candles
The pouring phase significantly impacts your candle’s final appearance and performance. Proper technique prevents common issues like sinkholes, tunneling, and uneven surfaces.
Pouring temperature matters: Pour too hot, and you risk air bubbles and uneven cooling. Pour too cool, and the wax may not flow properly or bond with previous layers. The sweet spot typically falls between 140-160°F for most wax types.
Preventing sinkholes: Sinkholes form when wax shrinks as it cools, creating depressions around the wick. To prevent this issue, use the “top-off” method. After the candle cools for 3-4 hours, reheat remaining wax to 170-180°F and pour a thin layer over the surface, filling any depressions.
Allow proper cooling time: Never move or disturb candles immediately after pouring. Allow at least 24 hours for paraffin wax or 48 hours for soy wax to cool completely. Premature disturbance causes uneven surfaces and weak candles. Place candles in a room-temperature environment away from drafts, direct sunlight, and temperature fluctuations.
For container candles, the cooling process is complete when the wax becomes opaque and reaches room temperature. Pillar candles require even longer cooling periods—up to 72 hours for optimal results.
Curing and Testing Your Candles
Curing is the often-overlooked step that transforms a good candle into an excellent one. During curing, fragrance oil fully binds with wax molecules, and wax crystallizes to its optimal density.
Curing timeline:
- Paraffin wax: 24-48 hours minimum
- Soy wax: 48-72 hours minimum
- Beeswax: 72+ hours for optimal results
Store candles in a cool, dark place during curing. Avoid direct sunlight, which fades colors and can affect fragrance. Proper storage conditions ensure consistent quality and maximize fragrance throw when candles are burned.
Testing your candles:
Before considering your candles complete, perform a test burn. Light the candle and allow it to burn for 2-3 hours. Observe the following:
- Does the wick burn straight without leaning?
- Is the flame size appropriate (0.5 inches for optimal burning)?
- Does wax melt evenly across the surface?
- Is the scent throw appropriate for the room size?
- Does excessive soot form on the container?
If issues arise, document them for future batches. Small adjustments—like using a different wick size or adjusting fragrance ratios—often resolve problems.
Troubleshooting Common Issues
Tunneling: When candles burn only down the center, creating a tunnel of melted wax around the edges, the wick size is likely too small. For your next batch, use a larger ply wick. If you have an existing tunneled candle, carefully scrape away excess wax from the sides and relight.
Frosting (white spots): This cosmetic issue occurs when wax cools too quickly. While it doesn’t affect burning performance, it’s aesthetically undesirable. Solve this by pouring at slightly higher temperatures or placing candles in a warmer environment during cooling.
Wet spots (clear patches): These appear when wax pulls away from the container sides during cooling. Use the top-off method or apply heat gun treatment to remelt the surface slightly and encourage reattachment.
Weak scent throw: If your candles smell faint, you likely didn’t use enough fragrance oil or added it at too high a temperature. Increase fragrance ratios slightly (up to 10%) and maintain precise temperature control during the addition phase.
Excessive smoking: Black smoke indicates either too much fragrance oil, wicks that are too large, or wax that’s overheating. Reduce fragrance slightly, use smaller wicks, and maintain lower melting temperatures.
Soot buildup: If soot accumulates on the container sides, your wick is too large or burning too hot. Trim the wick to 0.25 inches and consider using smaller ply wicks in future batches.
For additional guidance on precision and measurement techniques, review our article on how to measure with accuracy, which emphasizes the importance of precise measurements in detailed projects.
FAQ
How long do homemade candles last compared to store-bought candles?
Homemade candles typically burn 25-50% longer than commercial options, depending on wax type and wick quality. Soy and beeswax candles offer exceptional burn times, often lasting 40-80 hours. This extended burn time makes DIY candles economical despite initial setup costs.
Can I use essential oils instead of fragrance oils?
While tempting, pure essential oils aren’t ideal for candles. They evaporate at lower temperatures than fragrance oils, resulting in weak scent throw and potential safety issues. Fragrance oils are specifically formulated for candle-making and provide superior performance and consistency.
What’s the ideal room temperature for candle-making?
Maintain a room temperature between 68-72°F during the entire process. Cooler temperatures promote faster cooling and potential frosting, while warmer temperatures extend cooling time and may cause sinkholes. Consistent temperature conditions throughout curing ensure optimal results.
How do I prevent my candles from cracking?
Cracks typically result from rapid temperature fluctuations during cooling. Avoid moving candles, keep them away from AC vents and fans, and maintain consistent room temperature. Pouring at slightly lower temperatures also reduces thermal stress on the wax.
Can I reuse old candle containers?
Absolutely! Clean containers thoroughly with hot water and mild soap to remove residual wax and fragrance. Dry completely before using. You can also use a heat gun to remove old wax residue. Reusing containers is economical and environmentally responsible.
What’s the best fragrance-to-wax ratio for scent intensity?
Most candle makers use 8-10% fragrance oil by weight for optimal scent throw without compromising burn quality. Start at 8% and adjust upward if desired, but never exceed 10% as this creates smoking and burning issues. Keep detailed notes on ratios and results for future batches.
How do I make my candles smell stronger?
Increase fragrance oil ratios incrementally (up to 10%), ensure proper curing time (48-72 hours minimum), and use high-quality fragrance oils from reputable suppliers. Room size affects perceived scent throw—larger rooms require higher fragrance concentrations. Test burn times also matter; allow 2-3 hours for full fragrance release.
What should I do if my candle won’t light?
If the wick won’t catch flame, it’s likely too wet with wax. Trim excess wax from the wick top, leaving only 0.25 inches. If the problem persists, the wick may be too small for your container. For future batches, use larger ply wicks and ensure wicks aren’t compressed or bent during pouring.
For more detailed measurement and precision guidance applicable to crafting projects, explore our comprehensive guide on achieving accurate measurements in detailed work. These principles directly apply to candle-making’s precise temperature and ratio requirements.
Whether you’re creating candles as gifts, starting a small business, or simply enjoying a relaxing hobby, mastering these techniques ensures consistent, professional-quality results. Start with basic paraffin or soy wax, practice proper temperature control, and document your process. Soon you’ll develop the intuition and skill to create stunning candles that rival any commercial product. Happy candle-making!
Related Posts

Superscript in Google Docs: Expert Tips

Strikethrough in Excel: Easy Steps for Beginners
