
How to Remove Gel Polish: Expert Tips
How to Remove Gel Polish: Expert Tips for Salon-Quality Results at Home
Gel polish is the gift that keeps on giving—until it doesn’t. That glossy, chip-resistant manicure that looked flawless two weeks ago is now looking decidedly less Instagram-worthy. The problem? Removing gel polish without damaging your nails feels like you need a degree in chemistry and a steady hand of steel. But here’s the good news: you don’t need to book an expensive salon appointment or spend hours picking at your nails with a file like you’re mining for gold.
The truth about gel polish removal is that it’s far less mysterious than the beauty industry wants you to believe. With the right technique, a few affordable supplies, and about 15-20 minutes of your time, you can safely remove even the most stubborn gel polish at home. We’re talking salon-quality results without the salon price tag or the judgment from your manicurist about how long you’ve gone between appointments.
Whether you’re a gel polish devotee or someone who tried it once and swore never again, this guide covers everything you need to know. We’ll walk you through multiple removal methods, common mistakes to avoid, and how to keep your nails healthy and strong throughout the process.
Why Proper Gel Polish Removal Matters
Before we dive into the how, let’s talk about the why. Gel polish sits on your nails differently than regular polish. It’s chemically bonded to the nail surface through UV or LED light curing, which means it’s not going anywhere without some serious persuasion. Peeling it off or using your teeth (yes, people do this) is basically asking for thin, brittle nails that peel like old paint.
Improper removal can cause significant damage to your nail beds, leading to weakness, brittleness, and those frustrating white spots that take months to grow out. Your nails are living tissue, and they deserve better than aggressive picking or harsh treatment. The good news? Doing it right takes barely more time than doing it wrong, and the results are absolutely worth it.
When you remove gel polish properly, you’re protecting your nail health while still getting that satisfying moment of watching the polish glide off. It’s one of those rare situations where the easy way and the right way are actually the same thing.
The Acetone Soak Method: The Gold Standard
The acetone soak method is the most popular removal technique for good reason—it works reliably and requires minimal effort. Acetone is the chemical solvent that breaks down the gel polish’s bond to your nail, essentially dissolving the polish so it slides right off.
Here’s why acetone is the industry standard: it’s effective, relatively quick, and when done correctly, it doesn’t damage your nails any more than the gel polish itself does. The key word here is “correctly,” which means using proper technique and taking precautions to protect your skin and surrounding areas.
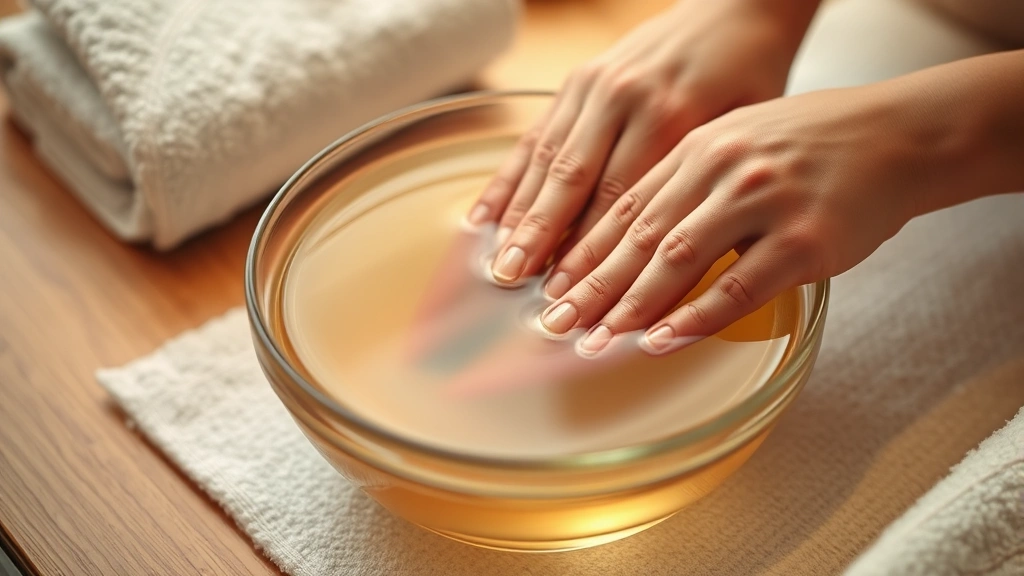
The basic concept is straightforward: soak your nails in pure acetone for 10-15 minutes, then gently push or rub away the softened polish. Some people prefer to file the top layer of gel polish first to help the acetone penetrate faster, though this step is optional if you’re patient.
Foil Wraps: Maximum Efficiency
The foil wrap method is essentially the acetone soak technique’s more efficient cousin. Instead of dunking your fingers into a bowl of acetone, you’re creating individual acetone-soaked wraps for each nail. This method uses less acetone, keeps it concentrated on your nails where it needs to be, and prevents your skin from getting overly dried out.
To use the foil wrap method, you soak cotton pads in acetone, place them on your nails, and wrap the area with aluminum foil to keep everything in place. It sounds fussy, but it’s actually less messy than you’d think, and it’s genuinely the fastest way to remove gel polish. Plus, you can multitask—read, watch TV, or scroll through your phone while your nails do the work.
Many people find this method superior because it prevents the acetone from evaporating as quickly, maintaining maximum potency throughout the removal process. The foil acts as a little greenhouse, keeping everything warm and concentrated. It’s particularly useful if you have thick gel applications or multiple gel coats layered on top of each other.
Alternative Methods for Sensitive Nails
Not everyone can tolerate acetone. Some people have sensitive skin, allergies, or respiratory concerns. If you fall into this category, there are alternatives worth exploring, though we’ll be honest—they require more patience.
Isopropyl Alcohol Method: This is a gentler option that uses rubbing alcohol instead of acetone. It works, but it’s slower and requires longer soak times (20-30 minutes). It’s less harsh on your skin, though, making it ideal for people with sensitivities.
Gel Polish Remover Soaks: Commercial gel polish removers formulated without acetone exist, though they’re typically pricier than acetone and less effective. They’re a compromise option if you want something between acetone and pure alcohol.
Filing Method: This is the nuclear option and requires serious patience. You basically file away the gel polish layer by layer. It’s time-consuming (easily 30-45 minutes), it creates a lot of nail dust, and it’s hard on your nails. However, it works without any liquid solvents, making it perfect for people who can’t use acetone or alcohol.
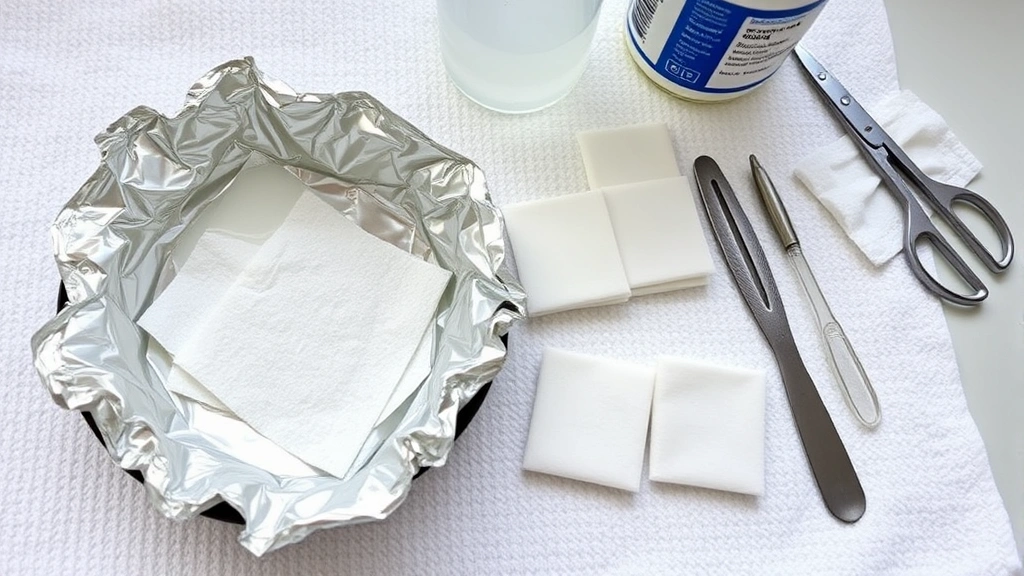
Essential Supplies You’ll Need
Here’s what you need to gather before starting the removal process. Most of these items are probably already in your home, and anything you don’t have is incredibly affordable.
- Pure Acetone: Look for 100% acetone, not acetone-based nail polish remover. You’ll find this in the beauty section of any drugstore or online. It’s usually under five dollars.
- Cotton Pads or Balls: Regular makeup remover pads work perfectly. Avoid cotton swabs—they’re too small and wasteful for this job.
- Aluminum Foil: Cut into 2-inch squares. You’ll need one for each nail you’re treating.
- Nail File: A medium-grit file (180-220 grit) works best. You’re not trying to reshape your nails; you just want to rough up the top layer slightly.
- Cuticle Pusher or Orange Stick: This helps gently push away the softened polish without scraping your actual nail.
- Nail Buffer: For smoothing your nails after removal and before any new polish application.
- Moisturizing Cuticle Oil: This is essential for post-removal care. Your nails will be dry after acetone exposure, and they need hydration.
- Hand Cream or Lotion: Similar to the cuticle oil, this helps restore moisture to your skin and nails.
- Small Bowl: If you’re doing the soak method rather than foil wraps. A cereal bowl or small mixing bowl works fine.
- Towel or Paper Towels: For drying your hands and protecting your work surface.
Step-by-Step Removal Process
Let’s walk through the most effective method: the foil wrap technique with acetone. This is what professionals use, and it’s what we recommend for the best results.
Step 1: Prepare Your Workspace
Lay out a towel or paper towels on a flat surface. You’ll want good lighting and a comfortable position where you can sit for 10-15 minutes. Open windows or ensure good ventilation—acetone fumes are strong and not pleasant. If you’re sensitive to smell, a fan pointing away from you helps tremendously. You might also want to gather a magazine, book, or your phone since you’ll have some downtime.
Step 2: File the Top Layer (Optional but Recommended)
Using your nail file, gently file the top glossy layer of each gel nail. You’re not trying to remove all the polish—just break through that shiny top coat. This takes about 2-3 minutes total and helps the acetone penetrate faster. Light, gentle strokes are all you need. If you skip this step, your soak time will just be a bit longer.
Step 3: Prepare Your Acetone Wraps
Cut aluminum foil into roughly 2-inch by 2-inch squares—you’ll need ten pieces (one per nail). Soak a cotton pad or ball in pure acetone. You want it thoroughly saturated but not dripping wet. Place the acetone-soaked cotton pad directly on your nail, then wrap the foil around it to hold it in place. The foil should be snug but not painfully tight. Repeat for all ten nails.
Step 4: Wait Patiently
Set a timer for 12-15 minutes. During this time, the acetone is breaking down the gel polish’s chemical bonds. Resist the urge to peek. Your nails are doing the work; you’re just waiting. If you have particularly thick gel applications or multiple coats, lean toward the 15-minute end of the spectrum.
Step 5: Check and Remove
After the timer goes off, remove the foil from one nail. Gently push at the edge of the gel polish with your cuticle pusher. If it slides off easily, you’re good to go. If it’s still pretty stuck, rewrap it and give it another 2-3 minutes. There’s no penalty for giving it extra time—it’s better than forcing removal and damaging your nail.
Step 6: Gently Remove the Polish
Once the gel is soft and pliable, use your cuticle pusher to gently roll or push the gel polish off your nail. Work from the base toward the tip. If you encounter resistance, don’t force it—rewrap and soak longer. The entire removal should feel easy and gentle. If you’re scraping or scratching at your nail, you’re doing it wrong.
Step 7: Clean and Buff
Once all the gel polish is removed, wash your hands thoroughly with soap and warm water. Pat dry. Using your nail buffer, gently smooth the surface of your nails. Your nails might look a bit dull or have some residue—that’s normal. Buffing restores some shine and removes any remaining bits of gel.
When learning how to get nail glue off skin, you’ll apply similar techniques for stubborn adhesive residue that might remain on your cuticles or surrounding skin. A gentle rub with a cotton pad soaked in acetone will remove any remaining polish bits.
Post-Removal Nail Care
What you do after gel removal is just as important as the removal process itself. Your nails have been through something, and they need love and attention to recover.
Immediate Aftercare (First 24 Hours)
Apply cuticle oil to your nails and surrounding skin generously. Your nails are dehydrated from the acetone exposure, and this oil helps restore moisture. Use it liberally—think of it as a spa treatment for your hands. Reapply every few hours if possible. Wear gloves if you’re doing dishes or cleaning; your nails are vulnerable right now.
Weekly Maintenance
Continue using cuticle oil daily for at least a week. Apply hand cream regularly. Avoid harsh chemicals and excessive water exposure. If you absolutely must do dishes, wear gloves. Your nails are rebuilding their protective layers, and you want to give them every advantage.
Wait Before New Polish
Resist the temptation to immediately apply new gel polish. Give your nails at least three to five days of recovery time. If your nails look particularly thin or damaged, wait a full week. This gives your nail surface time to re-harden and regain its resilience. If you must wear polish, regular nail polish is fine—it won’t damage your nails the way gel would on top of fresh removal.
Common Mistakes to Avoid
Mistake 1: Peeling the Polish Off Manually
This is the biggest culprit for nail damage. Gel polish is incredibly durable, which means it doesn’t peel off easily. If you try to force it, you’re taking layers of your actual nail with it. We know it’s tempting—that satisfying peeling sensation calls to us—but resist. Your future nails will thank you.
Mistake 2: Using Regular Nail Polish Remover
Regular nail polish remover is much weaker than pure acetone and won’t effectively dissolve gel polish. You’ll end up soaking for hours with minimal results, which is frustrating and wasteful. Always use 100% pure acetone for gel removal.
Mistake 3: Skipping the Preparation Step
Filing the top layer before soaking isn’t required, but it significantly speeds up the process. Skipping it means longer soak times and more waiting. It’s a five-minute step that saves you ten minutes of soaking—seems like a no-brainer.
Mistake 4: Ignoring Skin Protection
Acetone is harsh on skin. If you’re doing the bowl soak method and your skin is submerged for long periods, you can experience irritation, dryness, or even chemical burns if you’re sensitive. The foil wrap method minimizes skin contact, which is another reason it’s superior. If using the bowl method, try to keep acetone contact limited to your nails only.
Mistake 5: Rushing the Process
Gel polish removal isn’t a race. If you try to speed things up by scraping aggressively or using excessive force, you’ll damage your nails. The slow, patient approach literally takes only 15-20 minutes. It’s worth it to do it right.
Mistake 6: Skipping Aftercare
You removed your gel polish successfully—don’t undo that by neglecting aftercare. Your nails need moisture, protection, and rest. Cuticle oil and hand cream aren’t luxuries; they’re necessities. Think of them as part of the removal process itself.
If you’ve dealt with similar stubborn residue situations, you might recognize the approach. The same patience and gentle technique that works for how to get hair dye off skin applies here—force and aggression make things worse, while patience and the right approach solve the problem cleanly.
Frequently Asked Questions
How long does gel polish removal take?
The entire process takes 15-20 minutes from start to finish with the foil wrap method. The acetone soak method takes about 10-15 minutes of soaking time, plus 5 minutes of preparation and removal. The filing method takes 30-45 minutes because you’re literally filing away the gel layer by layer.
Can I remove gel polish without acetone?
Yes, but it’s slower and less effective. Isopropyl alcohol works but requires 20-30 minutes of soaking. Filing works but is extremely time-consuming. Commercial gel removers without acetone exist but are expensive and often less effective. Acetone is the gold standard for a reason.
Will removing gel polish damage my nails?
When done properly, gel removal doesn’t permanently damage your nails. You might notice temporary thinness or dryness, but this recovers with proper aftercare within a few days to a week. Your nails grow out completely every three to four months, so any temporary damage is just that—temporary. However, aggressive removal methods can cause lasting damage.
How often can I safely remove and reapply gel polish?
Ideally, you should wait 3-5 days between removal and reapplication to let your nails recover. Doing this every two weeks (the typical gel polish lifespan) is fine. However, if you’re removing and reapplying every week, you’re stressing your nails unnecessarily. Give them breaks.
My nails are really weak after removal—what should I do?
This is temporary. Use cuticle oil daily, apply hand cream regularly, wear gloves when cleaning or doing dishes, and avoid harsh chemicals. Consider taking a break from gel polish for a few weeks to let your nails rebuild their strength. Biotin supplements might help, though the evidence is mixed. Most importantly, be patient—nails recover naturally over time.
Can I use the acetone I have for cleaning?
No. Cleaning acetone isn’t pure enough and often contains additives that aren’t safe for your skin or nails. Always buy acetone specifically labeled for nail use or beauty use. It’s only a few dollars and worth the investment.
Is acetone smell dangerous?
Acetone has a strong smell that some people find unpleasant, but the fumes aren’t dangerous in normal use. Good ventilation (open windows, fan running) is sufficient. If you’re pregnant, have respiratory concerns, or are particularly sensitive, take extra precautions with ventilation or consider the alternative methods mentioned earlier.
What if gel polish won’t come off after soaking?
Give it more time. Soak for another 5-10 minutes. If it’s still not budging, you might have an extra-thick application or multiple coats. Some gel products are more resistant than others. Patience is your friend here—forcing it risks nail damage. If you’ve soaked for 30+ minutes and nothing’s happening, try filing the top layer more aggressively to help acetone penetration.
Can I remove gel polish while pregnant?
The main concern with gel removal during pregnancy is acetone fume exposure. If you’re pregnant, use the foil wrap method (less skin exposure and fume inhalation), ensure excellent ventilation, and consider the filing method or isopropyl alcohol method as alternatives. Talk to your doctor about your specific situation, but many pregnant people safely remove gel polish with proper precautions.
Should I go to a salon or do it at home?
Home removal is perfectly safe and effective when done properly. It saves money and time. The only advantage of salon removal is that someone else does the work. If you have severely damaged nails or mobility issues that make the process difficult, a salon might be worth it. Otherwise, you’ve got this.
Related Posts

How Long to Boil Lobster Tails: Cooking Guide

How Long to Fly from New York to London? Travel Times
