
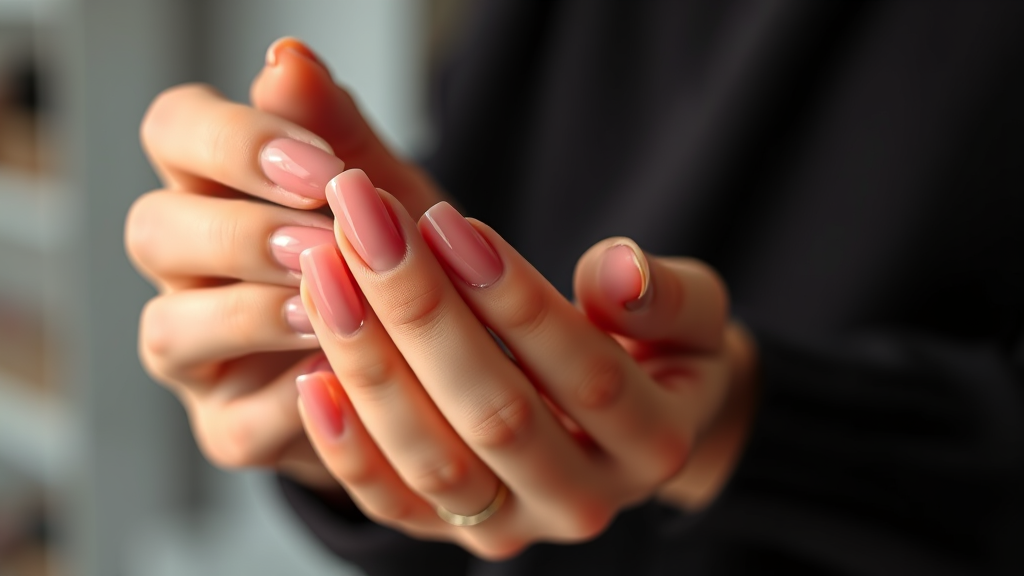
Easily Remove Gel Nail Polish at Home Without Damage
Gel nail polish has revolutionized the beauty industry with its long-lasting, chip-resistant formula that keeps nails looking salon-fresh for weeks. However, when it’s time to change your manicure, removing gel polish can seem daunting without the right knowledge and techniques. Many people worry about damaging their natural nails during the removal process, leading to weak, brittle, or peeling nails.
The good news is that with the proper methods and tools, you can safely remove gel nail polish at home without compromising the health of your natural nails. This comprehensive guide will walk you through various professional techniques that nail technicians use, adapted for home use. By following these step-by-step instructions and safety precautions, you’ll maintain healthy, strong nails while enjoying the flexibility of changing your manicure whenever you desire.
Understanding Gel Polish and Why Proper Removal Matters
Gel nail polish differs significantly from regular nail polish in its chemical composition and curing process. Unlike traditional polish that air-dries, gel polish contains photoinitiators that harden when exposed to UV or LED light. This curing process creates strong polymer chains that bond tightly to the nail surface, resulting in the durability that makes gel manicures so popular.
The strong adhesion that makes gel polish long-lasting also makes it challenging to remove. Attempting to peel or pick off gel polish can cause significant damage to your natural nails, including:
- Removal of the top layers of the nail plate
- White spots and ridges on the nail surface
- Thinning and weakening of the natural nail
- Increased susceptibility to breaks and splits
- Delayed nail growth and recovery
According to the FDA’s guidelines on nail care products, proper removal techniques are essential for maintaining nail health. Understanding the science behind gel polish helps you appreciate why patience and the right approach are crucial for safe removal.
Essential Tools and Supplies for Safe Removal
Before beginning the removal process, gather all necessary tools and supplies. Having everything prepared ensures a smooth, efficient removal without interruptions that could lead to mistakes or damage. Here’s your complete toolkit:
- 100% Pure Acetone: The most effective solvent for breaking down gel polish
- Cotton balls or pads: For applying and holding acetone against nails
- Aluminum foil: To secure cotton and create a controlled soaking environment
- Nail file (180/240 grit): For gently buffing the top coat
- Cuticle pusher or orange wood stick: For gently removing softened polish
- Nail buffer: For smoothing any remaining residue
- Cuticle oil or nourishing treatment: For post-removal nail care
- Hand cream or moisturizer: To restore hydration after acetone exposure
Quality tools make a significant difference in both the ease of removal and the final results. Invest in good-quality files and cuticle pushers that won’t damage your nails. The National Center for Biotechnology Information emphasizes the importance of using appropriate tools for nail care procedures.
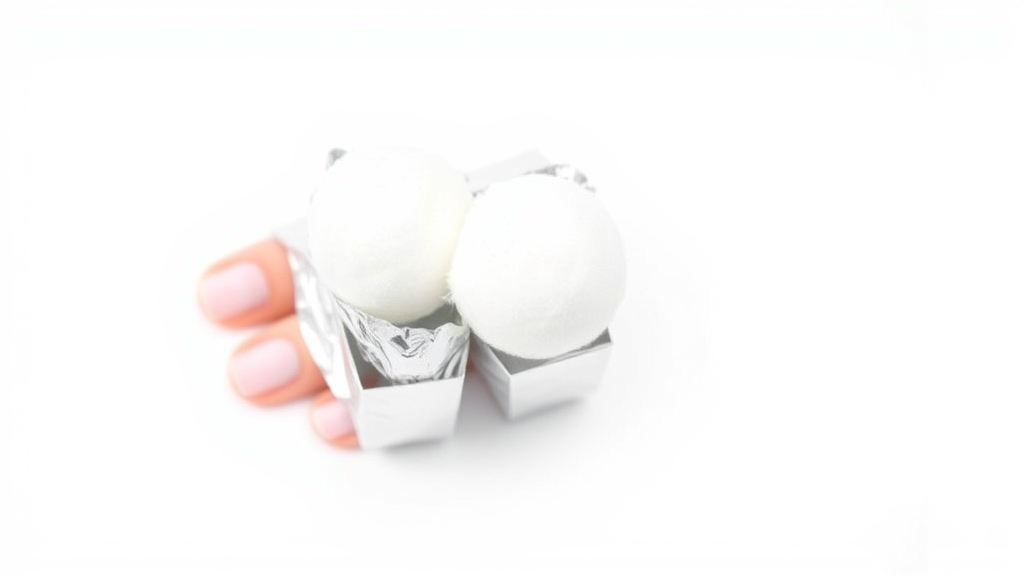
The Acetone Soaking Method
The acetone soaking method is the most widely recommended technique for removing gel nail polish safely. This method relies on acetone’s ability to break down the polymer bonds in cured gel polish, softening it for easy removal.
Step-by-Step Process:
- Prepare your workspace: Work in a well-ventilated area and protect surfaces with towels or paper.
- File the top coat: Gently file the shiny top coat to break the seal and allow acetone penetration.
- Apply cuticle oil: Protect surrounding skin from acetone’s drying effects.
- Soak cotton balls: Saturate cotton balls with 100% pure acetone.
- Place and secure: Position soaked cotton on each nail and wrap fingertips with foil.
- Wait patiently: Allow 10-15 minutes for the acetone to work.
- Check progress: Gently press cotton against nail to test if polish is lifting.
- Remove softened polish: Use a cuticle pusher to gently slide off dissolved gel.
- Repeat if necessary: Some areas may need additional soaking time.
The key to success with this method is patience. Rushing the process or using excessive force can damage your natural nails. Similar to how you need precision when learning how to measure ring size for jewelry, nail care requires attention to detail and proper technique.
Professional Foil Wrap Technique
The foil wrap technique is a salon-standard method that creates an optimal environment for gel polish removal. This method maintains consistent contact between acetone and the gel polish while preventing evaporation.
Detailed Instructions:
- Cut foil squares: Prepare 4-inch squares of aluminum foil for each nail.
- Buff the surface: Lightly file the top coat to create microscopic openings.
- Saturate cotton: Ensure cotton balls are thoroughly soaked but not dripping.
- Position carefully: Place soaked cotton directly on the nail surface.
- Wrap securely: Fold foil around the fingertip, creating a tight seal.
- Maintain contact: Press foil wraps against nails periodically during soaking.
- Remove systematically: Start with the first nail wrapped and work in order.
- Clean residue: Use a buffer to smooth any remaining gel particles.
This method typically requires 15-20 minutes but provides more consistent results than other techniques. The controlled environment prevents acetone evaporation and maintains optimal contact with the gel polish throughout the process.
Cotton Ball Soaking Method
For those who prefer a simpler approach without foil, the cotton ball soaking method offers an effective alternative. This technique works well for lighter gel polish applications and regular maintenance.
Implementation Steps:
- Prepare cotton balls: Use high-quality cotton balls that won’t leave fibers on nails.
- Create acetone reservoir: Pour acetone into a shallow dish for easy access.
- Soak thoroughly: Ensure each cotton ball absorbs maximum acetone.
- Apply with pressure: Press soaked cotton firmly against each nail.
- Hold in place: Maintain pressure for 30-60 seconds per nail.
- Rotate cotton: Use fresh sections of cotton as they become saturated with dissolved gel.
- Work systematically: Complete one hand before moving to the other.
- Final cleanup: Remove any remaining residue with a clean cotton pad.
While this method may require more frequent reapplication of acetone, it allows for better monitoring of the removal progress and immediate adjustment of technique as needed.
Gentle Filing Technique for Stubborn Polish
Sometimes, even after proper soaking, some gel polish may remain stubborn. In these cases, gentle filing can help remove the final layers without damaging your natural nails. This technique should only be used as a last resort and with extreme caution.
Safe Filing Approach:
- Use appropriate grit: Choose a 240-grit file for gentle removal
- File in one direction: Avoid back-and-forth motions that can cause splitting
- Apply minimal pressure: Let the file do the work, don’t force it
- Check frequently: Stop immediately when you reach the natural nail
- Focus on edges: Target areas where gel typically lifts first
- Buff lightly: Smooth any rough patches with a fine buffer
The filing technique requires the same careful attention as other household tasks that demand precision, such as when you need to know how to clean a washing machine properly to avoid damage to delicate components.
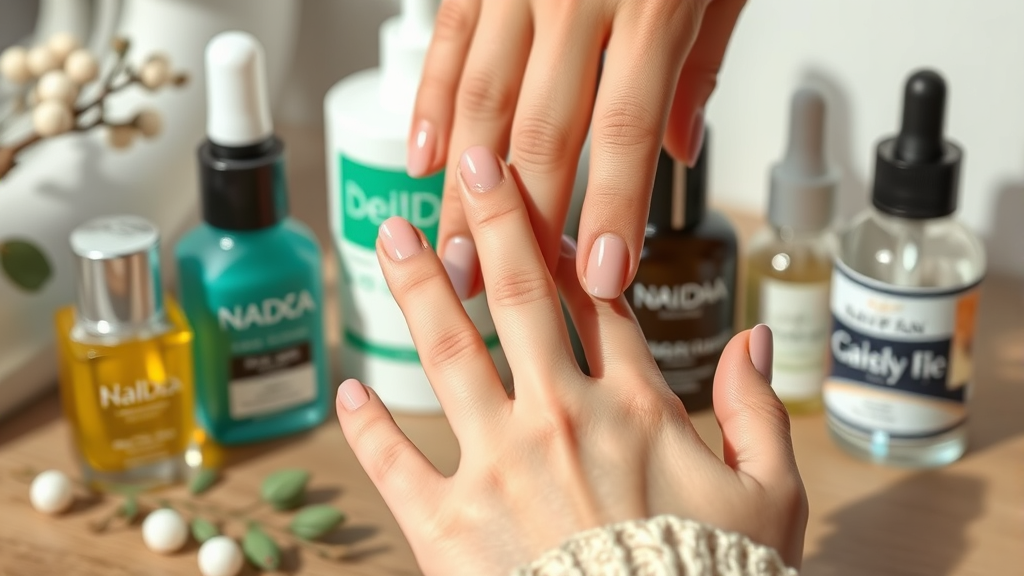
Post-Removal Nail Care and Recovery
Once you’ve successfully removed your gel polish, your nails need immediate attention to recover from the acetone exposure and return to their healthy state. Proper aftercare is crucial for maintaining nail strength and preventing future problems.
Immediate Post-Removal Care:
- Wash thoroughly: Remove all acetone residue with warm, soapy water
- Apply cuticle oil: Massage nourishing oil into nails and cuticles
- Moisturize extensively: Use a rich hand cream to restore hydration
- Avoid immediate reapplication: Give nails at least 24 hours to recover
- Assess nail condition: Check for any damage that needs attention
Long-term Recovery Strategy:
- Daily oil treatments: Apply cuticle oil twice daily for one week
- Strengthen with treatments: Use nail hardening products if nails feel weak
- Maintain hydration: Keep hands and nails moisturized consistently
- Protect during activities: Wear gloves for cleaning and household tasks
- Monitor growth: Watch for signs of healthy nail growth resuming
According to research published by the National Library of Medicine, proper nail care after chemical exposure significantly impacts recovery time and long-term nail health.
Common Mistakes to Avoid
Understanding what not to do is just as important as knowing the correct techniques. These common mistakes can cause significant damage to your natural nails and should be avoided at all costs.
Critical Mistakes:
- Peeling or picking: Never attempt to peel off gel polish manually
- Using regular nail polish remover: Standard removers lack the strength to dissolve gel
- Excessive filing: Over-filing can thin and weaken natural nails
- Skipping the buffing step: Failing to break the top coat seal prevents acetone penetration
- Rushing the process: Insufficient soaking time leads to forced removal
- Ignoring aftercare: Neglecting post-removal treatment causes long-term damage
- Using dull tools: Worn files and pushers can catch and tear nails
Prevention Strategies:
Just as you would take precautions when dealing with household issues like learning how to get rid of ants safely, nail care requires a methodical approach. Plan your removal session when you have adequate time and won’t be rushed. Prepare all tools in advance and resist the temptation to speed up the process.
The American Academy of Dermatology emphasizes that patience in nail care procedures prevents most common injuries and long-term damage.
Frequently Asked Questions
How long does it take to remove gel nail polish at home?
The complete removal process typically takes 30-45 minutes, including preparation and aftercare. The actual soaking time ranges from 10-20 minutes, depending on the gel polish thickness and brand. Rushing this process can lead to nail damage, so it’s important to allocate sufficient time for safe removal.
Can I remove gel polish without acetone?
While acetone is the most effective method, alternatives include using a nail dehydrator, filing off the polish entirely, or soaking in warm water for extended periods. However, these methods are generally less effective and may require more time or cause more damage than acetone-based removal.
Is it safe to remove gel polish frequently?
Frequent removal (more than once per week) can damage your natural nails due to repeated acetone exposure and mechanical stress. It’s recommended to allow at least 24-48 hours between removal and reapplication, and consider giving your nails a break every few cycles to recover naturally.
What should I do if my nails feel weak after removal?
Weak nails after gel removal are common and usually temporary. Focus on intensive moisturizing with cuticle oils, use nail strengthening treatments, avoid harsh chemicals, and consider taking a break from gel polish until your nails recover their natural strength.
Why won’t my gel polish come off even after soaking?
Stubborn gel polish may indicate insufficient buffing of the top coat, low-quality acetone, inadequate soaking time, or particularly thick polish application. Try re-buffing the surface, using fresh 100% acetone, and extending the soaking time to 20-25 minutes.
How can I prevent damage during the removal process?
Prevent damage by using 100% pure acetone, properly buffing the top coat, allowing adequate soaking time, avoiding excessive force when pushing off polish, and following up with intensive moisturizing and nail care treatments immediately after removal.
Should I take breaks between gel manicures?
Yes, nail health experts recommend taking breaks every 2-3 gel manicure cycles to allow your natural nails to recover. During breaks, focus on moisturizing treatments and allow your nails to strengthen naturally. This practice, similar to how you might need to address other maintenance issues like how to unclog a toilet before problems worsen, helps prevent long-term damage and maintains overall nail health.
Related Posts

How Long to Boil Lobster Tails: Cooking Guide

How Long to Fly from New York to London? Travel Times
