
How to Polish Silver: Expert Techniques
How to Polish Silver: Expert Techniques for Stunning Results
There’s something deeply satisfying about watching a tarnished piece of silver transform into a gleaming treasure right before your eyes. Whether you’re restoring a family heirloom, preparing your collection for display, or simply maintaining everyday pieces, knowing how to polish silver properly makes all the difference. The good news? You don’t need expensive professional services or harsh chemical treatments to achieve that mirror-like shine.
Silver tarnishing is a natural process that happens when the metal reacts with sulfur compounds in the air and moisture. Rather than viewing it as a setback, think of it as an invitation to practice a rewarding maintenance skill. The techniques we’ll explore range from gentle methods suitable for delicate pieces to more robust approaches for heavily tarnished items. Each method has its place in your silver-care toolkit, and understanding when to use each one will help you preserve your pieces for generations to come.
This comprehensive guide walks you through everything from identifying the type of silver you’re working with to selecting the right polishing approach and maintaining that brilliant finish. Let’s dive into the art and science of silver polishing.
Identifying Your Silver Type
Before you begin polishing, it’s crucial to understand what you’re working with. Not all silver is created equal, and misidentifying your piece could lead to damage. Sterling silver, the most common form for jewelry and decorative items, contains 92.5% pure silver mixed with other metals for durability. Coin silver, an older standard, typically contains 90% pure silver. Fine silver, which is 99.9% pure, is softer and less commonly used for items that require durability.
You’ll often find hallmarks or stamps on silver pieces indicating their purity. Look for markings like “925” for sterling silver or “900” for coin silver. If your piece lacks clear markings, you might be dealing with silver-plated items, which require even gentler handling since aggressive polishing can wear through the thin silver coating to expose the base metal underneath.
Understanding your silver’s composition helps you choose the appropriate polishing method. Sterling silver can handle more vigorous polishing techniques, while fine silver and plated pieces demand a lighter touch. When you’re learning how to clean sterling silver, this foundational knowledge becomes your first line of defense against accidental damage.
Preparation and Safety
Proper preparation sets the stage for successful polishing and protects both you and your silver. Start by assessing the current condition of your piece. Is it lightly tarnished with just surface discoloration, or is it heavily oxidized with dark, stubborn spots? This evaluation determines which method you’ll use and how much elbow grease you’ll need.
Gather your materials in a well-ventilated workspace. You’ll want soft-bristled brushes, lint-free cloths, and your chosen polishing agent. If you’re using commercial silver polish, read the instructions thoroughly and ensure your space has adequate airflow. Some polishing compounds produce fumes, so an open window or fan is essential for your safety and comfort.
Protect your work surface with newspaper or cloth to catch any spillage. Wear an apron or old clothing you don’t mind getting stained, as silver polish can leave marks that are difficult to remove. If you have sensitive skin, consider wearing cotton gloves throughout the process. Having paper towels within arm’s reach makes cleanup efficient and prevents you from rubbing polish-covered hands on your clothes.

Polishing Methods Explained
The world of silver polishing offers several effective approaches, each with distinct advantages. Understanding your options empowers you to choose the best method for your specific situation.
Commercial Silver Polish
This remains the gold standard for many enthusiasts and professionals alike. Quality commercial polishes like Twinkle or Wright’s contain specially formulated compounds that remove tarnish efficiently. They work through a combination of mild abrasives and chemical agents that dissolve oxidation. The process is relatively quick, especially for moderate tarnishing, and results are consistently excellent. However, some commercial polishes contain harsh chemicals, so always work in ventilated spaces and follow manufacturer instructions.
Baking Soda Method
For those preferring natural solutions, baking soda offers a gentle yet effective alternative. This method works particularly well for lightly to moderately tarnished pieces and is safe for delicate items. The mild abrasive action combined with the slightly alkaline nature of baking soda helps lift tarnish without aggressive scrubbing. It’s also budget-friendly and uses ingredients you likely already have at home.
Aluminum Foil and Baking Soda
This chemical method harnesses an electrochemical reaction to remove tarnish. When silver comes into contact with aluminum in a baking soda solution, a reaction occurs that transfers the tarnish from your silver to the aluminum foil. It’s remarkably effective for heavily tarnished pieces and requires minimal physical effort. However, it works best on items without gemstones or delicate surfaces that could be damaged by the solution.
Vinegar and Salt
Another natural option involves combining white vinegar with salt to create a mild acidic paste. This method works well for items that aren’t too heavily tarnished and provides gentle results. The acidity helps dissolve tarnish while the salt provides mild abrasive action. It’s particularly suitable for pieces where you want to minimize physical rubbing.
Professional Polishing Cloths
These specially treated cloths contain polishing compounds woven into the fabric itself. They’re ideal for quick touch-ups and maintaining already-polished pieces. While they won’t tackle heavy tarnish as effectively as other methods, they’re convenient, mess-free, and perfect for regular maintenance. Many silver enthusiasts keep one in their jewelry box for immediate touch-ups.
When considering how to clean jewelry more broadly, you’ll find that these same principles apply to many other metals and materials, though silver’s reactivity makes it somewhat unique in its tarnishing behavior.

Step-by-Step Polishing Process
Method 1: Commercial Polish Application
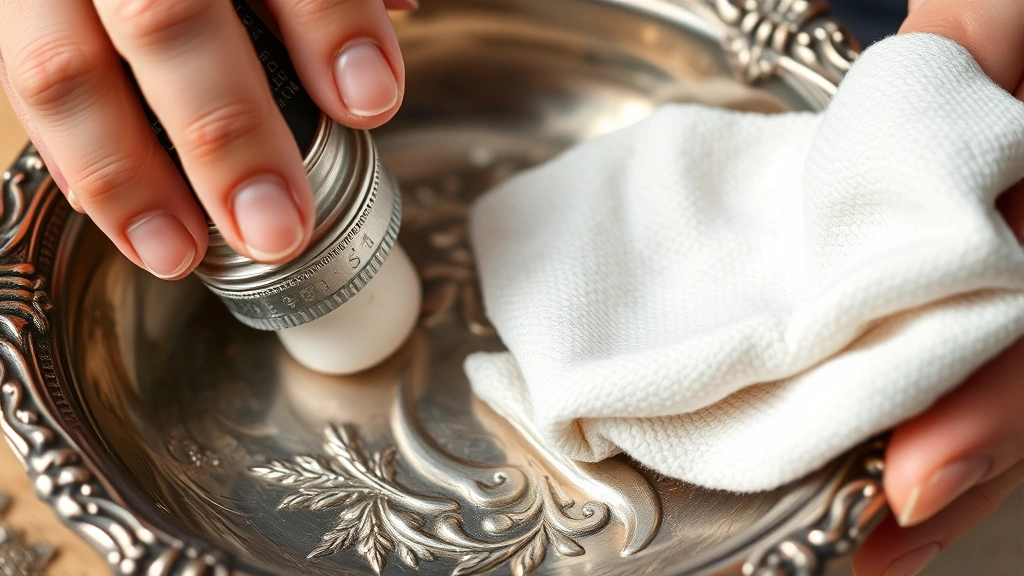
Begin by gently dusting your silver piece with a soft-bristled brush to remove loose particles and surface dust. This prevents debris from creating scratches during polishing. Apply a small amount of commercial polish directly onto a soft cloth—never apply polish directly to the silver, as this makes it harder to control the amount and can lead to uneven coverage.
Using gentle circular motions, work the polish into the silver’s surface. Let the compound do the work rather than applying excessive pressure. You’ll notice the cloth becoming darker as tarnish transfers onto it. Continue working in circular motions for one to three minutes, depending on the severity of tarnishing. For intricate designs or detailed areas, use a soft-bristled brush with a small amount of polish to reach crevices.
Once you’ve covered the entire piece, rinse it thoroughly under lukewarm running water. Use a soft cloth to gently remove any remaining polish residue. Dry immediately and completely with a lint-free cloth to prevent water spots. For extra shine, buff the piece gently with a clean cloth using circular motions.
Method 2: Baking Soda Paste
Mix three parts baking soda with one part water to create a thick paste. The consistency should be similar to toothpaste—thick enough to stay where you apply it but spreadable enough to work easily. If your paste is too dry, add water gradually; if too wet, add more baking soda.
Apply the paste to your silver using a soft cloth, working in small sections. Use gentle circular motions, allowing the mild abrasive to lift tarnish gradually. For delicate pieces or those with gemstones, work even more gently and avoid letting the paste sit for extended periods. Rinse thoroughly under lukewarm water, ensuring all paste residue is removed. Dry completely with a soft cloth.
Method 3: Aluminum Foil Reaction
Line a bowl with aluminum foil, shiny side up. Fill the bowl with hot (not boiling) water and add one tablespoon of baking soda per cup of water. Place your tarnished silver directly on the foil, ensuring it contacts the foil. The tarnish will gradually transfer from the silver to the foil through an electrochemical reaction. Depending on the severity of tarnishing, this may take anywhere from five to thirty minutes.
Remove the silver carefully using tongs or your fingers (the water will be warm but manageable). Rinse under cool running water and dry immediately with a soft cloth. You might notice some residue remaining; gently buff it away with a clean cloth. This method is remarkable for its effectiveness on heavily oxidized pieces, though it requires no polishing effort on your part.
Method 4: Vinegar and Salt Soak
Combine one cup of white vinegar with one tablespoon of salt in a bowl. Stir until the salt dissolves completely. Submerge your silver piece in the solution and let it soak for twelve hours. After soaking, remove the piece and gently rinse it under cool running water. Use a soft cloth to gently buff away any remaining tarnish. This method works best for moderately tarnished items and requires patience but minimal effort.
Special Considerations for Delicate Pieces
Antique silver, jewelry with gemstones, and silver-plated items require modified approaches to prevent damage. Heavily oxidized antique pieces might be better left to professionals, as overly aggressive polishing can remove patina that adds historical and monetary value.
For jewelry containing gemstones, avoid submerging pieces in chemical solutions that might damage the stones or their settings. Instead, use gentle polishing cloths or mild baking soda paste applied only to the silver portions. Work carefully around stones, and consider whether the piece truly needs aggressive polishing or if a gentle buff would suffice.
Silver-plated items demand extra caution since vigorous polishing wears through the plating layer. Use only soft cloths and gentle methods. The aluminum foil method and commercial polishes should be applied with extreme care and minimal rubbing. Often, professional polishing is worth the investment for valuable plated pieces, as DIY polishing risks exposing the base metal underneath.
When working with pieces that have intricate details or combined materials, test your chosen method on an inconspicuous area first. This allows you to verify that your approach won’t cause unwanted effects before treating the entire piece. Additionally, if you’re ever uncertain about a valuable or irreplaceable piece, consulting a professional conservator before attempting any polishing is the wisest approach.
Maintenance and Prevention
The real secret to maintaining beautiful silver isn’t just knowing how to polish it—it’s preventing excessive tarnishing in the first place. Proper storage makes an enormous difference. Keep silver in a cool, dry place away from direct sunlight. Moisture and humidity accelerate tarnishing, so avoid storing silver in bathrooms or damp basements.
Consider using anti-tarnish strips or cloths in your storage containers. These contain compounds that absorb the sulfur compounds responsible for tarnishing, significantly slowing the oxidation process. Change these strips periodically as they become saturated. Alternatively, store silver in individual soft cloth pouches or wrapped in acid-free tissue paper to minimize air exposure.
Regular use actually helps maintain silver’s appearance. When you wear silver jewelry or use silver items, the friction from handling provides gentle polishing action. Pieces that sit unused for years tend to tarnish more heavily than those in regular rotation. If you have decorative silver pieces, occasionally handle and admire them—this isn’t just emotionally satisfying, it’s also excellent maintenance.
For everyday maintenance of frequently used pieces, professional polishing cloths work wonderfully. A quick buff with one of these cloths every few weeks keeps your silver looking brilliant without requiring full polishing sessions. Think of it as preventive maintenance that keeps tarnish from accumulating to problematic levels.
Understanding the broader context of metal care helps too. Just as knowing how to clean brass involves understanding oxidation and patina, silver care benefits from recognizing that tarnish is a natural process that requires ongoing attention. Accepting this reality helps you develop sustainable maintenance habits rather than waiting until pieces are severely oxidized.
Avoid storing silver with rubber bands, plastic wrap, or materials containing sulfur compounds. Some papers and cardboard boxes actually accelerate tarnishing due to their sulfur content. When in doubt, use archival-quality storage materials or simple soft cloth pouches. Your investment in proper storage pays dividends through reduced polishing frequency and better long-term preservation.
If you’re working on projects involving multiple metals, such as those requiring knowledge of how to remove rust from iron components near silver items, keep these materials completely separate. Cross-contamination can accelerate tarnishing in nearby silver pieces.
Frequently Asked Questions
How often should I polish my silver?
This depends on storage conditions, frequency of use, and personal preference. Regularly used pieces might need polishing only a few times yearly, while stored pieces could go longer. If you notice tarnish beginning to develop, that’s your signal to polish. Using anti-tarnish storage methods can extend polishing intervals significantly.
Is it safe to use the aluminum foil method on all silver?
The aluminum foil method works well on most sterling and fine silver pieces, but avoid using it on silver-plated items or pieces with gemstones and delicate settings. The heat and solution can damage gemstone adhesives and wear through plating. Test on an inconspicuous area first when uncertain.
Can I use toothpaste to polish silver?
While some people use toothpaste, most toothpastes are too abrasive for silver and can create microscopic scratches. Additionally, toothpaste often contains fluoride and other additives that aren’t ideal for silver. Stick with products specifically formulated for silver polishing or the gentler natural methods described above.
What’s the difference between polishing and cleaning silver?
Cleaning removes surface dirt and dust, while polishing removes tarnish and oxidation. You’ll often clean before polishing. When you’re learning how to clean sterling silver, remember that gentle cleaning with mild soap and water comes before polishing with compounds or abrasives.
How do I know if my piece is silver-plated or solid silver?
Look for hallmarks indicating purity (925, 900, 950, etc.). Silver-plated items usually say “plated,” “EP,” or “EPNS” (electroplated nickel silver). If unsure, the weight and feel of the piece provides clues—solid silver is heavier and denser than plated items. When uncertain, treat it as plated to avoid damage.
Can I polish silver with gemstones?
Yes, but carefully. Avoid submerging gemstone jewelry in chemical solutions. Use gentle methods like soft cloths or mild baking soda paste applied only to silver portions. Work around stones carefully, and consider professional polishing for valuable pieces.
Why does silver tarnish?
Silver reacts with sulfur compounds in the air and moisture to form silver sulfide, the dark substance we call tarnish. This is a natural chemical process that can’t be completely prevented, only slowed through proper storage and maintenance. Understanding this helps you accept tarnishing as a normal part of silver ownership rather than a sign of failure.
Is professional polishing worth the cost?
For valuable antiques, heavily damaged pieces, or items with complex details, professional polishing often provides superior results and protects your investment. For everyday silver and costume pieces, DIY methods work wonderfully and save money. Reserve professional services for pieces where the value justifies the expense.
What should I do if polishing doesn’t remove all the tarnish?
Some tarnish stains are permanent or indicate damage to the silver’s surface. If one method doesn’t work completely, you might try another approach, but recognize that some oxidation is simply part of a silver piece’s history. Heavy or stubborn tarnish might require professional restoration or might be better left as patina that adds character to antique pieces.
Related Posts

How Long to Boil Lobster Tails: Cooking Guide

How Long to Fly from New York to London? Travel Times
