
How to Plant Grass Seed: Expert Guide
How to Plant Grass Seed: Expert Guide to a Lush, Healthy Lawn
There’s something deeply satisfying about transforming a patchy, tired lawn into a verdant carpet of green. Whether you’re dealing with bare spots from winter damage, pet wear-and-tear, or you’re starting from scratch, knowing how to plant grass seed is one of those essential homeowner skills that pays dividends year after year. The good news? It’s far simpler than most people think, and you don’t need fancy equipment or a landscaping degree to pull it off.
The real secret lies in understanding the fundamentals: timing, soil preparation, seed selection, and consistent aftercare. Get these elements right, and you’ll have germinating grass within weeks. Miss a step, and you’ll be wondering why your investment didn’t take. This guide walks you through every phase of the process, from assessing your lawn’s needs to nurturing those tender seedlings into mature, resilient grass.
Before we dive into the mechanics, let’s acknowledge something important: planting grass seed is genuinely one of the most rewarding DIY projects you can tackle. It requires minimal financial investment, works on any property size, and delivers visible results that make your entire outdoor space feel refreshed. Plus, you’ll develop a better understanding of what your lawn needs to thrive.
Understanding Your Lawn’s Needs
Before you scatter a single seed, take time to evaluate what you’re working with. Walk your yard during different times of day and note where sunlight hits, where water pools, and where existing grass struggles. These observations inform every decision that follows.
Consider whether you’re doing a complete renovation or spot-seeding. Spot-seeding addresses small bare patches and damaged areas, while a full renovation means starting fresh across the entire lawn. The scope determines your approach, materials, and timeline. Additionally, think about whether you’re interested in expanding your gardening skills beyond grass—if you’ve been curious about producing your own food, you might explore how to grow carrots or other vegetables in a dedicated garden bed alongside your lawn renovation project.
Test your soil if you haven’t recently. Most county extension offices offer affordable soil testing that reveals pH levels, nutrient content, and texture. This information is invaluable because it tells you exactly what amendments your soil needs. You might also assess drainage by observing how quickly water soaks in during rain or watering.
Choosing the Right Grass Seed
Not all grass seed is created equal, and choosing the wrong variety guarantees disappointment. Your region, climate, and lawn conditions all influence which seed will thrive.
Grass varieties generally fall into two categories: cool-season grasses and warm-season grasses. Cool-season varieties like fescue, bluegrass, and ryegrass flourish in northern climates with cold winters and moderate summers. They germinate in spring and fall when soil temperatures are cooler. Warm-season grasses such as Bermuda, zoysia, and St. Augustine thrive in southern regions with hot summers and mild winters, germinating when soil warms in late spring.
Beyond climate, consider your lawn’s specific conditions. Do you have mostly shade or full sun? Shade-tolerant varieties exist within both cool and warm-season categories. Is your soil compacted or well-draining? Some grasses handle poor soil better than others. Will the lawn experience heavy foot traffic or is it primarily ornamental? High-traffic areas need hardy varieties bred for durability.
Most lawn seed retailers sell regional seed blends specifically formulated for your area—these are your safest bet. A quality blend combines multiple grass varieties to increase the chances that something will thrive under your specific conditions. Check the seed label for germination rates (aim for 85% or higher) and the percentage of weed seeds (should be minimal).
Preparing Your Soil
Soil preparation is where many DIYers cut corners, and it’s precisely where you shouldn’t. Grass seed germinates best in loose, nutrient-rich soil with good contact between seed and earth. Compacted, depleted soil guarantees poor germination rates and weak growth.
Start by removing debris—dead grass, rocks, sticks, and anything else that prevents seed-to-soil contact. For spot-seeding, rough up the area with a rake, breaking up compacted soil. For full renovations, consider renting a power rake or dethatcher to remove the dead grass layer (called thatch) that accumulates over time. This might seem aggressive, but it’s transformative.
Next, test and amend your soil based on results. If your soil is acidic (common in many regions), add lime to raise pH. If it’s alkaline, sulfur helps lower it. Most grasses prefer slightly acidic to neutral pH (6.0 to 7.0). Work in organic matter like compost to improve texture and nutrient content. For compacted clay soil, this makes an enormous difference. Aim to loosen the top 2-3 inches of soil.
If your soil is significantly depleted, apply a balanced starter fertilizer formulated for new seed. This gives germinating seeds the nutrients they need during those critical early weeks. Follow label instructions carefully—too much fertilizer can actually harm delicate seedlings.
Water your prepared area lightly after amending. This helps settle everything and gives you a sense of how water moves through your soil. If water pools instead of soaking in, you’ve got drainage issues that might require raised beds or French drains in addition to soil amendment.
Timing Your Seeding
Timing is absolutely critical for grass seed success. Plant at the wrong time and you’re fighting against nature rather than working with it.
For cool-season grasses, the ideal windows are early fall (late August through September) and early spring (March through April). Fall is actually preferable because soil is still warm from summer, moisture levels are typically higher due to increased rainfall, and seedlings have an entire season to establish strong roots before summer heat arrives. Spring seeding works but is riskier because summer heat and drought stress young seedlings.
Warm-season grass seed germinates when soil temperature consistently reaches 65-70°F, typically late May through June. Planting too early means seed sits dormant or rots in cool, wet soil. Waiting until mid-summer means seedlings face extreme heat stress during their most vulnerable growth phase.
Avoid winter seeding in cold climates—seed won’t germinate, and it’ll likely wash away or be eaten by birds. Similarly, don’t seed during peak summer heat in any climate. The combination of high soil temperature, intense sun, and dry conditions creates a hostile environment for germination.
Check local weather forecasts before seeding. You want consistent moisture for at least the first 2-3 weeks. If you’re in a drought period or a dry spell is forecasted, either wait or be prepared to water religiously. If heavy rain is coming, that’s actually ideal—nature will handle watering for you.
Planting Techniques and Methods
Now comes the fun part—actually getting seed into the ground. You have several methods to choose from, each with advantages depending on your situation.
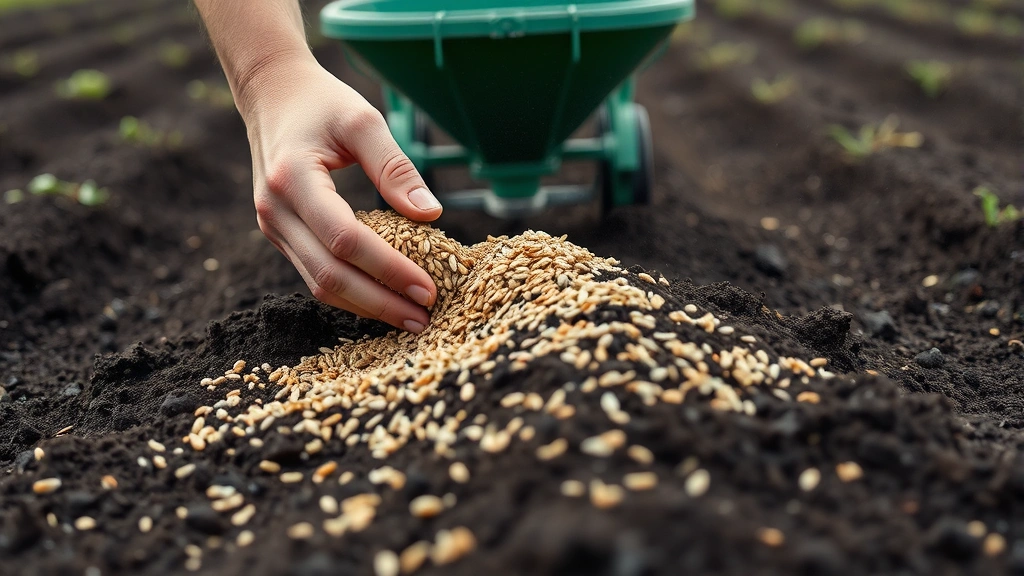
Hand-Seeding for Small Areas: For spot-seeding or small lawns, hand-seeding works perfectly. Divide your area into sections, then broadcast seed evenly across each section. This requires some practice to achieve consistent coverage, but it’s meditative and gives you complete control. The key is using a light touch and overlapping your throws slightly to avoid gaps.
Broadcast Spreader Method: For larger areas, a broadcast spreader (also called a rotary spreader) is efficient and economical. Fill the hopper with seed, set the gate to the appropriate opening for your seed size, and walk at a consistent pace while the spreader flings seed in a circular pattern. Make overlapping passes to ensure even coverage. This method covers ground quickly and distributes seed more uniformly than hand-seeding.
Drop Spreader Method: A drop spreader releases seed directly below as you walk, creating precise rows. It’s slower than a broadcast spreader but offers excellent control, particularly useful when you’re seeding near garden beds or hardscaping where you don’t want seed to land. Many professionals prefer drop spreaders for renovation work.
Hydroseeding: This professional method sprays a slurry of seed, mulch, fertilizer, and tackifier. It’s expensive but excellent for large areas, steep slopes, or challenging terrain. If you’re doing extensive work, getting quotes from hydroseeding companies is worthwhile.
Regardless of method, aim for proper seeding rate—typically 3-4 pounds per 1,000 square feet for most cool-season blends, though rates vary. Check your seed bag for specific recommendations. Too little seed means sparse coverage; too much wastes seed and creates competition that weakens individual plants.
After seeding, lightly rake the area to work seed into the soil surface. This improves soil contact without burying seed too deeply. Seeds need light to germinate, so don’t bury them more than 1/4 inch deep. Apply a thin layer of compost or straw mulch if you want to retain moisture and protect seed from birds, but this is optional for most situations.
Watering and Maintenance
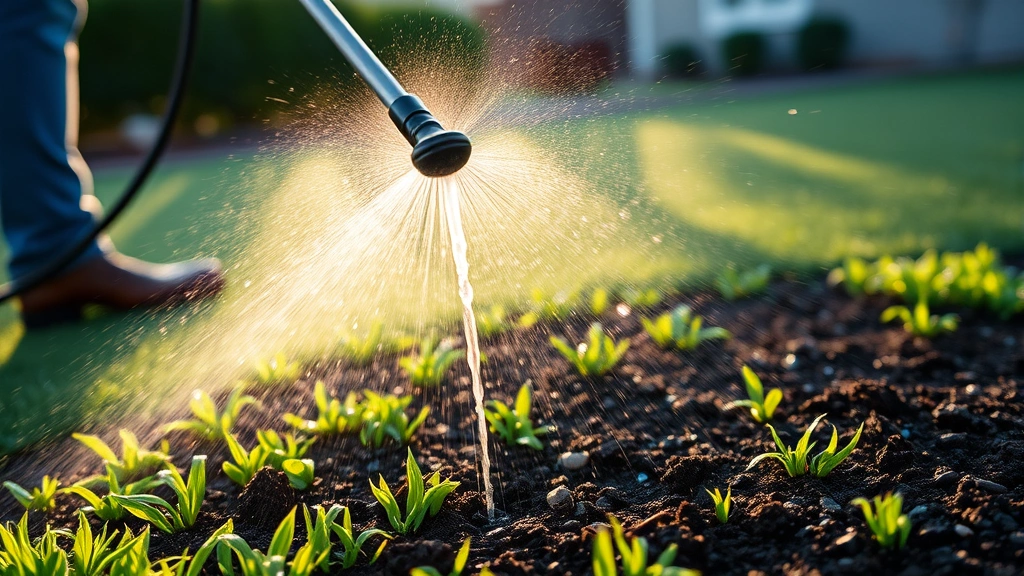
Germinating grass seed is thirsty grass seed. For the first 2-3 weeks after planting, consistent moisture is non-negotiable. This is where many projects fail—people either underwater or get inconsistent with watering.
Water lightly but frequently during germination phase. Your goal is keeping the top 1 inch of soil consistently moist without creating puddles or runoff. Early morning watering is ideal because it reduces disease pressure and ensures moisture is available when temperatures start rising. Many people find that watering twice daily (early morning and late afternoon) during germination works best.
Germination typically takes 7-14 days depending on grass variety, soil temperature, and moisture levels. Once you see green shoots emerging, you can gradually reduce watering frequency while increasing the amount applied with each watering. This encourages deeper root development.
After the first month, transition to deeper but less frequent watering. Established seedlings need about 1 inch of water per week from rainfall or irrigation. Water deeply enough that moisture penetrates 4-6 inches into soil, encouraging roots to grow deeper and creating drought resilience.
Avoid walking on newly seeded areas for at least 3-4 weeks. Young seedlings are fragile and easily damaged. Keep pets off the area too. Fertilize again at 4-6 weeks with a balanced lawn fertilizer, then establish a regular feeding schedule going forward. If you’re curious about other growing projects that benefit from similar soil preparation and feeding regimens, you might explore how to grow garlic in a dedicated bed.
Mow for the first time when grass reaches about 3 inches tall, cutting it back to 2-2.5 inches. Set your mower blade high and use a sharp blade to avoid tearing tender shoots. After this first mow, establish a regular mowing schedule, typically weekly during growing season, maintaining your preferred height (usually 2.5-3.5 inches depending on grass type).
Troubleshooting Common Issues
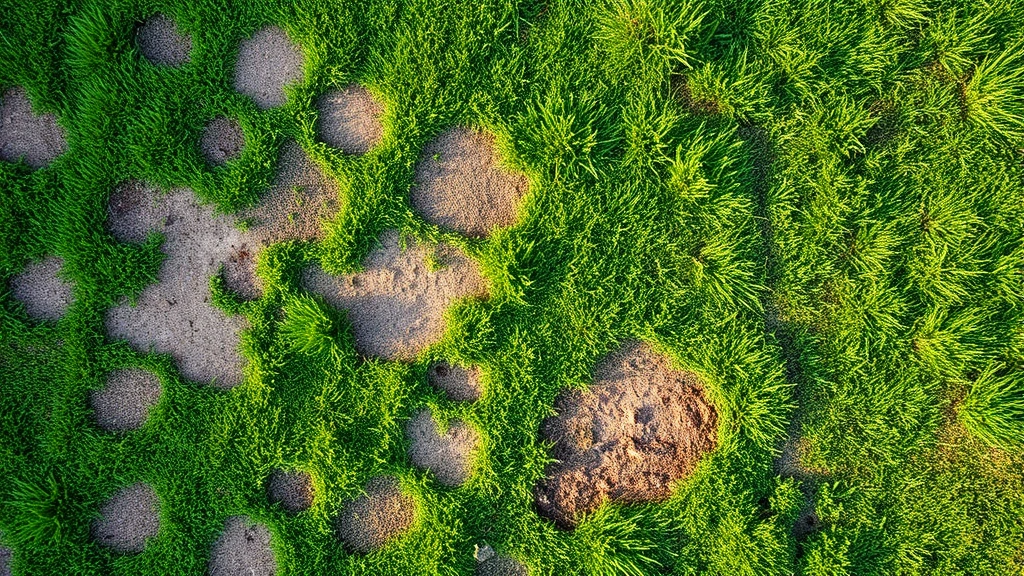
Poor Germination: If you’re seeing spotty germination after 3 weeks, likely culprits include poor soil contact, inconsistent watering, or wrong planting timing. Bare spots can be reseeded—prepare the area again and sow fresh seed. Sometimes patience is the answer; some seeds germinate slower than others.
Weed Invasion: Weeds often appear before grass is fully established because bare soil is prime real estate for weed seeds. Resist the urge to use herbicides on young seedlings. Instead, hand-pull visible weeds and reseed any bare spots they leave behind. Once grass is established, it’ll naturally crowd out most weeds.
Fungal Disease: Excessive moisture combined with poor air circulation can trigger fungal issues like damping-off disease. If you notice gray or brown spots on seedlings, improve air circulation by mowing (if grass is tall enough) and reduce watering frequency slightly. Ensure you’re not overwatering.
Thin or Weak Growth: This usually indicates insufficient nutrients or too much shade. If it’s a shade issue, consider shade-tolerant grass varieties for future seeding. If it’s nutrients, apply a balanced fertilizer and ensure consistent watering.
Dormant Patches: Sometimes seed just doesn’t take in certain areas. This might be due to compacted soil, poor drainage, or shade. Address the underlying cause—loosen soil, improve drainage, or switch to shade-tolerant varieties—then reseed.
Remember that establishing a beautiful lawn is a gradual process. First-year seedlings won’t look like mature lawn. Give it a full growing season before judging results. You might also expand your property’s productivity by learning to how to grow onions in a vegetable garden while your lawn establishes itself.
Frequently Asked Questions
Can I plant grass seed anytime during the year?
Timing matters significantly. Cool-season grasses should be planted in early fall or early spring. Warm-season grasses need to be planted when soil reaches 65-70°F consistently, typically late May through June. Avoid planting during extreme heat, cold, or drought periods.
How much does it cost to seed a lawn?
Costs vary based on lawn size and seed quality. For a typical 5,000-square-foot lawn, you’ll spend $50-150 on seed alone, plus amendment and fertilizer costs. If you rent equipment like a power rake or spreader, add another $50-100. Professional hydroseeding runs $500-2,000+ for the same area.
Do I need to remove old grass before seeding?
For spot-seeding, no—rough up the area and overseed. For full renovation with significant dead grass or thatch buildup, removing old grass first dramatically improves results. If you’re seeding into relatively healthy existing lawn, power raking or dethatching is sufficient.
How often should I water newly seeded grass?
During germination (first 2-3 weeks), water lightly twice daily to keep the top inch consistently moist. After germination, gradually reduce frequency while increasing depth. Once established, aim for 1 inch per week through rainfall or irrigation.
When can I mow newly seeded grass?
Wait until grass reaches about 3 inches tall, then mow to 2-2.5 inches. This typically takes 4-6 weeks depending on conditions. Use a sharp blade and avoid mowing when grass is wet.
What’s the difference between seed, sod, and plugs?
Seed is the most economical but takes longest to establish (6-8 weeks). Sod provides instant coverage but costs significantly more. Plugs are small pieces of established grass—they’re middle-ground in cost and time. For most DIYers, seed offers the best value and learning opportunity.
Can I overseed my existing lawn to make it thicker?
Absolutely. Overseeding is a great way to thicken thin lawns and introduce disease-resistant varieties. Prepare the area by power raking or roughly roughing up the soil, apply seed, and maintain moisture for 2-3 weeks. Many people overseed annually in fall for continuous improvement.
Is starter fertilizer necessary?
It’s beneficial but not absolutely necessary if your soil is reasonably fertile. A soil test tells you whether your lawn needs it. For poor soil or complete renovations, starter fertilizer provides a significant boost to germination and early growth rates.
What if my area gets afternoon shade?
Shade-tolerant grass varieties exist within both cool and warm-season categories. Ask your seed supplier for blends suited to partial shade. You might also consider how to grow ginger or other shade-tolerant plants in areas where grass consistently struggles, diversifying your landscape.
How do I know if my soil pH is correct?
Get a professional soil test through your local county extension office. Most grasses prefer pH between 6.0 and 7.0. If your soil is too acidic, add lime; if too alkaline, add sulfur. A soil test takes guesswork out of the equation.
Can I plant grass seed in containers or raised beds?
Yes, though it’s unconventional. Use quality potting soil mixed with compost, keep it consistently moist, and provide adequate sunlight. Container grass works for small decorative areas or experimental growing. If you’re interested in container gardening for vegetables, exploring how to store onions after a successful harvest is a natural next step.
Related Posts

How Long to Boil Lobster Tails: Cooking Guide

How Long to Fly from New York to London? Travel Times
