
How to Pair a Roku Remote: Easy Steps
How to Pair a Roku Remote: Easy Steps for Seamless Control
There’s nothing quite like the frustration of a remote that won’t cooperate. You’re ready to settle in for your favorite show, and your Roku remote decides to take an unscheduled vacation from your device. The good news? Pairing a Roku remote is actually one of the simplest tech tasks you’ll encounter, and we’re here to walk you through it without the jargon or unnecessary complications.
Whether you’ve just unboxed a new Roku device, replaced a faulty remote, or simply need to reconnect after a hiccup, the pairing process takes just a few minutes. Unlike some streaming devices that require complex setup procedures, Roku has designed their remotes to connect intuitively. By the end of this guide, you’ll be a Roku remote pairing pro.
Let’s dive into the straightforward steps that’ll have your remote communicating with your Roku device faster than you can say “play something good.”
Understanding Roku Remotes and Pairing Basics
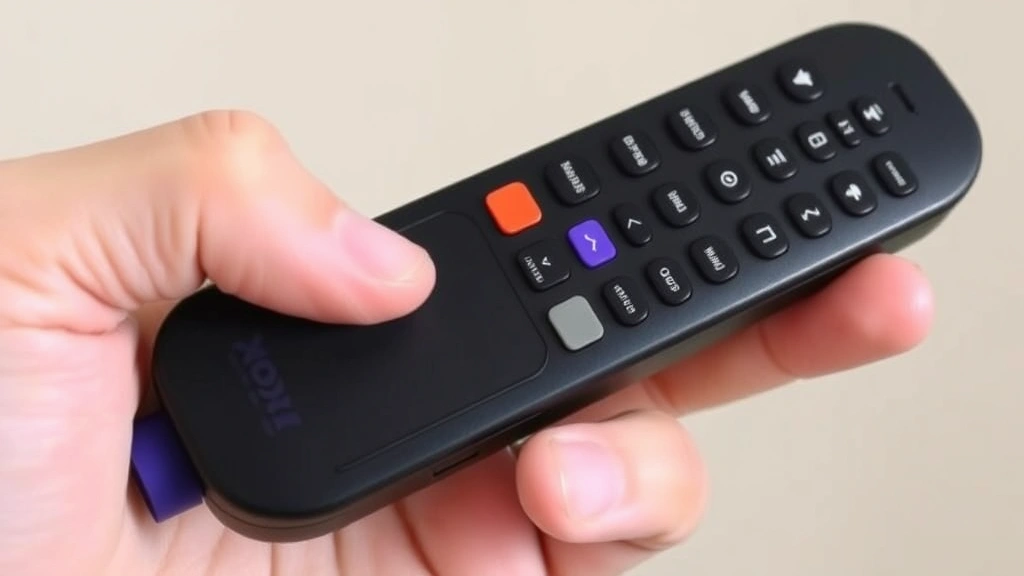
Roku remotes operate in a few different ways depending on the model. Most modern Roku remotes use either infrared (IR) or enhanced remotes with wireless connectivity. The enhanced models use a pairing process similar to Bluetooth, while standard IR remotes simply need a clear line of sight to your device. Understanding which type you have is the first step toward successful pairing.
The enhanced remotes—often called Roku Voice Remotes or Streaming Stick remotes—offer the advantage of not requiring a direct line of sight. This means you can control your Roku even if the remote isn’t pointed directly at the device. These remotes do require pairing, which establishes a wireless connection between the remote and your Roku player.
Standard IR remotes, conversely, work immediately without any pairing process. If you’re using an older Roku remote, you might not need to pair it at all—just make sure the batteries are fresh and you’re aiming it at the Roku device. However, if you’ve recently upgraded to an enhanced remote, pairing is necessary to unlock its full potential.
Preparation: What You Need Before Starting
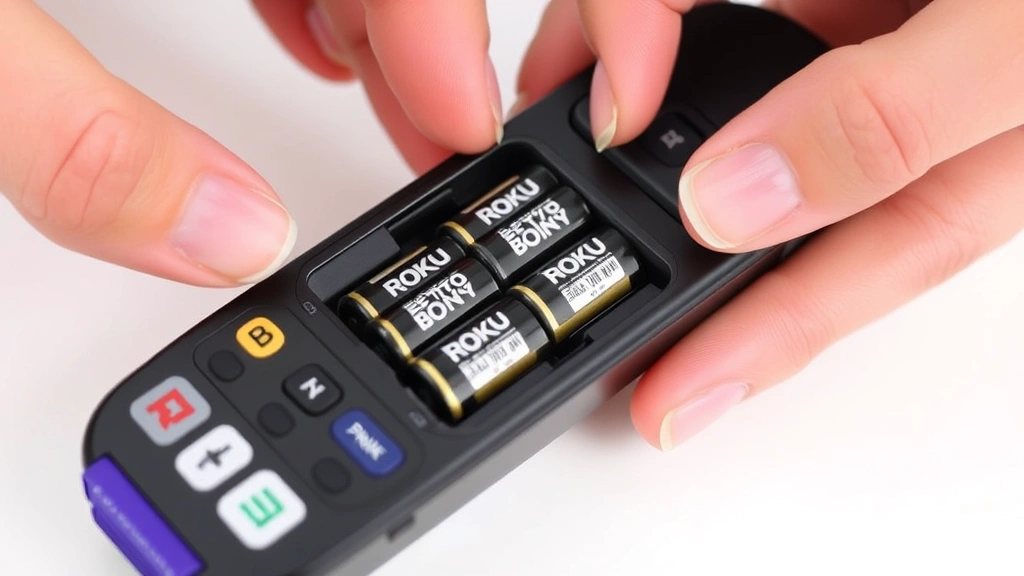
Before you begin the pairing process, gather a few essentials to ensure smooth sailing. First, locate your Roku remote and check the battery compartment. Replace batteries if they’re low or corroded—this is often the culprit behind pairing failures. Fresh batteries are your first line of defense against connection issues.
Next, ensure your Roku device is powered on and easily accessible. You’ll need to interact with the device itself during the pairing process, so make sure it’s not tucked away in an awkward spot. If your Roku device has been unplugged or powered off for an extended period, turn it on and wait about 30 seconds for it to fully initialize.
Check that your Roku device is connected to your home network. While this isn’t strictly necessary for IR remotes, enhanced remotes require an active network connection to pair properly. If you’re unsure about your network status, navigate to Settings on your Roku device using another remote or the Roku mobile app to verify connectivity.
Step-by-Step Pairing Instructions
Method 1: Pairing an Enhanced Roku Remote
For enhanced or Voice remotes, follow these straightforward steps:
- Locate the pairing button: On the back of your enhanced remote, you’ll find a small pairing button. It’s usually located near the battery compartment and is quite small—you might need to use a pen or paperclip to press it.
- Press and hold the pairing button: While looking at the back of the remote, press and hold the pairing button for 3-5 seconds. You’ll see a light indicator on the remote flash, signaling that it’s in pairing mode.
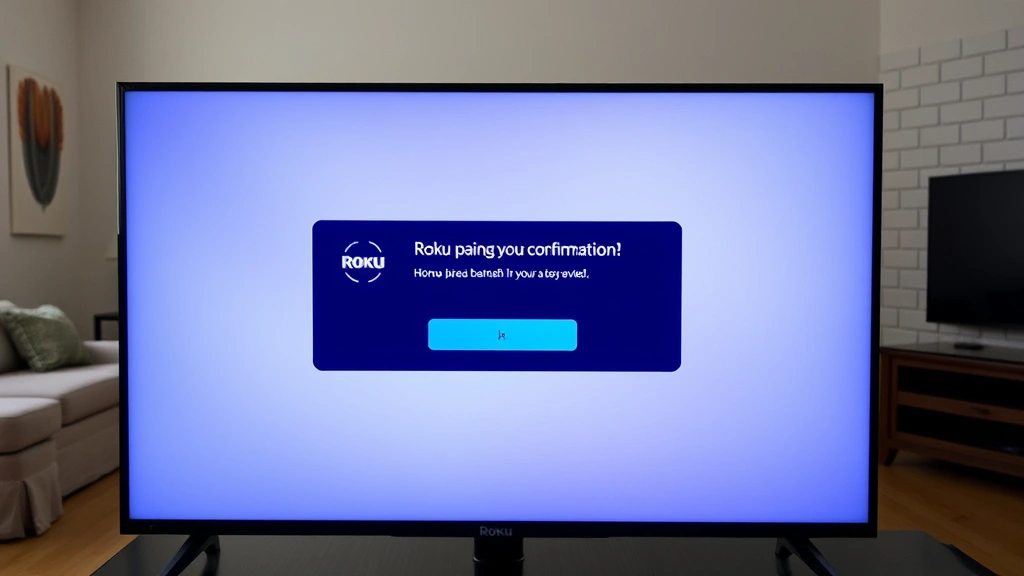
- Watch for confirmation on your TV: Within 10-15 seconds, your Roku device should display a pairing confirmation message on your television screen. This message typically says “Remote paired” or shows a similar confirmation.
- Test the connection: Once you see the confirmation, try pressing a button on the remote. Your Roku device should respond immediately. If nothing happens, proceed to our troubleshooting section.
Method 2: Using the Roku Mobile App to Pair
If you don’t have physical access to the pairing button or prefer an alternative method, you can pair your remote using the Roku mobile app:
- Download the Roku app: Available on both iOS and Android, the official Roku app serves as a mobile remote and pairing assistant.
- Connect your phone to the same network: Ensure your smartphone is connected to the same WiFi network as your Roku device.
- Open the app and select your device: Launch the Roku app and tap on your Roku device from the list of available devices.
- Navigate to remote settings: Look for a menu option related to remotes or pairing, typically found in the device settings within the app.
- Follow on-screen prompts: The app will guide you through the pairing process, which usually involves confirming pairing on both your phone and the Roku device.
Method 3: Factory Reset Pairing
If your remote has been previously paired and suddenly stopped working, a factory reset might be necessary. This clears any corrupted pairing data and allows you to start fresh:
- Remove the batteries: Take out the batteries from your remote and set them aside.
- Press buttons on the remote: Without batteries, press various buttons on the remote for 10-15 seconds to discharge any residual power.
- Reinsert fresh batteries: Install new batteries into the remote, ensuring correct polarity (+ and – aligned properly).
- Perform the pairing process again: Follow Method 1 or Method 2 above to re-pair your remote.
Troubleshooting Common Pairing Issues
Remote Won’t Enter Pairing Mode
If your remote doesn’t respond when you press the pairing button, first check that you’re pressing the correct button on the back. Some users mistakenly press the reset button instead. The pairing button is typically smaller and located near the battery compartment. If you’re still having trouble, try replacing the batteries with fresh ones—low battery power can prevent the remote from entering pairing mode.
Roku Device Doesn’t Recognize the Remote
When your Roku device fails to acknowledge the pairing attempt, ensure both devices are on the same network. Enhanced remotes require WiFi connectivity to pair. Check your network settings on the Roku device and confirm it’s connected. If the device has been recently factory reset, you may need to set up the network connection again before attempting to pair an enhanced remote.
Remote Pairs but Then Disconnects
If your remote pairs successfully but frequently disconnects, the issue often relates to network interference or weak signal strength. Move your Roku device closer to your WiFi router and away from other electronics that might cause interference, such as microwaves or cordless phones. Also, ensure your router firmware is up to date and that your WiFi signal is strong throughout your viewing area.
Nothing Happens After Pairing Confirmation
Sometimes the pairing confirmation appears, but the remote still doesn’t control your device. In this case, restart both your Roku device and the remote. Unplug your Roku device for 30 seconds, then plug it back in. Remove the remote’s batteries, wait 10 seconds, and reinsert them. Then attempt the pairing process once more.
If you’re unable to connect your Roku device to WiFi in the first place, check out our guide on how to connect Roku to WiFi without remote for alternative connection methods that don’t require a paired remote.
Advanced Tips for Remote Management
Pairing Multiple Remotes to One Device
Roku allows you to pair multiple enhanced remotes to a single device, which is perfect for households with multiple TVs or if you want a backup remote. Simply follow the standard pairing process with each remote, and your Roku device will recognize and respond to all paired remotes. This is particularly useful in larger homes where different family members might use different remotes in different rooms.
Switching Between Roku Remotes
If you need to switch from an enhanced remote to a standard IR remote, or vice versa, the process is seamless. Roku devices automatically detect which type of remote is being used. You don’t need to unpair one before using another—simply start using your preferred remote, and the device will adapt accordingly. This flexibility makes it easy to use different remotes depending on your situation.
Updating Remote Firmware
Occasionally, Roku releases firmware updates for enhanced remotes. These updates improve functionality and fix bugs. To check for updates, go to your Roku device’s settings menu and look for a “Check for updates” or “System update” option. Your remote will automatically receive updates when connected to your device, so there’s no separate process needed.
Comparing with Other Streaming Devices
If you’re also working with other streaming devices, you might find pairing processes vary significantly. For instance, if you have a Fire TV device, the process of pairing a FireStick remote follows a similar logic but with different steps. Additionally, if you ever need to troubleshoot a FireStick remote, our guide on how to reset a FireStick remote provides detailed instructions for that ecosystem. Understanding these differences helps you manage multiple streaming devices more effectively.
Mobile App as a Temporary Solution
While you’re troubleshooting a physical remote, remember that the Roku mobile app can serve as a complete replacement remote. This is incredibly helpful if your remote is lost, broken, or simply won’t pair. The app offers all the same functionality as a physical remote and requires only your smartphone and network connectivity. It’s a perfect backup solution for those moments when hardware fails.
Frequently Asked Questions
How long does it take to pair a Roku remote?
The pairing process typically takes less than 30 seconds from start to finish. Most of that time is waiting for the Roku device to display the confirmation message. If it takes longer than a minute, something is likely wrong, and you should consult the troubleshooting section.
Do all Roku remotes require pairing?
No. Standard infrared remotes don’t require any pairing process—they work immediately out of the box. Only enhanced remotes with wireless connectivity need to be paired with your Roku device. You can usually identify an enhanced remote by its larger size and the presence of a pairing button on the back.
Can I pair a Roku remote to multiple devices?
Enhanced remotes can be paired to multiple Roku devices, but they’ll typically control whichever device is closest or has the strongest signal. For multi-device households, Roku recommends having a dedicated remote for each device to avoid confusion.
What should I do if my remote still won’t work after pairing?
First, try the factory reset method described in the pairing process section. If that doesn’t work, check for physical damage to the remote and ensure the batteries aren’t depleted. If you’ve exhausted all options, contact Roku customer support or consider replacing the remote. Sometimes hardware simply fails, and replacement is the most practical solution.
Is pairing the same as connecting to WiFi?
Not exactly. Pairing is the process of establishing a connection between your remote and Roku device specifically. Your Roku device must be connected to WiFi for enhanced remotes to pair, but pairing itself is a separate process that happens after WiFi connectivity is established.
Can I use my phone as a Roku remote permanently?
Yes, absolutely. The Roku mobile app provides full remote functionality and can be used as your primary remote if you prefer. Many users appreciate the app for its keyboard functionality when entering text, which is more convenient than navigating on-screen keyboards with a physical remote.
What’s the difference between pairing and syncing?
In the context of Roku remotes, these terms are often used interchangeably. Pairing establishes the initial connection between remote and device, while syncing typically refers to maintaining that connection. For practical purposes, you can think of them as the same process.
Pro Tip: For additional streaming setup help, explore how to stream Netflix on Discord to understand more about Roku integration with other platforms and services.
Getting your Roku remote paired shouldn’t feel like rocket science, and with these straightforward steps, it won’t. Whether you’re setting up a brand-new device or troubleshooting an existing connection, you now have the knowledge to tackle any pairing challenge. Keep your batteries fresh, ensure your network is solid, and you’ll enjoy uninterrupted streaming enjoyment for years to come.
For more detailed technical information, check out the official Roku support documentation, which provides device-specific pairing instructions. You can also reference This Old House for general home technology setup guidance, or consult Family Handyman for tech integration tips. For manufacturer specifications and remote compatibility, visit Home Depot’s electronics section, and don’t overlook Roku’s remote comparison guide to understand which model you own.
Related Posts

How Long to Boil Lobster Tails: Cooking Guide

How Long to Fly from New York to London? Travel Times
