
DIY Onigiri: Beginner’s Easy Step-by-Step Guide
DIY Onigiri: Beginner’s Easy Step-by-Step Guide
Onigiri, also known as omusubi or rice balls, are a beloved Japanese staple that combines simplicity with delicious versatility. These hand-formed triangles or balls of seasoned rice have been part of Japanese cuisine for centuries, traditionally packed in bento boxes for lunch or eaten as a quick snack. The beauty of onigiri lies in their accessibility—anyone can master how to make onigiri with just a few basic ingredients and minimal kitchen skills. Whether you’re a complete beginner or someone looking to expand your culinary repertoire, this comprehensive guide will walk you through every step of creating perfect onigiri at home.
What makes onigiri particularly appealing for DIY enthusiasts is that they require no special equipment beyond what most home cooks already have in their kitchen. Unlike some Japanese dishes that demand precision and expensive tools, onigiri celebrate the rustic charm of homemade food shaped by your own hands. You’ll discover that learning how to make onigiri opens doors to creative flavor combinations and helps you understand fundamental Japanese cooking principles. From classic umeboshi (pickled plum) to modern variations with cheese or spicy mayo, onigiri offer endless possibilities for customization.
Essential Ingredients for Perfect Onigiri
The foundation of exceptional onigiri starts with quality ingredients, though the list is remarkably short. The primary component is Japanese short-grain rice, which differs significantly from long-grain varieties. Short-grain rice has a higher starch content, making it stickier and more cohesive—essential characteristics for holding your onigiri together. Regular sushi rice works perfectly for this purpose, though you can also use regular Japanese rice if that’s what you have available. Avoid using brown rice or long-grain white rice, as these won’t provide the proper texture.
Sea salt is your next critical ingredient. This seasoning transforms plain rice into something memorable and helps draw out the rice’s natural flavors. Many traditional recipes call for using furikake, a Japanese seasoning blend containing salt, sesame seeds, dried seaweed, and fish flakes. Furikake adds incredible depth and umami to your onigiri without requiring multiple individual ingredients. You’ll also want to keep a small bowl of water mixed with a pinch of salt nearby—this mixture prevents the rice from sticking to your hands during the shaping process, making the entire experience more enjoyable and less messy.
For fillings, the possibilities expand dramatically based on your preferences and dietary needs. Traditional options include umeboshi (pickled plum), grilled salmon, tuna with mayo, kombu (seaweed), and pickled vegetables. If you’re just beginning, consider starting with simpler fillings like a single umeboshi plum or a small spoonful of seasoned tuna. As you gain confidence in how to make onigiri, you can experiment with more complex combinations. Consider your homemade condiments for unique flavor additions.
Equipment You’ll Need
One of the greatest advantages of making onigiri is the minimal equipment required. At the most basic level, you need only your hands—the traditional method involves shaping rice directly with your palms. However, several tools can make the process easier and more consistent, particularly for beginners still developing the proper technique. A rice cooker is invaluable for preparing the rice correctly, though a standard pot works fine if that’s your preference. The key is achieving the right moisture level in your cooked rice.
An onigiri mold, available at most Asian grocery stores or online retailers, simplifies the shaping process significantly. These plastic tools come in various shapes—triangular, round, or dome-shaped—and typically have a plunger mechanism that ejects the finished rice ball cleanly. While not absolutely necessary, molds are particularly helpful when you’re learning how to make onigiri consistently. A small bowl for your salt water and a cutting board for preparing fillings round out your basic toolkit.
Optional but helpful additions include a rice paddle for handling the hot rice, a small spoon for adding fillings, and a nori (seaweed) punch if you want decorative seaweed wraps. A damp kitchen towel is incredibly useful for wiping your hands between shaping—it keeps your workspace cleaner and makes the process feel more organized. Some cooks prefer using plastic wrap to shape their onigiri, which works wonderfully and eliminates direct hand contact with the rice entirely.
Preparing Your Rice
Proper rice preparation is absolutely fundamental to success when you’re learning how to make onigiri. Begin by rinsing your rice thoroughly under cold water, stirring gently with your hand for about one minute. This rinsing removes excess starch and helps achieve the ideal texture. Continue rinsing until the water runs relatively clear—typically three to four rinses accomplish this. Drain the rice completely in a fine-mesh strainer.
Cook your rice according to package directions or using a rice cooker. The standard ratio is typically one cup of rice to one and one-quarter cups of water, though this varies by rice type. If using a pot, bring the water to a boil, add rice, return to a boil, then reduce heat to low and cover tightly. Simmer for approximately 15-18 minutes until the water is completely absorbed. Allow the cooked rice to rest, covered, for 10 minutes before fluffing with a rice paddle or fork.
The rice temperature matters significantly when shaping. Ideally, work with rice that’s still warm but not so hot it burns your hands. If your rice cools completely, it becomes difficult to shape and won’t hold together as well. Some cooks add a small amount of rice vinegar and salt to the rice while it’s still warm, creating a light seasoning base. This step, borrowed from sushi preparation, adds subtle flavor complexity. Allow any seasoned rice to cool slightly before beginning the shaping process, as working with extremely hot rice can be uncomfortable.
Filling and Shaping Techniques
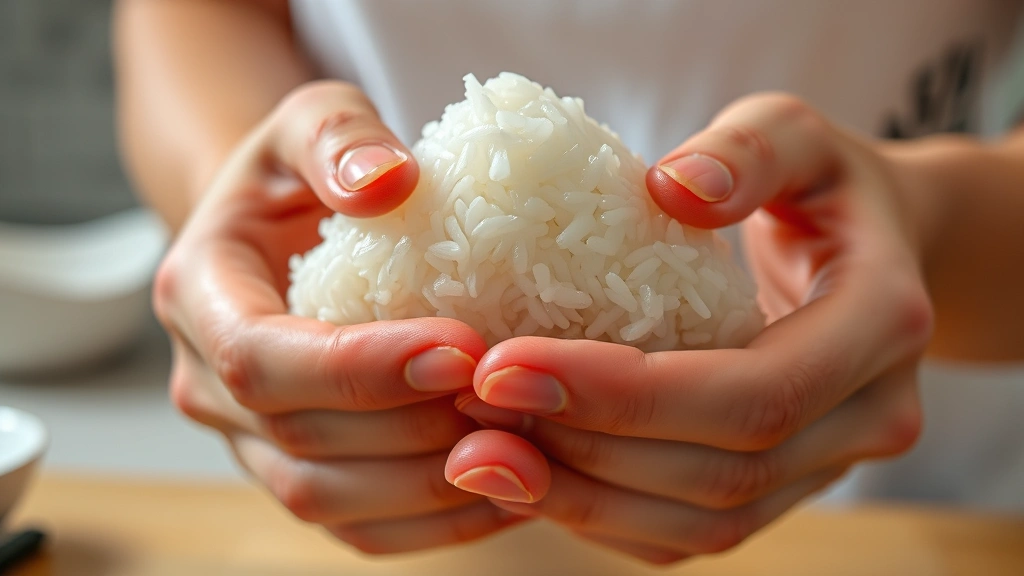
The actual shaping process is where how to make onigiri becomes an enjoyable, meditative experience. If using the hand-shaping method, fill a small bowl with your salt water mixture. Dip your hands into the mixture to coat them lightly—this prevents sticking without making the rice soggy. Take approximately one-half to three-quarters cup of cooked rice in one palm, creating a small mound.
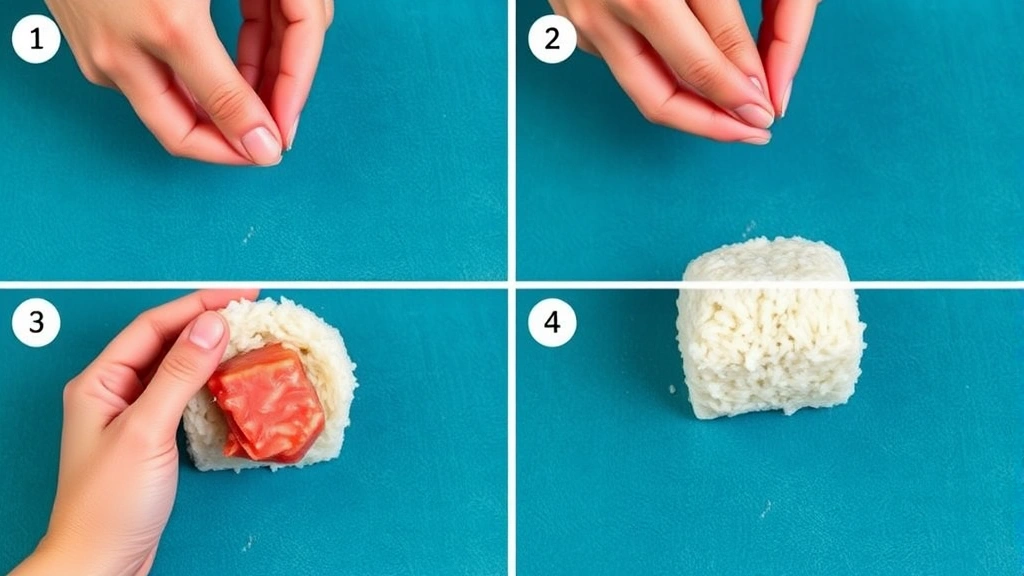
Create a small indentation in the center of the rice mound using your thumb. Place a small amount of filling—roughly one teaspoon—into this indentation. Cover the filling with a small amount of rice, then gently shape the rice around the filling using both hands. Apply light, even pressure while rotating the rice ball, gradually forming your desired shape. Triangle shapes are traditional and easier for beginners, but round or dome shapes work equally well. The entire shaping process should take about 20-30 seconds once you develop the rhythm.
If using a mold, the process becomes even more straightforward. Lightly wet the mold, add rice to the base chamber, create an indentation, add filling, and top with more rice. Press the plunger firmly and steadily to eject the finished onigiri onto your work surface. The mold method produces remarkably uniform shapes and removes the need for hand-shaping skill. Experiment with both techniques to discover which feels more natural to you.
A common mistake beginners make involves using too much filling. Resist the temptation to overstuff your onigiri—excessive filling makes the rice ball difficult to shape and increases the likelihood of the filling leaking out during handling. Similarly, applying too much pressure during shaping can make the rice dense and unpleasant. Gentle, confident pressure works better than aggressive squeezing. As you practice, you’ll develop intuition for the perfect balance.
For additional inspiration on DIY food projects, explore our guide on making evaporated milk or check out our FixWiseHub Blog for more culinary tutorials.
Popular Filling Ideas
Once you’ve mastered the basic technique of how to make onigiri, filling variations become your creative playground. The classic umeboshi filling features a single pickled plum in the center—salty, tangy, and absolutely traditional. This filling requires no preparation beyond placing the plum in your rice, making it perfect for beginners. The intense umami flavor of umeboshi provides satisfaction with minimal ingredients.
Tuna mayo, or tuna with Japanese mayonnaise, combines canned tuna with a small amount of mayo and sometimes a pinch of furikake. Mix these ingredients thoroughly before using as filling. This combination appeals to those who prefer milder, creamier flavors. Grilled or canned salmon offers similar versatility and pairs wonderfully with a tiny amount of lemon juice or soy sauce.
Kombu (seaweed) fillings provide an earthy, umami-rich option for adventurous eaters. Pickled kombu or kombu cooked with soy sauce and sugar work particularly well. For vegetarian options, consider sautéed mushrooms, pickled vegetables, or even a small amount of seasoned tofu. Many cooks create homemade condiments specifically for onigiri fillings.
Modern creative variations include spicy mayo with sriracha, cream cheese with cucumber, seasoned edamame, or even small pieces of grilled cheese for fusion-style onigiri. Japanese curry paste mixed with cooked vegetables creates a warming filling. Experiment with whatever appeals to your palate—onigiri’s beauty lies in their adaptability to individual preferences and available ingredients.
Storage and Serving Tips
Freshly made onigiri taste best within a few hours of preparation, though they remain edible for up to a day if stored properly. Place cooled onigiri in an airtight container and refrigerate. If you want to wrap them in nori (seaweed), do this just before eating rather than immediately after shaping—nori becomes soggy if left in contact with rice for extended periods. Alternatively, serve nori strips separately and let people wrap their own onigiri at mealtime.
For longer storage, onigiri freeze remarkably well for up to one month. Arrange cooled onigiri on a baking sheet, freeze until solid, then transfer to freezer bags. This makes them excellent for meal prep—shape a large batch on a weekend and enjoy them throughout the week. To reheat frozen onigiri, microwave for 30-45 seconds, or thaw overnight in the refrigerator and eat cold.
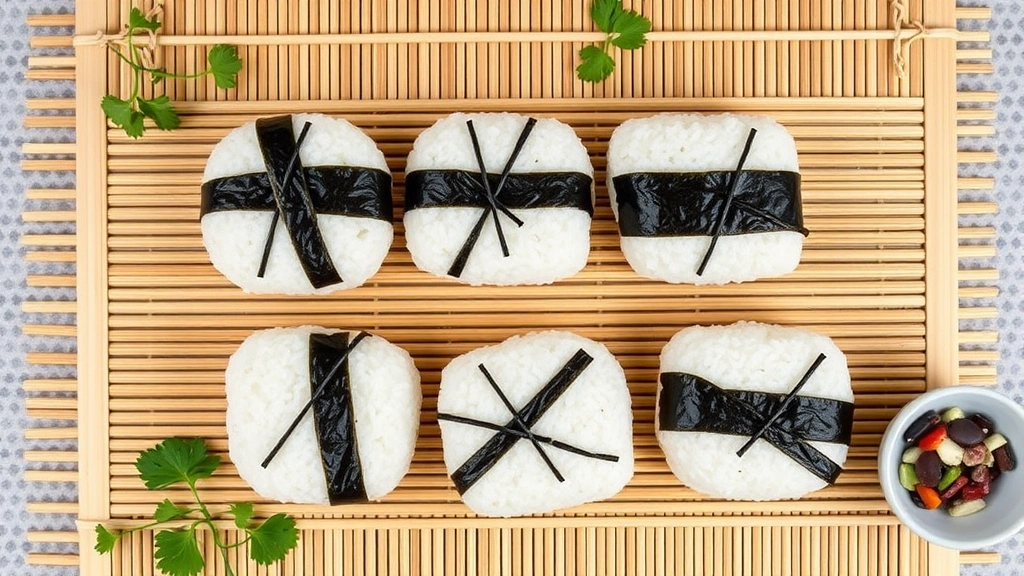
Traditional onigiri are often wrapped with a thin strip of nori around the middle, held in place by the rice itself. This serves both aesthetic and practical purposes—the nori prevents your hands from getting sticky when eating. Some people prefer to wrap the entire onigiri in nori, while others leave them unwrapped. There’s no single correct method; choose what appeals to you.
For a complete meal experience, pair your homemade onigiri with miso soup, pickled vegetables, and fresh fruit. Pack them in bento boxes with other complementary foods for elegant lunches. Many people find that learning how to make onigiri transforms their meal prep routine, making it easier to create satisfying, portable meals. Visit This Old House for additional lifestyle and home improvement content.
FAQ
Can I make onigiri ahead of time?
Yes, onigiri can be made up to one day in advance and stored in the refrigerator. For longer storage, freeze them for up to one month. Thaw overnight in the refrigerator before serving, or microwave from frozen for 30-45 seconds.
What’s the best rice for onigiri?
Japanese short-grain rice or sushi rice works best. These varieties have higher starch content, making them stickier and easier to shape. Avoid long-grain or brown rice, which won’t hold together properly.
How do I prevent my hands from getting sticky?
Dip your hands frequently in salt water (a mix of water with a pinch of salt). This prevents the rice from sticking while adding subtle seasoning. A damp kitchen towel nearby helps for quick hand-wiping between onigiri.
Can I make onigiri with vegetarian fillings?
Absolutely! Popular vegetarian options include pickled vegetables, sautéed mushrooms, seasoned tofu, umeboshi plum, and kombu seaweed. Get creative with whatever vegetables or ingredients you enjoy.
What’s the difference between onigiri and sushi?
While both use rice, onigiri are hand-formed rice balls with fillings, typically eaten warm or at room temperature. Sushi involves rice seasoned with vinegar, sugar, and salt, usually rolled with nori and served cold with raw fish or vegetables.
How much filling should I use?
Use approximately one teaspoon of filling per onigiri. Too much filling makes shaping difficult and can cause the rice to crack or leak. Start with less and increase as you gain confidence in your technique.
Can I use a rice cooker to keep rice warm while shaping?
Yes, many rice cookers have a warm setting that keeps rice at an ideal temperature for shaping. This is particularly helpful when making large batches, as you can shape onigiri continuously without the rice cooling down.
Are there any safety considerations when making onigiri?
The primary concern is handling hot rice. Allow rice to cool slightly before beginning the shaping process. If rice is too hot, it can burn your hands. Always test temperature with a small amount before proceeding.
What external resources can help me learn more?
Check out Family Handyman for additional DIY food preparation guides, or visit your local Asian market for specialty ingredients. Many online cooking communities share onigiri variations and techniques.
Can I make onigiri gluten-free?
Yes, onigiri are naturally gluten-free when made with regular rice and gluten-free fillings. Ensure any condiments or seasonings you use are certified gluten-free, particularly if using furikake or other pre-made blends.
Related Posts

Superscript in Google Docs: Expert Tips

Strikethrough in Excel: Easy Steps for Beginners
