
DIY Evaporated Milk Recipe: Expert Tips
DIY Evaporated Milk Recipe: Expert Tips for Homemade Success
Evaporated milk is a pantry staple that adds richness and depth to countless recipes, from creamy desserts to savory sauces. Whether you’ve run out of this essential ingredient or prefer to make everything from scratch, learning how to make evaporated milk at home is easier than you might think. This simple kitchen project requires just one ingredient and a bit of patience, making it perfect for home cooks who want complete control over their cooking components.
Creating your own evaporated milk eliminates the need to rely on store-bought cans and ensures you know exactly what goes into your food. Unlike condensed milk, which contains added sugar, evaporated milk is simply regular milk with about 60% of its water content removed through heating. The process concentrates the milk’s natural flavors and creates a thicker, creamier texture that works beautifully in both sweet and savory applications. Let’s explore the methods, tips, and tricks that professional cooks use to achieve restaurant-quality results in your own kitchen.
Understanding Evaporated Milk Basics
Before diving into the creation process, it’s important to understand what evaporated milk actually is and how it differs from other milk products. Evaporated milk is regular whole milk that has been heated to remove approximately 60% of its water content. This concentration process creates a product that is thicker, richer, and more intensely flavored than fresh milk. The result is a versatile ingredient that works in everything from creamy pasta sauces to decadent pies and custards.
The key to successful homemade evaporated milk is understanding the science behind the evaporation process. When you heat milk slowly and carefully, the water evaporates while the milk solids remain, creating a naturally thickened product. This is different from simply reducing milk quickly, which can cause the proteins to break down and create an undesirable texture. The best results come from low, steady heat over an extended period, allowing the milk to concentrate gradually without burning or scorching.
One advantage of making your own evaporated milk is that you can choose the type of milk you start with. While traditional recipes use whole milk, you can experiment with various homemade cooking techniques using 2% milk, skim milk, or even non-dairy alternatives like coconut or oat milk, depending on your dietary preferences and the dish you’re preparing. Each variation will produce slightly different results in terms of richness and final volume, so keep notes on your experiments.
Stovetop Method: The Traditional Approach
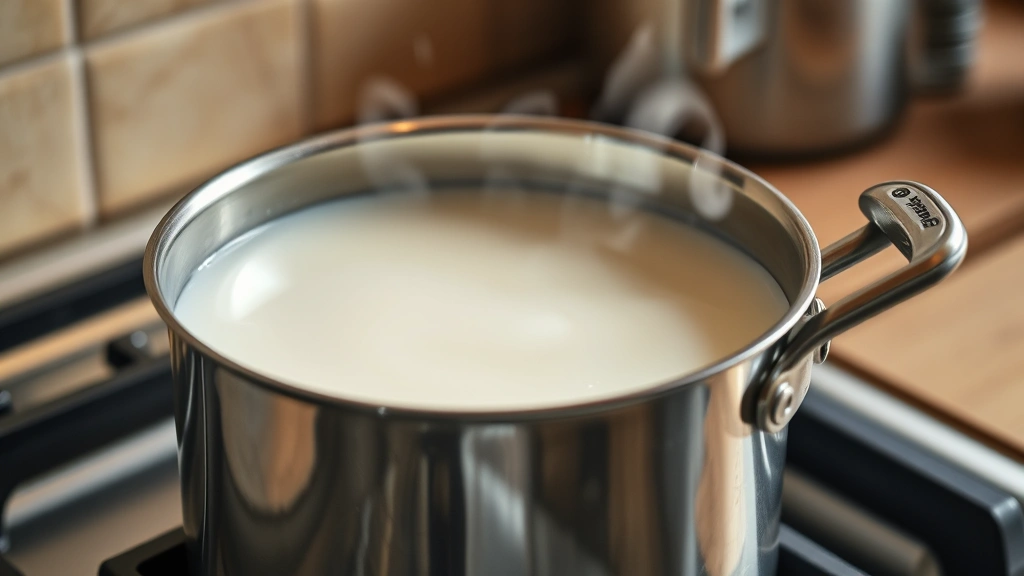
The stovetop method is the most straightforward way to make evaporated milk and requires only a heavy-bottomed saucepan and a reliable heat source. This classic technique gives you excellent control over the process and allows you to monitor the milk as it reduces. Start by pouring one quart of whole milk into your saucepan, choosing a vessel with high sides to prevent splattering during the heating process.
Place the saucepan over medium heat and bring the milk to a gentle simmer. Never allow the milk to boil vigorously, as this can cause the milk solids to scorch on the bottom of the pan and create an unpleasant burnt flavor. Once you reach a gentle simmer, reduce the heat to medium-low and maintain this temperature throughout the cooking process. You’ll notice a light skin forming on the surface of the milk—this is normal and contains valuable milk proteins, so avoid removing it.
The evaporation process typically takes 45 minutes to one hour, depending on your stovetop’s heat distribution and the width of your saucepan. A wider pan will cause faster evaporation, while a narrower, deeper pan will take longer. Stir the milk occasionally to ensure even heat distribution and prevent sticking on the bottom. The milk is ready when it has reduced to approximately two cups from your original quart—roughly a 50% reduction. You can test this by marking the original level on the outside of the pan with a piece of tape before you begin heating.
Oven Method for Hands-Off Convenience
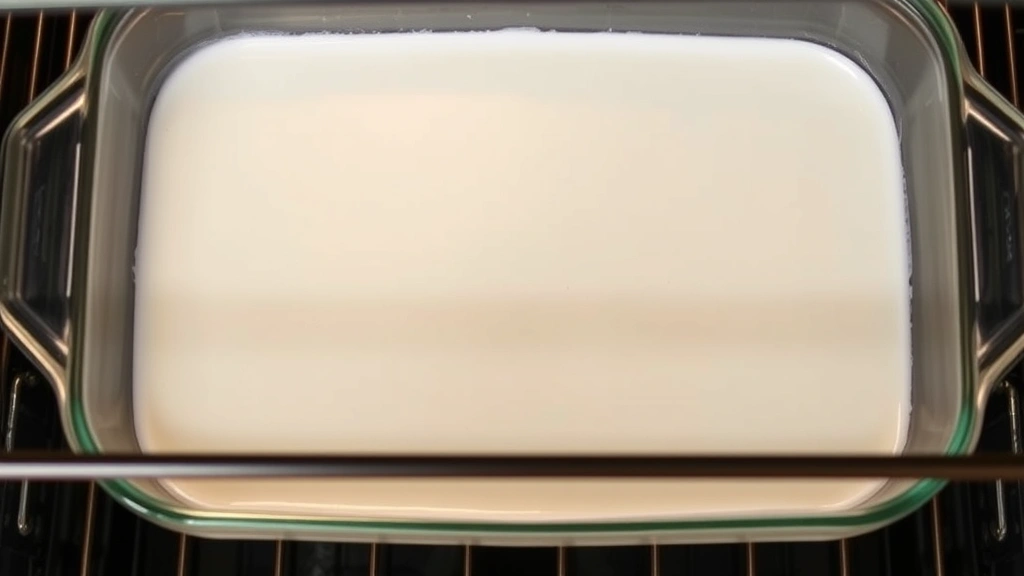
If you prefer a more passive approach that requires minimal stirring and supervision, the oven method is an excellent choice. This technique uses gentle, consistent heat to evaporate the milk slowly and evenly. Preheat your oven to 325 degrees Fahrenheit and pour your milk into a shallow baking dish or roasting pan. The larger surface area of a baking dish promotes faster evaporation compared to a tall, narrow pot.
Place the pan in the oven and allow the milk to reduce undisturbed for approximately 90 minutes to two hours. The longer cooking time compared to the stovetop method is due to the lower oven temperature, but the benefit is that you can simply set it and forget it—no stirring required. Check the milk periodically after the 90-minute mark to monitor progress. You’re looking for the same 50% reduction as with the stovetop method.
One important consideration with the oven method is the formation of a thick skin on the surface of the milk. While this skin contains valuable milk proteins, you may find it undesirable in your final product. If you prefer a smoother texture, you can gently remove the skin with a spoon or whisk before using the evaporated milk. Some cooks prefer to leave the skin in place for added nutrition and authentic texture, so this choice depends on your personal preference.
Slow Cooker Technique for Busy Cooks
The slow cooker offers a convenient hands-off method for making evaporated milk, perfect for busy home cooks who want to prepare their ingredients while attending to other tasks. Pour your milk into a slow cooker and set it to the low setting. Leave the lid off or propped open slightly to allow steam to escape—this is crucial for the evaporation process to occur. If you leave the lid fully closed, condensation will drip back into the milk and prevent proper reduction.
Cooking time in a slow cooker typically ranges from 8 to 12 hours, depending on the wattage of your appliance and your desired final consistency. Check the milk every few hours, giving it a gentle stir to ensure even heating. The longer cooking time means you’ll need to plan ahead, but the minimal attention required makes this method ideal for overnight cooking or weekend projects. Many cooks find that slow cooker evaporated milk has a particularly smooth, creamy texture.
One advantage of the slow cooker method is that the gentle, consistent heat reduces the risk of scorching compared to stovetop cooking. However, you’ll need to be patient with this method, as the low heat means slower evaporation. If you’re in a hurry, combine this technique with higher heat by switching to medium setting for the final few hours, but monitor carefully to prevent overheating.
Instant Pot Method: Quick and Efficient
For those with modern kitchen appliances, the Instant Pot offers a surprisingly effective method for making evaporated milk quickly. Pour your milk into the Instant Pot and use the sauté function on high heat. This allows you to heat the milk to a simmer and maintain consistent temperature control. Leave the lid off during this process to allow steam to escape and facilitate evaporation.
The sauté function will bring your milk to temperature relatively quickly, and you can maintain the simmer for 30 to 45 minutes depending on how much reduction you need. Stir occasionally to prevent sticking and ensure even heating. The advantage of the Instant Pot method is the speed—you can achieve your desired reduction in significantly less time than traditional stovetop or oven methods. The consistent heat distribution also reduces the risk of scorching.
If you’re familiar with heating milk for specialty beverages, you’ll find the Instant Pot’s temperature control particularly useful. However, remember that the Instant Pot’s sauté function works best when the lid is off, as the sealed environment prevents proper evaporation. Never attempt to use the pressure cooking function for this recipe, as pressure will force moisture back into the milk rather than allowing it to evaporate.
Storage and Shelf Life Guidelines
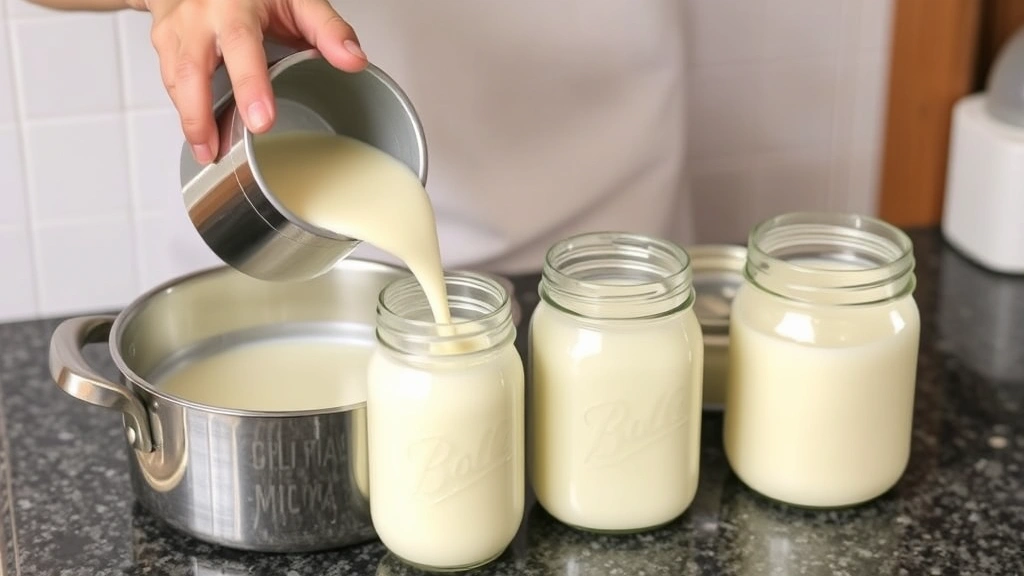
Proper storage is essential for maintaining the quality of your homemade evaporated milk and preventing spoilage. Once your evaporated milk has cooled to room temperature, transfer it to an airtight container—glass jars with tight-fitting lids work particularly well. Store your evaporated milk in the refrigerator, where it will keep for up to two weeks. The concentrated nature of evaporated milk gives it a longer shelf life than regular milk, but it will eventually spoil, so always check for off odors or curdling before use.
For longer-term storage, you can freeze your homemade evaporated milk in ice cube trays, then transfer the frozen cubes to freezer bags. This method allows you to portion out exactly what you need for future recipes. Frozen evaporated milk will keep for up to three months and thaws quickly when needed. When thawing, allow the milk to come to room temperature slowly in the refrigerator rather than at room temperature, which can encourage bacterial growth.
Label your containers with the date of preparation so you can easily track how long your evaporated milk has been stored. If you’re making large batches for future use, consider preparing multiple containers so you always have fresh evaporated milk on hand. Some cooks enjoy incorporating homemade ingredients into various recipes, and having evaporated milk ready makes spontaneous cooking projects much easier.
Expert Tips for Perfect Results
Experienced cooks have discovered numerous tricks for achieving exceptional homemade evaporated milk. One professional tip is to add a pinch of salt to your milk before heating—this enhances the milk’s natural flavors and prevents the burnt taste that sometimes develops during prolonged heating. A quarter teaspoon of salt per quart of milk is the ideal amount. This addition won’t make your evaporated milk taste salty but will instead deepen and round out the flavor profile.
Temperature control is absolutely critical for success. Invest in a reliable instant-read thermometer to monitor your milk’s temperature precisely. The ideal temperature range is 180 to 190 degrees Fahrenheit—hot enough to evaporate water efficiently but cool enough to prevent scorching. If your milk temperature exceeds 200 degrees, reduce the heat immediately. Maintaining this narrow temperature range requires attention, but the results are worth the effort.
Another expert technique is to use the milk from a cow you trust or select the highest-quality milk available. Ultra-pasteurized milk, which has been heated to very high temperatures, sometimes produces less satisfactory results than standard pasteurized milk. The extended heating of ultra-pasteurized milk can affect the protein structure, making it less stable during the evaporation process. If possible, choose standard pasteurized whole milk for the best texture and flavor.
Consider using a heavy-bottomed stainless steel pot rather than aluminum or thin-bottomed cookware. Aluminum can react with the milk’s acidity and impart an off-flavor, while thin-bottomed pots create hot spots that lead to scorching. A quality stainless steel pot distributes heat evenly and prevents the burnt flavor that can ruin your batch. If you don’t have a heavy-bottomed pot, use a diffuser between your stovetop and regular pot to distribute heat more evenly.
Common Mistakes to Avoid
Understanding common pitfalls helps you achieve consistent success with your homemade evaporated milk. The most frequent mistake is using heat that’s too high, which causes the milk to boil vigorously and develop a burnt or scorched flavor. Remember that gentle, steady heat produces superior results. If your finished evaporated milk has any burnt taste, you’ve exceeded the ideal temperature range. Next time, reduce your heat by one setting and allow for longer cooking time.
Another common error is over-reducing the milk. While a 50% reduction is the standard for evaporated milk, reducing beyond this point creates an overly thick product that may not work well in recipes designed for traditional evaporated milk. If you accidentally over-reduce, you can whisk in a small amount of fresh milk to return it to the proper consistency. Start with one or two tablespoons of fresh milk and add more as needed until you achieve the desired thickness.
Failing to account for continued reduction after removing the milk from heat is another mistake. Your evaporated milk will continue to thicken slightly as it cools, so remove it from the heat when it’s slightly thinner than your desired final consistency. This prevents over-reduction and ensures the perfect texture for your recipes. If you’re unsure, err on the side of slightly thinner rather than thicker—you can always reduce it further if needed.
Some cooks forget to remove or account for the skin that forms on the surface of slowly heated milk. While this skin contains valuable nutrients, its presence can affect the final texture and appearance of your evaporated milk. Decide in advance whether you prefer to remove it or incorporate it into your final product, and be consistent with your choice so your results are predictable. When making large batches, consistency in technique ensures uniform results across all your containers.
Finally, avoid using flavored or specialty milks unless specifically called for in a recipe. Chocolate milk, strawberry milk, or other flavored varieties will create evaporated milk with unexpected flavors that may not work in your intended recipes. Stick with plain whole milk for the most versatile homemade evaporated milk that works in both sweet and savory applications. If you want flavored evaporated milk, it’s better to add flavoring after the evaporation process is complete.
FAQ
Can I make evaporated milk with non-dairy milk alternatives?
Yes, you can make evaporated milk using non-dairy alternatives like oat, almond, or coconut milk. However, results vary depending on the brand and type of milk. Coconut milk produces the richest, most stable results, while almond milk may separate slightly during the evaporation process. Always use unsweetened varieties and expect a slightly different final flavor profile. Test with a small batch first before committing to a large quantity.
How much evaporated milk will I get from one quart of regular milk?
One quart of regular milk, reduced by approximately 50%, will yield roughly two cups of evaporated milk. However, the exact amount depends on your starting milk’s water content and how long you cook it. Always measure your milk before and after to know exactly how much you’ve produced. This information helps you scale recipes and plan future batches.
What’s the difference between homemade and canned evaporated milk?
Homemade evaporated milk is fresher and lacks the metallic taste some people detect in canned versions. Canned evaporated milk has been sterilized through a heat treatment process called ultra-high temperature pasteurization, which gives it a longer shelf life but can slightly alter the flavor. Homemade versions are more customizable and contain no additives or preservatives, making them ideal for those with specific dietary concerns.
Can I use evaporated milk in recipes that call for sweetened condensed milk?
Not directly. Sweetened condensed milk contains added sugar, while evaporated milk does not. If a recipe specifically calls for sweetened condensed milk, you cannot simply substitute evaporated milk without adjusting the sugar content. However, you can make sweetened evaporated milk by stirring in powdered sugar to your homemade evaporated milk. Add sugar gradually, starting with one-quarter cup per cup of evaporated milk, and adjust to taste.
Is homemade evaporated milk safe for canning and long-term storage?
Homemade evaporated milk is not recommended for canning due to the risk of spoilage and foodborne illness. The evaporation process doesn’t sterilize the milk sufficiently to make it shelf-stable without professional canning equipment and expertise. For safety, store your homemade evaporated milk in the refrigerator for up to two weeks or freeze it for longer storage. If you need shelf-stable evaporated milk, it’s best to rely on commercially canned versions that have been properly sterilized.
What can I use evaporated milk for?
Evaporated milk is incredibly versatile in the kitchen. Use it in creamy pasta sauces, custards, pies, and puddings. It works wonderfully in coffee for those seeking premium coffee preparation methods, adds richness to soups and chowders, and creates luxurious ice cream bases. You can also use it in sweet potato pie, flan, and countless other desserts. Some cooks even use it in savory dishes like curries and gravies for added creaminess.
How do I know when my milk has reduced enough?
The most reliable method is measuring. Mark your pan’s outside at the milk’s starting level, then cook until the milk reaches approximately half that height. Alternatively, pour your milk into a measuring cup before and after cooking to track the reduction precisely. Your finished product should coat a spoon lightly when you dip it in—thicker than regular milk but still pourable. If you’re uncertain, stop cooking slightly early; you can always reduce it further if needed.
Why did my evaporated milk separate or curdle?
Separation or curdling typically results from heat that’s too high or inconsistent temperature control. Milk proteins denature when exposed to excessive heat, causing visible separation. To prevent this, maintain a gentle simmer throughout cooking and monitor temperature carefully with a thermometer. If your batch separates, it’s still usable for cooking—simply whisk it well before using. For future batches, reduce your heat and increase cooking time for a smoother result.
Related Posts

Superscript in Google Docs: Expert Tips

Strikethrough in Excel: Easy Steps for Beginners
