

Candy Apple Recipe: Expert Tips for Beginners
Candy Apple Recipe: Expert Tips for Beginners
Candy apples are a classic treat that brings nostalgia and sweetness to any occasion. Whether you’re preparing for a fall festival, Halloween party, or simply want to impress family and friends, learning how to make candy apples in a gag (or any setting) is easier than you might think. This comprehensive guide walks you through every step, from selecting the perfect apples to achieving that glossy, professional-looking coating that makes these treats irresistible.
The beauty of candy apples lies in their simplicity and versatility. With just a few basic ingredients and some patience, you can create stunning confections that taste as good as they look. Whether you prefer classic red candy apples, gourmet variations with nuts and sprinkles, or creative flavored versions, this guide covers all the techniques you need to master this timeless treat.
Essential Ingredients and Equipment
Before you begin making candy apples, gather all necessary ingredients and tools. Having everything prepared ensures a smooth process and reduces stress during the coating stage, which requires speed and precision.
Ingredients you’ll need:
- Fresh apples (6-8 medium-sized)
- 2 cups granulated sugar
- ¾ cup light corn syrup
- ¾ cup water
- ¼ teaspoon cream of tartar
- 1 tablespoon butter
- 1 teaspoon vanilla extract
- ½ teaspoon cinnamon (optional)
- Food coloring (red, green, or your preference)
- Wooden sticks or skewers
Essential equipment:
- Candy thermometer (crucial for accurate temperature)
- Heavy-bottomed saucepan
- Wooden spoon for stirring
- Shallow bowl or cup for dipping
- Parchment paper or wax paper
- Baking sheet
- Vegetable oil for coating apples
- Bowls for toppings
Investing in a quality candy thermometer is non-negotiable. Temperature control determines whether your candy coating sets properly or remains sticky. A reliable thermometer takes the guesswork out of the process and guarantees professional results every time.

Selecting and Preparing Your Apples
The foundation of exceptional candy apples starts with selecting the right fruit. Not all apples work equally well for this application, so choosing wisely makes a significant difference in your final product.
Best apple varieties for candy coating:
- Granny Smith: Tart flavor provides excellent contrast to sweet candy coating; firm texture holds up well
- Honeycrisp: Sweet and crisp; their sturdy structure resists the hot candy mixture
- Fuji: Sweet with slight tartness; dense flesh prevents sogginess
- Braeburn: Firm and juicy; won’t become mushy during the dipping process
Avoid softer varieties like Red Delicious or McIntosh, as they become mealy when coated and lose their appeal quickly. Select apples that are medium-sized, unblemished, and firm to the touch. Smaller apples are easier to handle, while oversized specimens become difficult to dip and coat evenly.
Preparation steps:
- Wash apples thoroughly under running water and pat completely dry with paper towels
- Remove any stickers or labels carefully
- Bring apples to room temperature (cold apples cause candy to set too quickly)
- Rub each apple lightly with vegetable oil using a clean cloth; this helps the candy coating adhere better and creates a glossy finish
- Insert wooden sticks into the stem end of each apple, pushing about halfway through; twist gently to secure
The oil coating is particularly important. It creates a barrier that helps prevent the candy from sliding off and ensures even coverage. This step separates amateur attempts from professional-looking results. For extra security with larger apples, you can insert sticks slightly off-center rather than directly through the stem.
Making the Candy Coating
The candy coating is where magic happens. This is essentially a hard candy recipe that you’ll apply to your apples while it’s hot and pliable. Mastering this component is essential for successful candy apples.
Step-by-step candy preparation:
- Combine ingredients: In your heavy-bottomed saucepan, mix sugar, corn syrup, water, and cream of tartar. The cream of tartar prevents crystallization, ensuring a smooth, glossy finish
- Heat mixture: Place the saucepan over medium-high heat, stirring constantly until sugar dissolves completely (approximately 3-4 minutes)
- Stop stirring: Once mixture reaches a boil, stop stirring entirely. Stirring after this point encourages crystallization
- Monitor temperature: Insert your candy thermometer, ensuring the bulb doesn’t touch the bottom of the pan. You’re aiming for 300°F (hard crack stage)
- Watch for color change: The mixture will gradually turn from clear to light amber. This takes 8-12 minutes depending on your stove
- Remove from heat: When the thermometer reaches 300°F, immediately remove from heat
- Add finishing touches: Quickly stir in butter, vanilla extract, food coloring, and cinnamon (if using). Be careful—the mixture is extremely hot
- Cool slightly: Let the candy cool for 1-2 minutes. If it becomes too thick, you can warm it gently over low heat
Temperature precision is absolutely critical. Below 300°F, the coating remains sticky; above 310°F, it becomes brittle and may crack. A reliable thermometer removes uncertainty from this crucial step. For detailed guidance on temperature control in cooking, check out resources from Family Handyman for practical kitchen tips.
The color and flavor additions should happen quickly after removing from heat. This prevents the candy from setting before you’ve fully incorporated these ingredients. If you’re making multiple batches with different colors, divide the candy before adding coloring so you can create variations.
Dipping and Coating Techniques
This is where patience and technique come together. The dipping process requires confidence and speed to achieve even, professional-looking candy coats.
The dipping process:
- Prepare work area: Line your baking sheet with parchment or wax paper. Have all decorative toppings in shallow bowls nearby
- Test consistency: Before dipping your apples, test the candy’s consistency by dipping a fork into it. The candy should coat smoothly and cling to the fork
- Hold the stick: Grasp the wooden stick firmly, positioning your hand so it won’t get splashed with hot candy
- Quick dip: Plunge the apple into the candy coating in one smooth, confident motion. Keep it submerged for 2-3 seconds
- Rotate and lift: Twist the stick slowly as you lift the apple out, allowing excess candy to drip back into the pot
- Immediate placement: Place the coated apple on your prepared baking sheet immediately. Work quickly before the candy sets
- Apply toppings: If adding toppings, sprinkle them on while the candy is still warm and sticky (within 10-15 seconds)
Speed is your friend during dipping. Hesitation results in thick, uneven coatings or candy that sets prematurely on the stick. Practice your motion before beginning—a smooth, confident dip produces the best results. If the candy becomes too thick during the process, place the pot back over low heat for 30 seconds to restore its pliability.
For information about making apple sauce with your remaining apples, or exploring other culinary projects, check our comprehensive guides. You might also enjoy learning how to make au jus for savory applications or how to make almond milk for alternative beverage options.
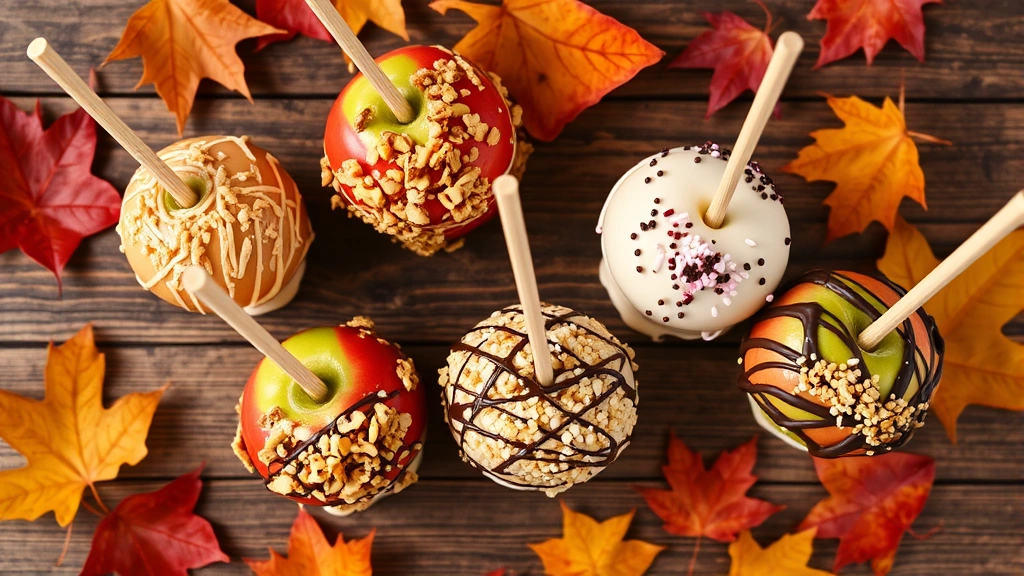
Decorative Variations and Toppings
Once you’ve mastered the basic technique, creative variations elevate your candy apples from simple treats to show-stopping creations. The possibilities are virtually endless.
Popular topping combinations:
- Classic Crunch: Crushed nuts (pecans, almonds, or walnuts) mixed with a pinch of sea salt
- Sprinkle Party: Rainbow sprinkles, pearl sugar, or nonpareils for visual appeal
- Chocolate Dream: Drizzle melted chocolate over the candy coating and top with chocolate chips
- Caramel Delight: Coat with caramel instead of hard candy, then add toffee bits
- Autumn Spice: Cinnamon-sugar mixture with crushed candy corn or graham crackers
- Gourmet Gold: Edible gold leaf or gold dust for elegant presentation
- Cookies and Cream: Crushed cookie pieces (Oreos or vanilla wafers) pressed into wet coating
The key to successful toppings is applying them while the candy is still warm and slightly tacky. This ensures they adhere properly rather than sliding off once the candy hardens. For a professional appearance, keep toppings to one or two complementary options per apple rather than overloading.
You can create elegant variations by using different food colorings. Try pastels for spring celebrations, deep reds and blacks for Halloween, or festive greens and reds for winter holidays. Experiment with flavored extracts too—almond, peppermint, or orange extract adds sophisticated flavor dimensions.
Troubleshooting Common Issues
Even experienced candy makers encounter occasional problems. Understanding common issues and their solutions helps you troubleshoot quickly and salvage your batch.
Problem: Candy coating is too thick and won’t coat evenly
Solution: The mixture cooled too long before dipping. Gently reheat over low heat for 15-30 seconds, stirring constantly. Test consistency with a fork before resuming. Be careful not to overheat, which causes the candy to become brittle.
Problem: Coating slides off the apple immediately
Solution: Your apple wasn’t oiled adequately before dipping. The oil creates necessary adhesion for the candy. For future batches, ensure thorough oil coating. If this happens mid-batch, wipe apples clean and reapply oil, then try dipping again after the candy has cooled slightly.
Problem: Candy coating is grainy or crystallized
Solution: You likely stirred the mixture after it began boiling or didn’t use cream of tartar. Both cause crystallization. Start fresh with a new batch, ensuring you don’t stir once boiling begins and that you include cream of tartar in your recipe.
Problem: Coating is too sticky and won’t harden
Solution: Your mixture didn’t reach hard crack stage (300°F). This is usually because the thermometer reading was inaccurate or the mixture was removed from heat too early. Use a reliable thermometer and ensure it reaches exactly 300°F before removing from heat.
Problem: Apples become mushy or soggy
Solution: You used soft apple varieties or held the apple in the candy too long. Stick with firm varieties like Granny Smith, and keep dipping time to 2-3 seconds maximum. Ensure apples are at room temperature before dipping.
Storage and Serving Tips
Proper storage ensures your candy apples remain delicious and maintain their beautiful appearance for days.
Storage guidelines:
- Room temperature storage: Place finished apples in an airtight container with parchment paper between layers. They’ll keep for 3-5 days
- Avoid refrigeration: Cold temperatures cause condensation, making the candy coating sticky and compromising texture
- Protect from humidity: Store in a cool, dry location away from moisture sources. High humidity softens the candy coating
- Individual wrapping: Wrap each apple in wax paper or cellophane for gift-giving or extended storage
- Freezer storage: Candy apples can be frozen for up to 2 weeks. Thaw at room temperature before serving to prevent condensation
Serving suggestions:
Serve candy apples at room temperature for optimal texture and flavor. The candy coating should have a satisfying snap when bitten into, while the apple provides refreshing crispness. They’re perfect for fall festivals, Halloween parties, carnival-themed events, or as unique homemade gifts. For a fun presentation, arrange them in a decorative bouquet using a vase filled with candy corn or autumn leaves.
Consider pairing your candy apples with complementary treats. If you enjoy making homemade confections, you might also appreciate how to make cottage cheese for savory applications or exploring our FixWiseHub Blog for additional recipes and techniques.
FAQ
Can I use artificial apples for candy coating?
While artificial apples won’t break down, they’re less satisfying than real fruit. Real apples provide texture contrast and natural flavor that enhances the overall experience. Stick with fresh apples for authentic candy apple treats.
How far in advance can I make candy apples?
Candy apples are best enjoyed within 2-3 days of making them. Beyond that, the candy coating may soften or the apple may begin to oxidize. For optimal freshness, make them the day before serving or morning of your event.
What’s the difference between candy apples and caramel apples?
Candy apples feature a hard, glossy candy coating made from sugar cooked to hard crack stage. Caramel apples use soft caramel coating. Candy apples have a satisfying crunch, while caramel apples offer a chewy texture. Both are delicious but provide different eating experiences.
Can I make candy apples without a candy thermometer?
A thermometer is highly recommended for consistent results. However, you can use the cold water test: drop a small amount of hot candy into cold water. Hard crack stage candy will break into brittle pieces. This method is less precise but works in emergencies.
Why did my candy coating crack when I bit into it?
Cracking usually means your candy cooked above 310°F, creating an overly brittle coating. Ensure your thermometer reaches exactly 300°F and remove from heat immediately. Slight cracking is normal and doesn’t affect taste, but excessive cracking indicates temperature was too high.
Can I make candy apples with different candy flavors?
Absolutely! Substitute the vanilla extract with peppermint, almond, or cherry extract. You can also make caramel-based coatings or incorporate different spices. The basic technique remains the same; only flavoring changes.
What’s the best way to clean up after making candy apples?
Allow hardened candy to cool completely, then soak pans and utensils in hot water with a bit of dish soap. The candy will dissolve easily. Never pour hot candy down the drain—it will harden and cause clogs. For equipment guidance, visit Lowe’s home improvement resources for kitchen maintenance tips.
Related Posts

Superscript in Google Docs: Expert Tips

Strikethrough in Excel: Easy Steps for Beginners
