
How to Make a Blast Furnace: Expert Guide
How to Make a Blast Furnace: Expert Guide
If you’ve ever wondered how to harness the power of industrial-grade smelting in your own space, you’re in for a treat. A blast furnace isn’t just some fantasy contraption—it’s a genuine piece of equipment that transforms raw materials into refined metals through intense heat and careful engineering. Whether you’re a gaming enthusiast looking to recreate Minecraft magic in real life, or someone genuinely interested in metallurgical processes, understanding how to construct and operate a blast furnace opens doors to fascinating craftsmanship.
The beauty of building your own blast furnace lies in the intersection of creativity and practical engineering. Unlike some DIY projects that feel more decorative than functional, a properly constructed blast furnace actually works. It requires patience, precision, and respect for safety protocols, but the satisfaction of successfully smelting your first batch of ore is absolutely worth it.
This comprehensive guide walks you through every step of the process—from gathering materials to firing up your furnace for the first time. We’ll cover the science behind why blast furnaces work, the specific materials you’ll need, and detailed instructions that even beginners can follow with confidence.
Understanding Blast Furnace Basics
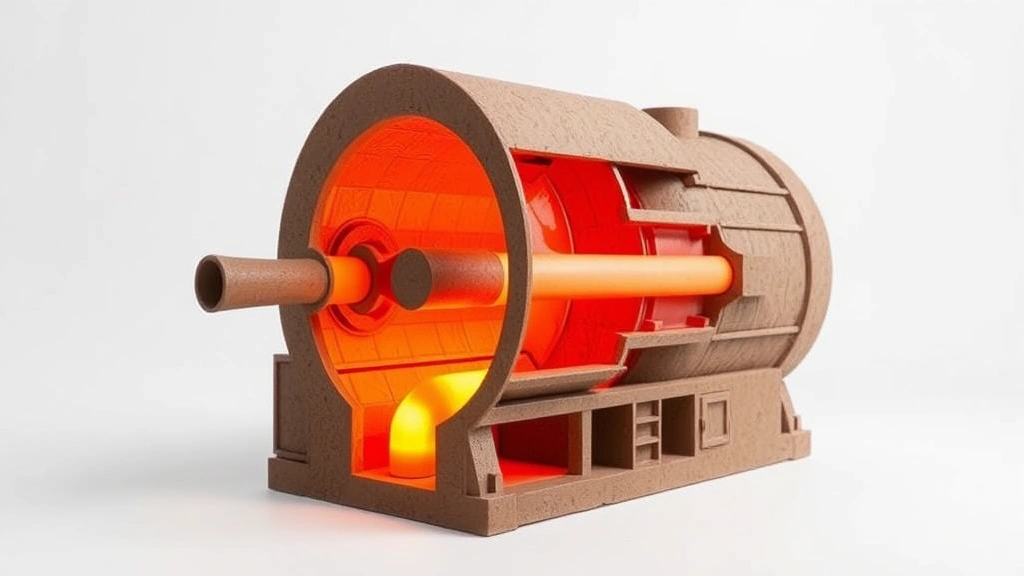
Before you start stacking bricks and mixing mortar, let’s talk about what a blast furnace actually does. At its core, a blast furnace is an enclosed structure designed to reach extremely high temperatures—we’re talking 1,200 degrees Celsius or higher. This intense heat, combined with forced air (the “blast” part), creates the perfect environment for chemical reactions that separate metal from ore.
The process works through a combination of heat and chemistry. When you introduce a fuel source like charcoal alongside your ore, the heat causes the ore to break down. The forced air accelerates oxidation and helps the fuel burn hotter. Lighter materials rise to the top as slag (waste material), while denser molten metal sinks to the bottom where you can collect it. It’s elegantly simple in theory, though the execution requires attention to detail.
Understanding this basic principle helps you make better decisions throughout the building process. You’ll realize why certain materials matter more than others, why ventilation is crucial, and why temperature control becomes your primary concern once the furnace is operational.
The traditional blast furnace design has remained largely unchanged for centuries because it works. That said, modern DIY versions adapt these principles for smaller scales and home workshops. You don’t need industrial-grade equipment to achieve legitimate results, though you do need to respect the process and maintain proper safety measures.
Materials and Tools You’ll Need
Success starts with gathering the right materials. Your blast furnace’s durability and efficiency depend heavily on what you build it from. Here’s what you’ll need:
Primary Building Materials:
- Fire bricks or refractory bricks (at least 100-150 pieces, depending on size)
- Refractory cement or mortar (high-temperature rated)
- Steel pipe or metal tubing for the air inlet (typically 1-2 inches diameter)
- Metal grating or mesh for internal support
- Steel drum or metal container for the outer shell (optional but recommended)
- Sand and clay for additional insulation
Operational Materials:
- Charcoal or coke (your fuel source)
- Raw ore (iron ore is most common for beginners)
- Flux material like limestone (helps separate impurities)
- Metal containers for collecting molten metal
Essential Tools:
- Heavy-duty work gloves rated for high heat
- Safety glasses and face shield
- Respirator mask (for dust and fumes)
- Tongs with long handles for material handling
- Thermometer or temperature gun
- Air pump or bellows system
- Masonry trowel
- Level and measuring tape
- Hammer and chisel
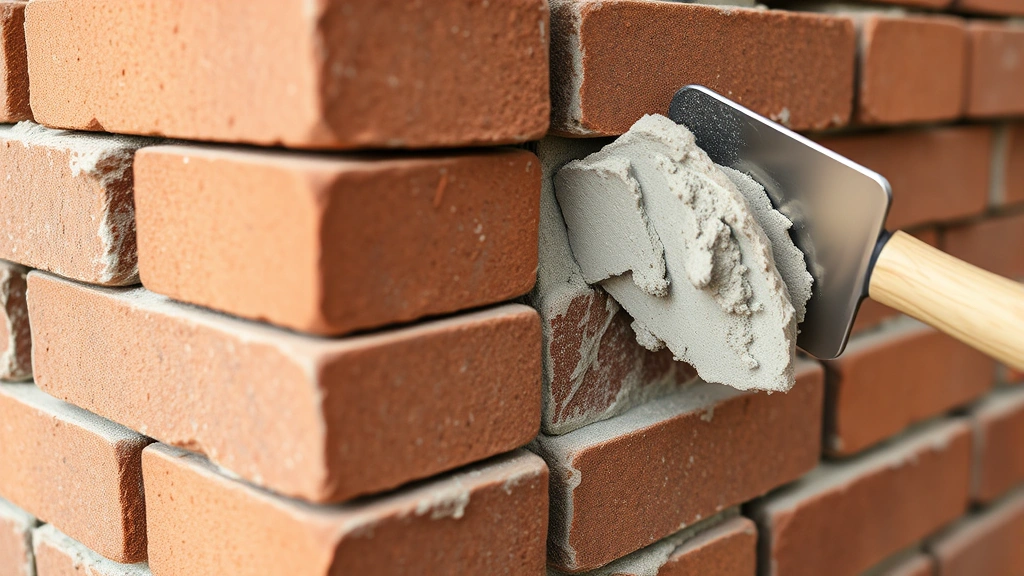
Fire bricks deserve special attention because they’re non-negotiable. Regular bricks will crack and crumble when exposed to the temperatures your furnace will reach. Refractory bricks are specifically engineered to withstand extreme heat without degrading. Yes, they cost more than standard bricks, but they’re the difference between a furnace that lasts years and one that collapses after a few uses.
When selecting your air inlet system, consider that forced air is what separates a blast furnace from a simple forge. You can use a manual bellows system for smaller operations, though an electric air pump offers more consistent results. The pipe should be positioned to enter the furnace near the bottom, angled slightly upward to create optimal air circulation.
Step-by-Step Construction
Now for the hands-on work. Building your blast furnace is a methodical process that rewards careful planning. Rushing through any stage will compromise your results.
Step 1: Design and Plan Your Layout
Start by sketching your furnace design. A typical DIY blast furnace stands about 2-3 feet tall with a diameter of 12-18 inches. Draw out the cross-section showing the air inlet location, the main combustion chamber, and the collection area at the bottom. Having this visual reference prevents mistakes during construction.
Step 2: Prepare Your Foundation
Build on level, non-flammable ground. A concrete pad works beautifully. Make sure the area around your furnace has adequate clearance—at least 10 feet from any structures or vegetation. You’ll want to work in a well-ventilated space, ideally outdoors or in a large workshop with good airflow.
Step 3: Construct the Furnace Shell
If using a steel drum as your outer shell, position it on your foundation. If building without a drum, create a circular or cylindrical structure using fire bricks arranged in a tight ring. Each brick should be secured with high-temperature refractory mortar. Work your way up layer by layer, checking for level and plumb as you go. This is where patience pays dividends—rushing the mortar application leads to weak joints that fail under thermal stress.
The key to successful construction is understanding that smooth stone surfaces create better heat retention than rough ones. If your fire bricks have rough surfaces, consider sanding them slightly before installation.
Step 4: Install the Air Inlet System
Position your steel pipe to enter near the bottom of the furnace, angled slightly upward. Secure it firmly so it won’t shift during operation. The pipe should penetrate about 3-4 inches into the furnace chamber. Seal the connection with high-temperature mortar to prevent air leaks around the pipe.
Your air delivery system—whether a bellows, pump, or blower—connects to the external end of this pipe. If you’re using a manual bellows system (similar to how you might make a bow with careful tension and release), ensure the mechanism operates smoothly before your first firing.
Step 5: Create Internal Support Structures
Place metal grating near the bottom of the furnace chamber. This creates a platform where materials rest while allowing ash and slag to fall through. Secure it so it won’t collapse under the weight of ore and fuel.
Step 6: Add Insulation Layers
Pack sand and clay mixture around the exterior of your brick structure (if not using a steel shell). This additional insulation layer helps maintain consistent temperatures and reduces heat loss. Aim for 2-3 inches of insulation material surrounding the furnace walls.
Step 7: Seal and Prepare
Before your first firing, inspect all joints and seams. Any gaps allow heat to escape and reduce efficiency. Use additional high-temperature mortar to seal any problem areas. Allow the mortar to cure fully—typically 24-48 hours—before operating the furnace.
When you’re ready to install your air delivery system permanently, make sure all connections are airtight. Even small leaks compromise the furnace’s ability to reach optimal temperatures.
Operating Your Furnace Safely
A blast furnace isn’t a toy or decorative piece—it’s a serious piece of equipment that demands respect. Safety must be your absolute priority before, during, and after operation.
Pre-Operation Safety Check:
- Verify all structural joints are secure and show no cracks
- Test your air delivery system independently to ensure consistent flow
- Confirm all materials are in place and secure
- Clear the surrounding area of flammable materials
- Have a fire extinguisher rated for metal fires nearby
- Never operate alone—always have another person present
- Wear full protective gear: heat-resistant gloves, face shield, safety glasses, and respirator
Starting Your First Fire:
Begin with a relatively cool fire to let the furnace gradually heat up. Place a bed of charcoal in the bottom chamber, then light it with a torch or starter. Allow the fire to establish before introducing air flow. Start with gentle air pressure and gradually increase as the fire intensifies. This gradual warm-up prevents thermal shock that could crack your bricks.
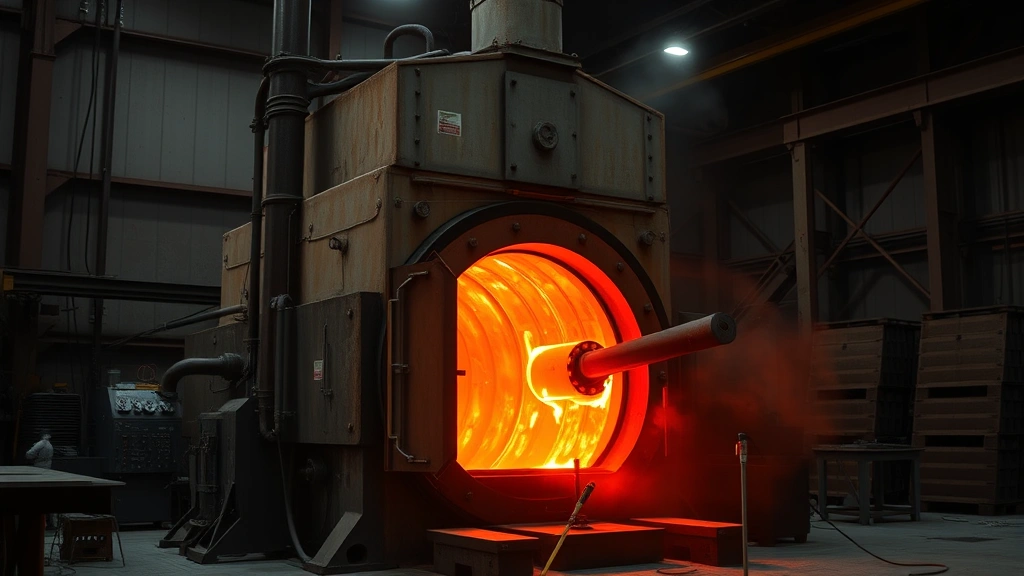
Once the furnace reaches operational temperature (you’ll see it glowing orange-red), begin adding ore and fuel in alternating layers. The ratio matters—typically you’ll use about 3 parts charcoal to 1 part ore, adjusted based on your specific materials and results.
During Operation:
Maintain steady air pressure throughout the process. Inconsistent air flow leads to uneven heating and poor ore reduction. Monitor temperature using a temperature gun or infrared thermometer, aiming for 1,100-1,300 degrees Celsius for most iron ore operations.
Keep detailed notes about what you’re doing: the ratio of materials, air pressure settings, time intervals, and results. This data becomes invaluable for optimizing future runs. You’ll quickly discover what works best for your specific furnace and materials.
Collecting Your Metal:
After approximately 30-45 minutes of operation (timing varies), molten metal begins pooling at the bottom. Using long-handled tongs and wearing full protective gear, carefully open the tap hole at the furnace base and direct the molten metal into a prepared metal container. Move deliberately but don’t rush—haste causes spills.
Cooling and Cleanup:
Never rush the cooling process. Allow your furnace to cool naturally over several hours. Rapid cooling stresses the brick structure and can cause cracking. Once completely cool, remove slag and ash from the collection area. Store your collected metal safely and allow it to cool fully before handling.
Common Issues and Solutions
Problem: Furnace Not Reaching Adequate Temperature
This usually indicates either insufficient air flow or poor fuel quality. Check your air delivery system for blockages or leaks. Verify your charcoal is high-quality and completely dry—wet or low-grade fuel won’t burn hot enough. You might also need to increase the air pressure gradually.
Problem: Uneven Heating or Hot Spots
Uneven temperature distribution often means your air inlet is positioned incorrectly or your material layers aren’t balanced. Adjust the angle of the air inlet pipe and ensure materials are loaded evenly throughout the chamber. Poor insulation can also cause this issue—check that your external insulation layer is complete and uniform.
Problem: Structural Cracks Appearing
Small surface cracks are normal and typically not concerning, but large cracks indicate problems. They usually result from rapid temperature changes or using improper bricks. Seal small cracks with high-temperature mortar. If major structural damage occurs, the furnace needs rebuilding.
Problem: Metal Not Reducing from Ore
This suggests your furnace isn’t reaching operational temperature or you need to adjust your fuel-to-ore ratio. Increase the charcoal percentage and boost air pressure. Also verify you’re using actual ore rather than decorative stones—genuine ore has different chemical composition necessary for reduction.
Problem: Excessive Smoke or Fumes
Some smoke is normal, but excessive fumes indicate incomplete combustion or ventilation issues. Ensure your work area has excellent airflow. Verify your charcoal is burning completely—incomplete combustion produces more noxious fumes. Always wear a quality respirator during operation.
Frequently Asked Questions
Can I use regular bricks instead of fire bricks?
Technically, you could attempt it, but you shouldn’t. Regular bricks contain moisture and minerals that break down at high temperatures. Your furnace would likely fail after one or two firings. Fire bricks cost more upfront but provide years of reliable service. It’s a worthwhile investment.
How hot does a blast furnace actually get?
A properly functioning blast furnace reaches 1,100-1,300 degrees Celsius (2,000-2,400 degrees Fahrenheit). Some industrial furnaces exceed 1,500 degrees Celsius. These temperatures are necessary to melt ore and separate metals from impurities.
What type of ore works best for beginners?
Iron ore is the most forgiving option for DIY operations. It reduces relatively easily and produces usable metal. Avoid complex ores that require specific flux materials or temperatures until you’ve mastered the basics with iron.
How much metal can I produce in one firing?
A typical home-scale blast furnace produces 2-5 pounds of metal per firing session. Larger furnaces produce more, but home operations prioritize safety and controllability over volume. Each firing takes 1-2 hours from start to finish.
Is it legal to operate a blast furnace in my area?
Regulations vary significantly by location. Check local zoning laws, environmental regulations, and any homeowner association rules before building. Some areas restrict open fires or metal working operations. Getting permission beforehand prevents costly mistakes.
What safety equipment is absolutely essential?
Heat-resistant gloves, face shield, safety glasses, and a respirator are non-negotiable. Beyond that, keep a metal-rated fire extinguisher nearby and never operate alone. The combination of extreme heat and molten metal demands serious safety precautions.
Can I use my blast furnace for other materials besides iron?
Yes, but each material requires different temperatures and flux materials. Copper, bronze, and other metals have different reduction points. Start with iron to learn the process, then experiment with other materials once you understand the fundamentals.
How do I know when my furnace is ready to produce metal?
When the furnace glows consistently orange-red and you’ve maintained steady air pressure for at least 20-30 minutes, it’s approaching readiness. You’ll notice molten material beginning to collect at the bottom. The tap hole will start showing a dull glow when metal is pooling below.
Related Posts

How Long to Boil Lobster Tails: Cooking Guide

How Long to Fly from New York to London? Travel Times
