
Clean Battery Terminals? Expert Tips Included
How to Clean Battery Terminals: Expert Tips for Optimal Performance
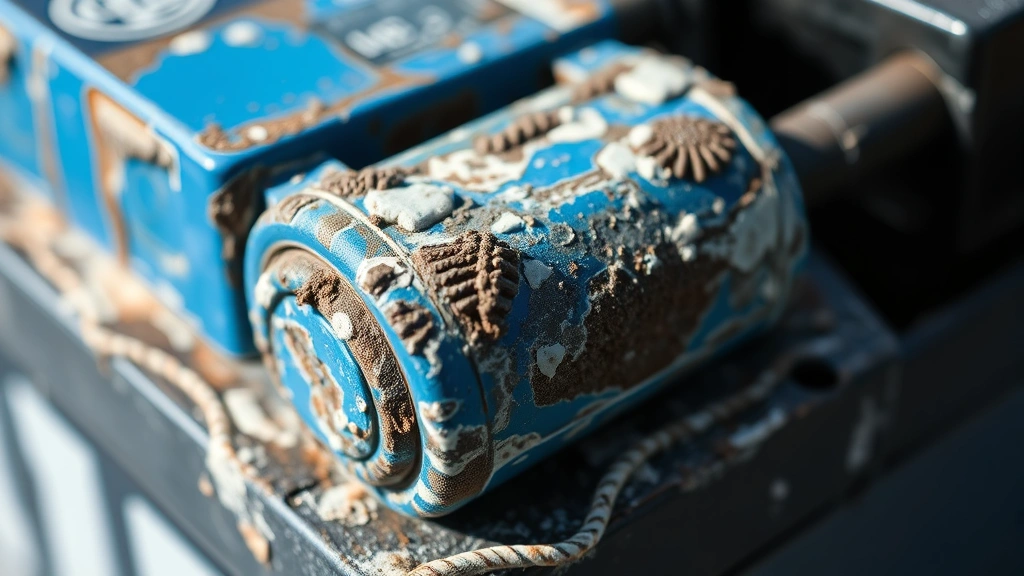
Battery terminals are one of the most overlooked maintenance points in vehicles, yet they play a critical role in ensuring reliable starting power and electrical system performance. Over time, corrosion builds up on battery terminals, creating a white, blue, or green crusty deposit that impedes electrical flow and can leave you stranded with a dead battery. This corrosion occurs when sulfuric acid from the battery reacts with the metal terminals, particularly in humid climates or when batteries are aging.
The good news is that cleaning battery terminals is a straightforward DIY task that requires minimal tools and takes just 15-30 minutes. By learning how to clean battery terminals properly, you’ll improve your vehicle’s electrical efficiency, extend battery life, and avoid costly replacements or emergency roadside service calls. This comprehensive guide walks you through every step of the process, from safety precautions to advanced maintenance tips that mechanics use.
Why Battery Terminals Corrode
Understanding the root cause of battery terminal corrosion helps you prevent it more effectively. Battery terminals corrode due to a chemical reaction between the battery’s internal sulfuric acid and the lead or copper terminals. When the battery charges and discharges, hydrogen gas is released, which combines with oxygen and moisture in the air to create corrosion.
Several factors accelerate this process. Overcharging causes excessive gas emission, while undercharging leaves the battery vulnerable to oxidation. Temperature fluctuations, particularly in cold climates, force the battery to work harder and generate more corrosive byproducts. Moisture and humidity create an ideal environment for the corrosion reaction to occur rapidly. Additionally, loose battery cable connections increase resistance, generating heat that speeds up the corrosive process.
The color of the corrosion indicates the terminal material. White or light blue corrosion typically appears on lead terminals, while green or blue-green corrosion suggests copper terminals or brass connections. Red or reddish corrosion on the positive terminal is less common but indicates more severe oxidation. Regardless of color, all types of corrosion reduce electrical conductivity and should be removed promptly.
Safety Precautions Before You Start
Battery safety cannot be overstated. Car batteries contain sulfuric acid and generate hydrogen gas, both hazardous materials. Always follow these essential safety guidelines before attempting to clean battery terminals.
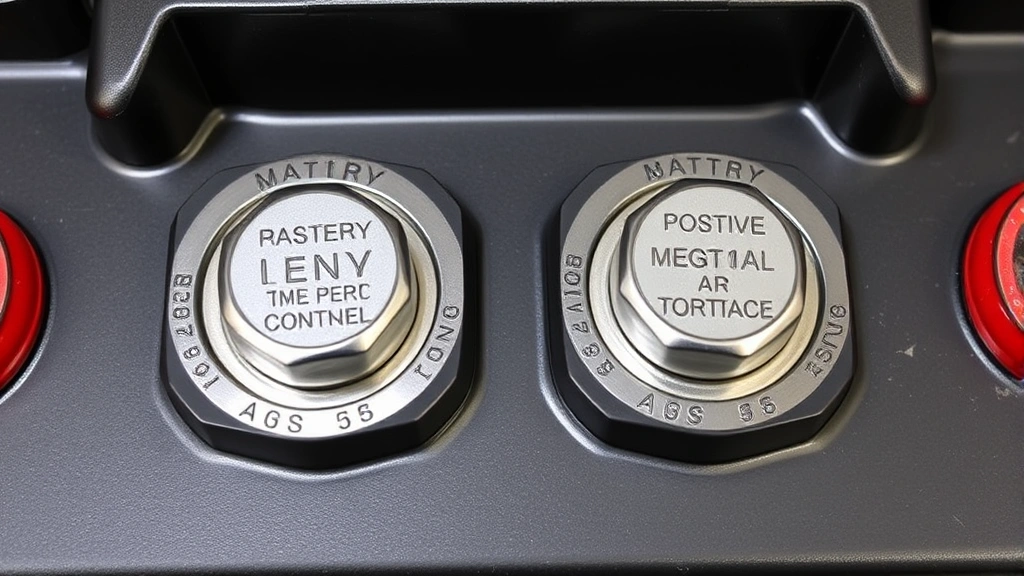
Disconnect the battery properly: Always disconnect the negative terminal first, then the positive terminal. This prevents accidental electrical shorts that could cause sparks or explosions. When reconnecting, reverse the order: positive first, then negative.
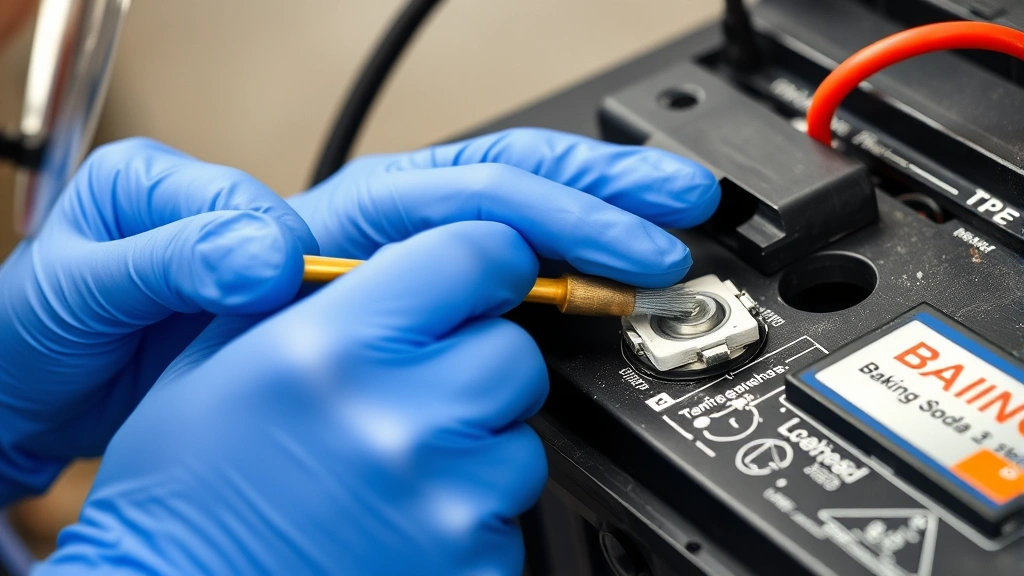
Wear appropriate protective gear: Safety glasses protect your eyes from corrosive particles and splashing acid. Wear nitrile gloves to protect your hands from both acid and corrosion particles. A respirator or dust mask prevents inhalation of corrosive dust.
Work in a well-ventilated area: Never work in an enclosed space. The hydrogen gas released by batteries is highly flammable and can accumulate in poorly ventilated areas. Always work outdoors or in a garage with the door open.
Avoid open flames and sparks: Don’t smoke, use power tools, or create any spark-generating activity near the battery. Hydrogen gas can ignite explosively.
Never mix cleaning solutions: Some DIY solutions might recommend mixing different cleaners. This is dangerous and can create toxic fumes. Stick to one cleaning method at a time.
Tools and Materials You’ll Need
Gathering the right tools ensures an efficient cleaning process and better results. You likely have most of these items at home already.
Essential tools:
- Socket wrench or adjustable wrench (to disconnect terminals)
- Wire brush with brass bristles (never use steel wool, which can scratch terminals)
- Small plastic brush for detailed cleaning
- Safety glasses and nitrile gloves
- Clean rags or paper towels
- Battery terminal puller (optional but helpful for stuck connections)
Cleaning solutions (choose one):
- Baking soda solution: Mix 3 tablespoons of baking soda with 1 cup of water. This is the safest, most eco-friendly option and neutralizes battery acid effectively.
- Coca-Cola or other carbonated beverage: The phosphoric acid dissolves corrosion without the hazards of stronger chemicals. This works surprisingly well for light to moderate corrosion.
- White vinegar: Use undiluted white vinegar for moderate corrosion. The acetic acid dissolves deposits safely.
- Commercial battery cleaner: Products like those from This Old House’s recommended retailers are specifically formulated for this task and work quickly.
- Distilled water: Use for final rinses to prevent new corrosion from tap water minerals.
Having these materials on hand before you start prevents delays and ensures a thorough cleaning job.
Step-by-Step Cleaning Process
Step 1: Prepare Your Workspace
Park your vehicle in a well-ventilated area, preferably outdoors. Open the hood and locate the battery. Take a moment to observe the extent of corrosion and identify which terminal (positive or negative) is more corroded. This helps you plan your approach. Ensure your engine is completely cool before beginning work.
Step 2: Disconnect the Battery
Using your socket wrench or adjustable wrench, loosen the negative terminal (marked with a minus sign or black cable) first. This is crucial for safety. Remove the negative cable completely and set it aside where it cannot accidentally touch the battery or metal parts of the engine. Next, loosen and remove the positive terminal (marked with a plus sign or red cable). Keep these cables separated and away from the battery to prevent accidental reconnection during cleaning.
Step 3: Assess the Corrosion Level
Examine the terminals closely. Light corrosion appears as a thin white or blue coating. Moderate corrosion forms a thicker crust that partially obscures the terminal. Severe corrosion completely covers the terminal and may have eaten into the metal surface. The corrosion level determines which cleaning solution and technique you’ll use. Light corrosion responds well to baking soda or cola. Moderate to severe corrosion benefits from commercial cleaners or vinegar.
Step 5: Apply Your Chosen Cleaning Solution
If using baking soda solution, dip your wire brush into the mixture and apply it directly to the corroded terminals. The solution will foam slightly as it reacts with the corrosion—this is the neutralization process working. For cola or vinegar, pour a small amount directly onto the terminals and let it sit for 2-3 minutes before brushing. This soaking time allows the acid to penetrate and loosen stubborn deposits.
Step 6: Scrub Away Corrosion
Using firm, circular motions with your brass wire brush, scrub the corroded areas. Brass bristles are hard enough to remove corrosion but soft enough not to damage the terminal metal. Work until the terminal surface appears shiny and clean. For crevices and hard-to-reach spots, use your smaller plastic brush. Don’t worry about being too aggressive—terminals are designed to withstand this cleaning process. Continue scrubbing until you see bare metal without any white, blue, or green deposits.
Step 7: Clean the Cable Connectors
The corrosion isn’t just on the battery terminals; it also accumulates inside the cable connectors that clamp onto the terminals. These connectors are often overlooked, leading to poor electrical contact even after terminal cleaning. Insert your wire brush into each connector and scrub thoroughly, rotating the brush to reach all interior surfaces. This step is critical for restoring full electrical conductivity. Many electrical problems blamed on dead batteries are actually caused by corroded cable connectors.
Step 8: Rinse Thoroughly
Once all corrosion is removed and the terminals shine, rinse the area with distilled water. Use a clean rag dampened with distilled water to wipe away any remaining cleaning solution and corrosion particles. Avoid tap water if possible, as minerals in tap water can contribute to future corrosion. Continue rinsing until the water runs clear and no residue remains. Dry everything completely with a clean, dry rag. Any moisture left behind can quickly lead to new corrosion.
Step 9: Reconnect the Battery
This step reverses the disconnection process. First, reconnect the positive terminal (red cable) and tighten the connection securely. Then, reconnect the negative terminal (black cable) and tighten it. Make sure both connections are tight enough that they don’t wiggle when you pull on the cables. Loose connections defeat the purpose of cleaning and will cause the same problems again. Test the connections by gently tugging on each cable—they should not move.
Step 10: Start Your Vehicle and Test
Close the hood and start your vehicle. The engine should turn over more easily and start more quickly than before cleaning. Listen for a stronger starter motor sound, which indicates improved electrical flow. If the battery still seems weak, you may have a deeper problem, such as a failing battery that needs replacement.
Preventing Future Corrosion
Now that your battery terminals are clean, taking preventive steps extends the time between cleanings and protects your investment.
Apply a protective coating: After cleaning and drying completely, apply a thin layer of petroleum jelly, dielectric grease, or commercial battery terminal protector to the terminals and connectors. These coatings create a barrier against moisture and oxygen, the two primary corrosion culprits. Reapply this coating every 6-12 months or whenever you notice corrosion returning. This simple step can reduce corrosion frequency by 80 percent.
Install anti-corrosion washers: These inexpensive felt or rubber washers sit between the terminal and connector, absorbing corrosive gases and preventing direct contact with moisture. If your vehicle doesn’t have them, they’re worth installing as a permanent preventive measure.
Check your charging system: Overcharging accelerates corrosion. Have your alternator and voltage regulator tested if you notice corrosion returning frequently. A properly functioning charging system keeps the battery at 13.5-14.5 volts, which minimizes corrosion. If your charging system is faulty, you’ll keep developing corrosion no matter how often you clean the terminals.
Maintain proper battery water levels: If you have a traditional lead-acid battery with removable caps, check water levels monthly. Low water levels increase hydrogen gas emission and corrosion. Top off with distilled water as needed. Modern sealed batteries don’t require this maintenance, but older vehicles benefit from regular checking.
Keep the battery secure: A loose battery vibrates and creates poor connections, generating heat and corrosion. Ensure your battery is properly secured in its hold-down bracket. Tighten any loose bolts or straps.
Monitor humidity: In humid climates, corrosion develops faster. If you live in a high-humidity area, clean your battery terminals more frequently—perhaps every 3-4 months instead of annually. Parking in a garage rather than outdoors also helps reduce moisture exposure.
When to Replace vs. Clean
Not every corroded battery can be saved by cleaning. Understanding when cleaning is sufficient and when replacement is necessary saves time and prevents safety issues.
Clean if: Corrosion is limited to the terminals and connectors with no visible damage to the battery case itself. The battery is less than 3-4 years old and starts the vehicle after cleaning. You notice corrosion has returned multiple times but the battery still functions between cleanings. The vehicle starts promptly after cleaning, indicating the battery still holds a strong charge.
Replace if: The battery case is cracked or leaking. Corrosion has eaten deep pits into the terminal metal, making a secure connection impossible. The battery is older than 4-5 years, as battery life typically maxes out around this point. The vehicle cranks slowly even after cleaning, suggesting the battery is worn out. You’ve cleaned the terminals multiple times in a short period (more than once per month), indicating internal battery failure.
If you’re unsure whether your battery needs replacement, visit an auto parts store for a free battery test. Most retailers like AutoZone, O’Reilly Auto, and NAPA offer this service without obligation. They’ll tell you definitively whether your battery is healthy or dying.
For more comprehensive vehicle maintenance, learn how to check your oil level, which is equally important for engine longevity.
FAQ
How often should I clean my battery terminals?
Most vehicles require battery terminal cleaning every 12-24 months. If you live in a humid climate, have an older vehicle, or notice corrosion returning frequently, clean them every 6 months. Regular inspection during routine maintenance helps you catch corrosion early before it affects vehicle performance.
Can I use steel wool instead of a brass wire brush?
No. Steel wool scratches and damages the terminal surface, creating rough spots where corrosion accelerates. Always use brass or soft-bristled brushes designed for this purpose. The small investment in a proper brush pays dividends in terminal longevity.
Is baking soda safe to use on car batteries?
Yes, baking soda is one of the safest cleaning solutions available. It neutralizes battery acid without the hazards of stronger chemicals and is completely non-toxic. It’s especially recommended for beginners and those without chemical experience.
What if corrosion returns immediately after cleaning?
Rapid corrosion return indicates an underlying problem, usually an overcharging alternator or a faulty voltage regulator. Have your charging system tested professionally. Additionally, check that all connections are tight and consider applying a protective coating like dielectric grease to slow future corrosion while you address the root cause.
Can I clean battery terminals without disconnecting the battery?
Technically yes, but it’s not recommended. Disconnecting the battery is the safest approach, preventing accidental electrical shorts. If you must clean without disconnecting, extreme caution is necessary, and the risk of damaging vehicle electronics or causing injury increases significantly. Always disconnect for safety.
How long does battery terminal cleaning take?
For light corrosion, expect 15-20 minutes. Moderate corrosion takes 20-30 minutes. Severe corrosion may require 45 minutes to an hour. The time varies based on corrosion severity, your familiarity with the task, and tool quality. First-time cleaning typically takes longer as you work carefully and methodically.
Should I clean my battery terminals if there’s no visible corrosion?
Preventive cleaning isn’t necessary if terminals appear clean and shiny. However, annual inspection is wise. If you notice the slightest discoloration or if your vehicle is over 3 years old, a quick cleaning won’t hurt and ensures optimal electrical performance. Prevention is easier than dealing with starting problems caused by hidden corrosion.
What’s the best product for preventing future corrosion?
Dielectric grease and petroleum jelly both work well and cost just a few dollars. Commercial battery terminal protectors are also effective. Apply whichever product you choose after cleaning and drying the terminals completely. Reapply every 6-12 months for continuous protection. Family Handyman experts recommend dielectric grease as the best long-term preventive solution.
Related Posts

Superscript in Google Docs: Expert Tips

Strikethrough in Excel: Easy Steps for Beginners
