
How to Clean an Iron? Expert Tips Revealed
How to Clean an Iron: Expert Tips Revealed
A clean iron is essential for achieving crisp, professional-looking results on your clothes. Over time, irons accumulate mineral deposits, fabric residue, and burnt-on starch that can damage delicate fabrics and leave marks on your garments. Whether you’re dealing with a stubborn sticky soleplate or mineral buildup from hard water, knowing how to clean an iron properly will extend your appliance’s lifespan and restore its performance.
Many people overlook iron maintenance, not realizing that regular cleaning prevents costly repairs and ensures every garment looks its best. From dealing with hard water stains to removing melted fabric, this comprehensive guide covers every cleaning scenario you might encounter. We’ll walk you through professional techniques used by dry cleaners and laundry experts, along with affordable household solutions that deliver results.
Why Regular Iron Cleaning Matters
Your iron works hard to keep your clothes wrinkle-free, but it faces constant challenges from mineral-rich water, fabric fibers, and heat exposure. When you don’t maintain your iron properly, several problems develop. Mineral buildup clogs steam vents, reducing steam output and forcing you to press harder on fabrics. This increased pressure can scorch delicate materials like silk and polyester. A dirty soleplate catches on fabric, creating snags and pulls that ruin garments permanently.
Professional pressers and tailors clean their irons daily because they understand the relationship between appliance maintenance and garment quality. You don’t need to clean yours that frequently, but establishing a regular cleaning routine—roughly monthly for heavy users, quarterly for occasional ironers—prevents accumulated damage. Clean irons also heat more evenly, eliminating hot spots that cause browning and scorching. The investment of 15 minutes in cleaning saves you hundreds of dollars in replaced clothing and repair costs.
Safety Precautions Before You Start
Before attempting any cleaning method, safety must come first. Always unplug your iron from the electrical outlet and allow it to cool completely—this typically takes 30 minutes after use. Never attempt to clean a hot iron, as you risk severe burns and damaging internal components. Check your iron’s instruction manual for manufacturer-specific warnings; some premium models have special coating that certain cleaning methods can damage.
Ensure your work area is dry and well-ventilated, especially when using vinegar or commercial cleaning products that produce fumes. Keep children and pets away from your workspace. If you’re using any liquid cleaning solutions, have paper towels and a dry cloth nearby to prevent water from entering electrical components. Test any new cleaning method on the bottom corner of the soleplate first to ensure it won’t damage your specific iron model. When in doubt, contact the manufacturer or consult your user manual.
Cleaning the Soleplate: Step-by-Step Methods
The soleplate is your iron’s most critical component and the area that requires the most attention. Several effective cleaning methods exist, ranging from gentle to aggressive depending on buildup severity.
Method 1: Baking Soda Paste (Gentle)
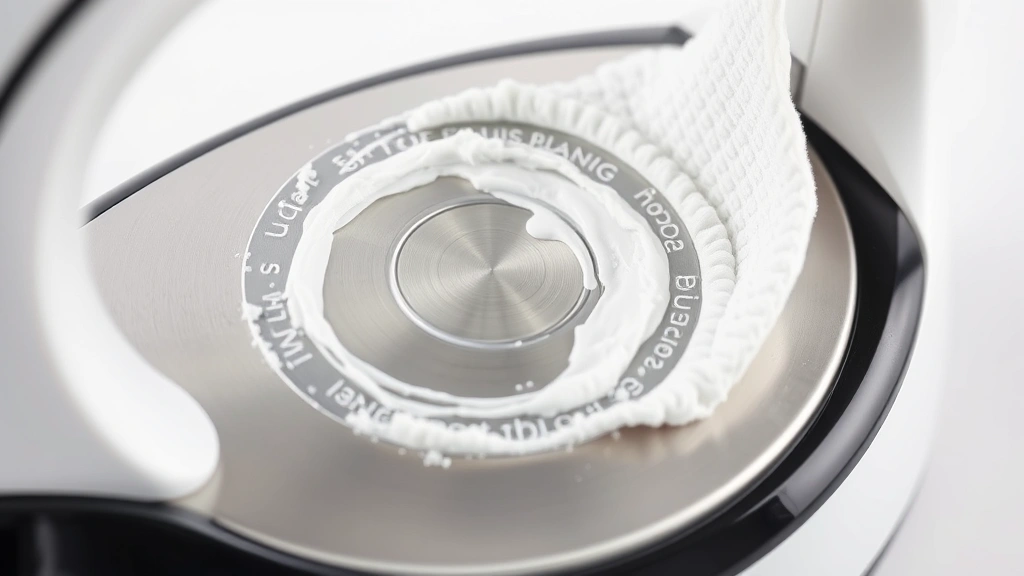
This method works excellently for light to moderate buildup and won’t damage any iron coating. Mix baking soda with a small amount of water to create a thick paste—aim for a consistency similar to peanut butter. Dip a soft cloth or non-abrasive sponge into the paste and gently rub the cooled soleplate in circular motions. Pay extra attention to the tip and heel where residue accumulates. Wipe away the paste with a damp cloth, then dry thoroughly with a clean towel. This approach is safe for all iron types and leaves no chemical residue.
Method 2: White Vinegar Solution (Medium Strength)
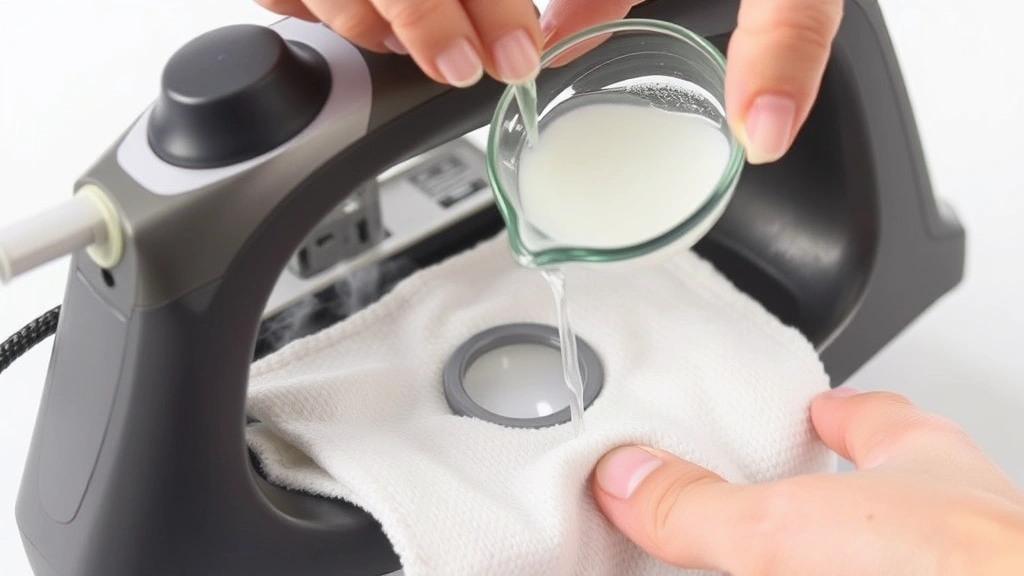
White vinegar effectively dissolves mineral deposits without scratching surfaces. Heat your iron to medium temperature, then unplug it. Mix equal parts white vinegar and water in a shallow bowl. Dip a soft cloth into the solution and wipe the entire soleplate thoroughly. For stubborn mineral buildup, let the vinegar solution sit on the affected area for 2-3 minutes before wiping. The acetic acid in vinegar breaks down mineral compounds that hard water deposits leave behind. This method works particularly well if you have hard water in your area. After cleaning, wipe the soleplate with a damp cloth to remove vinegar residue, then dry completely.
Method 3: Salt and Cotton Method (Traditional)
This time-tested approach combines salt’s abrasive properties with cotton cloth’s gentleness. Heat your iron to medium-high temperature, then unplug it. Sprinkle a generous amount of table salt onto a small cotton cloth or old cotton shirt. Rub the soleplate with the salt-covered cloth using gentle circular motions. The salt gently abrades away buildup while the cotton prevents scratching. This method works remarkably well for removing burnt-on fabric and light starch residue. Wipe away all salt particles with a damp cloth and dry thoroughly before using your iron again.
Method 4: Commercial Iron Cleaner (Heavy Duty)
Products specifically designed for iron cleaning offer powerful results for severe buildup. Popular brands like Family Handyman’s recommended iron cleaners work by chemically dissolving mineral deposits and burnt residue. Follow the product instructions carefully, as formulations vary. Most require you to apply the cleaner to a cooled soleplate, let it sit briefly, then wipe clean. Some products can be applied to a warm iron. Always ventilate well when using commercial cleaners, as they often produce strong odors. These products are excellent for irons that have been neglected for extended periods.
Method 5: Toothpaste Technique (Specialized)
Non-gel white toothpaste contains mild abrasives and cleaning agents that work surprisingly well on iron soleplates. Apply a small amount of toothpaste directly to the cooled soleplate and rub gently with a soft cloth using circular motions. The mild abrasive particles remove buildup without scratching the surface. This method works particularly well for removing burnt-on fabric fibers. Rinse thoroughly with a damp cloth and dry completely. Avoid colored or gel toothpaste, which may stain or leave residue.
Removing Mineral Deposits and Hard Water Stains
Hard water—water containing high concentrations of calcium and magnesium minerals—causes the most persistent iron problems. These minerals accumulate inside steam vents and on the soleplate, creating white crusty deposits that block steam output and damage fabrics. If your iron produces spotty steam or leaves white marks on clothes, mineral buildup is likely the culprit.
Descaling Your Iron’s Internal System
Many irons feature a self-cleaning or descaling cycle specifically designed to flush mineral deposits from internal passages. Check your manual for the descaling function—it’s often a button labeled “Clean” or “Descale.” Fill the water reservoir with equal parts white vinegar and distilled water. Heat the iron, then activate the descaling cycle over a sink or towel, as the vinegar solution will spray out forcefully. The acidic vinegar dissolves mineral buildup in steam vents and internal channels that you cannot access manually.
Repeat the descaling process 2-3 times with fresh vinegar solution until the water running out appears clear. Then run the cycle 2-3 more times using only distilled water to rinse away all vinegar residue. Using distilled water instead of tap water for future ironing sessions dramatically reduces mineral accumulation, especially if you have hard water. Distilled water costs just a few dollars per gallon and extends your iron’s lifespan significantly.
Cleaning Blocked Steam Vents
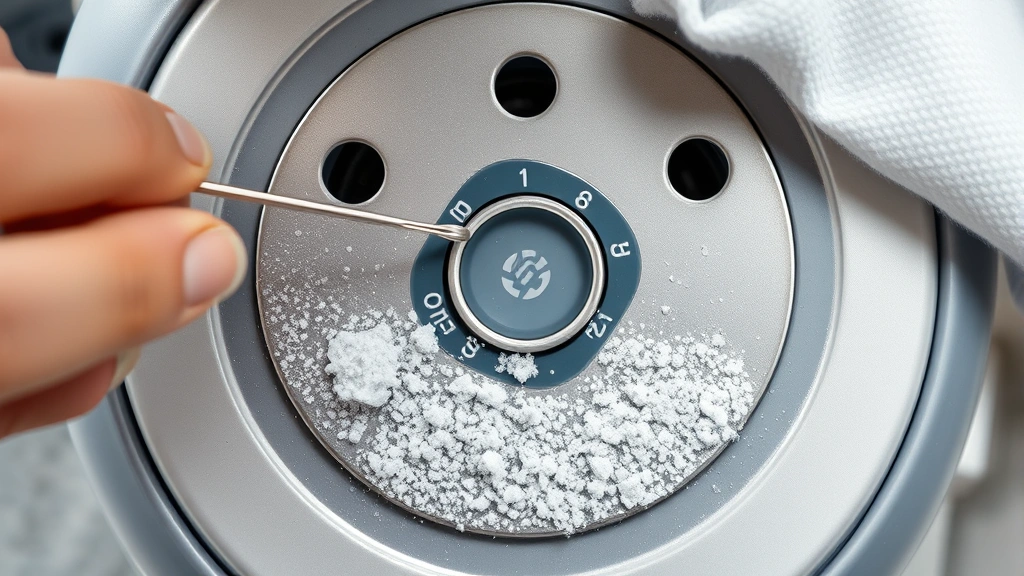
Steam vents often become clogged with mineral deposits, preventing proper steam distribution. After descaling, inspect the vent holes on your soleplate. If you see white crusty deposits, use a straightened paperclip or toothpick to gently poke each vent hole, dislodging trapped minerals. Work carefully to avoid enlarging the holes or damaging the soleplate. Clean away loosened deposits with a damp cloth. This manual approach combined with descaling ensures all vents function properly.
Dealing with Burnt-On Fabric and Residue
Accidentally pressing synthetic fabrics at too-high temperatures or melting polyester blends onto your soleplate creates stubborn burnt-on residue that requires specialized removal techniques. This situation demands patience and the right approach to avoid spreading the damage.
Immediate Action After Burning
If you’ve just melted fabric onto your iron, immediately unplug it and let it cool completely. Do not attempt to wipe away melted fabric while the iron is hot, as this spreads the damage across the soleplate. Once cooled, the melted material hardens and becomes easier to remove. Gently scrape the hardened residue using a plastic scraper or old credit card held at a shallow angle. Plastic tools won’t scratch your soleplate like metal implements. Work slowly and deliberately, using gentle pressure rather than aggressive scraping.
Vinegar Soak Method for Stubborn Residue
For burnt fabric that won’t scrape away easily, use a vinegar soak. Soak a cloth in white vinegar and place it on the affected area of the cooled soleplate. Let it sit for 10-15 minutes, allowing the vinegar to penetrate and soften the residue. The acetic acid helps break down burnt material. After soaking, gently rub with a soft cloth or non-abrasive sponge. Repeat the process if necessary. This patient approach eventually removes even severe burnt-on residue without damaging your iron.
Rubbing Alcohol for Melted Synthetic Materials
Isopropyl rubbing alcohol effectively dissolves melted polyester and synthetic materials. Dampen a cloth with rubbing alcohol and rub the affected area gently. The alcohol breaks down the chemical bonds in melted plastic-based fabrics, allowing you to wipe them away. This method works particularly well for polyester blends. Ensure good ventilation since rubbing alcohol produces fumes. Work in a well-ventilated area and avoid prolonged exposure to vapors.
Cleaning the Water Reservoir and Steam Vents
The water reservoir collects mineral deposits, algae, and bacteria over time, especially if you leave water sitting in your iron for extended periods. A clean reservoir ensures pure steam that won’t stain your clothes or produce foul odors.
Emptying and Rinsing the Reservoir
Always empty your iron’s water reservoir after each use. This simple habit prevents mineral and bacterial growth. If your iron has been sitting with water inside for weeks or months, the water likely contains algae and mineral deposits. Empty the old water completely and rinse the reservoir several times with fresh water. For stubborn deposits, fill the reservoir with equal parts white vinegar and water, let it sit for 30 minutes, then empty and rinse thoroughly with fresh water.
Deep Cleaning with Descaling Solution
Fill the reservoir with a commercial descaling solution formulated for irons, or use a vinegar-water mixture. Activate your iron’s descaling or self-cleaning function to run the solution through the system. This flushes mineral deposits from internal passages and vents. Repeat 2-3 times with fresh solution, then run the cycle 3-4 times with distilled water to remove all descaling solution residue. Fill the reservoir with distilled water for your next ironing session.
Preventing Future Buildup
The single most effective prevention method is using distilled water exclusively. While distilled water costs slightly more than tap water, the investment prevents mineral accumulation that causes expensive repairs. If your tap water is extremely hard, using distilled water becomes even more critical. Always empty the reservoir after ironing—never leave water sitting in your iron for days or weeks. This prevents bacterial growth and algae formation that creates odors and staining.
Preventative Maintenance Tips
Consistent maintenance prevents the need for aggressive cleaning and extends your iron’s operational lifespan by years. Establishing simple habits takes minimal effort but delivers significant results.
After Every Use
Empty the water reservoir completely and allow your iron to cool on a heat-resistant surface. Never store your iron while hot. Once cooled, wipe the soleplate with a dry cloth to remove any residual moisture or lint. This daily practice prevents mineral accumulation and keeps your soleplate clean between deeper cleanings.
Weekly for Regular Users
If you iron frequently, perform a quick visual inspection of the soleplate weekly. Look for lint accumulation, mineral spots, or fabric fibers. Use a soft cloth to gently wipe away any visible debris. This 2-minute task prevents buildup from becoming problematic. Similar to how you’d check oil in your car regularly, frequent iron inspection catches problems early.
Monthly Deep Clean
Once monthly, perform a thorough soleplate cleaning using one of the methods described above. Choose the appropriate method based on your iron’s condition—baking soda paste for light maintenance, vinegar solution for moderate buildup. This regular deep clean prevents mineral and residue accumulation from reaching problematic levels. Monthly maintenance takes 15 minutes and prevents the need for time-consuming restoration cleaning.
Quarterly Descaling
Even if you use distilled water, running a descaling cycle quarterly keeps internal passages clear and steam vents unobstructed. This preventative approach maintains consistent steam output and even heat distribution. If you use tap water, increase descaling frequency to monthly or bi-monthly, depending on water hardness in your area.
Proper Storage Practices
Store your iron in a cool, dry location away from humidity, which promotes rust and corrosion. Never store your iron while it contains water. Use a protective iron cover or cloth to prevent dust accumulation. Store the power cord loosely coiled to prevent damage. These simple storage practices maintain your iron’s appearance and functionality for years.
Using Quality Water
Investing in distilled water for ironing is one of the most effective preventative measures available. Hard tap water causes mineral buildup that requires increasingly aggressive cleaning. Distilled water—which has had minerals removed through distillation—prevents this accumulation entirely. The small additional cost for distilled water pays for itself through reduced cleaning time and extended appliance lifespan. This approach is similar to proper maintenance of vehicle fluids, where quality fluid prevents system damage.
FAQ
How often should I clean my iron?
For occasional users (ironing once weekly or less), clean your iron monthly. Regular users (3-5 times weekly) should clean every 2-3 weeks. Heavy users (daily ironing) benefit from weekly cleaning. The frequency depends on your water hardness and iron usage patterns. If you use distilled water, you can extend cleaning intervals by 50% since mineral accumulation occurs much more slowly.
Can I use vinegar inside my iron?
Yes, white vinegar is safe for internal iron cleaning through the descaling function. Mix equal parts vinegar and distilled water, fill the reservoir, and run the descaling cycle over a sink. Never use vinegar directly on a hot soleplate, as the rapid heating can damage internal components. Always follow up with distilled water rinses to remove all vinegar residue before using your iron on clothes.
What should I do if my iron leaks water?
Water leakage often indicates mineral buildup blocking steam vents or internal passages. Run a descaling cycle with vinegar solution to clear blockages. If leaking continues after descaling, the iron may have internal damage requiring professional repair. Never attempt to disassemble your iron yourself, as this voids warranties and poses electrical hazards. Check the This Old House recommendations for steam irons if you’re considering replacement.
Is it safe to clean my iron with steel wool?
Never use steel wool on your iron’s soleplate. Steel wool scratches and damages the non-stick coating, creating rough spots that catch on fabric and cause snagging. Stick with soft cloths, non-abrasive sponges, and gentle scraping tools like plastic scrapers or old credit cards. Protecting your soleplate’s coating preserves your iron’s functionality and lifespan.
Why does my iron leave white marks on clothes?
White marks indicate mineral deposits being transferred from your iron to fabric. This occurs when mineral buildup on the soleplate or in steam vents isn’t properly cleaned. Run a descaling cycle and clean your soleplate thoroughly using vinegar solution or a commercial iron cleaner. Switch to distilled water for future ironing to prevent recurrence. If white marks persist after cleaning, mineral deposits may have accumulated inside steam vents requiring professional descaling service.
Can I clean my iron with acetone or nail polish remover?
Avoid acetone and nail polish remover on irons. These solvents can damage plastic components, the power cord, and potentially the non-stick soleplate coating. Stick to mild solutions like vinegar, baking soda, or commercial iron cleaners specifically formulated for safe use. When in doubt, consult your iron’s user manual for approved cleaning methods.
What’s the best water to use in my iron?
Distilled water is ideal for all irons. Distilled water has had minerals removed through a distillation process, eliminating the mineral buildup that causes problems. Tap water, especially hard water high in calcium and magnesium, causes mineral deposits that reduce steam output and require frequent cleaning. Some people use filtered water, but distilled water provides superior results. The small additional cost easily pays for itself through reduced maintenance and extended iron lifespan.
Related Posts

Superscript in Google Docs: Expert Tips

Strikethrough in Excel: Easy Steps for Beginners
