

How to Clean a Shower Head: Expert Guide
How to Clean a Shower Head: Expert Guide
There’s something deeply satisfying about stepping into a shower with perfect water pressure and an even spray pattern. Then reality hits—your shower head sputters, sprays in weird directions, and that relaxing morning ritual becomes more frustration than zen. The culprit? Mineral deposits and sediment buildup that silently accumulate over time.
The good news is that cleaning your shower head is one of those rare home maintenance tasks that requires zero special skills, minimal tools, and about fifteen minutes of your time. Whether you’re dealing with a handheld showerhead or a fixed overhead fixture, we’ve got you covered with methods that actually work.
This guide walks you through everything from identifying the problem to restoring your shower to its former glory. No plumber needed, no expensive products required—just common household items and a little elbow grease.
Why Shower Heads Get Dirty
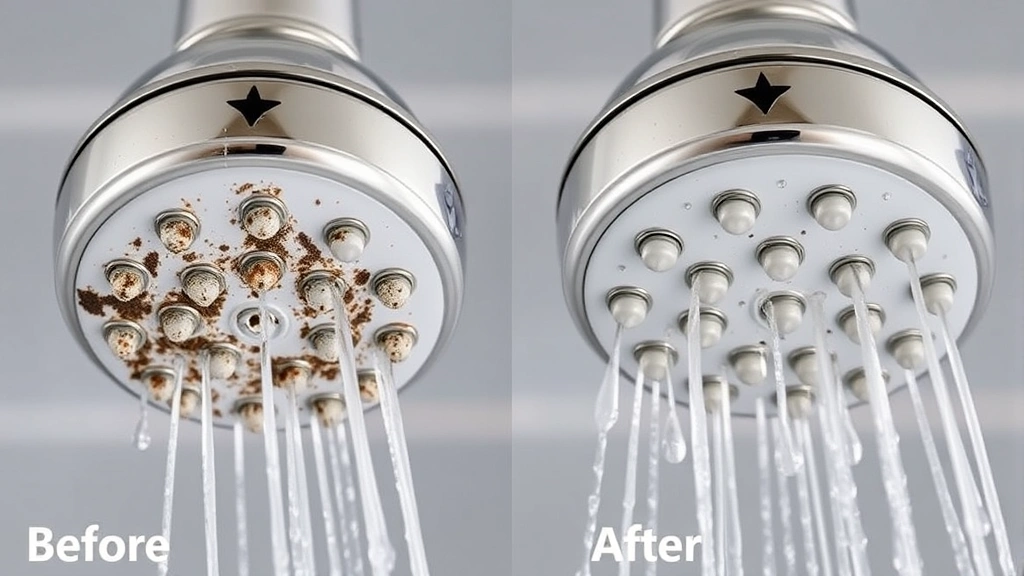
Before diving into solutions, let’s understand what’s actually happening in your shower head. Hard water is the primary culprit—those minerals like calcium and magnesium accumulate inside the nozzles and aerator, gradually restricting water flow. Over time, this mineral buildup creates blockages that reduce pressure and create uneven spray patterns.
If you’ve ever noticed white, crusty deposits around your shower head or inside the nozzles, that’s limescale—essentially the same thing causing issues in your descaling a Keurig with vinegar. The difference is that shower heads have dozens of tiny holes, and each one can get clogged independently.
Beyond mineral deposits, your shower head can accumulate bacteria, mold, and mildew—especially in the aerator and internal passages. This isn’t just about aesthetics; it can affect water quality and your shower experience.
What You’ll Need
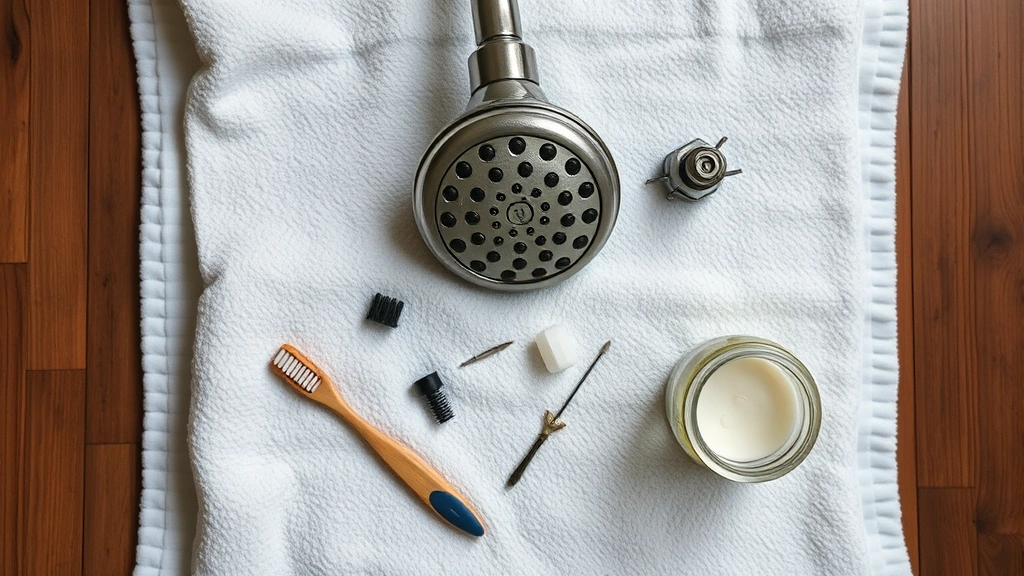
The beauty of cleaning a shower head is that you probably already have everything required:
- White vinegar (the workhorse of this project)
- A plastic bag or container (large enough to submerge the head)
- Rubber bands or zip ties (to secure the bag)
- An old toothbrush (for scrubbing small areas)
- A small needle or toothpick (for clearing individual nozzles)
- Baking soda (optional, for stubborn buildup)
- Pliers or an adjustable wrench (only if you need to remove the head)
That’s it. No specialized cleaners, no expensive equipment. Just items you likely have in your bathroom or kitchen right now.
Method One: The Vinegar Soak
This is the most straightforward approach and works beautifully for moderate buildup. The acetic acid in vinegar dissolves mineral deposits without harsh chemicals.
Step 1: Prepare Your Soaking Container
Fill a plastic bag or small container with white vinegar—enough to fully submerge your shower head. If you have a fixed overhead shower head, you’ll need a larger container or bag that can reach it.
Step 2: Submerge and Secure
If using a handheld showerhead, simply place it in the bag and fill with vinegar. For fixed heads, fill a bag with vinegar, carefully position it around the shower head, and secure it with rubber bands or zip ties. Make sure the nozzles are completely submerged.
Step 3: Let It Soak
Leave your shower head soaking for at least 30 minutes. For heavy buildup, overnight soaking delivers better results. The longer it soaks, the more effectively the vinegar dissolves mineral deposits.
Step 4: Scrub and Rinse
Remove the shower head and use your old toothbrush to gently scrub away any remaining deposits. Use a needle or toothpick to carefully clear any blocked nozzles—a gentle poking motion works better than forceful jabbing. Rinse thoroughly under running water.
Step 5: Test the Water Flow
Turn on your shower and check the water pressure and spray pattern. You should notice an immediate improvement. If some nozzles still seem blocked, repeat the soaking process.
This method handles about 80% of shower head cleaning situations. It’s gentle enough for all shower head materials and effective enough for most mineral buildup.
Method Two: Cleaning Without Removal
Sometimes you don’t want to mess with removing your shower head—maybe it’s stuck, or you simply prefer a quicker approach. This method works directly on fixed shower heads.
The Bag Method for Fixed Heads
Fill a plastic bag with white vinegar and carefully position it around your shower head. Secure it tightly with rubber bands, making sure the nozzles are submerged in vinegar. Leave it for at least an hour, then remove the bag and scrub with an old toothbrush.
The advantage here is zero disassembly. The disadvantage is that you’re limited by how much vinegar you can keep in contact with the nozzles, so stubborn buildup might need multiple treatments.
The Spray Bottle Method
For lighter cleaning or maintenance, fill a spray bottle with vinegar and spray your shower head daily. This prevents buildup from accumulating in the first place and keeps your shower head in top condition with minimal effort.
Method Three: Deep Cleaning Tough Buildup
When mineral deposits are severe and vinegar alone isn’t cutting it, you need to escalate your approach. This method involves removing the shower head and using stronger treatments.
Step 1: Remove the Shower Head
Use pliers or an adjustable wrench to carefully unscrew the shower head from the shower arm. Wrap a cloth around the connection point first to prevent scratching the finish. Turn counterclockwise until it comes free.
Step 2: Disassemble if Possible
Many shower heads have removable aerators or internal components. Check if yours disassembles—usually by unscrewing the aerator from the head itself. Separating components exposes more surface area to your cleaning solution.
Step 3: Create a Vinegar and Baking Soda Paste
Mix white vinegar with baking soda to create a paste with a consistency like peanut butter. This combination is more aggressive than vinegar alone and works wonders on stubborn limescale.
Step 4: Apply and Let It Work
Coat the shower head and aerator with your paste, paying special attention to the nozzles. Let it sit for 15-30 minutes. The fizzing action helps break down mineral deposits.
Step 5: Scrub Thoroughly
Use your toothbrush to scrub away the paste and loosened deposits. For individual nozzles, use a needle or thin wire to carefully clear any remaining blockages. Work gently to avoid damaging the nozzles.
Step 6: Soak for Final Polish
After scrubbing, submerge the cleaned parts in pure vinegar for another 30 minutes. This final soak dissolves any remaining residue and ensures complete cleaning.
Step 7: Reassemble and Reinstall
Rinse everything thoroughly under running water, reassemble if you disassembled it, and screw the shower head back onto the shower arm. Hand-tighten first, then use your wrench to snug it up—don’t over-tighten or you might strip the threads.
This deep-cleaning approach handles even the most stubborn mineral buildup. It’s more involved than the soaking method, but the results justify the extra effort.
Maintenance Tips for Long-Term Results
Cleaning your shower head is great, but preventing excessive buildup saves you time and effort down the road. Here are practical habits that keep your shower head performing optimally.
Weekly Vinegar Spray
Once weekly, spray your shower head with white vinegar and let it sit for 5-10 minutes before rinsing. This prevents mineral deposits from accumulating and keeps your shower head perpetually clean.
Squeegee Your Shower Head
After each shower, wipe down your shower head with a squeegee or dry cloth. This removes excess water and minerals, reducing the environment where deposits form.
Address Plumbing Issues
If you have particularly hard water, consider installing a water softener or point-of-use water filter. This addresses the root cause rather than just treating symptoms. If you’re also dealing with drainage issues, our guide on how to unclog a shower drain covers those solutions comprehensively.
Check Your Shower Head Regularly
Don’t wait until water pressure is terrible. Monthly quick inspections help you catch buildup early, when a simple vinegar spray handles it completely.
Consider Filter Cartridges
Some modern shower heads include replaceable filter cartridges that reduce mineral deposits. While they don’t eliminate the need for cleaning, they significantly reduce frequency.
Think of maintenance like brushing your teeth—a little effort regularly beats major work later. The same principle applies to cleaning hardwood floors or cleaning your dishwasher—consistent care prevents major problems.
If you’re tackling other household cleaning projects, similar descaling principles apply across your home. The washing machine cleaning process uses vinegar similarly, and understanding how to remove rust helps with chrome fixtures that might show discoloration.
Professional Help When Needed
If your shower head remains problematic after thorough cleaning, the issue might be internal plumbing rather than the head itself. A plumber can diagnose whether you need valve cleaning or replacement rather than just shower head maintenance. For comprehensive guidance, check resources like This Old House’s shower repair guide.
Frequently Asked Questions
How often should I clean my shower head?
In areas with moderate hard water, quarterly cleaning keeps things running smoothly. If you have particularly hard water, monthly cleaning prevents excessive buildup. Light weekly vinegar sprays between deep cleans maintain optimal performance.
Can I use CLR or other commercial cleaners instead of vinegar?
Commercial descaling products work, but vinegar is safer for most shower head materials, cheaper, and effective. Harsh chemicals can damage certain finishes or rubber components. If vinegar isn’t working after multiple attempts, a commercial descaler might help, but test it on a small area first.
Why is my shower head still sputtering after cleaning?
If cleaning doesn’t solve the problem, several factors could be at play. The issue might be internal valve problems, water pressure issues from your main line, or sediment in the supply lines rather than just the shower head. You might also have shower drain clogs affecting water flow. Consider calling a plumber if the problem persists.
Is it safe to soak plastic shower heads in vinegar?
Yes, white vinegar is safe for plastic, chrome, stainless steel, and brass. It won’t damage any standard shower head material. However, avoid soaking for more than overnight if you’re concerned about extended vinegar exposure.
Can I prevent hard water buildup without a water softener?
Absolutely. Regular maintenance—weekly vinegar sprays, daily squeegee wiping, and monthly deeper cleaning—prevents most buildup issues. You don’t need expensive equipment; consistent habits work just as well.
What if my shower head won’t unscrew?
Apply a penetrating oil like WD-40 and let it sit for 30 minutes, then try again. Wrap a cloth around the connection to improve grip and prevent slipping. If it’s still stuck, avoid forcing it—call a plumber rather than risk damaging the fitting.
Should I clean the shower arm connection too?
Yes, mineral deposits can accumulate where the shower head connects to the arm. While unscrewing to clean, wipe the threads with a vinegar-soaked cloth. This prevents future connection issues and ensures a tight seal.
Related Posts

How Long to Boil Lobster Tails: Cooking Guide

How Long to Fly from New York to London? Travel Times
