
How to Clean a Humidifier: Expert Guide
How to Clean a Humidifier: Expert Guide
Your humidifier works hard to keep your home’s air moist and comfortable, especially during those dry winter months or in arid climates. But here’s the thing: if you’re not cleaning it regularly, you’re basically cultivating a petri dish of mold, bacteria, and mineral deposits. Gross? Absolutely. Preventable? Completely.
A neglected humidifier doesn’t just become less effective—it can actually make your indoor air quality worse and potentially irritate your respiratory system. The good news is that cleaning your humidifier isn’t complicated or time-consuming. With the right approach and a little elbow grease, you can keep it running like new and extend its lifespan significantly.
Think of humidifier maintenance the same way you’d approach cleaning your coffee maker or descaling your Keurig with vinegar—regular upkeep prevents buildup and keeps everything functioning optimally. In this guide, we’ll walk you through everything you need to know about keeping your humidifier clean, fresh, and operating at peak performance.
Why Regular Cleaning Matters
Understanding the importance of humidifier maintenance helps you stay motivated to keep up with the routine. When water sits in your humidifier’s tank and filter for extended periods, it becomes a breeding ground for microorganisms. Mineral deposits from tap water accumulate on internal components, reducing efficiency and potentially causing mechanical failure.
The warm, moist environment inside your humidifier is basically an invitation for mold and bacteria to throw a party. If you continue using a contaminated humidifier, you’re essentially dispersing these particles into your breathing space. For people with allergies, asthma, or other respiratory conditions, this can be particularly problematic.
Regular cleaning also extends your humidifier’s lifespan. Components that are caked with mineral buildup work harder and wear out faster. By investing just 10-15 minutes weekly, you’re protecting your investment and ensuring your humidifier performs reliably when you need it most.
What You’ll Need
Before diving into the cleaning process, gather these supplies to make the job easier and more effective:
- White vinegar: Your secret weapon for dissolving mineral deposits and killing bacteria
- Distilled water: Prevents mineral buildup when used in the humidifier
- Soft-bristled brush or old toothbrush: Perfect for scrubbing hard-to-reach areas
- Microfiber cloths: Won’t leave lint behind like paper towels
- Hydrogen peroxide: Great for sanitizing and preventing mold
- Baking soda: A gentle abrasive for stubborn deposits
- Small bowl or container: For soaking smaller parts
- Pipe cleaner or small wire brush: For cleaning narrow openings
You might notice that vinegar appears on this list—the same approach you’d use when descaling a Keurig with vinegar works beautifully for humidifiers too. The acid naturally breaks down mineral buildup without harsh chemicals.
Daily Maintenance Steps
Consistency is key to preventing major cleaning headaches down the road. These daily tasks take just minutes but make a huge difference:
- Empty the tank: After each use, empty any remaining water from the tank. Stagnant water is a breeding ground for bacteria and mold.
- Refill with fresh water: Always use distilled water instead of tap water. This single change dramatically reduces mineral buildup.
- Wipe down the exterior: Use a damp microfiber cloth to wipe the outside of the humidifier, removing dust and moisture.
- Check the filter: Visually inspect the filter for visible mold, discoloration, or buildup. If it looks questionable, it’s time to replace it.
- Ensure proper ventilation: Keep your humidifier in a well-ventilated area to prevent excess moisture from accumulating nearby.
Think of this routine like maintaining other household appliances—just as you’d regularly empty and rinse your washing machine to prevent odors and buildup, your humidifier benefits from this simple daily care.
Deep Cleaning Process
Once weekly, give your humidifier a thorough cleaning to remove accumulated debris and mineral deposits. Here’s how to do it properly:
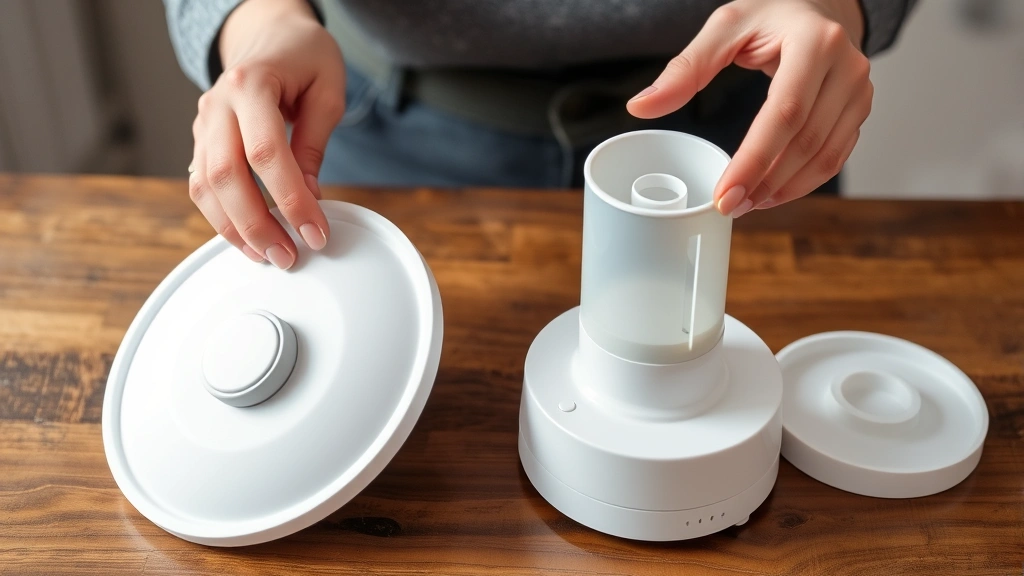
Step 1: Unplug and Disassemble
Always unplug your humidifier before cleaning. Once it’s disconnected, carefully disassemble all removable parts. Most humidifiers have a tank, filter, mist outlet, and base that separate easily. Consult your manufacturer’s instructions if you’re unsure about disassembly.
Step 2: Rinse the Tank
Hold the tank under warm running water and rinse thoroughly. If there’s visible buildup inside, fill it halfway with warm water and shake vigorously for 30 seconds. Empty and repeat if necessary.
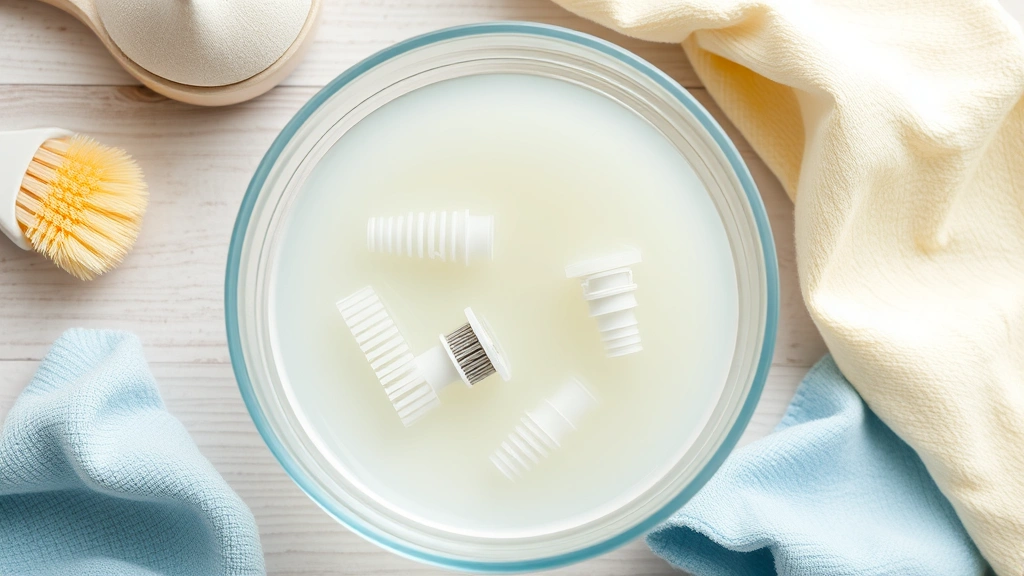
Step 3: Soak in Vinegar Solution
Create a cleaning solution using equal parts white vinegar and warm water. Submerge the tank and any removable parts in this solution for 20-30 minutes. The vinegar dissolves mineral deposits and kills bacteria naturally. This is the same principle behind cleaning a coffee maker—vinegar’s acidity is incredibly effective at breaking down mineral accumulation.
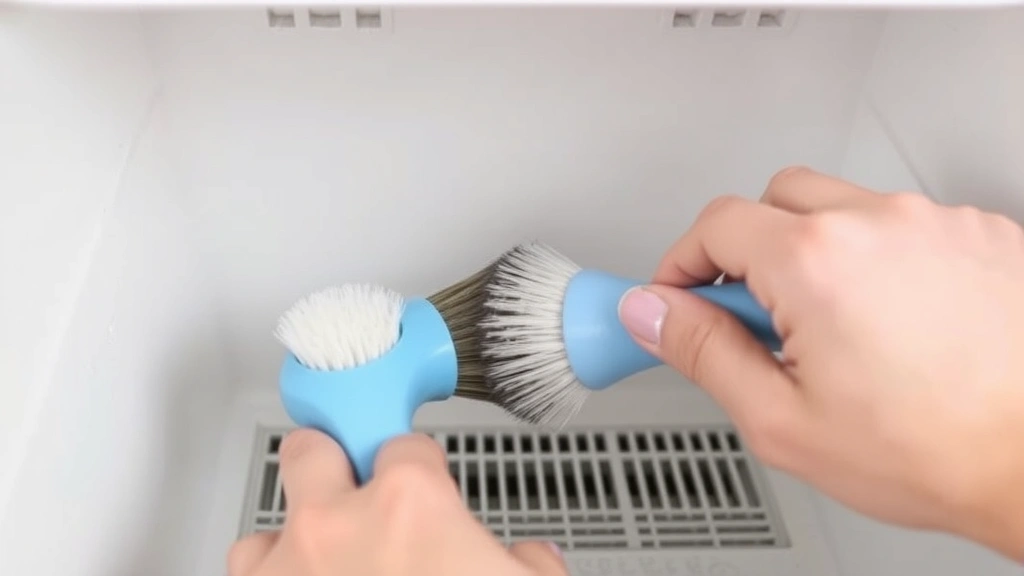
Step 4: Scrub Thoroughly
Using your soft-bristled brush or old toothbrush, scrub all interior surfaces, paying special attention to corners and crevices where deposits love to hide. For narrow openings or the mist nozzle, use a pipe cleaner to reach deep inside.
Step 5: Clean the Base
The base deserves attention too. Use a damp cloth to wipe down the exterior and interior surfaces. If mineral deposits are stubborn, create a paste with baking soda and a little water, apply it to the affected area, let it sit for 5 minutes, then scrub gently.
Step 6: Rinse Everything Thoroughly
Rinse all components multiple times under clean running water to remove every trace of vinegar and debris. Any leftover vinegar smell will dissipate quickly, but thorough rinsing ensures nothing interferes with your humidifier’s performance.
Step 7: Dry Completely
Use microfiber cloths to dry all parts thoroughly before reassembling. Moisture left behind can promote mold growth, so don’t skip this step.
Step 8: Reassemble and Test
Once everything is dry, reassemble your humidifier according to the manufacturer’s instructions. Fill the tank with distilled water, plug it in, and run it for a few minutes to ensure everything works properly before putting it back into regular use.
Dealing with Mineral Deposits
Mineral deposits are the most common humidifier complaint, especially if you live in an area with hard water. These crusty, white, or brownish deposits accumulate on heating elements, filters, and interior surfaces, reducing efficiency and potentially causing mechanical problems.
The best prevention strategy is using distilled water exclusively. Yes, it costs a bit more than tap water, but it saves you from dealing with heavy mineral buildup. If you’ve already got deposits, here’s your game plan:
Vinegar Soak Method: For heavy deposits, let parts soak in undiluted white vinegar for 30-60 minutes. The acidity will soften even stubborn buildup. This approach mirrors the technique you’d use when removing rust from metal surfaces—time and the right chemical solution do the heavy lifting.
Baking Soda Paste: For deposits that resist vinegar, make a thick paste with baking soda and water. Apply it to the affected area, let it sit for 10 minutes, then scrub with your brush. The gentle abrasive action removes deposits without damaging components.
Ultrasonic Cleaning: If your humidifier parts are small enough, consider using an ultrasonic cleaning device (available online). These devices use high-frequency vibrations to dislodge mineral deposits incredibly effectively.
Preventing Mold and Bacteria
Prevention is always better than trying to eliminate a mold problem after it develops. Here’s how to keep your humidifier mold-free:
- Use distilled water: Distilled water contains fewer minerals and impurities that feed mold growth.
- Empty daily: Never let water sit in your humidifier for more than 24 hours. Change it daily, even if you haven’t used it.
- Replace filters regularly: Follow your manufacturer’s recommendations for filter replacement. Most need changing every 30-60 days depending on usage.
- Hydrogen peroxide rinse: Once weekly, after your vinegar soak, do a final rinse with a solution of one part hydrogen peroxide to three parts water. This sanitizes surfaces and prevents microbial growth.
- Store properly: If you’re storing your humidifier during warmer months, ensure it’s completely dry first. Store it in a cool, dry place away from sunlight.
- Maintain proper humidity levels: Keep your home’s humidity between 30-50%. Higher levels actually promote mold growth elsewhere in your home, defeating the purpose of using a humidifier.
Think of mold prevention like maintaining other household systems—similar to how you’d maintain a dishwasher to prevent buildup and odors, consistent humidifier care prevents serious problems.
Troubleshooting Common Issues
White Dust Around the Room
This mineral dust means you’re using tap water. Switch to distilled water immediately. The white dust won’t harm you, but it’s a sign your humidifier is working harder than necessary. If you’ve already got dust accumulation, wipe surfaces with a damp cloth.
Humidifier Stops Working Mid-Cycle
Mineral deposits on sensors or heating elements often cause this. Disassemble and soak all parts in vinegar solution for 30-60 minutes, then scrub gently. If the problem persists after cleaning, the sensor might need replacement.
Musty or Moldy Smell
This indicates bacterial or mold growth. Immediately empty the tank, disassemble everything, and soak all parts in a hydrogen peroxide solution for 20 minutes. Scrub thoroughly, rinse multiple times, and dry completely. Run it with distilled water for the first use after cleaning.
Weak Mist Output
Clogged nozzles or mineral buildup on the mist outlet reduce output. Use a pipe cleaner to clear the nozzle opening. If that doesn’t help, soak the mist outlet component in vinegar solution for 30 minutes and scrub gently.
Water Leaking from the Base
Check that all seals and gaskets are properly seated and not cracked. If they look fine, disassemble the base and inspect for mineral deposits around the seal area. Clean thoroughly with vinegar solution. If seals are cracked or damaged, they’ll need replacement.
Filter Turning Green or Black
This is mold growth on your filter. Replace it immediately—filters aren’t meant to be cleaned and reused. Prevention is key: use distilled water, empty daily, and replace filters on schedule. If you’re replacing filters constantly, you might be using tap water or not emptying the tank regularly enough.
Frequently Asked Questions
How often should I clean my humidifier?
Daily maintenance (emptying and refilling) should happen every single day. A thorough deep clean with vinegar solution should occur weekly. If you notice visible deposits or smell, clean immediately regardless of the schedule.
Can I use tap water in my humidifier?
Technically yes, but it’s not ideal. Tap water contains minerals that accumulate quickly, creating buildup and requiring more frequent cleaning. Distilled water prevents this issue almost entirely and is worth the small additional cost.
Is white vinegar safe to use in humidifiers?
White vinegar is safe for cleaning humidifier parts, but you shouldn’t run it through the humidifier itself unless your manufacturer specifically approves it. Use vinegar for soaking and scrubbing parts, then rinse thoroughly with distilled water before reassembling.
What’s the best way to prevent mold in my humidifier?
Use distilled water, empty the tank daily, replace filters on schedule, and maintain your home’s humidity between 30-50%. These four habits eliminate the conditions mold needs to grow.
Can I put my humidifier parts in the dishwasher?
Check your manufacturer’s instructions first. Most plastic components can handle a dishwasher’s gentle cycle, but heating elements or electronic parts should never go in. When in doubt, hand wash with vinegar solution instead.
How long do humidifier filters last?
Most filters last 30-60 days depending on usage and water hardness. If you use distilled water and maintain your humidifier well, you’ll get closer to 60 days. With tap water and minimal maintenance, expect to replace them more frequently.
Why does my humidifier smell bad?
Bad smells indicate bacterial or mold growth. Immediately empty the tank and do a deep clean with vinegar and hydrogen peroxide solution. Going forward, empty the tank daily and use distilled water to prevent this issue.
Is it normal for humidifiers to have mineral buildup?
It’s common when using tap water, but not normal or necessary. Switching to distilled water essentially eliminates mineral buildup. If you’re already using distilled water and still seeing deposits, your distilled water might not be as pure as advertised—try a different brand.
Can I use bleach to clean my humidifier?
Avoid bleach. It’s too harsh and can damage plastic components and leave harmful residue. Vinegar and hydrogen peroxide are safer, more effective alternatives that won’t harm your humidifier.
Related Posts

How Long to Boil Lobster Tails: Cooking Guide

How Long to Fly from New York to London? Travel Times
