
Applying Eyeliner Perfectly: Tips from Makeup Artists
Applying Eyeliner Perfectly: Tips from Makeup Artists
Eyeliner is one of the most transformative makeup products available, capable of defining eyes, creating dimension, and completely changing your look in seconds. Whether you’re aiming for a subtle enhancement or a dramatic cat-eye, mastering eyeliner application requires practice, the right tools, and insider knowledge from professional makeup artists. This comprehensive guide will walk you through everything you need to know to apply eyeliner like a pro, from selecting the perfect product to executing flawless techniques.
Many people struggle with eyeliner application because they lack proper guidance on technique, product selection, and the subtle adjustments that make all the difference. The good news is that with the right approach and consistent practice, anyone can achieve salon-quality eyeliner application at home. We’ve gathered professional tips and tricks from experienced makeup artists to help you master this essential skill.
Choosing the Right Eyeliner Product
The foundation of perfect eyeliner application starts with selecting the right product for your needs. Different eyeliner formulas offer distinct advantages, and understanding their characteristics will help you make an informed choice. Visit our comprehensive how-to guides for similar step-by-step approaches to mastering techniques.
Liquid Eyeliner: Liquid eyeliner is prized by makeup artists for its precision and longevity. This formula provides bold, defined lines with excellent color payoff. The thin applicator brush allows for detailed work, making it ideal for creating sharp wings and intricate designs. Liquid eyeliner typically lasts longer throughout the day and resists smudging better than pencil alternatives.
Pencil Eyeliner: Pencil eyeliners offer versatility and ease of application, making them perfect for beginners. They’re forgiving if you make mistakes and allow for easy blending and smudging. Pencil liners work well for creating softer, more natural looks and are excellent for tightlining the upper lash line.
Gel Eyeliner: Gel formulas provide a middle ground between liquid and pencil options. They offer precision similar to liquid eyeliner but with easier application and blending capabilities. Gel liners are highly pigmented and water-resistant, making them an excellent choice for long-wearing looks.
Powder Eyeliner: Powder eyeliners work best for creating smoky, blended looks. They’re less precise than other formulas but excellent for creating gradient effects and soft definitions along the lash line.
[IMAGE_1]
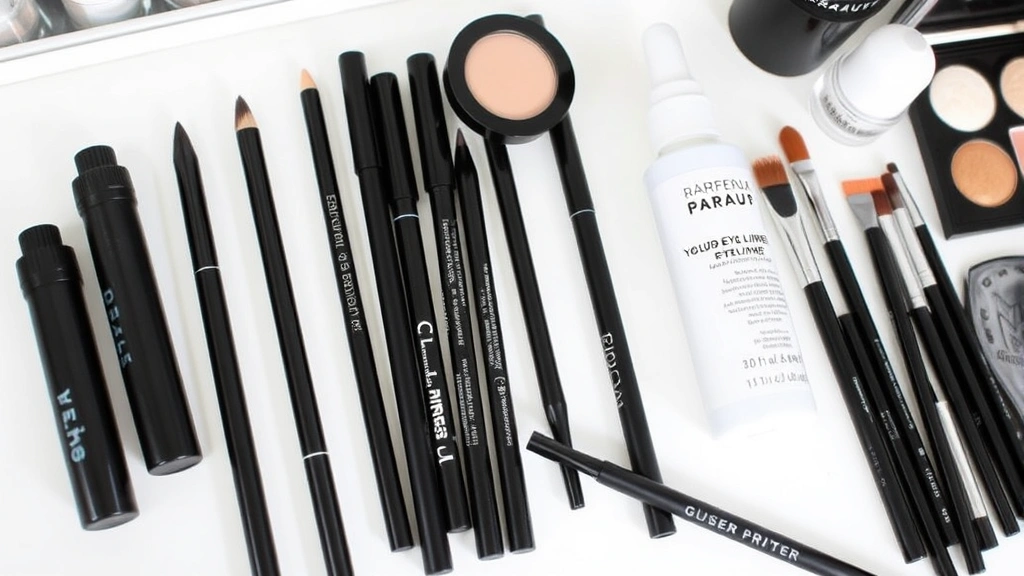
Essential Tools and Brushes
Having the right tools makes eyeliner application significantly easier and more precise. Professional makeup artists invest in quality brushes and applicators because these tools directly impact the final result. When learning detailed application techniques, using proper equipment is fundamental to success.
Eyeliner Brushes: A thin, angled brush is essential for applying liquid or gel eyeliner with precision. The angle allows you to control the line width and create sharp wings. Flat brushes work well for creating thicker lines, while ultra-thin brushes excel at detailed work like tightlining.
Smudge Brushes: Small, fluffy brushes are perfect for blending and softening eyeliner, particularly pencil or gel formulas. These brushes help create smoky effects and gradient looks.
Eyeliner Pencil Sharpeners: A quality sharpener keeps pencil eyeliners at the perfect point for precise application. Dull pencils lead to imprecise lines and product waste.
Applicators: Many liquid eyeliners come with built-in applicators, but having backup applicators or replacements ensures you always have the right tool available.
Preparing Your Eye Area
Proper preparation is crucial for achieving flawless eyeliner application that lasts throughout the day. Just as you would prepare surfaces before applying finishes, your eye area needs proper preparation for optimal results.
Cleanse and Moisturize: Start with clean skin by gently cleansing your eye area. Apply a lightweight eye cream or primer to create a smooth base. This step prevents eyeliner from clinging to dry patches and ensures even application.
Use an Eye Primer: An eye primer is invaluable for creating a smooth, long-wearing base for eyeliner. Primers fill in fine lines, create a tacky surface for better product adherence, and help prevent smudging and fading. Apply a small amount across your eyelid and let it set for a few seconds before applying eyeliner.
Set with Powder: A light dusting of translucent or skin-toned powder over the eye area helps eyeliner grip better and prevents oils from causing smudging. Use a small, fluffy brush to apply powder gently.
Ensure Proper Lighting: Good lighting is essential for precise application. Natural daylight or a well-lit makeup mirror allows you to see exactly where you’re placing your eyeliner and catch any mistakes before they become permanent.
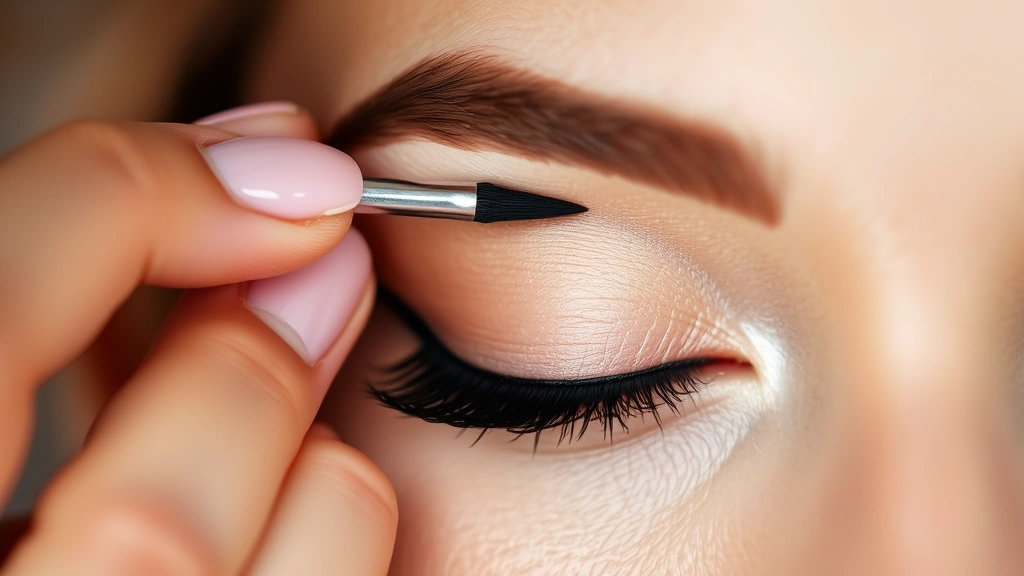
Liquid Eyeliner Techniques
Liquid eyeliner is the professional choice for creating precise, long-lasting lines. While it has a steeper learning curve than pencil eyeliner, mastering this product opens up endless possibilities for creative eye looks.
Creating a Steady Hand: Professional makeup artists use several techniques to ensure steady application. Rest your elbow on a stable surface, such as a table or countertop, to minimize hand tremors. Some artists rest their pinky finger on the cheekbone to create an anchor point, allowing for micro-adjustments without moving their entire hand.
Mapping Your Line: Before applying liquid eyeliner, many professionals map out their desired line using a pencil eyeliner. This acts as a guide and allows you to visualize the final result before committing to the liquid formula. Start with small dots along where you want the line to go, then connect them.
The Flick Technique: For a classic winged eyeliner, start at the inner corner of your eye and draw a thin line along the upper lash line. At the outer corner, flick the brush upward and outward at a 45-degree angle, creating the wing. The key is using one confident stroke rather than multiple tentative ones.
Tightlining with Liquid: Tightlining (applying eyeliner to the waterline) creates the illusion of thicker lashes. Use a thin liquid eyeliner applicator and carefully apply product between the lashes at the base of the upper lash line. This requires a steady hand and good lighting.
Correcting Mistakes: Keep a cotton swab slightly dampened with makeup remover nearby. If you make a mistake with liquid eyeliner, immediately use the swab to clean it up before the product dries completely.
Pencil Eyeliner Application
Pencil eyeliner is more forgiving than liquid formulas, making it an excellent starting point for beginners. The blendable nature of pencil eyeliner also allows for creative, softer looks that liquid eyeliner cannot easily achieve.
Sharpening Your Pencil: A sharp pencil is essential for precise application. Use a quality eyeliner sharpener designed specifically for cosmetic pencils. Sharpen before each use to maintain control and accuracy.
Choosing Your Pressure: The amount of pressure you apply significantly affects the final look. Light pressure creates soft, subtle lines perfect for everyday wear, while heavier pressure produces bolder, more defined lines. Experiment with different pressures to find what works best for your desired aesthetic.
Lining Technique: Hold your pencil at a slight angle and draw along the upper lash line in short strokes. Rather than one continuous line, multiple small strokes give you better control and a more natural appearance. Start at the inner corner and work outward.
Blending and Softening: One advantage of pencil eyeliner is its blendability. Use a small, fluffy brush to soften harsh lines and create a more diffused look. This technique is perfect for creating smoky eyes or softening a too-dark line.
Waterline Application: Pencil eyeliner works beautifully on the waterline for tightlining. Gently pull down your lower lid and apply the pencil to the waterline, working from the inner to outer corner. This technique makes eyes appear larger and lashes fuller.
Gel Eyeliner Mastery
Gel eyeliner combines the precision of liquid formulas with the blendability of pencil options, making it a favorite among professional makeup artists. Like learning complex precise adjustment techniques, gel eyeliner application improves with practice and proper method.
Selecting the Right Brush: Gel eyeliner requires a specific brush for optimal application. An angled brush works best for creating defined lines, while a thin, flat brush excels at tightlining. The brush should be firm enough to control the product but soft enough to blend.
Loading the Brush: Dip your brush into the gel pot at a slight angle, loading just enough product for a few inches of line. Too much product leads to clumpy application, while too little requires constant reloading.
Drawing the Line: Press the brush gently against your eyelid and draw along the lash line using short strokes. Gel eyeliner allows for easy correction—if you’re unhappy with a section, simply wipe it away with a clean brush or cotton swab and reapply.
Creating Definition: Gel eyeliner excels at creating defined, long-lasting lines. For extra definition, apply a second thin layer once the first coat dries slightly. This layering technique creates bold, professional-looking results.
Blending Capabilities: One major advantage of gel eyeliner is its blendability. Use a damp brush or smudge brush to soften edges and create gradient effects. This versatility makes gel eyeliner suitable for both precise and smoky looks.
Creating Specific Eyeliner Looks
Different eye shapes and occasions call for different eyeliner applications. Understanding how to adapt your technique ensures flattering results regardless of your eye shape or desired aesthetic.
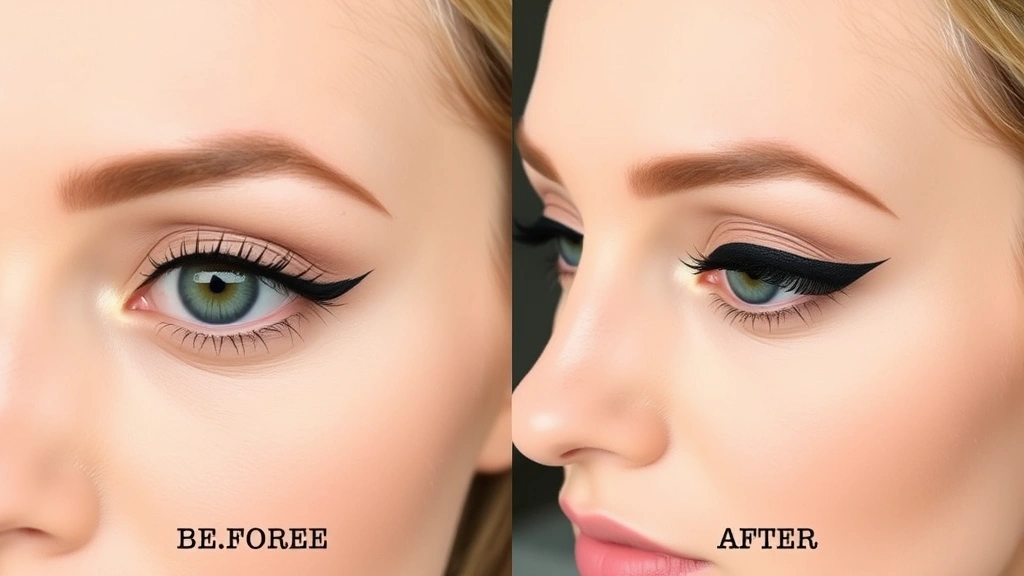
The Winged Eyeliner (Cat Eye): This classic look works beautifully on most eye shapes. Start with a thin line along the upper lash line from the inner corner to the outer corner. At the outer corner, angle your brush upward and outward at 45 degrees, creating a wing. The wing should be proportional to your eye size—larger eyes can accommodate bigger wings, while smaller eyes look better with subtle flicks.
The Smoky Eye: Create a smoky eye by applying eyeliner along the entire lash line, then smudging it with a blending brush. Apply darker eyeliner to the upper lash line and waterline, then use a fluffy brush to blend and diffuse the color. This creates a sultry, blended effect that’s perfect for evening looks.
The Graphic Liner: Bold, graphic eyeliner is trending in the beauty world. Use a liquid eyeliner to create geometric shapes, double lines, or artistic designs. This look requires steady hands and confidence but creates stunning, eye-catching results.
The Subtle Tightline: For a barely-there look that still enhances eyes, tightline the upper waterline only. This technique makes lashes appear thicker and eyes appear larger without obvious eyeliner. It’s perfect for professional settings or natural everyday looks.
The Lower Lash Line: Applying eyeliner to the lower lash line creates depth and definition. Use a pencil or gel eyeliner for easier blending. Apply along the lower lash line, then soften with a blending brush. This technique works best with neutral or skin-toned eyeliner for a subtle effect.
Common Mistakes to Avoid
Even experienced makeup users make eyeliner mistakes. Learning from common errors helps you avoid frustration and achieve better results faster. Similar to how you’d troubleshoot problems systematically, identifying and correcting eyeliner mistakes improves your technique.
Applying on Bare Skin: One of the most common mistakes is applying eyeliner directly to bare skin without primer. This causes eyeliner to smudge, fade, and wear unevenly throughout the day. Always use an eye primer as a base.
Using Dull Pencils: A dull pencil eyeliner creates imprecise lines and requires excessive pressure, which can irritate delicate eye area skin. Keep your pencil sharpened for clean, controlled application.
Drawing One Continuous Line: Attempting to draw eyeliner in one continuous stroke often results in wobbly, uneven lines. Instead, use short strokes or dots, building your line gradually. This technique gives you more control and allows for corrections.
Ignoring Eye Shape: Different eye shapes require different eyeliner placements and techniques. Hooded eyes benefit from placement slightly above the natural lash line, while monolids look striking with bold graphic liners. Understanding your eye shape helps you apply eyeliner in the most flattering way.
Overloading the Brush: Too much product on your brush leads to thick, clumpy lines and excess product that can drip or smudge. Load your brush with just enough product for a few inches of line.
Skipping the Setting Step: Even long-wearing eyeliner formulas benefit from setting. A light dusting of translucent powder or a setting spray helps eyeliner last longer and prevents smudging.
Not Accounting for Eye Movement: Remember that your eyelids move throughout the day. What looks perfect when your eyes are open might transfer to your lids when closed. Apply eyeliner slightly above the natural lash line to account for this movement.
Using the Wrong Shade: The eyeliner shade you choose significantly affects your overall look. Black eyeliner is dramatic and suits many people, but softer shades like brown, gray, or navy can be more flattering for some. Experiment with different colors to find your best match.
FAQ
What’s the best eyeliner for beginners?
Pencil eyeliner is typically the best choice for beginners because it’s forgiving, easy to blend, and allows for quick corrections. Once you’re comfortable with pencil eyeliner, you can experiment with gel and liquid formulas. Many beginners find step-by-step visual guides helpful when learning new techniques.
How do I prevent eyeliner from smudging?
Use an eye primer before applying eyeliner, set with translucent powder, and choose long-wearing formulas. Avoid touching your eyes throughout the day, and consider using a setting spray to lock everything in place. Liquid and gel eyeliners typically smudge less than pencil formulas.
Can I wear eyeliner if I have sensitive eyes?
Yes, but choose hypoallergenic formulas specifically designed for sensitive eyes. Avoid applying directly to the waterline if it causes irritation. Perform a patch test before using new products, and consult a dermatologist if you experience persistent irritation.
How do I fix a eyeliner mistake?
For liquid eyeliner mistakes, immediately wipe away with a damp cotton swab before the product dries. For pencil eyeliner, gently erase with a cotton swab or blend the mistake away. For gel eyeliner, wipe away while still wet or use a damp brush to blend.
What’s the difference between tightlining and traditional eyeliner application?
Tightlining applies eyeliner to the waterline (between the lash line and the eye), creating the illusion of thicker lashes. Traditional eyeliner sits on top of the lash line. Tightlining is more subtle and works for everyday looks, while traditional application is more visible and bold.
How long should eyeliner last?
With proper application and setting, most eyeliners last 8-12 hours. Liquid formulas typically last longest, followed by gel, then pencil. Waterproof formulas resist moisture and heat better than regular formulas.
Should I apply eyeliner before or after eyeshadow?
Apply eyeshadow before eyeliner. This prevents eyeshadow from disturbing your eyeliner line and allows you to use eyeliner to define and enhance your eyeshadow look. If using eyeshadow primer, apply it before eyeshadow but after your eye primer.
Related Posts

Superscript in Google Docs: Expert Tips

Strikethrough in Excel: Easy Steps for Beginners
