

Add Music to Google Slides: Expert Tips
Add Music to Google Slides: Expert Tips
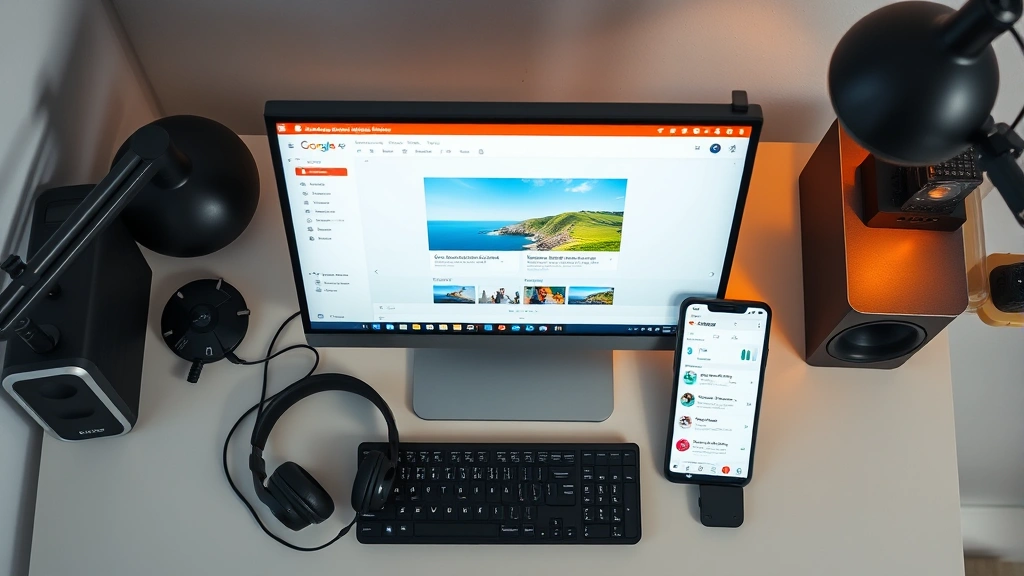
Google Slides has become the go-to presentation tool for professionals, educators, and students worldwide. While most people focus on adding text, images, and transitions, many overlook one powerful feature: audio. Adding music to your Google Slides presentation can transform a standard slideshow into an engaging multimedia experience that captivates your audience.
Whether you’re creating a business pitch, educational presentation, or creative project, background music sets the mood and keeps viewers engaged. This comprehensive guide walks you through every method to add music to Google Slides, from uploading audio files to embedding YouTube videos with sound. You’ll discover expert tips, troubleshooting solutions, and best practices that professionals use to create polished presentations.
Understanding Audio Options in Google Slides
Google Slides doesn’t have a built-in “Insert Audio” button like some desktop presentation software. However, this doesn’t mean you can’t add music—it simply means you need to understand the available workarounds. The platform offers several legitimate methods, each with unique advantages depending on your needs and technical comfort level.
The primary methods include uploading audio through Google Drive, embedding YouTube videos that contain music, and using third-party tools that integrate with Google Slides. Understanding these options helps you choose the best approach for your specific presentation. Some methods work better for background music throughout your entire presentation, while others work best for music on individual slides.
When planning your audio strategy, consider whether you want music playing continuously throughout your presentation, music tied to specific slides, or sound effects accompanying transitions. Your choice will determine which method you implement. Additionally, think about your audience’s technical capabilities and the presentation environment—will they be viewing this online, downloading it, or watching it in a specific location?
How to Upload Audio Files Directly
The most straightforward method involves uploading your audio file and embedding it within your presentation. While Google Slides doesn’t have a native audio insertion tool, you can work around this limitation using Google Drive integration.
Step 1: Prepare Your Audio File
First, ensure your audio file is in a compatible format. Google Slides works best with MP3, WAV, and OGG files. If you have audio in other formats, consider converting it using free tools like Audacity or online converters. Keep your file size reasonable—large audio files can slow down your presentation.
Step 2: Upload to Google Drive
Open Google Drive and upload your audio file directly. Click the “+ New” button, select “File upload,” and choose your audio file from your computer. Wait for the upload to complete, then right-click the file and select “Open with” followed by “Google Drive.” This allows you to access the file’s sharing link.
Step 3: Get the File’s Shareable Link
Right-click your uploaded audio file and select “Get link.” Copy this link—you’ll need it for the next step. Ensure the file is set to “Viewer” permission so anyone with the link can access it.
Step 4: Create a Text Box or Shape as Audio Container
In your Google Slides presentation, navigate to the slide where you want the audio. Insert a text box or shape that will serve as your audio player button. You might use a music note emoji or create a button labeled “Play Music.” This visual element helps viewers understand that audio is available.
Step 5: Link to Your Audio File
Select your text box or shape, then click “Insert” from the menu and select “Link.” Paste the shareable link to your audio file. When viewers click this element during the presentation, it will open your audio file in a new window where they can play it.
This method works well for presentations where you want viewers to control when audio plays. It’s particularly useful for adding interactive elements to your slides, similar to how you might add clickable signatures or other interactive components to documents.
Embedding Music from YouTube
YouTube offers an extensive library of royalty-free music and background tracks perfect for presentations. This method is excellent because it provides continuous playback without file uploads.
Finding Royalty-Free Music on YouTube
YouTube’s Audio Library contains thousands of free music tracks and sound effects you can use. Search for “YouTube Audio Library” and sign into your YouTube account. Browse by genre, mood, or instrument to find the perfect track for your presentation. Download the audio file directly or note the video ID.
Embedding a YouTube Video with Audio
If you find a YouTube video containing your desired music, you can embed it directly into your slide. Click “Insert” in your Google Slides menu, then select “Video.” Search for the YouTube video or paste its URL. The video will embed into your slide, and you can resize it as needed.
For audio-only presentations, you can make the video player very small or position it off to the side. When you play the slideshow, the embedded video will play its audio. This method ensures reliable playback across different devices and locations.
Creating a Dedicated Audio Slide
Many presenters create a single slide dedicated to audio with an embedded YouTube video player. This slide might appear at the beginning or end of your presentation. You can customize the video player size and position to fit your design aesthetic.
Using Google Drive to Store Audio
Google Drive serves as an excellent central hub for managing presentation audio. By storing all your audio files in Drive, you maintain version control and easy access across devices.
Organizing Your Audio Library
Create a dedicated folder in Google Drive specifically for presentation audio files. Organize by project, presentation type, or theme. This system makes it easy to locate the right audio when creating new presentations. You might create subfolders for background music, transition sounds, and special effects.
When you store files in Google Drive, you can access them from any device where you’re logged into your Google account. This flexibility is invaluable for presenters who work across multiple computers or devices.
Sharing Audio Files Securely
If you’re collaborating with others on your presentation, Google Drive’s sharing features allow you to control who can access your audio files. You can share links with specific people, set expiration dates, or create public links. This ensures your audio remains secure while allowing collaborators to access what they need.
For presentations where multiple people need to contribute audio, create a shared Google Drive folder. All contributors can upload their audio files, and you can manage everything from one central location. This approach works particularly well for team presentations or educational projects.

Adding Sound Effects and Transitions
Beyond background music, Google Slides allows you to add sound effects to slide transitions, creating a more polished presentation experience.
Built-in Transition Sounds
Google Slides includes several built-in sound effects for transitions. Select a slide, click “Slide” in the menu, then choose “Slide transition.” In the transition panel, you’ll find options to add sound. While the selection is limited, these built-in options require no additional setup.
Custom Transition Sounds
For more control, use third-party add-ons available through the Google Workspace Marketplace. Search for audio or sound effect add-ons that integrate with Google Slides. These tools expand your options significantly and allow you to customize the audio experience more thoroughly.
When adding transition sounds, use them sparingly. Too many sound effects can become distracting and unprofessional. Reserve sound effects for important transitions or key moments in your presentation.
Timing Audio with Animations
Google Slides allows you to animate objects on your slides. You can synchronize these animations with audio playback for dramatic effect. For instance, animate text to appear while background music plays, or time image reveals to specific moments in an audio track.
Best Practices for Presentation Audio
Volume Control and Balance
Audio should enhance your presentation without overpowering your voice or the content. Set background music at a volume level that sits behind your spoken words. Test your audio levels before presenting to ensure proper balance. If presenting to a large audience, use the venue’s sound system and do a sound check beforehand.
Choosing Appropriate Music
Select music that matches your presentation’s tone and content. Corporate presentations benefit from subtle, professional background music, while creative presentations might use more dynamic tracks. Educational presentations should use music that supports learning without creating cognitive overload.
Always ensure you have the right to use any music in your presentation. Use royalty-free music from platforms like YouTube Audio Library, Freepik, or Pexels to avoid copyright issues.
Testing Audio Before Presentation
Always test your audio setup before presenting to an audience. Play through your entire presentation and verify that all audio files play correctly, volumes are appropriate, and timing is accurate. Check audio on the device and location where you’ll present—sometimes audio that works on your computer doesn’t work on a projector or in a large room.
Consider your audience’s experience. Will they be watching on individual devices or a shared screen? Are they in a quiet room or a noisy environment? These factors influence how you implement audio in your presentation.
Accessibility Considerations
Remember that some audience members may have hearing difficulties. Always include visual elements that convey the information your audio provides. If music accompanies important content, also display that content in text or images. This approach makes your presentation inclusive and ensures everyone can access the information regardless of audio capabilities.
Troubleshooting Common Audio Issues
Audio Not Playing During Presentation
If your audio doesn’t play when you present, check your internet connection first. Many audio methods require active internet access. Verify that your shared links are set to viewable by anyone with the link. If using embedded YouTube videos, ensure they’re not region-restricted or age-gated.
Test your audio on the actual device and location where you’ll present. Sometimes audio works on your personal computer but fails on a projector or different network. Having a backup audio file saved locally can save your presentation if internet connectivity fails.
Audio Quality Issues
Poor audio quality often stems from compressed files or low bitrate audio. When uploading audio to Google Drive, ensure you’re using high-quality source files. MP3 files encoded at 192 kbps or higher provide good quality for presentations. Avoid heavily compressed audio that sounds tinny or distorted.
If audio quality degrades during playback, your internet connection might be the issue. Consider downloading files locally or using audio hosted on reliable servers like YouTube.
Syncing Audio with Slides
When using embedded videos or linked audio files, syncing with slide transitions can be challenging. Plan your slide transitions to align with natural breaks in your audio. Alternatively, focus on adding audio to individual slides rather than creating continuous playback across multiple slides.
For more complex presentations involving multiple audio elements, consider using presentation software specifically designed for audio integration, or work with Google Slides’ animation features to create timed sequences.
Compatibility Issues Across Devices
Different devices and browsers handle audio differently. What plays perfectly on your computer might not work on a mobile device or older browser. Test your presentation on multiple devices before presenting to ensure compatibility.
If your audience will be downloading and viewing your presentation offline, embedded YouTube videos won’t work. In these cases, use the Google Drive upload method to ensure audio remains accessible even without internet connection.
For presentations distributed to multiple people, provide clear instructions about audio playback. Some viewers might need to enable audio permissions or adjust their device settings to hear your presentation properly.
FAQ
Can I add music that plays throughout my entire Google Slides presentation?
Yes, you can use embedded YouTube videos or Google Drive-hosted audio files to create continuous background music. Create a single slide with an embedded video player set to autoplay, or use multiple linked audio files across slides. The challenge is maintaining seamless playback across transitions, which works better when you embed a YouTube video that plays for your presentation’s duration.
What audio formats does Google Slides support?
Google Slides itself doesn’t directly support audio insertion, but the methods described in this guide work with MP3, WAV, OGG, and other common audio formats. When uploading to Google Drive, use formats compatible with your browser’s media player. MP3 is the most universally supported format.
Is there a file size limit for audio in Google Slides?
Google Drive allows files up to 5 TB, so file size isn’t typically a concern for audio. However, larger files take longer to upload and may affect presentation performance. Keep audio files under 100 MB for optimal performance, and compress audio if possible without losing quality.
Can I add music to Google Slides on a mobile device?
Yes, you can add music using the methods described in this guide from mobile devices. The process is similar, though some features may be slightly different on mobile browsers. Test your presentation thoroughly on mobile to ensure audio works properly.
How do I ensure my music is royalty-free and legally usable?
Use music from platforms specifically offering royalty-free content, such as YouTube Audio Library, Creative Commons licensed music, or subscription services like Epidemic Sound. Always check the license terms before using any music in your presentation. If in doubt, contact the rights holder for permission.
What should I do if my audience can’t hear the audio?
First, verify your device’s volume is turned up and audio output is working. Check that your internet connection is stable if using streaming audio. Ensure shared links are set to viewable by anyone. If presenting to a large group, use the venue’s sound system. Have a backup audio file saved locally in case streaming fails.
Can I add music to specific slides only?
Yes, you can add linked audio files or embedded videos to individual slides. This approach gives you more control over when audio plays. Each slide can have different audio, or you can have audio on just a few key slides. This method works better than trying to create continuous audio across multiple slides.
How do I remove audio from my Google Slides presentation?
Simply delete the embedded video player, remove the link from your text box or shape, or delete the slide containing audio. If you embedded a YouTube video, click on it and press Delete. If you linked to audio through a text box, remove the link by selecting the text and clicking the link icon in the toolbar.
Related Posts

Superscript in Google Docs: Expert Tips

Strikethrough in Excel: Easy Steps for Beginners
