
Cabin Air Filter Change? Expert Advice Inside!
Cabin Air Filter Change? Expert Advice Inside!
Your vehicle’s cabin air filter is one of the most overlooked maintenance items, yet it plays a critical role in keeping the air you breathe while driving clean and fresh. Whether you’re commuting through dusty highways or navigating urban pollution, understanding how often to change cabin air filter can save you money and protect your family’s health. This comprehensive guide will walk you through everything you need to know about cabin air filter maintenance, replacement intervals, and professional best practices.
Many car owners don’t realize that their vehicle’s cabin air filter accumulates dust, pollen, and contaminants just like the air filter in your home’s HVAC system. Neglecting this component can lead to reduced air conditioning efficiency, unpleasant odors, and compromised air quality inside your car. By learning the proper maintenance schedule and replacement techniques, you’ll ensure optimal performance and comfort for every drive.
Understanding Your Cabin Air Filter
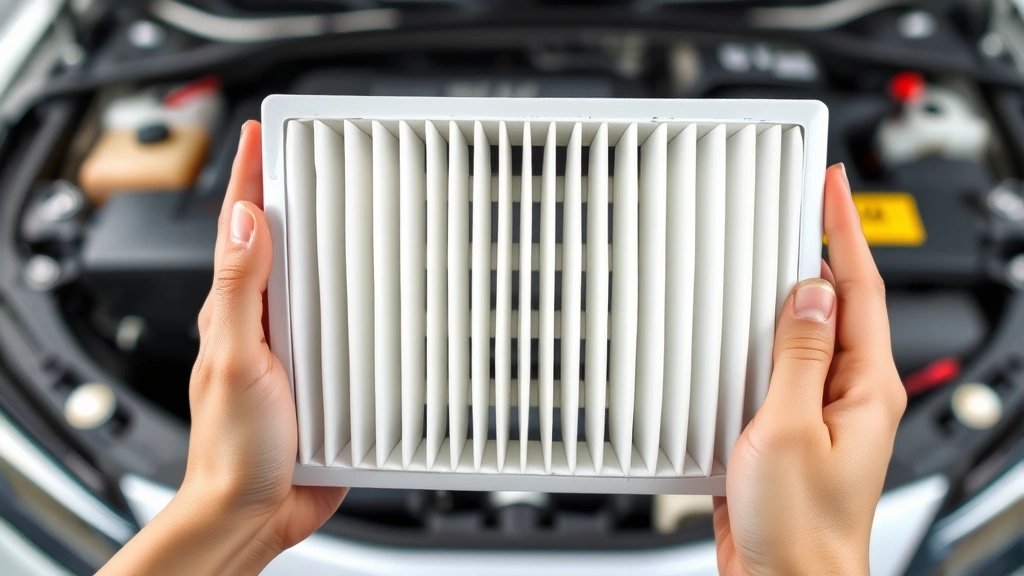
The cabin air filter is a component designed to purify the air that enters your vehicle’s interior through the heating, ventilation, and air conditioning (HVAC) system. Located behind your dashboard or in the engine compartment, this filter traps dust, pollen, mold spores, and other airborne particles before they circulate through your car’s cabin. Think of it as a protective barrier between you and outdoor pollutants.
Modern cabin air filters typically use pleated media made from synthetic fibers or paper, similar to home air filters used in regular home maintenance. The pleated design increases surface area, allowing the filter to capture more particles while maintaining adequate airflow. Some premium filters include activated carbon layers that neutralize odors and filter out harmful gases like nitrogen dioxide and ozone.
The effectiveness of your cabin air filter depends on several factors: the environment where you drive, your vehicle’s design, and how regularly you replace the filter. Urban drivers, those living in dusty climates, or anyone with allergies should pay special attention to their filter’s condition and replacement schedule.
Recommended Replacement Schedule
The standard recommendation for cabin air filter replacement is every 12 to 15 months or between 12,000 to 15,000 miles, whichever comes first. However, this baseline assumes normal driving conditions. Your specific replacement interval may vary significantly based on your driving environment and personal factors.
Normal Driving Conditions: If you primarily drive in suburban or rural areas with minimal traffic and low pollution, you can typically extend your replacement interval to the upper end of the manufacturer’s recommendation—around 15 months or 15,000 miles.
Severe Driving Conditions: The EPA defines severe driving as frequent exposure to dusty roads, heavy traffic in polluted areas, or driving in regions with high pollen counts. If this describes your situation, consider replacing your cabin air filter every 6 to 12 months or 6,000 to 12,000 miles. Drivers in desert regions, agricultural areas, or major metropolitan areas fall into this category.
Always consult your vehicle’s owner manual, as different manufacturers may have varying recommendations. Some luxury brands suggest more frequent replacements, while others may recommend longer intervals. Check This Old House’s maintenance resources for general home upkeep parallels, though vehicle-specific guidance should take priority.
If you frequently drive with windows down or frequently encounter smoke, construction dust, or pollen-heavy environments, you should inspect your filter more often. Many mechanics recommend checking your filter every oil change to assess its condition visually.
Signs Your Filter Needs Replacement
Beyond following a strict schedule, your cabin air filter will give you clear signs when it needs attention. Learning to recognize these indicators ensures you replace the filter before air quality significantly deteriorates.
Reduced Airflow: The most common sign is noticeably weaker airflow from your vents, even when the fan is set to maximum. A clogged filter restricts air movement, making it harder to cool or heat your cabin effectively. This can be particularly frustrating during summer or winter months when climate control is essential.
Unpleasant Odors: A musty or stale smell coming from your air vents indicates a filter saturated with dust, pollen, and potentially mold growth. These odors become more pronounced when you first turn on the AC after extended periods of non-use. Similar to how you’d address unwanted odors in your home, a fresh cabin air filter eliminates vehicular air quality issues.
Allergic Reactions: If you or your passengers experience increased sneezing, itchy eyes, or other allergy symptoms while driving, your cabin air filter may be failing to adequately filter pollen and allergens. This is especially noticeable during spring and fall when pollen counts are highest.
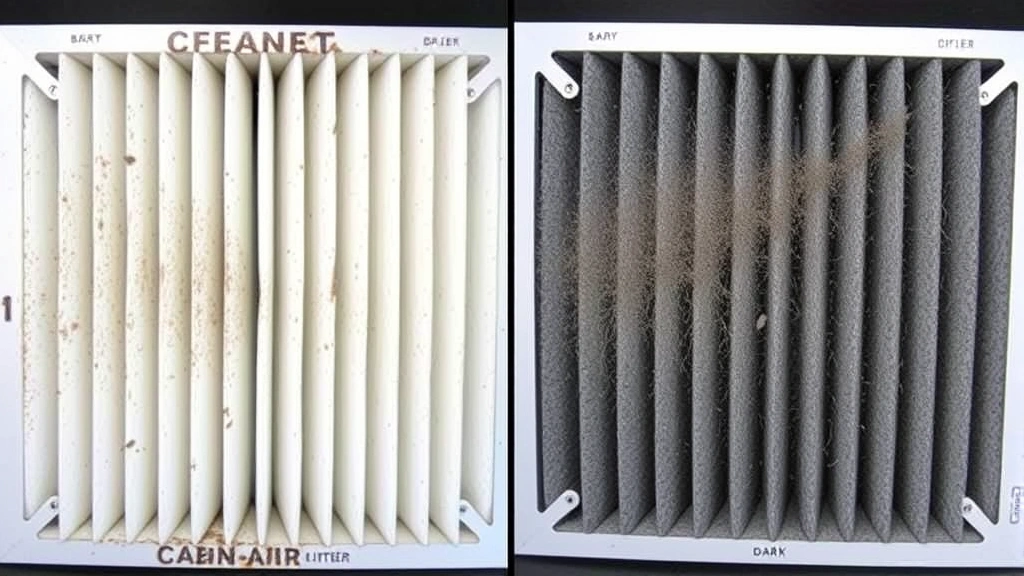
Visual Inspection: If you can access your filter, look for visible dirt accumulation, discoloration, or debris. A filter that appears gray or dark brown instead of white or light gray definitely needs replacement. Some filters may show clumping or compacted debris, indicating they’ve reached their capacity.
AC System Noise: A struggling HVAC system may produce unusual sounds as it works harder to push air through a clogged filter. This increased strain can also reduce the lifespan of your blower motor and compressor.
Step-by-Step Replacement Guide
Replacing your cabin air filter is a straightforward DIY task that typically takes 15 to 30 minutes, depending on your vehicle’s design. Follow these steps for successful replacement:
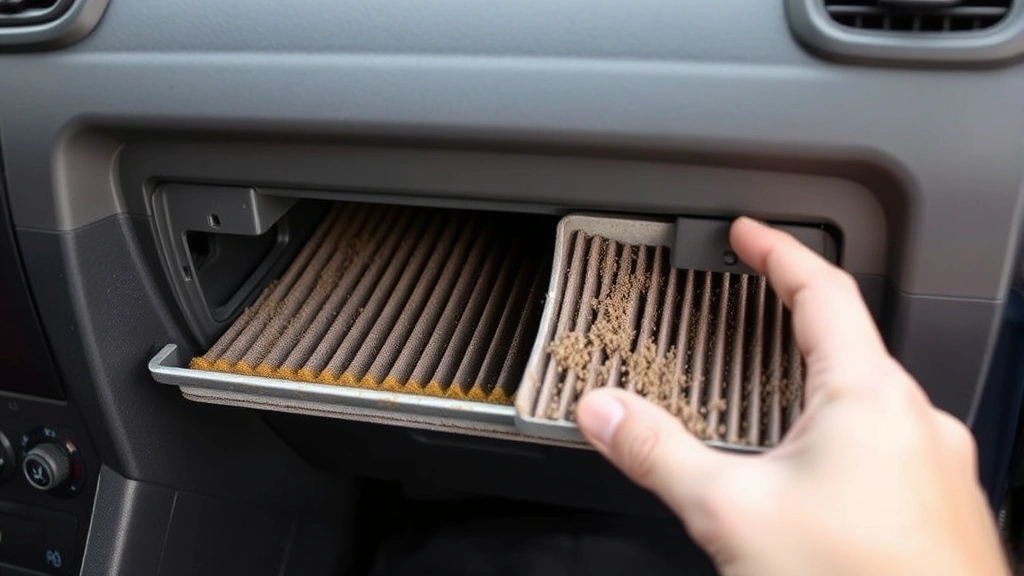
Step 1: Locate Your Filter Consult your owner’s manual to find your cabin air filter’s location. Most vehicles have the filter behind the glove compartment, under the hood, or beneath the windshield cowl. Some luxury vehicles may have multiple filters, so verify your specific model.
Step 2: Gather Your Materials You’ll need the replacement filter (ensure you have the correct part number), potentially a screwdriver or socket set, and a vacuum cleaner. Wearing gloves is recommended to keep dust off your hands during removal.
Step 3: Access the Filter Housing If your filter is behind the glove compartment, open it fully and locate the release tabs or screws. Some glove boxes have a hinge mechanism that allows full removal; others simply require pushing tabs to lower the compartment. For underhood filters, remove any plastic covers or panels blocking access.
Step 4: Remove the Old Filter Carefully slide or lift the old filter out of its housing. Note the airflow direction—indicated by arrows on the filter frame—so you install the new filter correctly. The dirty filter may release dust, so work slowly to minimize particles entering the cabin.
Step 5: Clean the Housing Use a vacuum with a brush attachment to clean the filter housing, removing accumulated dust and debris. This prevents contamination of your new filter and ensures optimal airflow.
Step 6: Install the New Filter Position the new filter with the airflow arrows pointing in the correct direction (typically toward the cabin interior). Slide it firmly into place until it seats completely in the housing. You should feel slight resistance as it settles into position.
Step 7: Reassemble Components Replace the glove compartment, plastic covers, or panels in reverse order. Ensure everything clicks securely into place and there are no loose components.
Step 8: Test Your System Start your vehicle and run the AC and heat to verify proper airflow from all vents. You should notice improved air circulation and fresher-smelling air immediately.
Tools and Materials You’ll Need
Unlike many automotive repairs, cabin air filter replacement requires minimal tools and materials. This accessibility makes it an ideal first DIY maintenance task for vehicle owners of all experience levels.
- Replacement Cabin Air Filter: Obtain the correct filter for your vehicle’s year, make, and model. Check your owner’s manual or use online parts finders to ensure compatibility. OEM filters are reliable, but quality aftermarket options are often more affordable.
- Screwdriver or Socket Set: Depending on your vehicle, you may need a Phillips or flathead screwdriver, or a socket wrench to remove fasteners. Keep a small set handy for various sizes.
- Work Gloves: Latex or cotton gloves protect your hands from dust and debris. This is especially important if you have allergies or sensitive skin.
- Flashlight or Headlamp: Better visibility makes accessing the filter housing easier and helps you confirm proper installation. Many filter locations are poorly lit.
- Vacuum Cleaner: A handheld or shop vacuum with brush attachment cleans the housing thoroughly. This step is optional but highly recommended for optimal performance.
- Owner’s Manual: Your vehicle’s manual provides specific instructions and safety information. It’s invaluable for locating your filter and understanding your vehicle’s unique configuration.
- Drop Cloth or Newspapers: Protect your vehicle’s interior by laying down protection where you’ll work, especially if the filter is behind the glove box.
Professional vs DIY Installation
While cabin air filter replacement is one of the most accessible DIY automotive tasks, some vehicle owners prefer professional installation. Understanding the pros and cons of each approach helps you make the best decision for your situation.
DIY Replacement Advantages: Replacing your cabin air filter yourself saves money on labor costs, typically $50 to $100 at service centers. You control the timeline and can replace the filter whenever convenient. The process helps you become more familiar with your vehicle’s systems, similar to learning basic home maintenance skills. Plus, you ensure a quality filter is installed and can immediately verify the results.
Professional Installation Advantages: Mechanics have experience with various vehicle models and can quickly complete the replacement, even on unusual configurations. They can inspect related components like your blower motor and HVAC system for potential issues. Some service centers include filter replacement as part of routine maintenance packages.
When to Choose Professional Service: If your vehicle has unusual filter locations, multiple filters, or complex access requirements, professional installation might be worth the cost. Luxury vehicles or those with integrated climate control systems may benefit from professional expertise. If you’re uncomfortable working on your vehicle or lack the necessary tools, a mechanic’s experience ensures proper installation.
Finding a Reputable Service Provider: Ask friends and family for recommendations, check online reviews on Google and Yelp, and verify that any service center is certified and insured. Compare quotes from multiple locations, as prices vary significantly. Look for shops that offer warranties on their work.
Cost Considerations
Understanding the full cost picture helps you budget for cabin air filter maintenance and make informed decisions about DIY versus professional replacement.
Filter Cost: Replacement cabin air filters typically range from $15 to $50, depending on quality and your vehicle type. OEM filters from dealerships cost more but guarantee compatibility. Quality aftermarket filters from reputable brands offer excellent performance at lower prices. Budget-friendly options are available but may have shorter lifespans and lower filtration efficiency.
Labor Costs: Professional installation typically costs $50 to $100, though luxury dealerships may charge more. Some independent shops offer competitive rates, so shopping around is worthwhile. Many service centers include filter replacement during routine maintenance visits, sometimes at no additional cost.
Long-Term Savings: Regular cabin air filter replacement prevents problems that could cost significantly more to repair. A clogged filter forces your blower motor to work harder, reducing its lifespan and potentially requiring expensive replacement. Improved air quality also benefits your health and comfort, making the investment worthwhile.
Preventive Maintenance Value: Replacing your filter on schedule costs only $30 to $150 annually, depending on driving conditions and whether you do it yourself. This minimal expense prevents larger issues and maintains your vehicle’s resale value. A well-maintained cabin air system is a selling point when you eventually trade or sell your vehicle.
Consider purchasing filters in bulk if you have multiple vehicles or plan to keep your car long-term. Some retailers offer discounts on multiple filter purchases. Online retailers like Amazon often have competitive pricing and convenient delivery options.
FAQ
How do I know if my cabin air filter is dirty?
Signs of a dirty filter include reduced airflow from vents, musty odors, increased allergy symptoms, and visible dust accumulation when you inspect the filter. You can also check your owner’s manual for inspection recommendations or schedule a professional inspection during routine maintenance.
Can I clean and reuse my cabin air filter?
While some people attempt to clean filters with compressed air or vacuum cleaners, most manufacturers recommend replacement rather than cleaning. Pleated filters can be damaged during cleaning, reducing their effectiveness. For the cost savings and improved air quality, replacement is the better option.
What happens if I don’t replace my cabin air filter?
Neglecting replacement leads to reduced airflow, unpleasant odors, increased allergy symptoms, and reduced HVAC system efficiency. Over time, a severely clogged filter forces your blower motor to work harder, potentially causing premature failure and expensive repairs. Air quality inside your vehicle suffers significantly.
Are expensive cabin air filters worth the cost?
Premium filters with activated carbon layers offer superior odor elimination and gas filtration compared to basic filters. If you live in a polluted area, have allergies, or drive frequently in dusty conditions, the improved air quality justifies the extra expense. For normal driving conditions, quality aftermarket filters provide excellent value.
Can I replace my cabin air filter in winter or bad weather?
Yes, you can replace your filter in any weather. If you’re working in cold or wet conditions, protect your work area and take extra care to prevent moisture from entering the filter housing. Ensure your vehicle is parked safely and that you have adequate lighting for the task.
How often should I check my cabin air filter?
Check your filter visually every 6 months or during routine maintenance visits like oil changes. In severe driving conditions, inspect it more frequently—every 3 months. This helps you catch a clogged filter before it significantly impacts air quality and system efficiency.
Do all vehicles have cabin air filters?
Most modern vehicles manufactured after 2000 have cabin air filters, but not all. Older vehicles, some basic economy models, and certain specialty vehicles may lack them. Check your owner’s manual to confirm whether your vehicle has a cabin air filter and its location.
Related Posts

Superscript in Google Docs: Expert Tips

Strikethrough in Excel: Easy Steps for Beginners
