
How to Build a Shed? Expert Tips & Tricks
How to Build a Shed: Expert Tips & Tricks
Building a shed is one of the most rewarding DIY projects you can tackle. Whether you need extra storage space for tools, garden equipment, or seasonal items, a well-constructed shed adds both functionality and value to your property. This comprehensive guide walks you through every step of the shed-building process, from initial planning and material selection to foundation preparation and roof installation.
A shed is more than just a storage structure—it’s a personal project that teaches you valuable construction skills applicable to many other home improvement endeavors. With proper planning, the right tools, and attention to detail, you can build a sturdy, attractive shed that will serve your needs for decades. Whether you’re a first-time builder or have completed other home improvement projects, this guide provides expert tips and practical advice to ensure your success.
Planning Your Shed Project
Before you drive a single nail, proper planning is essential. Start by determining the purpose of your shed and how much space you’ll need. Will it house garden tools, bicycles, lawn equipment, or a combination of items? Measure your storage needs carefully to avoid building something too small. Most homeowners find that 8×10 or 10×12 feet provides adequate space without being overwhelming.
Next, check local building codes and zoning regulations. Many municipalities require permits for structures over a certain size, typically 120-200 square feet. Contact your local building department to understand setback requirements—how far the shed must be from property lines and existing structures. This step prevents costly mistakes and legal issues down the road. You should also verify that your property has no underground utilities before digging.
Create a detailed design plan with measurements and materials lists. Sketch your shed layout, including door placement, window locations, and interior organization. Consider climate conditions in your area—if you live in a snowy region, plan for a steeper roof pitch to shed snow effectively. In windy areas, ensure your design can withstand local wind speeds. This planning phase typically takes a few hours but saves significant time and money during construction.
Review our comprehensive how-to guides and tips for additional planning resources and detailed project walkthroughs that complement your shed-building journey.
Choosing Materials and Tools
Material selection significantly impacts your shed’s durability, appearance, and maintenance requirements. Wood sheds offer classic aesthetics and are relatively easy to build, but require regular maintenance. Pressure-treated lumber resists rot and insects, making it ideal for framing. For siding, consider cedar or pine for natural beauty, or vinyl for low maintenance. Metal sheds are durable and weather-resistant but require proper ventilation to prevent condensation.
Essential materials include:
- Lumber: 2×6 or 2×8 for beams, 2×4 for framing, 1×8 or 1×10 for siding
- Roofing: Asphalt shingles, metal panels, or corrugated plastic
- Hardware: Galvanized nails, screws, bolts, hinges, and handles
- Foundation materials: Concrete, gravel, or pressure-treated skids
- Fasteners: Use exterior-grade, rust-resistant options
Your tool collection should include basic carpentry tools: a circular saw, drill-driver, hammer, tape measure, level, square, and sawhorses. Consider renting specialized equipment like a pneumatic nailer or power miter saw if you don’t own them. Quality tools make the work easier and produce better results. Invest in a good level—it’s crucial for ensuring your shed is plumb and square.
For detailed information on educational requirements and structured learning, you might explore how many credits you need to graduate college, which teaches planning and organization skills applicable to large projects.
Preparing the Foundation
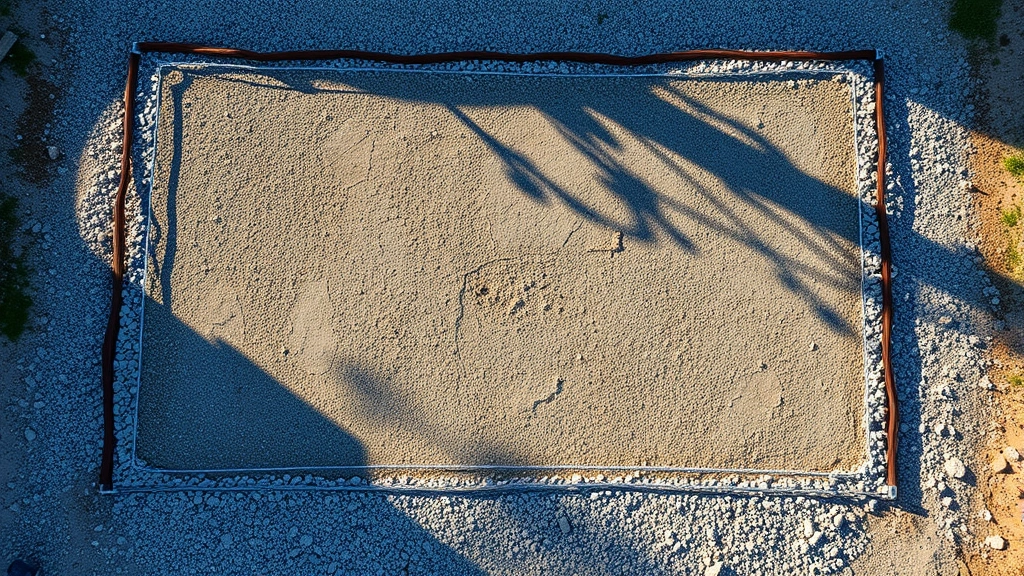
A solid foundation prevents settling, water damage, and structural problems. The three main options are concrete slabs, gravel pads, and pressure-treated skids. For most DIY builders, a gravel foundation provides an excellent balance of simplicity and functionality. Excavate the area to 4-6 inches deep, level it carefully, and fill it with compacted gravel.
If building on a concrete slab, ensure it’s level and properly drained. Slope the ground slightly away from the shed to direct water runoff. For skid foundations, use pressure-treated 4×6 or 4×8 beams placed on concrete blocks or piers. This elevates the shed floor, improving ventilation and preventing wood rot from ground moisture contact.
Measure diagonals to ensure your foundation is square. For an 8×10 shed, both diagonals should measure 12.8 feet. Adjust corner positions until measurements match. This seemingly minor detail prevents twisted frames and alignment problems throughout construction. Mark the foundation perimeter with string lines to guide frame installation.
Building the Frame Structure
Begin by installing the base frame—the bottom horizontal members that rest on your foundation. Use pressure-treated lumber to resist moisture. Connect corners with galvanized bolts or exterior-grade screws, ensuring each joint is square and level. The base frame must be absolutely level; use shims under skids or beams to correct any high spots.
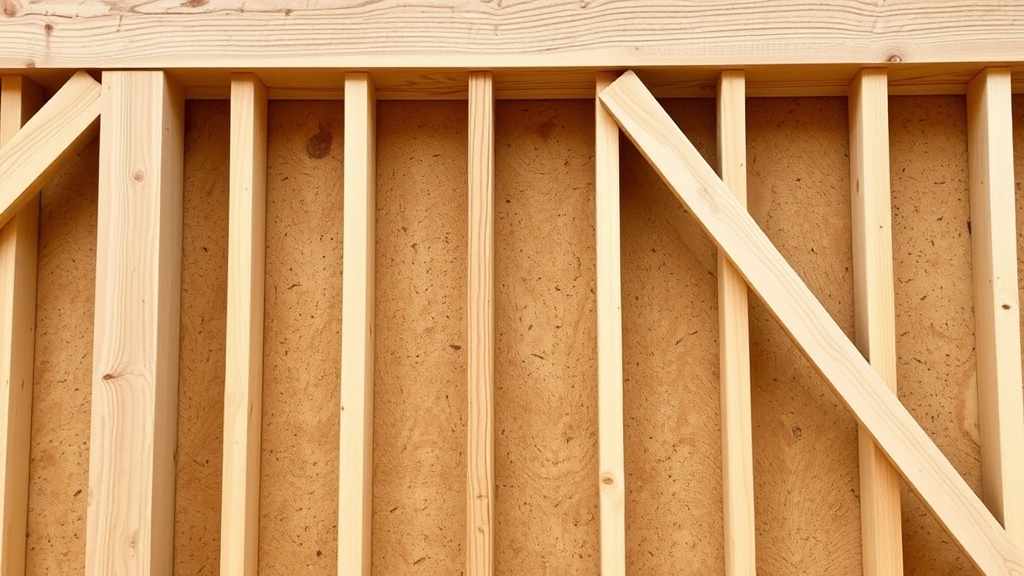
Next, install vertical wall studs spaced 16 inches on center. This spacing provides adequate support while using standard materials efficiently. Attach studs to the base frame with bolts or lag screws. Use temporary diagonal bracing to keep walls plumb while you work. Install a double top plate, which ties walls together and provides a solid surface for roof attachment.
For door and window openings, frame them with proper headers. A header must span the opening width and support the weight above. For openings less than 4 feet, a single 2×8 suffices; wider openings require doubled 2x8s or 2x10s. Install jack studs (vertical supports) on each side of headers to transfer loads to the base frame.
Key framing tips:
- Check plumb frequently with a 4-foot level
- Use diagonal bracing temporarily until sheathing is installed
- Double-check all measurements before cutting
- Ensure all fasteners are properly driven and seated
- Install blocking between studs for future attachment points
This Old House provides excellent shed building resources and video tutorials that demonstrate proper framing techniques in detail.
Installing Walls and Roofing
Once the frame is square and plumb, install wall sheathing. Exterior plywood or oriented-strand board (OSB) provides structural bracing and a surface for siding attachment. Start at a corner, ensuring the first sheet is plumb. Secure sheathing with 8-penny nails or 1.5-inch screws spaced 6 inches apart at edges and 12 inches in the field. Stagger joints to increase strength and prevent long cracks.
Install siding after sheathing. Horizontal lap siding is popular for sheds, offering good weather protection and traditional appearance. Start at the bottom and work upward, overlapping each course slightly. Ensure siding is level and properly fastened with nails or screws appropriate for your material. Leave small gaps (about 1/8 inch) between pieces to allow for wood expansion and contraction.
Roof construction requires careful attention to load-bearing capacity. Install rafters using the proper size and spacing for your roof pitch and snow load. Most sheds use 2×6 rafters spaced 24 inches on center. Calculate the correct rafter length and angle for your roof pitch using roof pitch tables or online calculators. Install collar ties or ceiling joists to prevent rafter spreading under load.
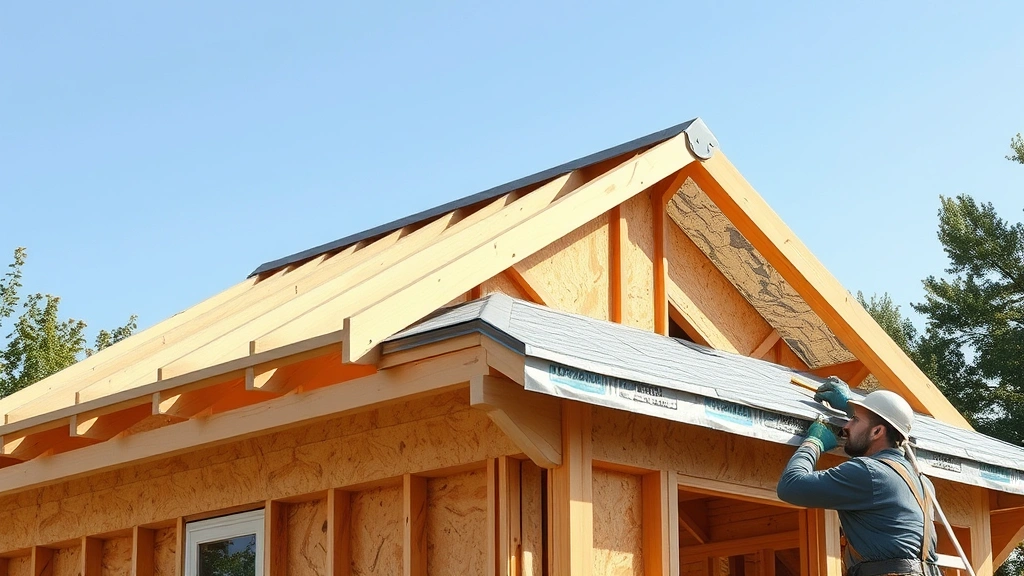
Install roof sheathing (plywood or OSB) perpendicular to rafters, starting at the eave and working toward the ridge. Secure with nails or screws spaced 6 inches apart. Install underlayment (roofing felt or synthetic material) before shingles to provide a water barrier. Shingles go on last, overlapping from bottom to top. Follow manufacturer instructions for proper nailing patterns and overlap distances.
Ventilation is critical for roof longevity. Install soffit vents at the eaves and ridge vents at the peak to allow air circulation. This prevents moisture buildup and extends shingle life. Proper ventilation also reduces interior temperatures on hot days, protecting stored items.
Adding Finishing Touches
Install doors and windows after the structure is weathertight. Pre-hung doors simplify installation—just set them in the frame opening and shim until plumb and level. Secure with fasteners through the frame into surrounding studs. Hinges should be rated for exterior use and installed with appropriate screws that won’t pull out under weight.
Windows provide light and ventilation. Install them similarly to doors, ensuring they’re level and square. Use exterior caulk around frames to prevent water infiltration. Consider operable windows for warm-weather ventilation, or fixed windows for maximum weather protection.
Interior finishing depends on your shed’s purpose. Install shelving for tool storage, using sturdy brackets and lumber rated for your load requirements. Add electrical outlets if you need to power tools or lighting. Wire for a shed requires proper outdoor-rated components and should be done by a licensed electrician if you’re uncomfortable with electrical work.
Paint or stain exterior surfaces for protection and appearance. Quality exterior paint lasts 5-7 years before requiring repainting. Stain penetrates wood and provides a more natural look but requires more frequent maintenance. Seal all wood ends and joints to prevent moisture absorption.
Family Handyman offers detailed finishing advice and maintenance tips for shed projects and other home structures.
Don’t overlook gutters and downspouts. These direct water away from your shed foundation, preventing erosion and water damage. Install gutters along all roof edges and extend downspouts at least 4 feet away from the structure. Proper drainage is one of the most important yet overlooked aspects of shed maintenance.
FAQ
Do I need a permit to build a shed?
Most jurisdictions require permits for sheds over 120-200 square feet or those with electrical connections. Check your local building department’s requirements before starting construction. Permits ensure your shed meets safety codes and don’t violate zoning regulations. The permit process typically costs $50-200 and takes 1-2 weeks.
What’s the best foundation type for a shed?
Gravel foundations work well for most DIY projects, offering simplicity and adequate drainage. Concrete slabs provide durability but are more difficult to install. Pressure-treated skids elevate the structure, improving ventilation and preventing rot. Choose based on your climate, soil conditions, and budget.
How long does a typical shed project take?
A basic 8×10 shed takes 40-80 hours of labor spread over 2-4 weeks. This includes planning, material gathering, foundation preparation, framing, sheathing, roofing, and finishing. Working with helpers speeds the process. Weather delays and material availability can extend timelines.
What tools do I absolutely need?
Essential tools include a circular saw, power drill, hammer, tape measure, level, and square. A miter saw improves accuracy for angle cuts. A pneumatic nailer speeds fastening significantly. Rent or borrow specialized tools rather than purchasing if you won’t use them for future projects.
How can I make my shed more weathertight?
Install proper underlayment under roofing, use quality caulk around windows and doors, ensure siding overlaps correctly, and install gutters with downspouts. Seal all wood joints and edges. Proper ventilation prevents moisture buildup inside. These measures extend your shed’s lifespan significantly.
Can I build a shed on my property without a foundation?
Building codes typically require some form of foundation or support system. Direct contact with soil promotes rot and settling. Even a simple gravel pad or pressure-treated skid foundation prevents most problems. Consult your local building department about minimum requirements.
For additional educational context on planning complex projects, consider reviewing how long it takes to become a doctor, which demonstrates the importance of structured planning and commitment to learning new skills, much like mastering shed construction.
Related Posts

Superscript in Google Docs: Expert Tips

Strikethrough in Excel: Easy Steps for Beginners
