
Smoking Ribs at 225: Expert Timing Guide
Smoking Ribs at 225°F: Expert Timing Guide for Perfect Results
Smoking ribs at 225°F is one of the most forgiving and reliable methods for achieving tender, flavorful results. This temperature sweet spot allows the meat to cook slowly and evenly while developing that coveted smoke ring and bark that makes barbecue so irresistible. Whether you’re a seasoned pitmaster or a backyard beginner, understanding the timing and technique for smoking ribs at this temperature will transform your grilling game.
The beauty of the 225°F approach lies in its consistency and predictability. At this moderate temperature, you’re not racing against the clock, yet you’re still achieving professional-quality results in a reasonable timeframe. Most racks of ribs will reach perfect tenderness in 5 to 6 hours, though several factors can influence your exact cooking time. This guide breaks down everything you need to know about smoking ribs at 225°F, from preparation through the final bite.
Ideal Timing at 225°F: What to Expect
When smoking ribs at 225°F, you can expect the following timeline based on rib type. Baby back ribs, the most popular choice for home smokers, typically require 5 to 6 hours of smoking time. Spare ribs, which are larger and contain more connective tissue, need approximately 6 to 7 hours. St. Louis-style ribs, a trimmed version of spare ribs, usually take 5 to 6 hours. The key variable is how tender you prefer your ribs—some pitmasters pull them at the 4.5-hour mark for a firmer bite, while others extend to 7 hours for fall-off-the-bone tenderness.
The general rule of thumb is to plan for approximately 1 hour per pound of ribs, though this varies based on thickness and density. A rack of baby back ribs typically weighs 1.5 to 2 pounds, placing them in that 5 to 6-hour window. The meat will gradually transition from raw to perfectly tender as collagen breaks down and converts to gelatin, creating that desirable texture. You’ll notice the bark developing around the 2-hour mark, with a deeper, richer color emerging by hour 3.
Temperature consistency is crucial for accurate timing. If your smoker fluctuates between 200°F and 240°F, your ribs may cook faster or slower than expected. Investing in a quality meat thermometer with dual probes allows you to monitor both smoker temperature and internal meat temperature simultaneously, ensuring optimal results every time.
Preparing Your Ribs for Smoking Success
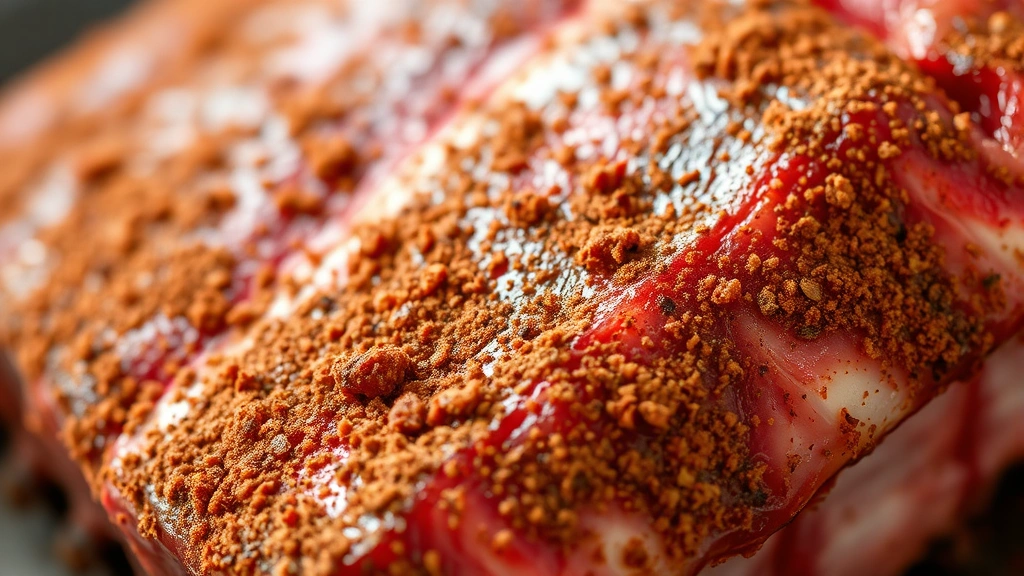
Proper preparation sets the foundation for exceptional smoked ribs. Begin by removing the membrane from the back of the ribs—this thin, papery layer prevents smoke penetration and seasonings from reaching the meat. Simply slide a butter knife or small spatula under the membrane at one end, loosen it, and peel it away with your hands. This single step makes a noticeable difference in flavor and texture.
Next, trim excess fat and meat as desired. While some fat provides flavor, removing particularly thick sections allows smoke and heat to penetrate more evenly. Create a dry rub using your favorite combination of ingredients. A classic approach combines brown sugar, paprika, garlic powder, onion powder, black pepper, and salt. Apply the rub generously the night before smoking, allowing flavors to penetrate the meat. If you’re short on time, even 2 to 3 hours of resting with the rub yields excellent results.
Pat your ribs dry with paper towels before placing them on the smoker. Moisture on the surface can slow the development of the bark and may cause your seasonings to wash away. Some pitmasters apply a thin layer of mustard or oil before the rub, which helps it adhere and creates additional flavor complexity. For those interested in other smoking techniques, our guide on how long to smoke pork butt covers similar preparation methods applicable to larger cuts.
Setting Up Your Smoker for Consistent Results
Whether you’re using an offset barrel smoker, a kamado-style cooker, or an electric smoker, achieving and maintaining 225°F is essential. Start your smoker 30 minutes before you plan to add ribs, allowing the temperature to stabilize. Use a quality thermometer positioned at grate level—the height where your ribs will sit—rather than relying solely on the built-in smoker thermometer, which often reads 25 to 50 degrees higher than actual cooking temperature.
For offset smokers, arrange your charcoal on one side and place a water pan on the opposite side. The water pan serves multiple purposes: it stabilizes temperature, adds humidity, and prevents flare-ups. Fill it with hot water initially, and check it hourly, refilling as needed. For kamado-style cookers, use the deflector plate system to create indirect heat zones, positioning ribs away from direct flame. Electric smokers offer the most precise temperature control, often with digital thermostats that maintain consistent heat with minimal intervention.
Wood selection significantly impacts flavor. Popular choices include hickory for a strong, classic barbecue taste; oak for a milder, balanced flavor; and fruitwoods like apple or cherry for subtle sweetness. Use a combination of 2 to 3 wood types for complexity. Add fresh wood every 45 minutes to 1 hour, using chunks rather than chips—chunks smolder longer and provide more consistent smoke than quickly-burning chips. Avoid heavily resinous woods like pine, which impart unpleasant flavors.
The 3-2-1 Method: A Proven Technique
The 3-2-1 method is a legendary technique that produces consistently tender, flavorful ribs. The numbers represent hours of smoking: 3 hours unwrapped, 2 hours wrapped, and 1 hour finished. This method works exceptionally well at 225°F and provides a structured approach for beginners while allowing experienced pitmasters to adjust based on feel and experience.
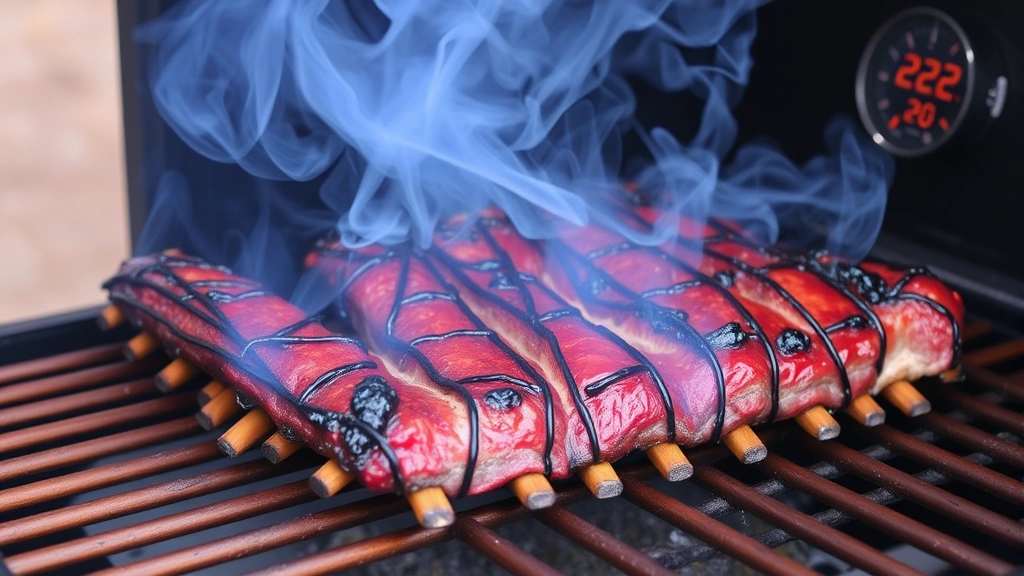
Phase 1 (3 hours of smoking): Place ribs bone-side down on the smoker grates. During this phase, the bark develops, smoke penetrates the meat, and the ribs begin releasing their own juices. Maintain steady 225°F temperature and add wood every 45 minutes. Resist the urge to spritz or check on the ribs constantly—every time you open the smoker, you lose heat and smoke. After 3 hours, you should see a deep reddish-brown bark forming, and the meat should have pulled back slightly from the bones.
Phase 2 (2 hours wrapped): Remove ribs from the smoker and wrap them tightly in aluminum foil. Before wrapping, add a mixture of butter, brown sugar, honey, and a splash of apple juice or cider vinegar inside the foil. This creates a steaming environment that accelerates tenderizing and adds a caramelized glaze. Place wrapped ribs back on the smoker at 225°F. The foil traps moisture, speeding the cooking process and ensuring the meat becomes incredibly tender. You won’t develop additional bark during this phase, but the meat’s texture will improve dramatically.
Phase 3 (1 hour finishing): Unwrap the ribs and return them to the smoker for the final hour. By this point, the meat should be nearly falling off the bone. During this phase, apply your favorite barbecue sauce if desired, allowing it to caramelize slightly on the surface. The final hour re-exposes the ribs to smoke and allows the exterior to firm up slightly after the steaming phase. This creates a pleasant textural contrast between the tender interior and flavorful bark.
The 3-2-1 method typically yields ribs that are done in 6 hours total, though you can adjust the timing based on your preferences. Some pitmasters use 2.5-2-1 for firmer ribs or 3.5-2-1 for extra tenderness. The flexibility of this method makes it ideal for various rib types and personal preferences.
Temperature Monitoring: The Critical Factor
Accurate temperature monitoring separates excellent smoked ribs from mediocre ones. Invest in a reliable dual-probe wireless thermometer that tracks both smoker temperature and internal meat temperature. Position the smoker probe at grate level, away from direct heat sources, to get a true reading of the cooking environment. For meat temperature, insert the probe into the thickest part of the ribs without touching bone.
The bend test provides a tactile way to assess doneness. Using tongs, carefully lift the ribs in the middle. If they bend easily and the meat begins to tear, they’re likely done. If they resist bending, they need more time. This test works best around the 5-hour mark for baby back ribs at 225°F. Some pitmasters also use the toothpick test—a toothpick should slide through the meat with minimal resistance when the ribs are perfectly tender.
Internal meat temperature isn’t as critical for ribs as it is for poultry or pork roasts, since ribs are relatively thin and don’t have food safety concerns at lower temperatures. However, most sources recommend aiming for an internal temperature of 190°F to 203°F for optimal tenderness. At 225°F, expect to reach this range around the 5 to 6-hour mark for baby back ribs.
Keep a detailed log of your smoking sessions, noting ambient temperature, wood type, smoker adjustments, and final results. This data proves invaluable for refining your technique over time. Factors like outside temperature, wind, and humidity all affect cooking time, so what takes 5.5 hours on a calm 70°F day might take 6.5 hours on a cold, windy 45°F day.
Common Mistakes to Avoid When Smoking Ribs
Even with the best intentions, several common mistakes can derail your smoked rib results. Temperature fluctuation stands as the primary culprit. Constantly opening the smoker to check progress causes temperature drops that extend cooking time and create inconsistent results. Set a timer, trust your thermometer, and resist the urge to peek excessively. Plan to open the smoker only for essential tasks: adding wood, checking water pan levels, and wrapping ribs during the 3-2-1 method.
Using too much smoke creates an acrid, unpleasant flavor. More smoke isn’t better—aim for thin, blue smoke rather than thick, billowing white smoke. Thick smoke indicates incomplete combustion and produces bitter compounds. If your smoker is producing white smoke, reduce wood quantity or improve airflow. After 3 to 4 hours, ribs have absorbed most of the smoke they’ll take, so you can reduce wood additions in later stages.
Not removing the membrane prevents proper seasoning and smoke penetration. This thin layer sits between the ribs and the meat, creating a barrier to flavor. Skipping this step is a simple error that significantly impacts results. Spend 30 seconds removing it before your ribs even hit the smoker.
Wrapping too early prevents bark development. The bark—that flavorful, textured exterior—forms during the first 3 hours of unwrapped smoking. If you wrap earlier, you’ll sacrifice bark quality. Similarly, wrapping too tightly can cause the ribs to steam unevenly. Wrap them securely enough to prevent leaks, but not so tightly that moisture can’t circulate.
Using wet wood creates excessive smoke that tastes bitter. Ensure your wood has been seasoned and dried. Even well-seasoned wood should be stored in a dry location. If you soak wood chips before smoking, soak them only briefly—soaked wood produces more steam than smoke.
Finishing and Serving Your Smoked Ribs
As your ribs approach the final hour, consider your finishing approach. Sauce application should happen only in the last 30 to 45 minutes of smoking. Applying sauce earlier can cause burning and mask the smoke flavor you’ve worked to develop. Brush sauce on both sides during the final phase, allowing it to caramelize slightly. For unsauced ribs, simply let them finish naturally, developing a beautiful mahogany bark.
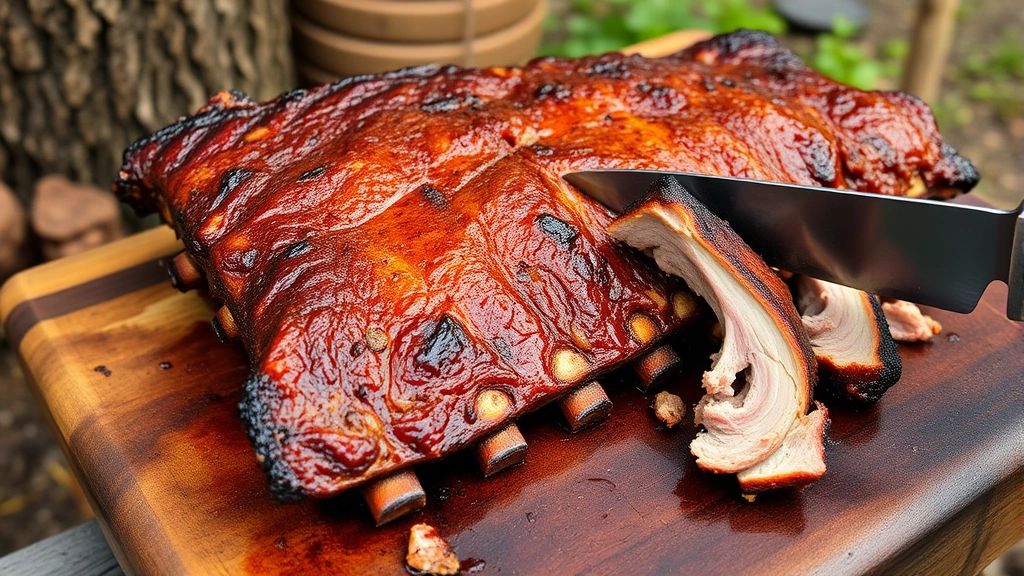
Once your ribs reach your desired tenderness, remove them from the smoker and let them rest for 5 to 10 minutes before cutting. This resting period allows juices to redistribute throughout the meat. Resist cutting into them immediately—patience during this final step preserves moisture and flavor. Use a sharp knife to separate individual bones, or serve racks whole for a dramatic presentation.
Pair your smoked ribs with classic sides. How to make yellow rice provides an excellent grain-based complement. Coleslaw, baked beans, cornbread, and grilled vegetables all pair beautifully with smoked ribs. Offer multiple sauce options on the side, allowing guests to customize their experience.
Leftover smoked ribs keep well in the refrigerator for 3 to 4 days when stored in an airtight container. Reheat them gently—wrapped in foil at 225°F for 20 to 30 minutes restores tenderness without drying them out. Smoked ribs also freeze excellently for up to 3 months, making them perfect for meal planning.
For additional smoking guidance and techniques applicable to other meats, visit the FixWise Hub Blog for comprehensive barbecue resources.
FAQ: Smoking Ribs at 225°F
How long do baby back ribs take at 225°F?
Baby back ribs typically require 5 to 6 hours at 225°F using the traditional method, or 6 hours using the 3-2-1 technique. Exact timing depends on rib thickness, smoker consistency, and your preferred tenderness level. Check for doneness using the bend test or by verifying internal temperature reaches 190°F to 203°F.
Can I smoke ribs at 225°F overnight?
While technically possible, smoking ribs overnight isn’t recommended. At 225°F, ribs reach optimal tenderness within 5 to 6 hours. Smoking longer than 8 to 9 hours can result in meat that becomes mushy or begins to fall apart excessively. Additionally, maintaining consistent temperature overnight is challenging and increases food safety risks.
What’s the difference between baby back and spare ribs at 225°F?
Baby back ribs are smaller and leaner, requiring 5 to 6 hours at 225°F. Spare ribs are larger with more fat and connective tissue, needing 6 to 7 hours. St. Louis-style ribs, a trimmed spare rib format, typically take 5 to 6 hours. Adjust timing based on rib thickness and your preferred tenderness.
Should I use the 3-2-1 method at 225°F?
Yes, the 3-2-1 method works excellently at 225°F and provides a structured approach that yields consistent results. The method’s timing aligns perfectly with this temperature, producing properly developed bark while ensuring tender meat. Beginners especially benefit from this predictable framework.
What wood pairs best with ribs at 225°F?
Hickory provides classic barbecue flavor, while oak offers a milder, balanced taste. Fruitwoods like apple and cherry add subtle sweetness. Combine 2 to 3 wood types for complexity. Avoid heavily resinous woods like pine. Add wood every 45 minutes to 1 hour, using chunks rather than chips for longer-lasting smoke.
How often should I spritz ribs while smoking at 225°F?
Spritzing every 45 minutes to 1 hour with apple juice, cider vinegar, or a similar liquid helps maintain moisture and prevents bark from becoming too thick. However, excessive spritzing can cool the smoker and wash away seasonings. Use a light hand and limit spritzing to the first 3 to 4 hours.
Can I increase the temperature to finish ribs faster?
Yes, you can increase temperature to 250°F or 275°F for the final 1 to 2 hours to accelerate cooking if needed. However, this risks drying out the meat and reducing smoke flavor. Maintaining 225°F throughout produces superior results. If time is limited, plan your smoking session accordingly or use the 3-2-1 method, which completes in 6 hours.
Related Posts

Superscript in Google Docs: Expert Tips

Strikethrough in Excel: Easy Steps for Beginners
