
How Long to Boil Green Beans? Cooking Guide
How Long to Boil Green Beans? The Complete Cooking Guide
There’s something wonderfully satisfying about perfectly cooked green beans—tender enough to cut with a fork, yet still maintaining that vibrant green color and a subtle snap. Whether you’re preparing a weeknight side dish or impressing guests at a dinner party, knowing exactly how long to boil green beans is the difference between a mediocre vegetable and a culinary triumph.
The truth is, boiling green beans isn’t complicated, but it does require attention to detail. Too short, and you’ll end up with raw, fibrous beans. Too long, and you’re left with mushy disappointment. In this comprehensive guide, we’ll walk you through everything you need to know about boiling green beans to perfection, from preparation to seasoning and storage.
Let’s dive into the specifics that’ll transform your green bean game forever.
How Long to Boil Green Beans
The standard answer is straightforward: fresh green beans typically take 4 to 7 minutes to boil, depending on their thickness and your desired texture. Thin, tender beans might be done in 4 minutes, while thicker beans could need up to 7 minutes for optimal tenderness.
If you’re working with frozen green beans, expect them to take slightly longer—usually 5 to 8 minutes—since they start from a frozen state. The key is starting with boiling water and maintaining that rolling boil throughout the cooking process.
Interestingly, the boiling method differs from other vegetable preparation techniques. If you’re curious about how long to steam broccoli, you’ll notice steaming takes considerably longer and requires different equipment. Boiling green beans is actually one of the faster cooking methods available.
Most home cooks find that 5 minutes hits the sweet spot for fresh green beans—long enough to soften them adequately without sacrificing that desirable crunch. This timing also preserves more nutrients compared to longer cooking times.
Preparing Your Green Beans
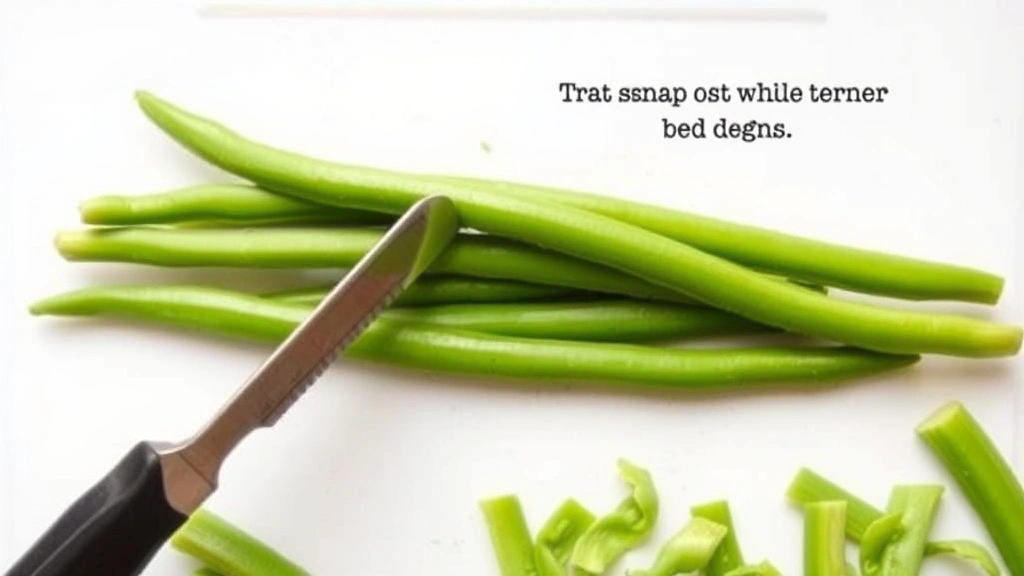
Before your beans hit the boiling water, proper preparation ensures the best results. Start by rinsing your fresh green beans under cold running water, rubbing them gently to remove any dirt or debris. Pat them dry with a clean kitchen towel.
Next, you’ll want to trim the ends. Hold each bean at the stem end and snap off about a quarter-inch. You’ll feel where the tender part begins—that’s your natural breaking point. Some people trim both ends; others just the stem end. Either approach works, though trimming both ends gives a more refined presentation.
For thicker beans, consider cutting them into 2 to 3-inch lengths for more even cooking. Uniform sizing matters more than you might think—it ensures all your beans finish cooking simultaneously. If you’re preparing beans alongside other vegetables like potatoes that take longer to boil, start the potatoes first, then add the beans later.
Don’t skip the rinsing step, even if the beans look clean. This removes surface dust and any residual pesticides if you’re using conventional produce.
Step-by-Step Boiling Instructions
Follow these simple steps for consistently perfect green beans:
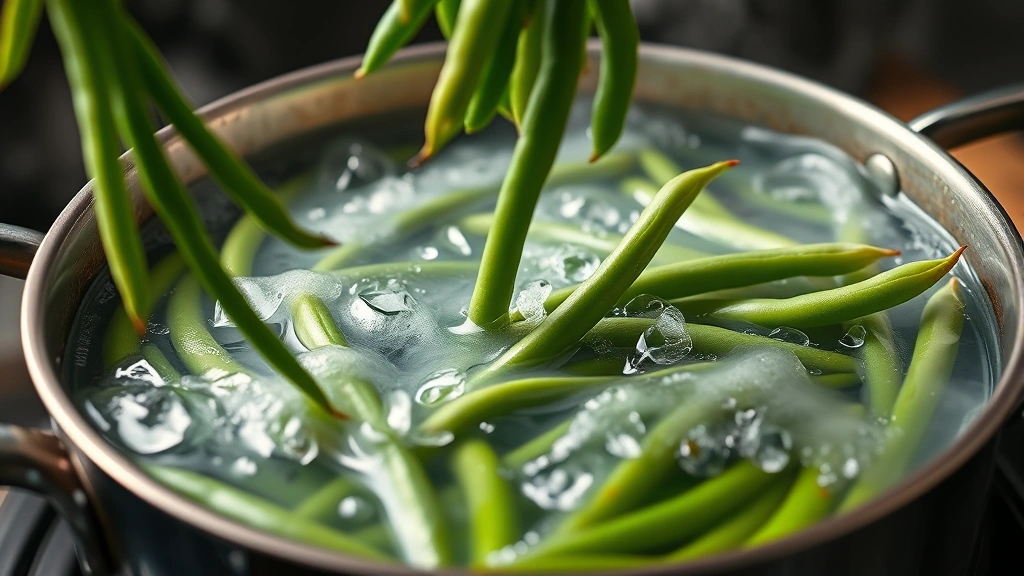
- Fill your pot with water: Use enough water to cover the beans by about an inch. A large pot (at least 4 quarts) works best. Salted water is essential—use about 1 tablespoon of salt per gallon of water, similar to pasta water.
- Bring water to a rolling boil: Don’t skip this step. The water must be actively boiling before the beans go in. This helps maintain the cooking temperature and ensures even cooking.
- Add the beans: Carefully place your prepared beans into the boiling water. The water temperature will dip momentarily; that’s normal. It’ll return to a boil within 30 seconds or so.
- Maintain a gentle boil: Reduce heat slightly if needed to keep a consistent, gentle boil rather than a violent, rolling boil. This prevents the beans from breaking apart.
- Set your timer: Start timing immediately after adding the beans. Fresh beans need 4-7 minutes; frozen beans need 5-8 minutes.
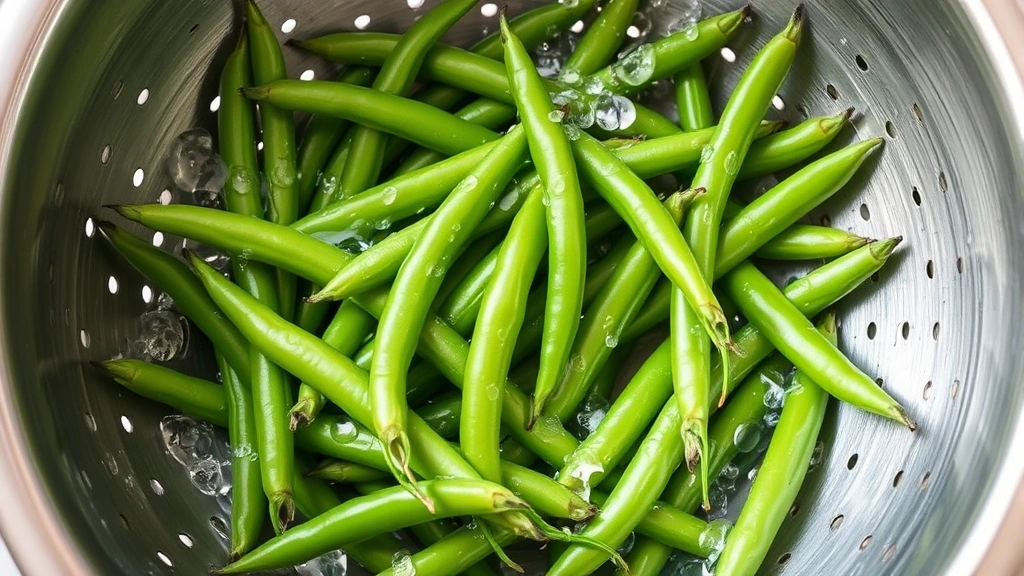
- Drain carefully: Once the timer goes off, carefully pour the beans into a colander, reserving some cooking liquid if desired (it can be used for seasoning).
The entire process, from filling the pot to draining, takes about 15 minutes total. It’s faster than many side dish alternatives and requires minimal active cooking time.
Testing for Doneness
The best way to know if your green beans are done is to taste one. Remove a bean with a fork and let it cool for a few seconds. It should bend easily but still have a slight firmness—what chefs call “al dente.” If it snaps cleanly, it’s probably overcooked.
Visual cues matter too. Perfectly cooked green beans maintain their bright green color. If they’re turning olive green or yellowish, you’ve overcooked them. Undercooked beans appear dull and pale compared to their fully cooked counterparts.
The texture test is your most reliable indicator. Pierce a bean with a knife tip. It should slide through with minimal resistance but not feel mushy. With practice, you’ll develop an intuition for the exact moment they’re ready.
Some people prefer slightly crunchier beans; others like them more tender. Adjust your timing by 30-second increments based on your preference. If you enjoy crispier vegetables, you might also appreciate learning about steaming broccoli, which offers different texture possibilities.
Seasoning and Flavoring Ideas
Properly salted boiling water is the foundation, but you can elevate your green beans with thoughtful additions. Here are compelling flavor combinations:
- Garlic and butter: After draining, toss beans with melted butter and minced fresh garlic. A squeeze of lemon juice brightens everything.
- Almonds and sesame: Toast sliced almonds separately, then toss with beans along with a drizzle of sesame oil and a sprinkle of sesame seeds.
- Bacon and onion: Crisp bacon, crumble it, and combine with caramelized onions and the drained beans for a classic side dish.
- Herbs de Provence: A light sprinkle of this French herb blend adds sophistication without overwhelming the delicate bean flavor.
- Mustard vinaigrette: Whisk together Dijon mustard, red wine vinegar, shallots, and olive oil for a tangy dressing that complements the beans beautifully.
- Asian-inspired: Combine low-sodium soy sauce, fresh ginger, garlic, and a touch of honey for an umami-rich coating.
If you’re planning a complete meal, consider how your green beans complement other dishes. For instance, if you’re learning how to season salmon, you might choose a lemon-herb green bean preparation that won’t compete with the fish.
Don’t be afraid to experiment. The beauty of green beans is their versatility—they play well with countless flavor profiles.
Common Mistakes to Avoid
Overcrowding the pot: This lowers water temperature too much and results in uneven cooking. Use a pot large enough that beans have room to move freely.
Using unsalted water: This is surprisingly common and results in bland beans. The salt seasons them from the inside out, not just on the surface.
Not bringing water to a full boil first: Starting with cold or warm water extends cooking time unpredictably and compromises texture.
Walking away and forgetting about them: Set a timer and stick around. The difference between perfect and overcooked is literally one minute.
Using old beans: Older beans take longer to cook and never achieve the same tender texture. Fresh beans, ideally used within a few days of purchase, are noticeably superior.
Neglecting to drain properly: Excess water makes your seasoning slide right off. Drain thoroughly in a colander and consider patting with paper towels if you’ve prepared them in advance.
Storage and Reheating
Leftover boiled green beans keep refrigerated for 3 to 5 days in an airtight container. Store them separately from any butter or sauce—add those fresh when reheating to prevent sogginess.
To reheat, you have several options. The stovetop method works beautifully: add beans to a skillet with a bit of butter over medium heat, stirring occasionally until warmed through (about 3-4 minutes). This method also allows you to add fresh seasonings or a quick sauce.
The microwave is fastest—place beans in a microwave-safe dish, cover loosely, and heat for 1-2 minutes, stirring halfway through. The texture won’t be quite as fresh, but it’s convenient for quick meals.
You can also freeze cooked green beans for up to 3 months. Blanch them first (boil for 3 minutes, then plunge into ice water), drain thoroughly, and freeze on a baking sheet before transferring to freezer bags. This prevents them from clumping together.
When preparing multiple components for dinner, understanding timing is crucial. For example, if you’re boiling chicken alongside green beans, you’ll need to coordinate when each ingredient goes into its respective pot to ensure everything finishes simultaneously.
For pantry organization, knowing how to store onions properly ensures you always have quality aromatics on hand for your green bean preparations.
Frequently Asked Questions
Can I boil green beans in advance?
Yes, you can boil green beans several hours ahead. Cool them immediately after cooking (ice bath is ideal), then refrigerate. Reheat gently before serving. This works well for meal prep or entertaining, though fresh-cooked beans have superior texture.
Why do my green beans turn gray or olive-colored?
This happens from overcooking or from chlorophyll breakdown. Keep cooking time to the recommended 4-7 minutes, drain promptly, and consider the ice bath method if serving cold—it stops the cooking process instantly and preserves color.
Should I add baking soda to the boiling water?
Some cooks add a pinch of baking soda to maintain green color, but it can make beans mushy and damages heat-sensitive nutrients. Skip it in favor of proper timing and immediate draining.
What’s the difference between boiling and steaming green beans?
Boiling is faster (4-7 minutes) but causes more nutrient loss to the water. Steaming takes longer (8-10 minutes) but retains more vitamins and minerals. Choose based on your time and nutritional priorities.
Can frozen green beans be boiled the same way as fresh?
Mostly yes, but add 1-2 extra minutes to cooking time. Thaw them first if you prefer, though frozen-to-boiling works fine. The main difference is initial water temperature, which thaws them as they cook.
How do I know if my green beans are fresh?
Fresh beans snap cleanly when bent, have a bright green color, and feel firm (not limp or wrinkled). Avoid beans with brown spots or soft areas. Purchase within a few days of intended use for best results.
Is there a way to reduce the cooking time?
Cut beans into smaller pieces (1-2 inches instead of full length) to reduce cooking time to 3-4 minutes. Ensure uniform sizing so everything cooks evenly. However, this sacrifices presentation somewhat.
Related Posts

How Long to Boil Lobster Tails: Cooking Guide

How Long to Fly from New York to London? Travel Times
