
How to Compost at Home? Eco-Friendly Tips
How to Compost at Home: Eco-Friendly Tips for Beginners
Composting is one of the most impactful ways to reduce household waste while creating nutrient-rich soil for your garden. Whether you live in an apartment, suburban home, or rural property, there’s a composting method that works for your lifestyle. By understanding the decomposition process and following proven techniques, you can transform kitchen scraps and yard waste into black gold for your plants.
Many homeowners are surprised to learn that composting doesn’t require special equipment or extensive knowledge. The process relies on natural microbial activity that breaks down organic matter over time. When you understand how long does a body take to decompose in different conditions, you gain insight into the broader principles of decomposition that apply to all organic materials. This guide will walk you through everything you need to know to start composting successfully today.
What Is Composting and Why It Matters
Composting is the controlled decomposition of organic materials into humus, a dark, crumbly substance that enriches soil. Unlike landfills where organic waste creates methane and other greenhouse gases, composting harnesses natural decomposition in an aerobic environment. The result is a sustainable cycle that reduces landfill waste by up to 30% while creating free fertilizer for your garden.
Environmental benefits extend beyond your backyard. When you compost, you’re reducing the demand for chemical fertilizers, which require fossil fuels to produce and transport. You’re also decreasing methane emissions from decomposing waste in landfills. According to This Old House’s composting guide, home composting can save households hundreds of dollars annually while supporting local ecosystems.
Beyond environmental impact, composting improves soil structure, water retention, and microbial health in your garden beds. Plants grown in compost-enriched soil show stronger root systems, better disease resistance, and increased nutrient uptake. Whether you’re growing vegetables, ornamental plants, or maintaining a lawn, finished compost is invaluable.
Choosing Your Composting Method
The right composting method depends on your space, timeline, and commitment level. Understanding different approaches helps you select the system that fits your situation.
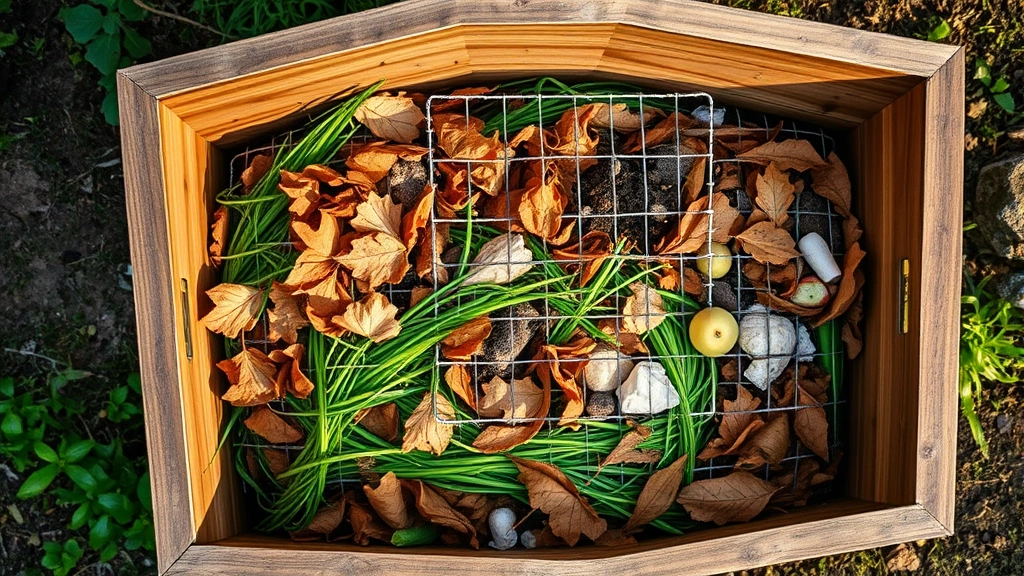
Bin Composting is the most popular method for homeowners. Enclosed bins contain the compost, reduce pest problems, and create optimal conditions for decomposition. Bins range from simple wooden structures to commercial plastic containers. This method typically produces finished compost in 3-6 months.
Pile Composting requires no container—you simply stack materials in your yard. This open-air approach is free and works well for large quantities of material, but it attracts pests more readily and takes longer to decompose. Pile composting typically requires 6-12 months.
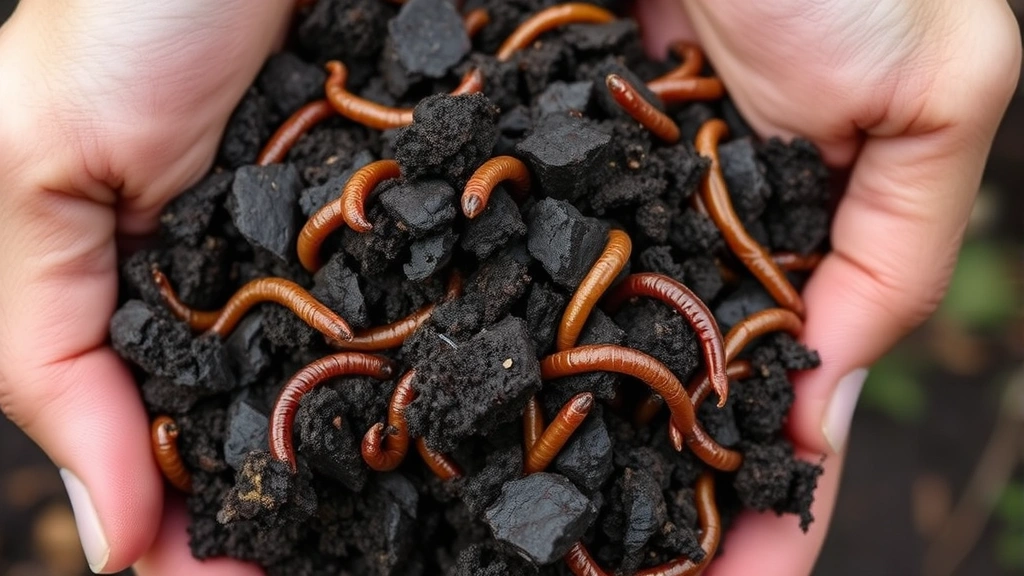
Vermicomposting uses red wiggler worms to break down organic matter in a specialized bin. This method works excellently indoors or in small spaces, producing compost in 3-6 months. Worms also create nutrient-rich castings that are incredibly valuable for plants. Visit the FixWiseHub Blog for additional home improvement strategies.
Bokashi Composting ferments food waste using specialized bran containing microorganisms. This anaerobic method handles meat, dairy, and oils that traditional composting cannot. The fermented material then breaks down in soil or a compost bin within 2-3 weeks.
Tumbler Composting uses a rotating drum that accelerates decomposition through frequent turning. These systems produce finished compost in 4-8 weeks but require more active management and typically cost more than static bins.
The Science of Decomposition
Understanding decomposition rates helps you optimize your composting system. The timeline for breaking down organic materials depends on several factors including temperature, moisture, carbon-to-nitrogen ratio, and particle size.
Temperature Control is critical. Decomposition happens fastest in the thermophilic (hot) phase, when internal temperatures reach 130-150°F (54-65°C). At these temperatures, beneficial microorganisms work rapidly to break down materials. Properly maintained compost piles reach hot temperatures within days. Cold composting occurs in winter or in inadequately maintained piles, where temperatures remain ambient and decomposition proceeds slowly—potentially taking 1-2 years.
Just as understanding how long does a body take to decompose in various environmental conditions teaches us about microbial activity and environmental factors, composting timelines depend heavily on conditions. A buried body in cool soil might take years to fully decompose, while the same organic material in an optimized hot compost pile breaks down in weeks. This comparison illustrates how dramatically conditions affect decomposition rates.
Moisture Balance is equally important. Microorganisms need moisture to survive and reproduce. Your compost should feel like a wrung-out sponge—moist but not waterlogged. Too dry, and microbial activity slows dramatically. Too wet, and anaerobic conditions develop, creating foul odors and slowing decomposition.
Carbon-to-Nitrogen Ratio directly affects decomposition speed. The ideal ratio is approximately 30:1 carbon to nitrogen. Brown materials (leaves, wood chips, paper) provide carbon; green materials (grass clippings, food scraps, manure) provide nitrogen. When balanced properly, microorganisms have optimal nutrition and reproduce efficiently.
Particle Size matters significantly. Smaller pieces have greater surface area for microbial colonization, accelerating decomposition. Shredding leaves, breaking down cardboard, and chopping food scraps into small pieces can cut composting time in half compared to whole materials.
Oxygen Availability supports aerobic microorganisms that work efficiently. Anaerobic decomposition (without oxygen) is slower and produces unpleasant odors. Turning your pile or using a tumbler introduces oxygen, dramatically speeding the process.
Building Your Compost Bin
Creating a functional compost bin requires minimal carpentry skills and inexpensive materials. A basic bin provides structure, contains materials, and creates the right microclimate for decomposition.
Simple Wooden Bin Construction
The easiest approach uses untreated wooden pallets or lumber. A 4×4-foot bin provides adequate volume for household waste while remaining manageable. You’ll need:
- Four wooden pallets or 2×12 lumber cut to 4-foot lengths
- Galvanized corner brackets or hardware cloth
- Hinged lid (optional but recommended)
- Drill with wood screws (galvanized or stainless steel)
- Work gloves and safety glasses
Assemble the four sides into a square, securing corners with brackets. Add a hinged lid using two-by-fours and galvanized hinges. Line the bottom with hardware cloth (1/4-inch mesh) to prevent rodents from tunneling in while allowing drainage and air circulation.
Alternative Commercial Options
If DIY construction isn’t appealing, plastic compost bins offer convenience. They’re pre-assembled, weatherproof, and often include doors for easy access. Tumbler bins provide the fastest results but cost more. Family Handyman offers detailed bin-building plans for various budgets and skill levels.
Placement Considerations
Location affects decomposition rates significantly. Place your bin in a spot receiving partial sunlight—full sun can dry materials too quickly, while deep shade slows microbial activity. Ensure good drainage to prevent waterlogging. Position near a water source for convenient moisture management. Keep bins at least 5 feet from house foundations to avoid pest issues.
What to Compost and What to Avoid
Success depends on composting the right materials. Understanding what breaks down efficiently prevents odors, pests, and failed batches.
Green Materials (Nitrogen-Rich)
- Fruit and vegetable scraps (excluding citrus in excess)
- Fresh grass clippings (avoid treated lawns)
- Plant trimmings and dead flowers
- Coffee grounds and tea bags
- Plant-based paper products
- Manure from herbivorous animals
- Legume plant material
Brown Materials (Carbon-Rich)
- Dry leaves and fall foliage
- Shredded paper and cardboard
- Wood chips and sawdust (untreated)
- Straw and hay
- Pine needles
- Newspaper (black ink only)
- Wood ash (in moderation)
Never Compost
- Meat, fish, or bones (attract pests and create odors)
- Dairy products and oils (slow decomposition, attract pests)
- Pet waste (contains harmful pathogens)
- Diseased plants (spread pathogens)
- Weeds with seeds (seeds survive composting)
- Treated wood or sawdust (contains toxic chemicals)
- Glossy or coated paper (contains harmful chemicals)
- Synthetic materials of any kind
When you’re maintaining your compost properly, you can also ensure your home systems work efficiently. Learn about how to clean a washing machine to reduce lint and waste entering water systems, which complements your sustainability efforts.
Managing Your Compost Pile
Active management dramatically improves decomposition speed and results. Regular attention prevents problems while accelerating the process.
Layering Strategy
Build your pile in alternating layers of brown and green materials. Start with a 4-inch layer of brown material for drainage and aeration. Add 4 inches of green material, then repeat. This alternating pattern ensures proper carbon-nitrogen balance and prevents compaction. End with a brown layer to reduce odors and pest attraction.
Moisture Management
Check moisture weekly, especially during dry periods. If your compost feels dry, spray it with water until it resembles a wrung-out sponge. During heavy rain, cover your pile with a tarp to prevent waterlogging. Drainage is critical—if water pools at the bin bottom, add more brown material and improve airflow.
Turning and Aeration
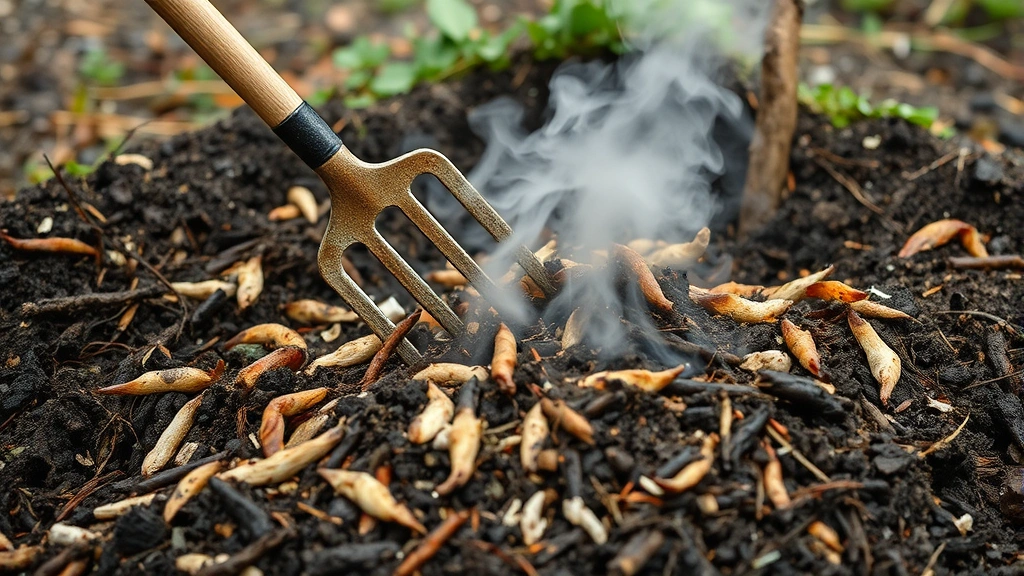
Turning your pile every 1-2 weeks accelerates decomposition by introducing oxygen. Use a garden fork to move outer material toward the center, where temperatures are hottest. If turning seems laborious, use a compost tumbler or install aeration pipes through your pile. Even turning monthly rather than weekly produces faster results than never turning.
Temperature Monitoring
A compost thermometer reveals whether your pile is in the hot phase. Temperatures between 130-150°F indicate optimal microbial activity. If temperatures remain below 110°F, your pile may lack nitrogen or moisture. Add more green material or water, then turn the pile.
Odor Management
Foul smells indicate anaerobic conditions. Solutions include turning the pile more frequently, adding brown material to improve aeration, and reducing moisture. Ammonia smells suggest excess nitrogen—add more brown material. Rotten smells indicate anaerobic decomposition—turn immediately and improve airflow.
Pest Prevention
Enclosed bins with secure lids prevent most pest problems. Avoid composting meat, dairy, and oils that attract rodents and insects. Keep compost covered with brown material to deter pests. If problems develop, turn the pile more frequently—the heat and disturbance deter pests. Check that hardware cloth lines your bin bottom, preventing burrowing animals from accessing materials.
Harvesting and Using Your Compost
After 3-6 months of proper management, your compost is ready to harvest. Finished compost is dark brown or black, crumbly, and smells earthy—not unpleasant. It should be unrecognizable as original materials.
Harvesting Methods
If using a static bin, remove the front panel or hinged door to access finished compost. Use a shovel to extract material from the bottom, where decomposition is most complete. Leave partially decomposed material at the top to restart the process. Tumbler bins allow easy access through a door at the base. Sift compost through 1/2-inch hardware cloth to separate fine material from remaining large pieces.
Using Your Compost
Finished compost improves any garden application. Mix it into garden beds at 2-4 inches deep before planting. Use as mulch around established plants, maintaining 2-3 inches distance from stems. Blend into potting soil for containers—use 25-50% compost with other ingredients. Create compost tea by steeping finished compost in water for 24 hours, then using the nutrient-rich liquid to water plants.
For lawns, spread 1/4 to 1/2 inch of finished compost across the grass and work it in with a rake. Grass receives nutrients while soil structure improves. Top-dress vegetable gardens annually with 1-2 inches of compost to maintain fertility without synthetic fertilizers.
Storage and Preservation
Finished compost stores indefinitely in dry conditions. Keep it in bins or bags protected from excessive moisture and direct sun. Stored properly, compost maintains its nutrient value and structure for years. If you have limited garden space, donate excess compost to neighbors, community gardens, or local schools. Many communities welcome free, high-quality compost.
Just as understanding home maintenance like how to unclog a toilet prevents larger problems, maintaining your compost system prevents issues and maximizes results. Regular attention creates a sustainable cycle that benefits your garden and the environment.
FAQ
How long does compost take to be ready?
Timeline depends on your method and management. Hot composting with regular turning produces finished compost in 3-6 months. Cold composting takes 6-12 months or longer. Vermicomposting and bokashi methods produce results in 3-6 weeks and 2-3 weeks respectively. Tumbler bins typically finish compost in 4-8 weeks.
Can I compost in an apartment?
Absolutely. Vermicomposting in a small bin under the sink or in a closet works perfectly. Bokashi buckets ferment food scraps in minimal space. Both methods produce finished compost or pre-compost material suitable for container plants. These methods generate no odor when managed properly, making them ideal for apartments.
Why does my compost smell bad?
Foul odors indicate anaerobic decomposition. Turn your pile immediately to introduce oxygen. Add brown material to improve aeration. Reduce moisture if the pile is waterlogged. Ammonia smells mean excess nitrogen—add more leaves or paper. Rotten smells indicate inadequate airflow—turn more frequently and consider adding aeration pipes.
What’s the best compost bin for beginners?
A simple wooden bin or affordable plastic bin works well for beginners. Both contain materials, reduce pests, and create proper decomposition conditions. If you prefer minimal effort, commercial tumbler bins accelerate results despite higher cost. Vermicomposting bins suit apartment dwellers. Start simple—you can upgrade later if desired.
Can I compost diseased plants?
No. Pathogens may survive the composting process and spread disease to your garden. Remove diseased plants from your compost pile. Dispose of them in yard waste bins or burn them if local regulations allow. Only compost healthy plant material.
How much compost does a household produce annually?
Average households produce 150-300 pounds of compostable material annually. This yields 30-60 pounds of finished compost, depending on decomposition efficiency. Households with large gardens or yards produce significantly more. Even apartment dwellers composting just food scraps generate meaningful amounts of finished compost.
Do I need special tools for composting?
A shovel and garden fork are helpful but not essential. A compost thermometer guides management but isn’t required. Hardware cloth prevents pests. Beyond these basics, most composting relies on natural processes. Start with what you have—you can add tools later based on your specific needs.
Can I compost sawdust and wood chips?
Yes, but only untreated wood. Sawdust from untreated wood or natural wood chips break down slowly but eventually. Avoid pressure-treated wood, plywood, or wood treated with stains and finishes—these contain toxic chemicals. Sawdust from hardware stores that cut untreated lumber is safe; commercial sawmills may use treated wood.
Related Posts

Superscript in Google Docs: Expert Tips

Strikethrough in Excel: Easy Steps for Beginners
