
How to Solder: Expert Guide for Beginners
How to Solder: Expert Guide for Beginners
Soldering might seem like an intimidating skill reserved for seasoned electricians and circuit board wizards, but here’s the truth: it’s one of the most satisfying and accessible DIY skills you can master. Whether you’re repairing a broken guitar cable, restoring vintage electronics, or tackling electrical projects around your home, soldering opens up a world of possibilities. The process is surprisingly straightforward once you understand the fundamentals, and with a bit of practice, you’ll be creating clean, professional-grade connections that’ll last for years.
What makes soldering so compelling is that it transforms you from someone who simply replaces broken items into someone who actually fixes them. There’s genuine pride in holding a repaired device and knowing you brought it back to life with your own hands. Plus, soldering skills complement other home improvement projects beautifully—if you’re comfortable with electrical work like wiring a 3-way switch, adding soldering to your toolkit makes you an even more capable DIYer.
This guide walks you through everything you need to know, from selecting the right equipment to executing flawless joints that professional electricians would approve of. Let’s get started.
Understanding Soldering Basics
Soldering is fundamentally about joining two metal pieces together using a filler metal called solder. Unlike welding, which melts the base metals themselves, soldering works at much lower temperatures and creates a mechanical and electrical bond without compromising the structural integrity of the components you’re connecting.
The magic happens because solder has a lower melting point than the metals being joined. When heated, the solder flows into the connection point and, upon cooling, creates a permanent bond. Think of it as a metallic glue that conducts electricity—which is exactly what you need for electrical repairs.
There are different types of solder, but for most beginner projects, you’ll be working with lead-free rosin core solder. This is the standard in modern electronics and is safer to handle than its lead-containing predecessor. The “rosin core” refers to the flux inside the solder, which is a chemical compound that helps the solder flow smoothly and bond properly.
Temperature control is crucial. Most beginner-friendly soldering irons operate between 350-400°F (175-200°C), which is hot enough to melt solder but cool enough that you won’t instantly destroy delicate components. Understanding this sweet spot separates mediocre solder joints from excellent ones.
Essential Tools and Materials
Before you strike your first joint, you’ll need to gather the right equipment. The good news? Entry-level soldering kits are affordable and surprisingly comprehensive.
Soldering Iron: This is your primary tool. For beginners, a 25-40 watt iron is ideal—powerful enough to heat connections efficiently but not so aggressive that it damages components. Digital temperature-controlled irons offer precision, though simple analog models work perfectly fine for learning.
Solder: Purchase lead-free rosin core solder in a 60/40 or 63/37 tin/lead ratio (even though it’s “lead-free,” the ratio refers to other metals). A small spool (around 50 feet) gives you plenty for practice without breaking the bank.
Wet Sponge or Brass Wire Cleaner: You’ll need something to clean your iron tip between joints. A natural sponge works great when kept moist, while brass wire cleaners offer a gentler alternative that doesn’t cool the iron as dramatically.
Helping Hands or Third-Hand Tool: These clamp-based devices hold wires and components steady while you work, freeing both your hands for the iron and solder. They’re genuinely invaluable and cost only $10-15.
Desoldering Wick or Pump: Mistakes happen. Desoldering wick (braided copper wire) absorbs excess solder when you need to undo a joint, while solder suckers use vacuum pressure for the same purpose. Having one on hand saves frustration.
Flux Pen: While rosin core solder includes flux, having extra flux in a pen applicator helps with tricky connections and older components that resist bonding.
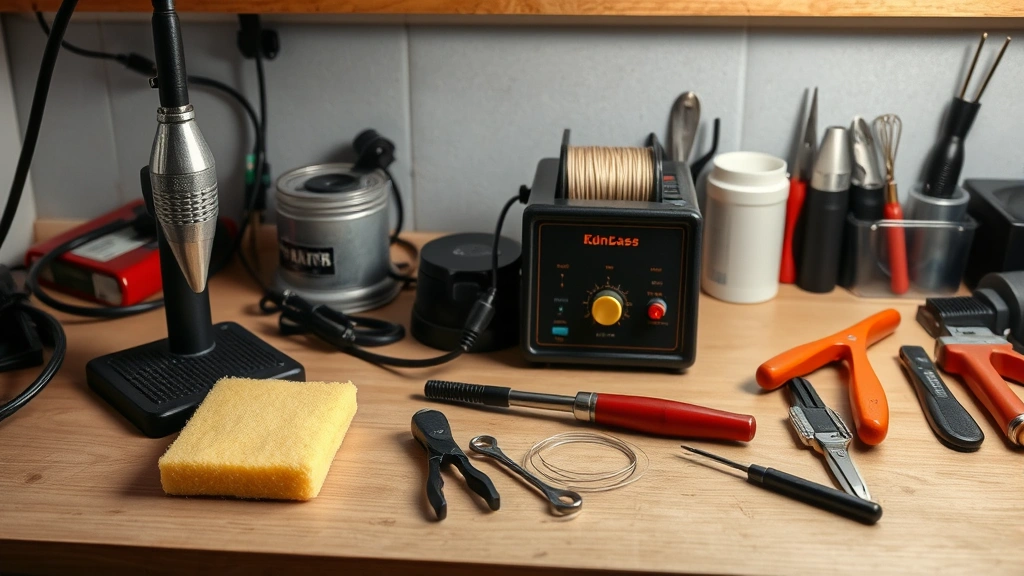
Wire Strippers and Cutters: You’ll need to prepare your wires before soldering. Quality strippers make clean cuts without damaging the wire itself.
Safety Equipment: A simple fume extractor or even a small fan helps dissipate solder fumes. While modern lead-free solder is safer, ventilation still matters. Keep a wet cloth nearby for quick cooling if needed.
Safety Considerations
Soldering is remarkably safe when approached with basic precautions. The iron reaches temperatures that could cause burns, so treating it with respect is paramount. Never leave a powered iron unattended, always return it to its stand immediately after use, and keep flammable materials away from your work area.
Fumes from soldering are minimal with modern lead-free solder, but working in a ventilated space remains important. Open a window or position your work near a fan. If you’re doing extensive soldering, a small desktop fume extractor ($30-50) is a worthwhile investment.
Wash your hands after soldering sessions, especially before eating or touching your face. While lead-free solder is safer than old lead-based varieties, basic hygiene prevents any potential issues. Keep the iron’s temperature as low as practical for your project—lower heat means less fume production and reduced burn risk.
When working with electronics that require soldering—like if you’re tackling electrical projects or repairs—always ensure the device is powered off and unplugged. If you’re working on car electronics, you might want to review how to disconnect car battery first to ensure complete power isolation.
Step-by-Step Soldering Process
Now for the practical part. Here’s how to create a perfect solder joint:
Step 1: Prepare Your Workspace
Organize everything within arm’s reach. Position your helping hands so components are stable and accessible. Plug in your iron and let it reach temperature (usually indicated by a light on the iron’s base). This takes 2-5 minutes depending on your iron.
Step 2: Clean and Prepare Components
Strip about 1/4 inch of insulation from wire ends. If you’re soldering to component leads or pads, ensure they’re clean—oxidized metal resists solder bonding. Use a small wire brush or fine sandpaper to remove any oxidation or corrosion. This step makes an enormous difference in joint quality.
Step 3: Position Everything
Use your helping hands to hold wires or components in the exact position where they need to be soldered. The connection should be physically stable before you introduce heat. This prevents movement that compromises the joint.
Step 4: Test Your Iron Temperature
Touch the iron tip to a small piece of solder. It should melt within 2-3 seconds. If it takes longer, your iron isn’t hot enough. If it instantly liquefies and smokes heavily, it might be too hot. Adjust accordingly.
Step 5: Apply Heat to the Connection
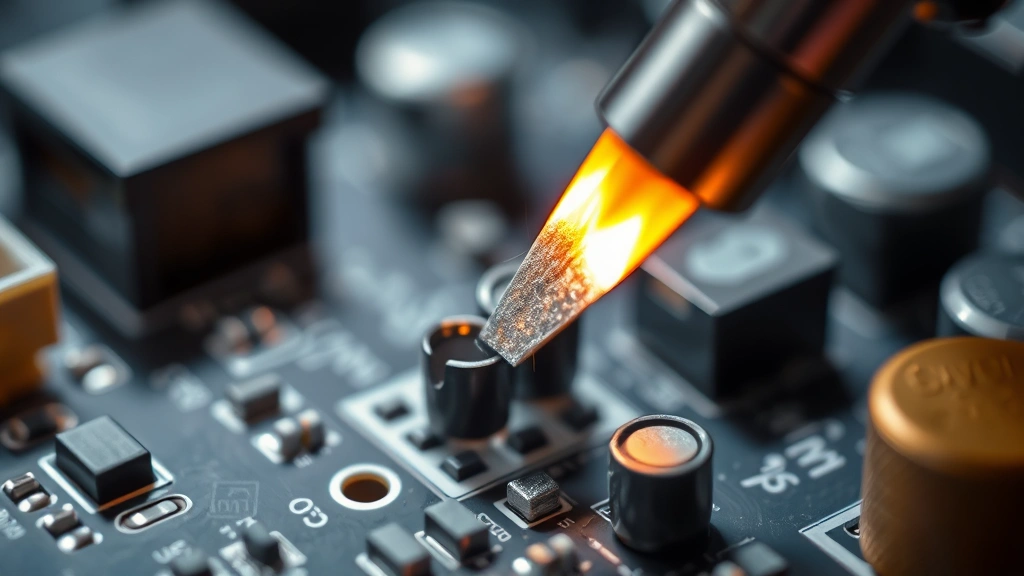
This is critical: heat the connection itself, not the solder. Place the iron tip against both pieces being joined for 2-3 seconds. You’re not trying to melt solder onto the connection; you’re heating the metals so they’ll accept solder. Think of it as preparing the surface rather than applying adhesive.
Step 6: Introduce the Solder
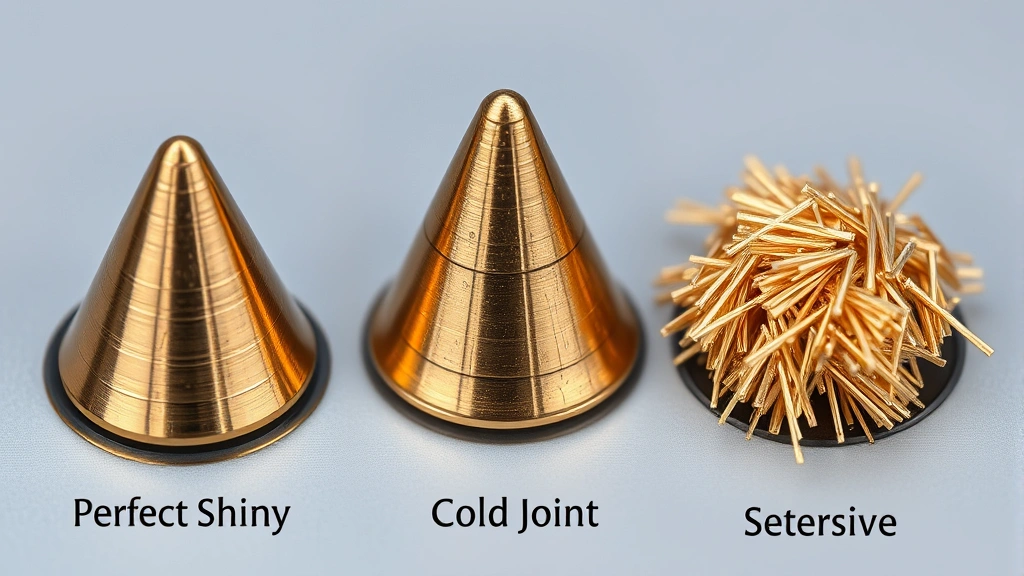
With the iron still in place, touch the solder to the heated connection (not directly to the iron tip). It should flow smoothly into the joint like water finding its level. Use just enough solder to create a shiny, cone-shaped joint—roughly the size of a grain of rice. Too much solder creates a cold joint; too little leaves a weak connection.
Step 7: Remove Solder First, Then Iron
This sequence matters. Pull away the solder first, then remove the iron. This prevents the joint from being disturbed as it cools. Allow the joint to cool naturally for a few seconds without touching it.
Step 8: Inspect Your Work
A perfect solder joint looks shiny and smooth with a cone-like shape. If it looks dull and grainy, you’ve created a “cold joint”—the solder didn’t properly bond to the metals. Cold joints look okay but conduct poorly and fail easily. You’ll need to reheat and re-solder these connections.
Common Mistakes and How to Avoid Them
The Cold Joint Problem: This is the most common beginner mistake. It happens when you don’t heat the connection long enough or when you apply solder directly to the iron instead of the joint. The solder sits on top like a blob rather than flowing into the connection. Solution: Always heat the metals first, and be patient with heating time.
Applying Too Much Solder: More solder doesn’t create stronger joints—it just makes messy ones. Excess solder can create bridges between adjacent connections, causing shorts in electronics. Use the “grain of rice” guideline and resist the urge to glob it on.
Insufficient Heat: Many beginners fear their iron is too hot and use inadequate heat instead. This creates weak joints and encourages cold solder connections. If your iron is rated for 40 watts, trust it to do its job. Modern irons are designed to handle standard electronic components without damage.
Moving the Joint While Cooling: This is like bumping a wet painting. Even slight movement while the solder cools can create a weak, crystalline joint. Let it cool undisturbed for at least 5 seconds before touching anything.
Dirty Iron Tip: A oxidized or dirty iron tip transfers heat poorly and prevents proper solder flow. Clean your iron tip frequently on the wet sponge or brass cleaner. A clean tip makes soldering dramatically easier.
Wrong Solder Type: Using lead-based solder when you should use lead-free (or vice versa) creates compatibility issues. Stick with lead-free rosin core solder for modern electronics and most DIY projects—it’s the standard for good reason.
Advanced Techniques
Once you’ve mastered basic soldering, these techniques expand your capabilities:
Surface Mount Soldering: Modern electronics use tiny surface mount components that require precise technique. A magnifying glass or jeweler’s loupe helps tremendously. The fundamental process remains the same, just at a smaller scale.
Desoldering and Rework: Sometimes you need to remove a component to replace it or fix a mistake. Desoldering wick works by wicking melted solder away from the joint. Heat the joint with your iron, apply the wick, and the solder flows into the wick’s fibers. Solder suckers use vacuum pressure for the same result. Practice this technique on scrap components before attempting it on valuable electronics.
Flux Application: For difficult connections or older components, applying extra flux before soldering improves bonding significantly. Flux pens make this easy—just apply a small amount to the connection point before heating.
Wave Soldering Simulation: If you’re working on multiple connections in a row, you can “wave” your iron across several joints efficiently. Heat each connection for 2-3 seconds, apply solder, and move to the next. This is faster than individual joints but requires more practice to maintain quality.
Through-Hole vs. Surface Mount: Through-hole soldering (where components have leads that go through circuit board holes) is generally easier for beginners. Surface mount soldering requires finer motor control. Most hobby projects use through-hole components, which is why they’re ideal for learning.
Understanding electrical principles helps too. If you’re working on wiring projects, familiarity with concepts like 3-way switches teaches you how circuits work, which informs better soldering practices. Similarly, if you’re repairing electronics or performing stick drift repairs on gaming controllers, soldering is often the key to bringing them back to life.
For broader DIY competency, soldering complements other skills. While it might seem unrelated to projects like installing a toilet or changing transmission fluid, mastering multiple repair techniques makes you a genuinely capable DIYer who can tackle problems across different domains.
Professional resources like This Old House’s electrical guides and Family Handyman’s soldering tutorials offer video demonstrations that complement written instruction. Home Depot’s tool guides help you select appropriate equipment for your specific projects. Additionally, manufacturer instructions for specific electronics you’re repairing provide context-specific guidance that general tutorials can’t match.
Frequently Asked Questions
What’s the difference between soldering and welding?
Soldering uses a filler metal (solder) to bond two metals without melting the base metals themselves. Welding melts the base metals and fuses them together. Soldering works at lower temperatures and is appropriate for electronics and delicate components, while welding is used for structural metal work.
Can I use a soldering gun instead of a soldering iron?
Yes, but irons are generally better for beginners. Soldering guns heat up instantly (great for production work) but offer less temperature control and are harder to manage for precision work. For learning and hobby projects, a temperature-controlled iron is the better choice.
How long does solder take to cool?
Lead-free solder cools completely in about 30-60 seconds, though you should avoid touching the joint for at least 5 seconds. The joint reaches its full strength after complete cooling, so patience pays off.
What if my solder joint looks dull instead of shiny?
A dull, grainy appearance indicates a cold joint—the solder didn’t properly bond to the metals. Reheat the joint and reapply solder. Ensure you’re heating the connection itself for adequate time before introducing solder.
Is lead-free solder as good as lead-based solder?
Modern lead-free solder is excellent and is the standard in electronics manufacturing. It’s safer to handle, environmentally friendly, and creates joints just as strong and conductive as lead-based solder when applied correctly. The main difference is that it requires slightly higher temperatures.
Can I solder copper pipes like electricians do?
Yes, but that’s a different application requiring different equipment. Plumbing soldering uses higher temperatures and different flux. An electronics soldering iron won’t get hot enough for plumbing work. You’d need a torch-based setup for that type of soldering.
How do I know when my iron is ready to use?
Most irons have an indicator light that turns off when the desired temperature is reached. You can also test by touching solder to the tip—it should melt within 2-3 seconds. Always wait for the iron to reach temperature before beginning work.
What should I do if I burn myself?
Run the affected area under cool water for 10-15 minutes. Don’t apply ice directly. For minor burns, over-the-counter burn cream helps. For serious burns, seek medical attention. Prevention is always better—treat the iron with respect and use proper technique.
Related Posts

How Long to Boil Lobster Tails: Cooking Guide

How Long to Fly from New York to London? Travel Times
