
How to Remove Security Tags: Expert Guide
How to Remove Security Tags: Expert Guide for Clothing and Retail Items
You’ve just gotten home with your new purchase, ready to enjoy it, only to discover that pesky security tag still dangling from the sleeve. Whether it’s a hard plastic tag or a fabric label, security tags can be frustrating obstacles between you and your new wardrobe. The good news? You don’t need to make a return trip to the store or call customer service. With the right approach and a bit of patience, you can safely remove security tags from clothes without damaging your garments.
Security tags come in various forms, each designed with different removal mechanisms in mind. Understanding what type you’re dealing with is the first step toward successful removal. Some tags use magnetic mechanisms, others rely on mechanical pins, and a few employ adhesive or specialized locking systems. The method you choose will depend entirely on the tag type and the fabric you’re working with.
This comprehensive guide walks you through multiple proven techniques to remove security tags from your clothing safely and effectively. Whether you’re dealing with a standard retail tag or something more stubborn, you’ll find practical solutions that won’t compromise your new purchase.
Understanding Different Security Tag Types
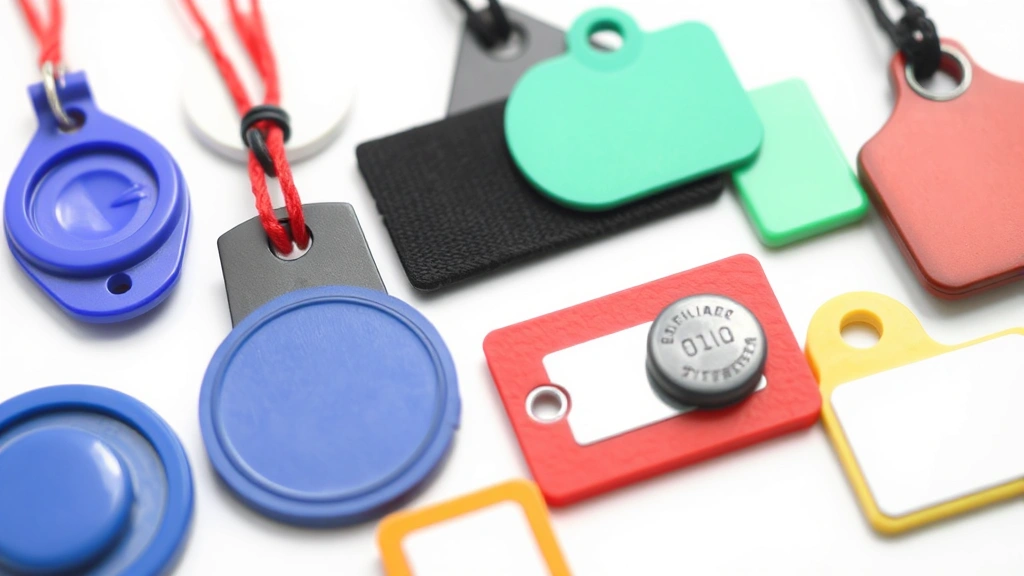
Before you attempt removal, identify what you’re working with. The most common retail security tag is the hard plastic clam-shell style, typically rectangular or square, that clicks loudly when you try to pry it open. These tags usually contain a locking pin mechanism and sometimes an ink cartridge designed to explode if tampered with incorrectly.
Another prevalent type is the fabric label tag, which is sewn directly onto clothing using specialized thread. These require a different approach than their plastic counterparts. Then there are magnetic detacher tags, which respond to specific magnetic frequencies used by store staff at checkout.
Some retailers use ultra-thin adhesive tags that blend into fabric, while luxury brands sometimes employ custom locking mechanisms that are nearly impossible to remove without professional equipment. Understanding which category your tag falls into will help you choose the most effective removal method.
Take a moment to examine your tag closely. Look for any visible locking mechanisms, ink cartridges, or adhesive layers. Does it have a prominent pin? Can you see any magnetic components? This reconnaissance will save you time and frustration down the road.
The Magnet Method: Your Best Starting Point
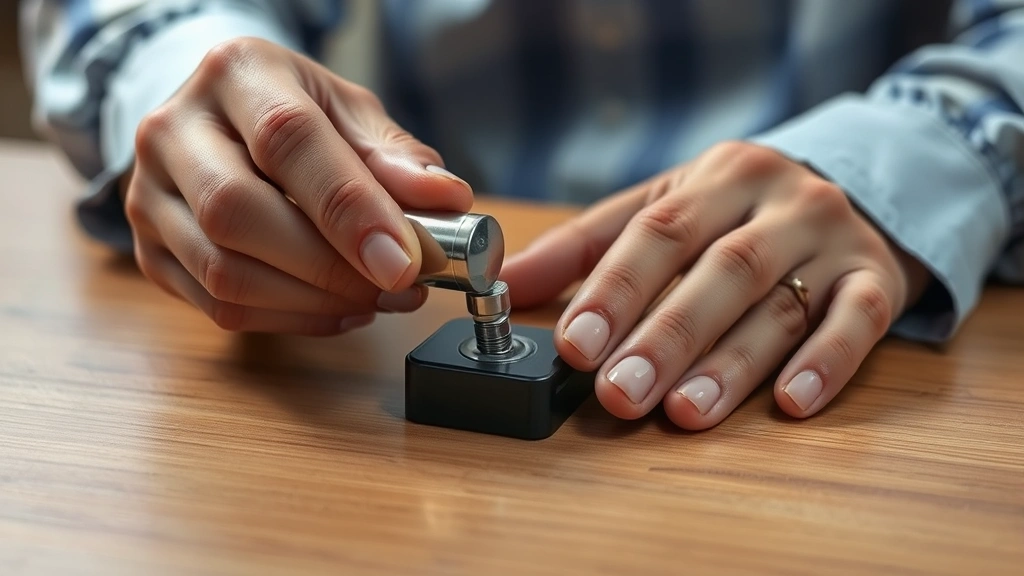
The magnet method is often the easiest and safest approach for most hard plastic security tags. Retail detachers work using powerful magnets, and while your household magnets won’t be quite as strong, they might do the trick on certain tag types. This method is particularly effective for tags manufactured several years ago, which tend to have less sophisticated locking mechanisms.
Start by gathering a strong neodymium magnet—the kind used for holding things on refrigerators or organizing metal objects. Position the tag flat on a table with the magnet held directly over the top. Apply steady, gentle pressure downward for 10-15 seconds. You might hear a subtle click, which indicates the locking mechanism has released.
Once you’ve applied the magnet, carefully attempt to pry open the tag using a flathead screwdriver or butter knife. Insert the tool into the seam where the two plastic halves meet and gently wiggle it back and forth. Avoid using excessive force, as this can damage the tag and potentially trigger any ink cartridges inside.
If you hear a click and feel the tag loosen, you’re on the right track. Slowly work your way around the entire perimeter, gently prying as you go. Many tags will pop open relatively easily once the magnetic lock has been disengaged. Be cautious with the pin mechanism inside—it’s often spring-loaded and can shoot out unexpectedly.
Using Scissors and Precision Tools
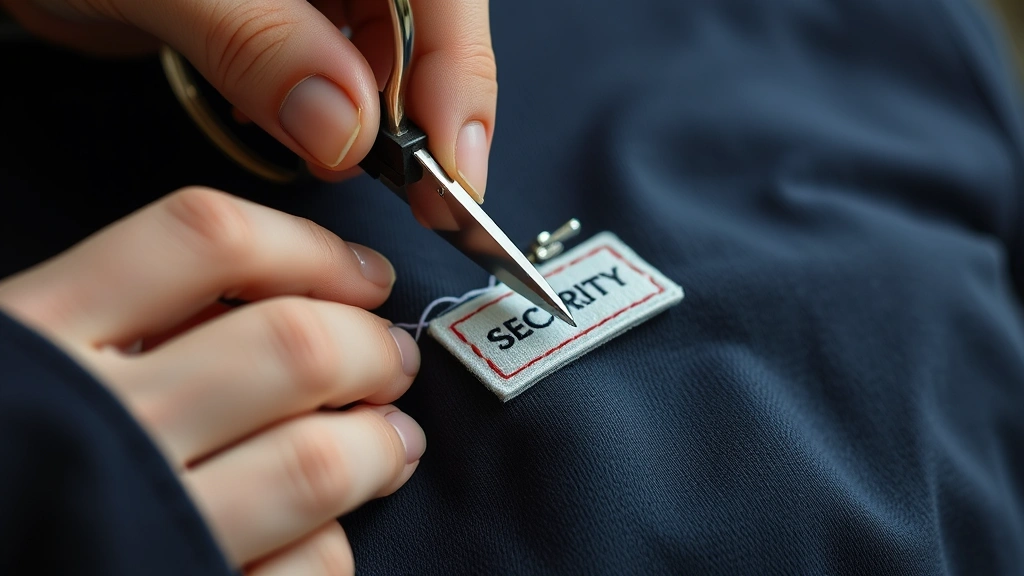
For fabric-based security tags or those sewn directly onto garments, scissors become your best friend. This method requires precision and patience to avoid cutting into the actual fabric of your clothing. Start by examining exactly how the tag is attached. Most sewn-on tags use a single thread or a small cluster of stitches holding them in place.
Use small, sharp scissors—embroidery scissors work perfectly—and carefully cut the thread as close to the tag as possible. Work slowly and deliberately, making small snips rather than large cuts. Hold the fabric taut with one hand while cutting with the other to minimize the risk of accidentally slicing into your garment.
Once you’ve cut most of the thread, gently wiggle the tag to see if it’s loose enough to remove. If there’s still resistance, continue cutting any remaining threads. After the tag is completely free, use tweezers to pull out any remaining thread fragments from the fabric. If you’re worried about damaging delicate materials, consider consulting our guide on how to remove ink from clothes for techniques that work with sensitive fabrics.
For tags attached with adhesive, this method won’t work as effectively. You’ll need to move on to other techniques designed for adhesive-based fasteners. The key is assessing your specific tag type before committing to a removal method.
The Freezer Technique for Stubborn Tags
When standard methods fail, the freezer can be your secret weapon. Cold temperatures can make certain plastics more brittle and potentially loosen adhesive bonds. Place your tagged garment in a freezer bag and leave it in the freezer for 2-4 hours. The cold makes some locking mechanisms less effective and can help adhesive lose its grip.
After the freezing period, remove the garment and immediately attempt removal while it’s still cold. The brittle plastic may be more prone to cracking or popping open. If you’re using the magnet method, try it again after freezing—sometimes the cold resets the magnetic mechanism.
This technique works particularly well for tags with adhesive components, as cold temperatures reduce adhesive strength temporarily. However, once the tag warms to room temperature, the adhesive may re-bond, so work quickly. If the tag doesn’t come off immediately after freezing, you may need to combine this method with others for optimal results.
Be cautious with delicate fabrics, as extreme cold can sometimes affect certain materials. Test this method on an inconspicuous area first if you’re concerned about your garment’s composition.
Dealing with Adhesive and Ink-Based Tags
Adhesive-backed security tags require a completely different approach than mechanical ones. These tags are designed to resist physical tampering, making brute force ineffective and potentially dangerous due to ink cartridge triggers. The safer approach involves carefully dissolving or weakening the adhesive.
Rubbing alcohol is your go-to solution for adhesive tags. Apply a small amount to a cotton ball and press it against the tag’s adhesive edge. Let it sit for 30 seconds to allow the alcohol to penetrate and weaken the adhesive bond. Gently attempt to peel back the tag’s edge. If it doesn’t budge, apply more alcohol and wait another minute.
For tags with ink cartridges, extreme caution is necessary. These cartridges are designed to burst if the tag is forcefully removed or tampered with incorrectly, potentially staining your garment permanently. If you suspect an ink cartridge is present, consider taking the item back to the retailer for professional removal. Attempting removal yourself could result in permanent damage.
If you’re dealing with sticky residue left behind after tag removal, you might need guidance on how to remove super glue techniques, as similar methods work for stubborn adhesive residue. Rubbing alcohol, acetone (test on a hidden area first), or specialized adhesive removers can all help clean up what remains.
Always test any chemical solution on a hidden area of your garment first to ensure it won’t cause discoloration or damage. Some fabrics react poorly to alcohol or acetone, so caution is essential.
Professional Removal Options
Sometimes the best solution is letting professionals handle it. Most retailers will remove security tags free of charge if you bring your purchase back within a reasonable timeframe. This is the safest option for high-value items or garments made from delicate materials.
Dry cleaning establishments often have professional tag removal equipment and experience dealing with various tag types. They understand how to safely handle ink-based tags and can remove them without risking damage to your clothing. The cost is typically minimal—often just a few dollars—and you get the peace of mind that comes with professional service.
If you’ve already attempted removal and damaged the garment, professional cleaners may also be able to help repair the damage or minimize its visibility. For luxury items or vintage pieces, this investment is usually worthwhile compared to the risk of permanent damage.
Another option is contacting the retailer’s customer service directly. Explain the situation, and many will provide you with a magnetic detacher or instructions for safe removal. Some high-end retailers actually provide this service as part of their customer experience.
Protecting Your Garments During Removal
Prevention is better than cure when it comes to protecting your clothing during tag removal. Before you begin any removal method, inspect the area around the tag for potential damage risks. Is the tag attached directly to delicate fabric, or is there a label underneath? Are there any nearby seams or embellishments that could be affected?
Place a piece of cardboard or a thin cloth between the tag and your garment if possible. This creates a barrier that protects the fabric from accidental cuts or adhesive transfer. For items made from silk, satin, or other delicate materials, this extra precaution is especially important.
Work in good lighting so you can see exactly what you’re doing. Poor lighting can lead to mistakes and accidental damage. If you’re using scissors, ensure they’re sharp—dull scissors require more pressure and are more likely to slip, potentially cutting fabric.
For garments that are prone to static from clothes, be aware that some removal methods might increase static buildup. Ground yourself before handling the garment by touching a metal object, and avoid working in extremely dry environments if possible.
After successful tag removal, inspect the area carefully for any damage, residue, or adhesive remnants. Address any issues immediately using appropriate cleaning methods. If you notice any ink stains, treat them promptly before washing, as heat can set stains permanently.
For garments that may have been affected by the removal process, consider learning proper how to shrink clothes techniques if the fabric has been stretched, or consult how to clean leather guides if you’re dealing with leather or faux leather garments that might need special care after tag removal.
Frequently Asked Questions
Will removing a security tag damage my clothes?
Not if you use the right method for your specific tag type. Hard plastic tags can usually be removed without any damage, while sewn-on tags require careful scissor work. Adhesive tags pose the greatest risk, particularly those with ink cartridges. Following the appropriate technique for your tag type minimizes damage risk significantly.
What if the tag has an ink cartridge and I accidentally trigger it?
Stay calm. Ink cartridges release permanent dye that can stain fabric. Immediately blot the area with a clean cloth—don’t rub, as this spreads the ink. Rinse the area with cold water and treat the stain using standard ink removal techniques. For severe stains, professional dry cleaning may be your best option.
Can I use a regular household magnet to remove security tags?
Maybe. Household magnets are significantly weaker than retail detachers, so they won’t work on all tag types. Neodymium magnets (the strong ones) have the best chance of success, but even these won’t work on modern, sophisticated tag designs. It’s worth trying, but don’t be surprised if it doesn’t work.
Is it legal to remove security tags myself?
Yes, absolutely. You own the garment once you’ve purchased it, so removing tags from your own clothing is completely legal. However, attempting to remove tags from merchandise you don’t own, or helping others do so, is considered theft and is illegal.
How do I remove the adhesive residue left behind after tag removal?
Rubbing alcohol works well for most adhesive residue. Apply it to a cotton ball and rub gently until the residue comes off. For stubborn residue, try a specialized adhesive remover or, as a last resort, a tiny amount of acetone (test on hidden fabric first). Wash the area thoroughly afterward.
What should I do if I can’t remove the tag myself?
Take the item back to the retailer where you purchased it. Most stores will remove tags for free, no questions asked. If that’s not possible, visit a local dry cleaner—they have professional equipment and experience dealing with all tag types.
Can I cut off a security tag with wire cutters?
Cutting through the plastic casing of a security tag with wire cutters is risky, especially if an ink cartridge is present. The vibration and pressure from cutting could trigger the cartridge, staining your garment. Scissors work better for sewn-on tags, while other methods are safer for hard plastic tags.
How long should I leave a garment in the freezer before attempting removal?
Two to four hours is the sweet spot. Longer periods won’t necessarily improve results and might affect delicate fabrics negatively. Work quickly after removing the garment from the freezer while it’s still cold, as the beneficial effects diminish as it warms to room temperature.
Related Posts

How Long to Boil Lobster Tails: Cooking Guide

How Long to Fly from New York to London? Travel Times
