
How to Propagate Succulents: Expert Guide
How to Propagate Succulents: Expert Guide
Succulents have become the darling of modern gardening, and for good reason. These resilient little plants thrive on neglect, boast stunning aesthetics, and multiply faster than you’d think possible. But here’s the thing most people don’t realize: you don’t need to buy new succulents constantly. With the right knowledge, your single jade plant or echeveria can become an entire collection of thriving plants—all for the cost of a watering can and some patience.
Propagating succulents is one of those rare DIY projects that feels like magic. You snip a leaf, wait a few weeks, and suddenly you’ve got a baby plant. It’s not just rewarding; it’s genuinely addictive. Whether you’re looking to fill your windowsills with greenery or gift friends with living plants they can actually keep alive, learning how to propagate succulents is an essential skill that takes just a few minutes to master.
The best part? This isn’t some complex gardening secret reserved for horticulturists. Anyone with a sunny spot and basic materials can do this successfully. Let’s walk through everything you need to know.
Understanding Succulent Propagation Methods
Before you start snipping away at your plants, it helps to understand what you’re actually doing. Propagation is simply creating new plants from existing ones, and succulents offer multiple pathways to success. The two primary methods are leaf propagation and stem cutting propagation, each with its own advantages and ideal use cases.
Leaf propagation is exactly what it sounds like: you remove a healthy leaf from your succulent and coax it into becoming a whole new plant. This method works beautifully for varieties like echeveria, aeonium, and jade plants. Stem cutting propagation, on the other hand, involves removing a section of the plant’s stem and encouraging roots to develop. This technique works particularly well for trailing succulents and varieties with thicker stems.
The reason succulents are so propagation-friendly comes down to their biology. These plants store water in their leaves and stems, which means they can survive and develop roots with minimal resources. They’re essentially built for reproduction, which is why you’ll sometimes find baby plants spontaneously appearing in your soil.
Understanding the difference between these methods matters because some succulents respond better to one technique over another. For instance, if you’re curious about how to propagate pothos, you’ll find that technique shares some similarities with succulent stem cutting but differs in moisture requirements. Similarly, the process for how to propagate snake plant involves some overlapping principles, though snake plants have their own quirks.
Leaf Propagation: The Easiest Method
Let’s start with leaf propagation because it’s genuinely the most forgiving method for beginners. You’ll need minimal tools: healthy succulent leaves (preferably from the base or middle of the plant), a shallow tray or container, well-draining soil, and patience. That’s it.
Step 1: Harvest Your Leaves
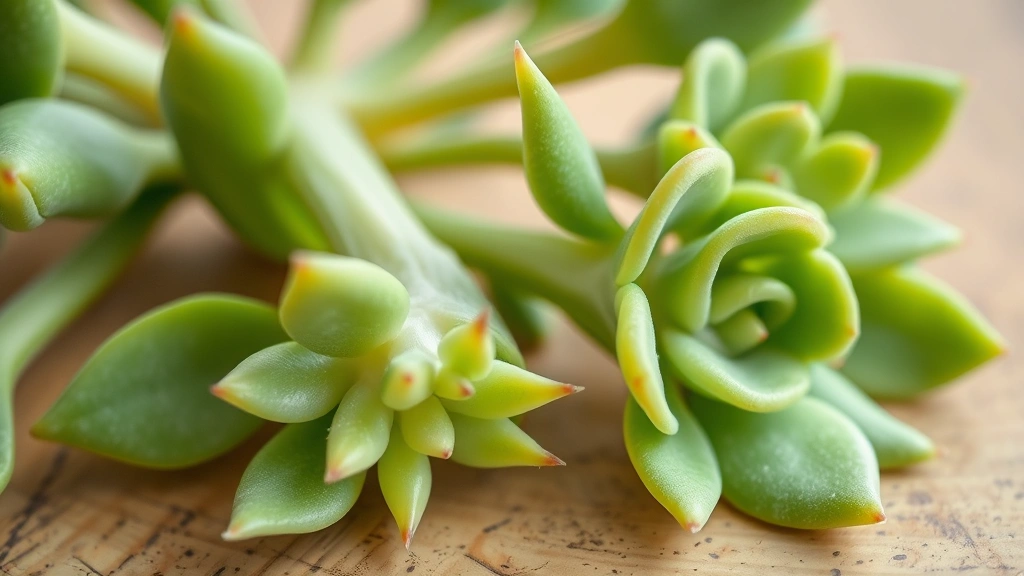
Gently grasp a leaf near the base of your succulent and wiggle it side to side with a slight downward motion. You want the entire leaf to come off cleanly, without any stem attached. This is crucial because a leaf with even a tiny bit of stem attached has a much better survival rate. If you’re working with a particularly stubborn plant, you can use a clean knife to make a precise cut right at the base.
Choose leaves that are plump and healthy-looking. Thin, shriveled leaves are less likely to propagate successfully. Ideally, collect more leaves than you think you’ll need—not all will make it, and that’s perfectly normal. A 70-80% success rate is considered excellent.
Step 2: Let Them Callus Over
This step separates successful propagators from frustrated plant parents. After removing your leaves, place them on a dry surface in indirect light and leave them alone for 3-7 days. During this time, the cut end will develop a protective callus—essentially a tiny scab that prevents the leaf from rotting when it contacts soil. Skip this step, and you’ll likely watch your leaves turn mushy and brown.
Step 3: Prepare Your Propagation Medium
Use well-draining soil specifically formulated for succulents or create your own mix with regular potting soil and perlite in a 1:1 ratio. Fill a shallow tray or small pots with this mixture. Dampen the soil lightly—not soaking wet, just slightly moist. This is the sweet spot where roots can develop without the leaf rotting.
Step 4: Place Leaves on Soil
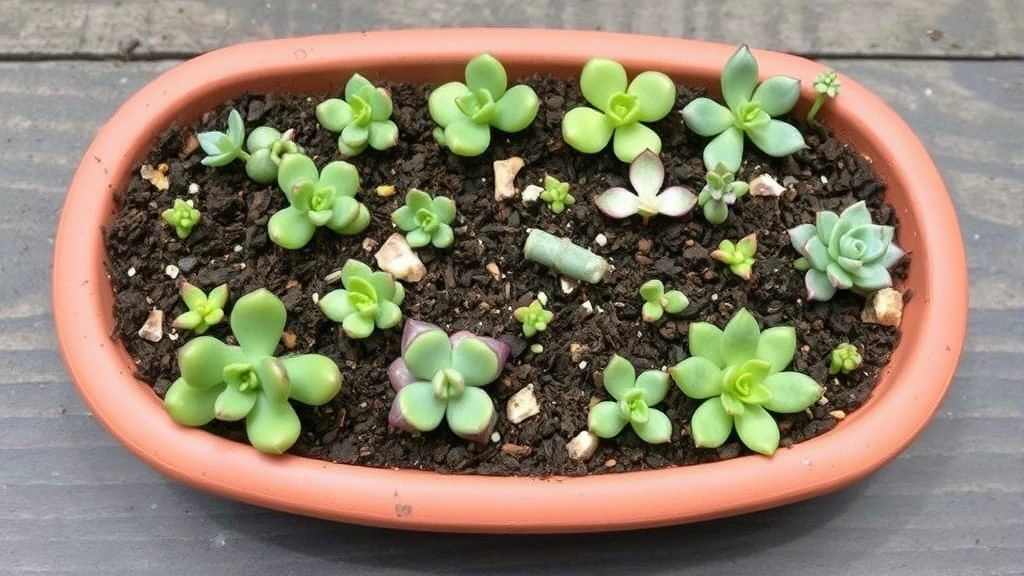
Lay your callused leaves flat on top of the soil, cut-side down. You can nestle them slightly into the soil, but don’t bury them. They should have good contact with the growing medium but remain mostly visible. If you’re using individual pots, one leaf per pot works well.
Step 5: The Waiting Game
Place your tray in bright, indirect light. An east or west-facing window works perfectly. Keep the soil lightly moist but never soggy—mist it every few days or water sparingly when it feels completely dry. Roots typically appear within 2-3 weeks, though some varieties take longer. Baby rosettes begin forming around week 4-6.
Once you see a tiny rosette forming, you can reduce watering even further. At this point, the baby plant is developing its own root system and needs less external moisture. Most propagators wait until the rosette is about half an inch across before treating it as an independent plant.
Stem Cutting Propagation
Stem cutting propagation is your go-to method for trailing succulents, tall leggy plants that need pruning, or varieties where leaf propagation doesn’t work well. Echeveria, sedum, and crassula species all respond beautifully to this technique.
Step 1: Select and Cut Your Stems
Using clean, sharp scissors or pruning shears, cut a section of stem 2-4 inches long, ideally from the top of the plant. Make your cut just below a node (the little bumps on the stem where leaves attach). Remove the lower leaves from this cutting, leaving the top 4-6 leaves intact. This bare section is where roots will develop.
Step 2: Callus Formation
Just like with leaf propagation, let your stem cuttings sit in dry, indirect light for 3-7 days to form a protective callus. This is non-negotiable if you want success. The callus prevents rot and signals to the plant that it’s time to develop roots.
Step 3: Planting Your Cuttings
Fill a container with succulent-specific soil and dampen it lightly. Insert your stem cutting about an inch deep into the soil, cut-end down. The bare section should be buried while the leafy top remains above soil. You can plant multiple cuttings in the same container, spacing them a couple of inches apart.
Step 4: Provide Appropriate Conditions
Place your container in bright, indirect light. Water sparingly—the soil should be barely moist. After 2-3 weeks, gently tug on the cutting. If you feel resistance, roots have developed. Once roots are established, you can gradually increase watering frequency as you would with a mature succulent.
One advantage of stem cutting propagation is speed. You’ll have a recognizable plant much faster than with leaf propagation because you’re starting with established foliage. However, it does require removing material from your parent plant, which some people prefer to avoid.
Creating the Ideal Growing Environment
Success with succulent propagation hinges on getting your environment right. These plants don’t ask for much, but what they do ask for is specific.
Light Requirements
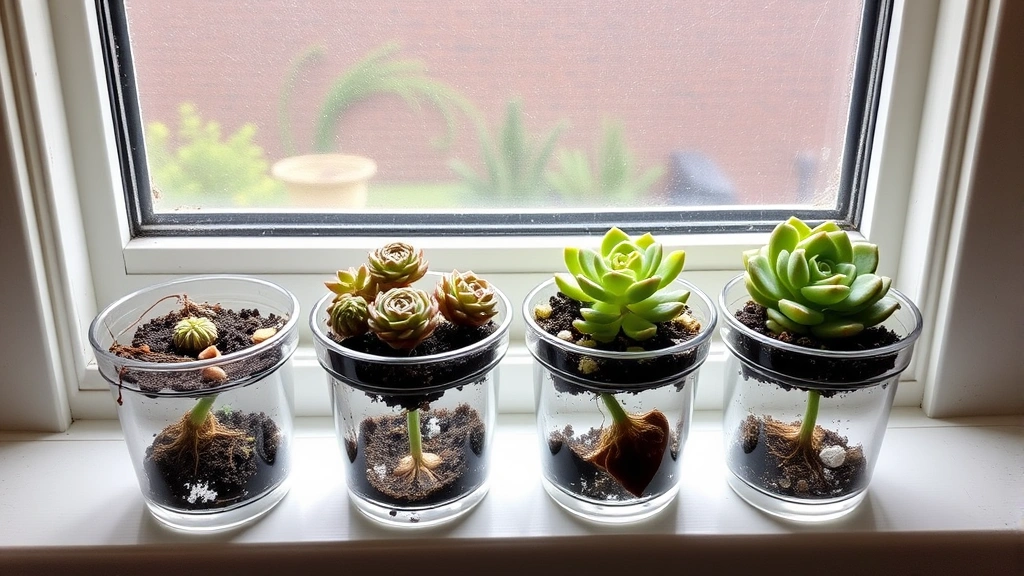
Succulents need bright light to thrive and develop properly. During propagation, bright, indirect light is ideal. A sunny windowsill that receives 4-6 hours of light daily works perfectly. If you’re in a low-light situation, consider a grow light positioned 6-12 inches above your propagations. Too little light results in weak, pale plants that struggle to establish themselves.
Temperature and Humidity
Most succulents prefer temperatures between 65-75°F during the day, with cooler nights being beneficial. Humidity should be kept moderate—succulents don’t appreciate the tropical greenhouse treatment. In fact, high humidity increases rot risk, which is why proper air circulation matters. A small fan on low speed in your propagation area helps prevent fungal issues.
Soil Composition
This cannot be overstated: regular potting soil will kill your propagations. The issue is drainage. Standard potting soil retains moisture, and succulents despise soggy roots. Use succulent or cactus-specific soil, or amend regular potting soil with 40-50% perlite or coarse sand. The goal is a medium that drains quickly while still providing some moisture retention.
Container Selection
Choose containers with drainage holes—this is non-negotiable. Shallow trays work well for leaf propagation, while individual small pots suit stem cuttings. Some propagators use terracotta, which offers excellent drainage and breathability. Plastic works fine too; just ensure drainage is adequate.
Common Mistakes and How to Avoid Them
Even with the best intentions, propagation attempts fail. Understanding common pitfalls helps you navigate around them.
Overwatering
This is the number-one killer of succulent propagations. People see a tiny plant and think it needs frequent watering, which is understandable but catastrophic. Succulents store water internally; they need less than you think. During propagation, mist occasionally or water only when soil is completely dry. When in doubt, err on the side of dryness.
Poor Drainage
Using inappropriate soil is the second-biggest culprit. If your propagations are consistently failing, examine your soil first. Does water drain through quickly? Does it feel heavy and compact? If so, amend it immediately with perlite or repot into a better medium.
Insufficient Light
Baby succulents need light to develop properly. Inadequate light results in stretched, weak plants that never achieve their full potential. Ensure your propagation area receives bright, indirect light consistently. If natural light isn’t available, supplement with grow lights.
Skipping the Callus Step
Some eager propagators skip the callus period, thinking they’re saving time. They’re actually guaranteeing failure. That 3-7 day wait is essential. The callus is literally the difference between success and rotting leaves.
Using Diseased or Weak Material
Propagating from unhealthy parent plants transfers problems to offspring. Before harvesting leaves or cuttings, ensure your parent plant is healthy and pest-free. If you notice any signs of disease or pest infestation, treat the parent plant first.
Patience Issues
Propagation takes time. Leaf propagation can take 6-8 weeks before you have a recognizable plant. If you’re checking constantly, adjusting conditions, or second-guessing yourself, you’ll likely cause more harm than good. Set up your propagations and largely leave them alone. Resist the urge to constantly fiddle.
For comparison, if you’re interested in how to grow garlic or how to grow ginger, you’ll find similar patience requirements with plant propagation projects. Similarly, how to plant grass seed requires understanding the right conditions and resisting the urge to over-manage the process.
Additional Resources and Expert Tips
For comprehensive guidance on succulent care post-propagation, This Old House offers detailed succulent growing guides. Family Handyman provides practical step-by-step instructions for various propagation scenarios. For specific succulent varieties and their individual needs, Garden Myths offers evidence-based succulent propagation information.
Frequently Asked Questions
How long does succulent propagation take?
Leaf propagation typically takes 6-8 weeks from leaf removal to a recognizable plant. Stem cutting propagation is faster, usually producing visible plants in 4-6 weeks. However, individual varieties vary, and environmental conditions affect timeline. Patience is essential—rushing the process often leads to failure.
Can I propagate succulents in winter?
Technically yes, but it’s not ideal. Succulents have reduced growth during winter months, which slows propagation significantly. If you must propagate in winter, provide supplemental grow lights and maintain consistent warmth. Spring and early summer are optimal propagation seasons when plants are naturally more active.
What’s the success rate for succulent propagation?
With proper technique, expect a 70-80% success rate for leaf propagation and slightly higher for stem cuttings. Some leaves simply won’t propagate for reasons beyond your control—it’s just part of the process. This is why collecting extra leaves is wise.
Do I need special equipment to propagate succulents?
No. Basic materials suffice: clean scissors, a shallow tray, succulent soil, and water. Some propagators use grow lights or heat mats, but these are optional enhancements rather than requirements. A sunny windowsill and basic materials are genuinely enough.
Can I propagate all succulent varieties?
Most succulents can be propagated, but some species respond better to specific methods. Echeveria, jade, aloe, and sedum are propagation superstars. Some varieties are trickier, but nearly all respond to at least one propagation method. If leaf propagation fails with a particular species, try stem cuttings.
Should I use rooting hormone for succulents?
Rooting hormone is optional for succulents. Unlike many plants, succulents are so predisposed to root development that hormone isn’t necessary. That said, it doesn’t hurt and may slightly accelerate the process. Use a powder formulation designed for succulents if you choose to use it.
How do I transition propagated succulents to regular pots?
Once your baby plants are established with visible roots and are about half an inch across, gradually transition them to regular succulent care. Move them to slightly larger pots with succulent soil. Maintain bright light and reduce watering frequency as they mature. After 2-3 months of growth, they’re essentially mature plants requiring standard succulent care.
What’s the best time of year to propagate succulents?
Spring and early summer are ideal because plants are naturally in growth mode. You can propagate year-round, but results are fastest during active growing seasons. Avoid late fall and winter when growth naturally slows.
Related Posts

How Long to Boil Lobster Tails: Cooking Guide

How Long to Fly from New York to London? Travel Times
