
How to Make Tortilla Chips: Easy Recipe Guide
How to Make Tortilla Chips: Easy Recipe Guide
There’s something magical about the moment when you bite into a freshly made tortilla chip—that satisfying crunch, the warmth still radiating from the kitchen, the knowledge that you created something delicious with your own two hands. If you’ve ever wondered whether you could replicate that restaurant-quality experience at home, the answer is a resounding yes. Making tortilla chips isn’t just possible; it’s surprisingly straightforward, and the results will make you question why you ever bought the pre-packaged variety.
The beauty of homemade tortilla chips lies in their simplicity and versatility. With just a handful of ingredients and basic kitchen equipment, you can craft chips that are perfectly crispy, lightly seasoned, or boldly flavored according to your preferences. Whether you’re preparing them for a casual family gathering, a game day spread, or simply stocking your pantry with a healthier snack option, this guide will walk you through every step of the process.
Beyond the basic technique, we’ll explore creative variations, troubleshooting tips, and pairing suggestions that transform your homemade chips into the star of any occasion. Let’s dive in.
Ingredients You’ll Need
The foundation of exceptional tortilla chips starts with quality ingredients. You’ll need corn tortillas as your base—ideally fresh ones, though day-old tortillas work beautifully too. Corn tortillas are preferable to flour tortillas for this project because they crisp up more effectively and deliver that authentic texture you’re after.
For the frying method, you’ll need neutral oil with a high smoke point. Vegetable oil, canola oil, or peanut oil are excellent choices. If you’re going the healthier route with baking, you can use a light coating of oil or skip it entirely for a lower-fat version. Salt is your basic seasoning foundation, though you might consider kosher salt or sea salt for better flavor distribution.
Here’s the complete ingredient list:
- 4-6 corn tortillas (fresh or slightly stale)
- Oil for frying or baking (vegetable, canola, or peanut oil)
- Salt to taste
- Optional: lime juice, garlic powder, cumin, chili powder, or paprika
The beauty of this recipe is its flexibility. You can start with these basics and then experiment with whatever seasonings call to you.
Equipment Essentials
You don’t need fancy gadgets to make excellent tortilla chips. A sharp knife or pizza cutter handles the cutting work efficiently. A heavy-bottomed pot or deep skillet is essential for the frying method—it distributes heat evenly and prevents hot spots that can burn your chips. A thermometer for monitoring oil temperature is genuinely helpful, though experienced cooks can judge readiness by observing how a test chip behaves.
For the baking method, a standard oven and baking sheet suffice. A wire rack placed on top of the baking sheet allows excess oil to drain during the frying process, resulting in crispier chips. Paper towels are invaluable for blotting excess oil and absorbing moisture.
Optional but helpful items include:
- Deep-fry or candy thermometer
- Slotted spoon or spider strainer for removing chips
- Wire cooling rack
- Kitchen tongs
- Large mixing bowl for seasoning
Step-by-Step Instructions
Let’s walk through the process of creating your homemade tortilla chips from start to finish. This method produces consistently excellent results whether you’re making a small batch or cooking for a crowd.
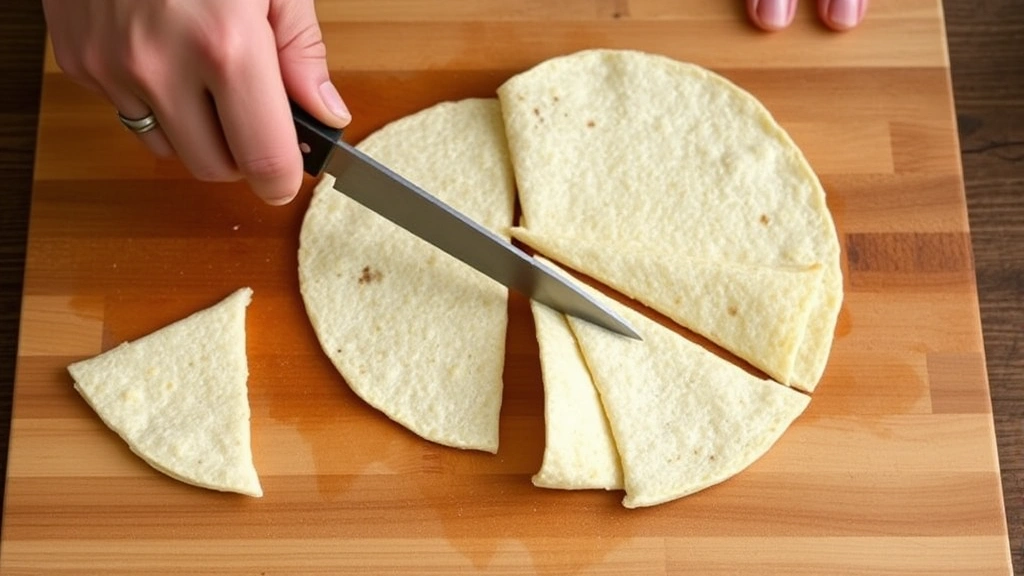
Preparation Phase: Start by laying your corn tortillas flat on a cutting board. If they’re particularly fresh and pliable, you might let them air dry for 10-15 minutes to make cutting easier. Using a sharp knife or pizza cutter, cut each tortilla into triangular wedges—typically 6-8 wedges per tortilla work well. Try to keep the pieces relatively uniform so they cook at the same rate.
Heating Your Oil: Pour your chosen oil into your pot or skillet to a depth of about 1-1.5 inches. Heat the oil to 350°F (175°C). This temperature is crucial—too cool and your chips will absorb excess oil and become greasy; too hot and they’ll burn before the inside crisps. Use your thermometer to verify the temperature, or test it by dropping a small piece of tortilla into the oil. It should sizzle immediately and float to the surface within a few seconds.
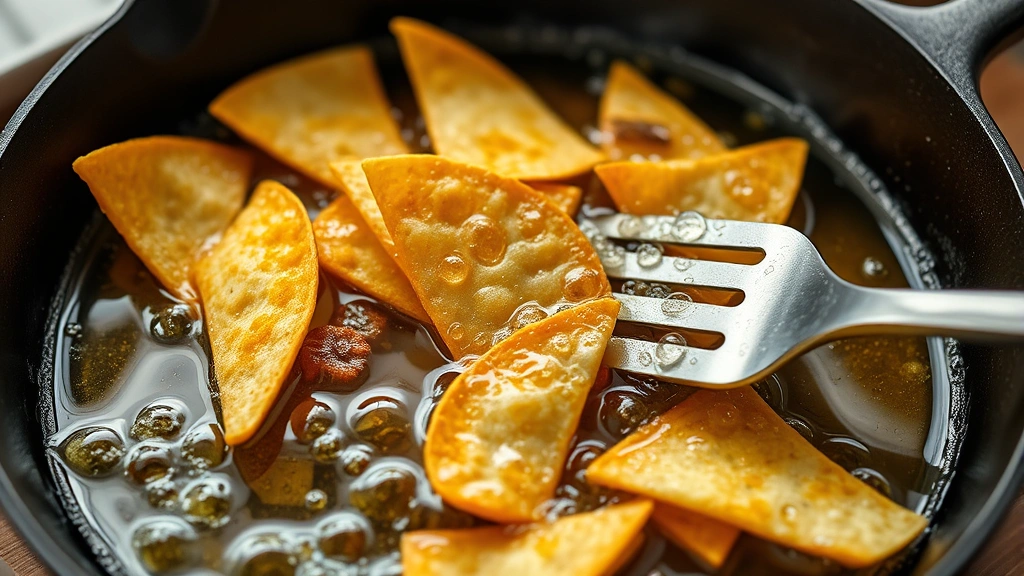
Frying Your Chips: Working in batches to avoid overcrowding, carefully place tortilla wedges into the hot oil. They should sizzle actively but not violently. Fry for approximately 1-2 minutes, stirring occasionally with a slotted spoon to ensure even cooking. You’re looking for a light golden color and a crispy texture. This is where timing matters—even 30 seconds can be the difference between perfectly crispy and slightly overdone.
Draining and Seasoning: Remove the chips with your slotted spoon and transfer them to a paper towel-lined plate or wire rack. This allows excess oil to drain. While the chips are still warm, sprinkle them with salt or your chosen seasonings. The warmth helps seasonings adhere better than if you wait until they’ve cooled.
Allow your chips to cool completely before storing. They’ll continue to crisp up as they cool, so don’t be alarmed if they seem slightly soft immediately after frying.
Frying Method vs. Baking Method
While frying produces the most authentic, restaurant-quality tortilla chips, baking offers a lighter alternative that appeals to health-conscious chip enthusiasts.
The Frying Advantage: Understanding how to fry properly elevates your chip game significantly. Fried chips achieve that perfect combination of crispy exterior and tender interior that’s difficult to replicate with other cooking methods. The oil transfers heat efficiently and creates the ideal texture. Fried chips also maintain their crispness longer than baked varieties.
The Baking Approach: Preheat your oven to 375°F (190°C). Cut your tortillas into wedges as described above. Toss them lightly with oil—just enough to coat them—and spread them in a single layer on a baking sheet. Bake for 8-12 minutes, stirring halfway through, until they’re golden and crispy. This method uses considerably less oil and produces a lighter chip, though some argue they lack the authentic crunch of fried versions.
For most home cooks, the frying method is worth the extra effort. The time investment is minimal, and the results justify the approach. However, if you’re preparing chips for someone watching their oil intake, baking absolutely works and still produces delicious results.
Seasoning and Flavor Variations
Plain salted tortilla chips are wonderful, but this is where your creativity truly shines. The warm chips readily absorb seasonings, making them the perfect canvas for flavor experimentation.
Classic Combinations: Lime and chili powder create that street-food vibe reminiscent of Mexican cuisine. Garlic powder mixed with paprika delivers a smoky, savory profile. For something bolder, combine cumin, chili powder, and a touch of cayenne pepper.
Consider complementing your chips with homemade dips. Preparing how to make salsa gives you fresh, vibrant accompaniments that pair perfectly with warm chips. For those who prefer creamier options, learning how to make guacamole rounds out your snack spread beautifully.
Unexpected Flavor Profiles: Ranch seasoning mixed with a bit of dill creates a sophisticated snack. Parmesan cheese with Italian herbs offers a completely different direction. Cinnamon and sugar transform tortilla chips into a dessert-adjacent treat that’s surprisingly addictive. Tajín seasoning—a Mexican blend of chiles, lime, and spices—elevates chips to restaurant quality instantly.
Application Techniques: For dry seasonings, toss your warm chips in a bowl with the seasoning mixture to ensure even distribution. For wet seasonings like lime juice, apply it before adding dry ingredients so everything adheres properly. The key is seasoning while the chips are still warm; cold chips repel seasonings.
Storage and Shelf Life
Homemade tortilla chips stay crispy for 3-5 days when stored properly. The enemy of chip crispness is moisture, so storage containers matter. Airtight containers work best, keeping humidity out and maintaining that satisfying crunch.
Store your cooled chips in an airtight container at room temperature. Avoid the refrigerator—cold temperatures can draw moisture from the surrounding air into your chips, making them soggy. If your chips do lose their crispness over time, you can revive them by spreading them on a baking sheet and warming them in a 300°F oven for 5-10 minutes.
For longer storage, freeze your tortilla chips for up to two months. Thaw them at room temperature before serving, or warm them in the oven to restore crispness. Many people prefer eating freshly made chips, so you might consider making smaller batches more frequently rather than stockpiling large quantities.
Common Mistakes to Avoid
Oil Temperature Errors: This is the most common pitfall. Oil that’s too cool produces greasy, limp chips; oil that’s too hot burns them before they crisp. Invest in a thermometer or test carefully with your first batch to dial in the perfect temperature for your setup.
Overcrowding the Pan: Frying too many chips at once drops the oil temperature significantly, resulting in oil absorption rather than crisping. Work in batches and give each chip space to cook properly.
Uneven Cutting: Tortilla wedges of different sizes cook at different rates. Aim for consistency so everything finishes simultaneously.
Seasoning Timing: Adding salt after the chips have cooled means it won’t adhere properly. Season immediately while the chips are warm and slightly oily.
Skipping the Draining Step: Allowing chips to sit in oil makes them progressively greasier. Use a rack or paper towels to remove excess oil quickly after frying.
Understanding these common issues means you’ll sidestep them and achieve excellent results on your first attempt.
Frequently Asked Questions
Can I use flour tortillas instead of corn tortillas?
While flour tortillas can be fried into chips, they don’t crisp up as effectively as corn tortillas and tend to retain a slightly chewy texture. Corn tortillas are specifically recommended for this recipe because their composition allows them to achieve that ideal crunch.
What’s the best oil for frying tortilla chips?
Vegetable oil, canola oil, and peanut oil are all excellent choices due to their high smoke points and neutral flavors. Avoid olive oil, which has a lower smoke point and can impart flavors that compete with your seasoning. For a more detailed guide, resources like The Pioneer Woman’s frying guide offer comprehensive information.
How do I know when my chips are done frying?
Look for a light golden color and listen for the sizzle to quiet down slightly. The chips should feel crispy when you touch them with a utensil. If you’re uncertain, remove one chip and let it cool for 10 seconds—it will continue crisping as it cools, so remove them while they’re still slightly pliable.
Can I make tortilla chips without frying?
Yes, baking is a viable alternative. Cut tortillas into wedges, toss lightly with oil, and bake at 375°F for 8-12 minutes, stirring halfway through. The results are lighter and use less oil, though some texture difference is noticeable compared to fried chips.
Do homemade tortilla chips contain additives or preservatives?
One major advantage of homemade chips is their purity. You control every ingredient—no preservatives, no mysterious additives, just tortillas, oil, and seasonings. This makes them an excellent choice for anyone concerned about processed foods.
Can I prepare tortilla chips ahead of time for a party?
Absolutely. Make them up to 5 days in advance and store in airtight containers. If they lose crispness, warm them in a 300°F oven for a few minutes before serving. Many hosts prepare chips the day before a gathering to minimize last-minute cooking.
What’s the difference between homemade and restaurant tortilla chips?
Restaurant chips are often made in bulk with industrial equipment and may contain additives for extended shelf life. Homemade chips are fresher, crispier immediately after cooking, and customizable to your exact preferences. The flavor difference is noticeable—homemade versions taste noticeably better to most people.
Can I add cheese to tortilla chips?
Yes. Sprinkle finely grated cheese on the warm chips immediately after frying. The residual heat will slightly melt the cheese, creating a delicious coating. Cotija, Parmesan, or sharp cheddar work particularly well.
Related Posts

How Long to Boil Lobster Tails: Cooking Guide

How Long to Fly from New York to London? Travel Times
