
How to Make Cottage Cheese: Expert Guide
How to Make Cottage Cheese: Expert Guide
There’s something genuinely satisfying about making your own cottage cheese at home. Not only do you control every ingredient that goes into it, but you also get to witness the magical transformation of simple milk into those distinctive curds and creamy whey. It’s easier than you might think, requires minimal equipment, and tastes infinitely better than most store-bought versions.
Making cottage cheese is one of those culinary projects that feels like alchemy but is actually rooted in straightforward chemistry. Once you understand the basic principles—how acid and heat work together to separate curds from whey—you’ll realize you’ve been overthinking it. Whether you’re interested in this as a cost-effective kitchen endeavor or simply want to explore homemade dairy products, this guide will walk you through everything you need to know.
The best part? You probably already have most of what you need in your kitchen right now. No special equipment, no obscure ingredients, just milk, an acid source, and a bit of patience.
What You’ll Need: Ingredients and Equipment
Let’s start with the essentials. You won’t need to invest in expensive gear or hunt down specialty items. The beauty of making cottage cheese at home is its simplicity, which is precisely why more people should be attempting it.
Ingredients:
- 1 gallon of whole milk (pasteurized, not ultra-pasteurized)
- 1/4 teaspoon of liquid rennet or 1/4 rennet tablet dissolved in cool non-chlorinated water
- 1/4 teaspoon of salt (adjust to taste)
- White vinegar or fresh lemon juice (about 1/4 cup)
- Optional: heavy cream for richness
Equipment:
- Large stainless steel pot
- Long-bladed knife for cutting curds
- Thermometer (crucial for temperature control)
- Cheesecloth or butter muslin
- Colander or strainer
- Slotted spoon
- Measuring cups and spoons
The milk selection matters more than you’d expect. Avoid ultra-pasteurized milk, as the high-heat treatment damages the protein structure needed for proper curd formation. Standard pasteurized whole milk works beautifully. If you have access to local dairy milk, even better—the fresher the milk, the better your results.
Rennet is the secret ingredient that makes everything work. This enzyme causes milk proteins to coagulate, creating those characteristic curds. You can find liquid or tablet rennet at health food stores, cheese-making supply shops, or online retailers. It’s inexpensive and keeps for ages.
Understanding the Science Behind Cottage Cheese
Before you start, let’s demystify what’s actually happening in your pot. Understanding the process makes troubleshooting easier and helps you achieve consistent results.
Milk contains proteins called casein and whey proteins suspended in a liquid matrix. When you introduce an acid (vinegar or lemon juice) and rennet, the casein proteins unfold and bond together, forming a solid network—these are your curds. The remaining liquid is whey, which contains the whey proteins, lactose, and water.
Temperature control is absolutely critical. Different temperatures cause the curds to behave differently. Too cold, and they won’t form properly. Too hot, and they’ll become rubbery and tough. The Goldilocks zone for cottage cheese is typically between 86°F and 104°F, depending on your specific method and desired texture.
This process shares similarities with making other dairy products. If you’re interested in expanding your homemade dairy repertoire, you might want to explore how to make sour cream, which uses a different fermentation approach but offers equally rewarding results. Similarly, understanding curd formation helps when you’re ready to tackle how to make heavy cream or even how to make milk butter.
The cutting technique also influences texture. Larger curds create a chunkier cottage cheese, while smaller curds yield a smoother, creamier product. Most traditional cottage cheese falls somewhere in the middle—small enough to be creamy but with enough texture to be interesting.
Step-by-Step Instructions for Making Cottage Cheese
Now for the main event. Follow these steps carefully, and you’ll have homemade cottage cheese ready in about two hours.
Step 1: Prepare Your Milk
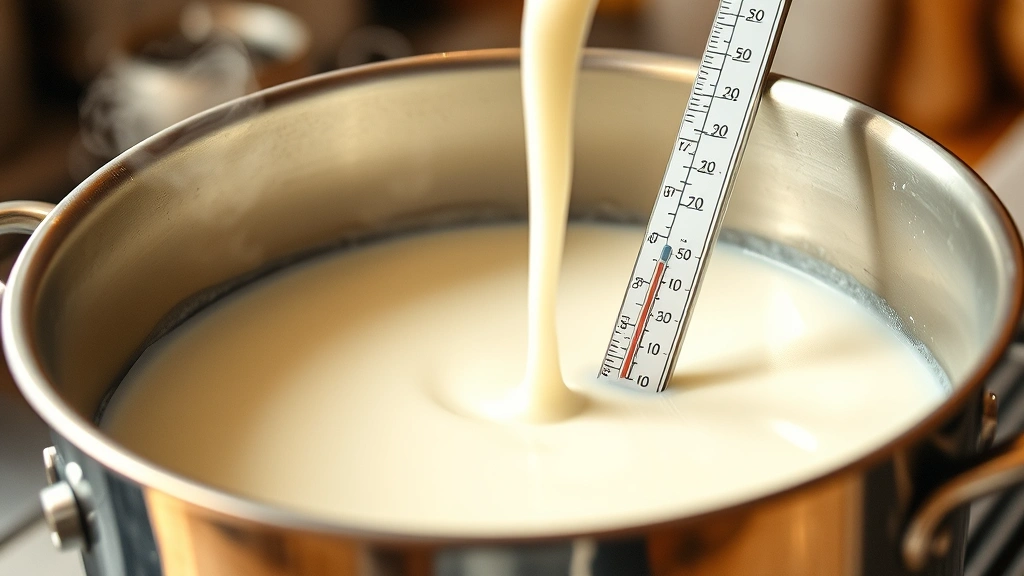
Pour your gallon of milk into the large pot. Slowly heat it to 86°F, stirring occasionally to ensure even heating. Use your thermometer to monitor progress. This initial warming should take about 10-15 minutes. Patience here prevents overshooting the temperature.
Step 2: Add the Rennet
Dilute your rennet in 1/4 cup of cool, non-chlorinated water. Let it sit for a few minutes. Slowly pour this mixture into your warmed milk while stirring gently in an up-and-down motion for about one minute. Stop stirring and let the milk sit undisturbed for 5-10 minutes. During this time, the rennet is working its magic, causing the milk to coagulate.
Step 3: Test for Clean Break
After the resting period, insert a knife at a 45-degree angle into the milk and lift gently. If the curds break cleanly and whey fills the gap, you’re ready to cut. If it’s still too soft, wait another minute or two.
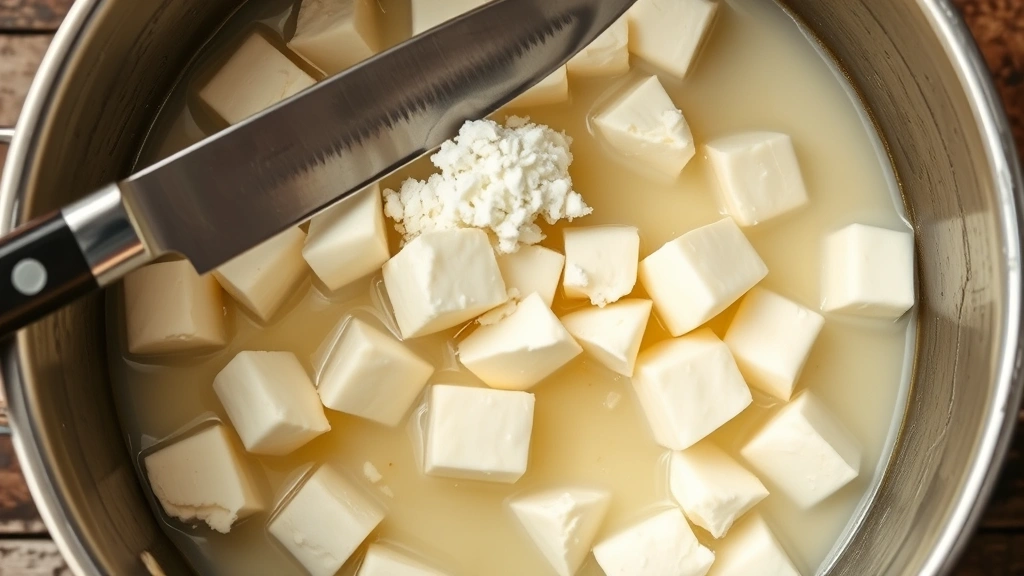
Step 4: Cut the Curds
Using a long-bladed knife, cut the curds into small cubes—roughly the size of a pea to a grain of rice, depending on your preferred texture. Make vertical cuts, then angle your knife to cut horizontally. Work slowly and deliberately. This process should take about 5-10 minutes.
Step 5: Gentle Heating
After cutting, slowly heat the curds to 104°F over about 30 minutes, stirring gently and frequently. This gradual heating firms up the curds. Stir every minute or so, being careful not to break them apart further.
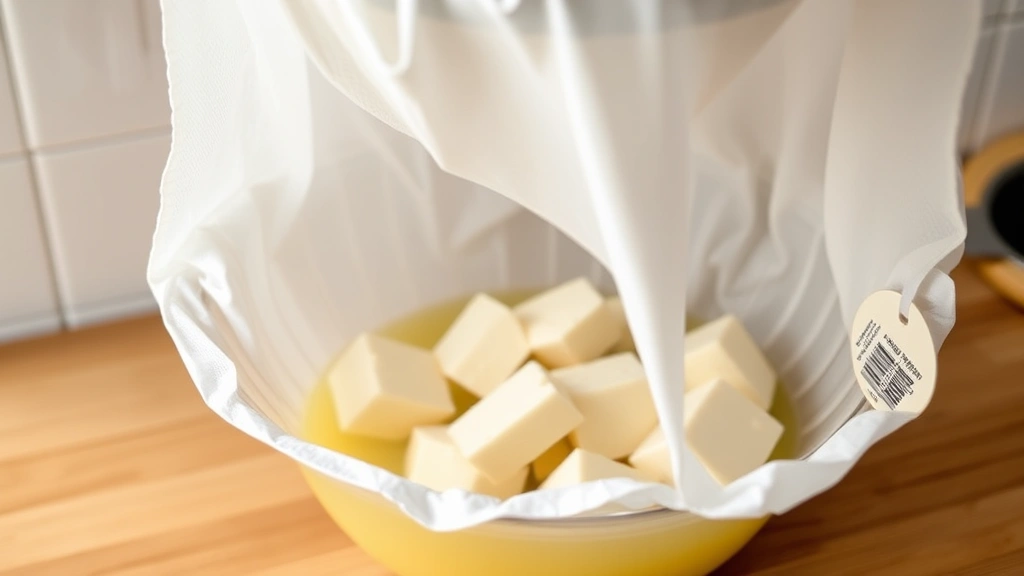
Step 6: Cook and Drain
Once you reach 104°F, maintain this temperature for about 30 minutes, stirring occasionally. The curds will continue to firm up. You’ll notice the whey becoming clearer as the curds expel more liquid. After this cooking period, line your colander with cheesecloth and carefully pour the curds and whey through it, reserving the whey.
Step 7: Rinse the Curds
This step is essential for achieving the right flavor. Pour cool water over the curds in the cheesecloth to rinse away excess whey and lactose. Some people prefer to do a cold water rinse, while others use lukewarm water. The temperature affects the final texture slightly—colder water creates firmer curds. Drain thoroughly.
Step 8: Add Cream and Salt
Transfer your drained curds to a clean bowl. Add about 1/4 cup of heavy cream (or more if you prefer creamier cottage cheese) and 1/4 teaspoon of salt. Stir gently to combine. Taste and adjust seasoning as needed. Some people like to add a touch of fresh dill or chives at this stage.
Congratulations—you’ve just made cottage cheese. It should have a creamy texture with distinct curds throughout. The flavor should be mild and slightly tangy.
Troubleshooting Common Issues
Even with careful attention, sometimes things don’t go exactly as planned. Here’s how to diagnose and fix common problems.
Curds Won’t Form
This usually indicates an issue with your milk or rennet. Ultra-pasteurized milk is the most common culprit. Make sure you’re using standard pasteurized milk. Also verify that your rennet hasn’t expired and was stored properly. If the milk is too cold when you add rennet, give it more time to work—sometimes 15-20 minutes instead of 10.
Curds Are Too Soft or Mushy
You likely didn’t heat them hot enough or long enough during the cooking phase. Make sure you’re reaching and maintaining 104°F for the full 30 minutes. Also, avoid cutting the curds too small initially—this exposes more surface area and causes them to lose too much liquid too quickly.
Curds Are Rubbery or Tough
Conversely, if your curds are tough, you’ve either cooked them too hot or too long. Stick to the 104°F temperature and don’t exceed 30 minutes of cooking. Also ensure you’re not cutting them into pieces that are too small.
Cottage Cheese Tastes Too Sour
This happens when excess whey remains or when you’ve used too much acid. Make sure you’re rinsing thoroughly and draining completely. You might also reduce the amount of vinegar or lemon juice slightly in your next batch.
Cottage Cheese Lacks Flavor
Bland cottage cheese usually means insufficient salt or not enough cream. Add salt gradually, tasting as you go. A bit of fresh lemon juice can also brighten the flavor. Don’t be shy with the cream either—it adds richness and improves mouthfeel.
Flavor Variations and Serving Suggestions
Once you’ve mastered the basic recipe, playing with flavors becomes genuinely fun. Homemade cottage cheese is a blank canvas for creativity.
Savory Variations:
- Fresh herbs: dill, chives, parsley, or basil
- Everything bagel seasoning
- Smoked paprika and cracked pepper
- Roasted garlic and herb blend
- Everything but the bagel seasoning
Sweet Variations:
- Honey and cinnamon
- Vanilla extract and nutmeg
- Fresh berries and a touch of maple syrup
- Lemon zest and poppy seeds
Serving Ideas:
Cottage cheese works brilliantly in both sweet and savory applications. Serve it for breakfast with fresh fruit and granola, or use it as a protein-rich topping for salads. Mix it into smoothies for added creaminess and protein. In cooking, it substitutes beautifully for ricotta in lasagna or pasta dishes. Try it on whole grain toast with everything bagel seasoning for a quick lunch. The versatility is remarkable once you start thinking beyond the traditional bowl.
For those exploring broader culinary endeavors, cottage cheese pairs wonderfully with components like how to make almond milk for creating interesting dairy-free-adjacent dishes, or it can complement homemade how to make brown gravy for more savory applications.
Storage and Shelf Life
Proper storage ensures your homemade cottage cheese stays fresh and delicious.
Refrigeration:
Store your finished cottage cheese in an airtight container in the refrigerator. It will keep for about 5-7 days, though it’s best consumed within the first few days when the texture is optimal. The flavor remains mild and fresh during this window.
Freezing:
Cottage cheese can be frozen, though the texture changes somewhat upon thawing. The curds become slightly grainy. It’s still perfectly usable in cooked dishes like lasagna or baked goods, but it won’t be ideal for eating fresh. Freeze in airtight containers or freezer bags for up to three months.
Signs of Spoilage:
Discard your cottage cheese if you notice an off smell, visible mold, or an unusual slimy texture. Trust your senses—if something seems off, it probably is.
Making in Batches:
Since cottage cheese has a relatively short shelf life compared to aged cheeses, many people prefer making it in smaller batches more frequently rather than attempting to preserve large quantities. A half-gallon batch takes roughly the same time and effort as a full gallon, so you might experiment with different batch sizes to find what works for your household.
Frequently Asked Questions
Can I use non-dairy milk to make cottage cheese?
Unfortunately, no. The process relies on milk proteins (specifically casein) to form curds. Non-dairy milks lack these proteins, so the chemistry simply doesn’t work. You need real dairy milk for this to succeed.
What’s the difference between cottage cheese curds and ricotta?
Great question. While they look similar, they’re made differently. Cottage cheese is made from milk curds, while ricotta is made from whey—the byproduct of other cheese-making. Ricotta has a smoother, more uniform texture, while cottage cheese has distinct curds. The flavor profiles differ too, with ricotta being slightly sweeter.
Do I need special equipment?
No, which is one of the beauties of this project. A good thermometer is essential, but beyond that, you’re using standard kitchen equipment. Cheesecloth is helpful but can be substituted with a fine mesh strainer or even several layers of paper towels in a pinch.
How much cottage cheese does one gallon of milk yield?
Typically, one gallon of milk yields about 1-1.5 pounds of finished cottage cheese, depending on how much cream you add and how thoroughly you drain the curds. This varies slightly based on milk fat content and your specific technique.
Can I use the leftover whey?
Absolutely. Whey is incredibly useful. Use it in soups, bread dough, or as a base for smoothies. It’s packed with protein and other nutrients. Some people even use it for gardening or composting. Don’t waste it.
Why is my cottage cheese grainy?
Graininess usually indicates that your curds are too small or that you’ve cooked them too long. Try cutting them slightly larger in your next batch and reducing the cooking time slightly. Temperature control during the cooking phase is also critical.
Can I use raw milk?
While some people do use raw milk for cheese-making, it carries food safety risks if not from a trusted source. For beginners, stick with pasteurized milk from reputable sources. The safety benefits outweigh any perceived advantages of raw milk.
What temperature should my kitchen be?
Room temperature (around 68-72°F) is ideal for cottage cheese making. Extremely cold kitchens may make it harder to reach and maintain the necessary temperatures, while very warm kitchens could cause overshooting. Work with your environment and adjust your heat source accordingly.
Related Posts

How Long to Boil Lobster Tails: Cooking Guide

How Long to Fly from New York to London? Travel Times
