
How to Install a Toilet: Expert Step-by-Step Guide
How to Install a Toilet: Expert Step-by-Step Guide
Installing a new toilet might seem like a job reserved for plumbers, but here’s the truth—it’s one of the most manageable bathroom upgrades you can tackle yourself. Whether you’re replacing an old, constantly running toilet or upgrading to a water-efficient model, the process is straightforward enough for a confident DIYer. You don’t need fancy tools or years of experience; just patience, basic plumbing knowledge, and the right approach.
A typical toilet installation takes between one and three hours, depending on your comfort level and whether you’re dealing with any complications from the old unit. The real satisfaction comes from knowing you saved a couple hundred dollars in labor costs and gained the confidence to handle future bathroom projects. Let’s walk through everything you need to know to get your new toilet installed properly and functioning beautifully.
Tools and Materials You’ll Need
Before you start, gather everything you’ll need within arm’s reach. Having the right tools prevents frustrating mid-project trips to the hardware store and keeps your workflow smooth. Here’s what you absolutely need:
- Adjustable wrench or socket wrench set for working with bolts and nuts
- Putty knife or scraper to remove old wax ring residue
- New wax ring with bolts (usually comes with the toilet or purchase separately)
- Bucket or wet/dry vacuum for water removal
- Gloves and towels because this job gets messy
- New toilet of your choice
- Flexible water supply line or braided connector
- Caulk and caulking gun (optional but recommended)
- Shims for leveling if needed
- Plumber’s putty or silicone sealant
Optional but helpful additions include a toilet auger (useful if you encounter clogs during removal) and a flange repair kit, just in case the existing flange is damaged beyond simple cleaning.
Preparation: Turn Off Water and Remove Old Toilet
The foundation of a successful installation is removing the old toilet safely and completely. This step requires patience and attention to detail, but it’s absolutely crucial for a clean installation surface.
Step 1: Shut Off the Water Supply
Locate the water shut-off valve behind your toilet, usually positioned low on the wall. Turn it clockwise until water stops flowing. Flush the toilet to empty the tank and bowl completely. If water continues to drain, check that the valve is fully closed. Pro tip: if the valve won’t turn or leaks, you may have found a bonus project—consider replacing it while you’re at it.
Step 2: Disconnect the Water Line
Using your adjustable wrench, carefully loosen the connection where the water supply line meets the bottom of the tank. Have your bucket ready because there will be residual water. Some people prefer using a wet/dry vacuum to catch this water, which is cleaner and faster. Once disconnected, set the supply line aside.
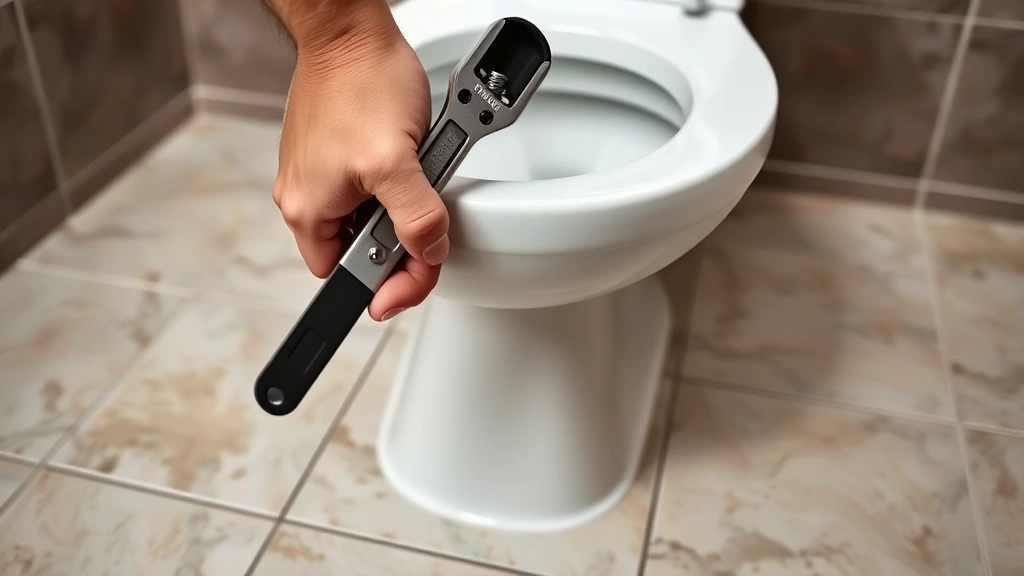
Step 3: Remove Bolts and Lift Away the Old Toilet
Look at the base of the toilet where it meets the floor. You’ll see two bolts (called closet bolts) on either side, usually covered by decorative caps. Pop off these caps and use your wrench to loosen the nuts. Once loose, you can remove the bolts entirely. Now comes the heavy part—carefully rock the toilet side to side gently to break the wax seal, then lift straight up. This is a two-person job if possible; toilets are awkward and heavy. Set it down on your towels in a designated area.
Inspecting and Preparing the Flange
The flange is the ring-shaped fitting that connects your toilet to the drain pipe. It’s absolutely essential that this area is clean and undamaged for a proper seal. Inspect it carefully before proceeding.
Use your putty knife or scraper to remove all old wax ring material, caulk, and debris from around the flange. This is tedious work, but don’t rush it. Any leftover wax or foreign material will compromise your new seal. Once you’ve scraped the flange clean, wipe the area with a damp cloth and let it dry completely.
Check the flange for cracks, breaks, or damage. A damaged flange will cause leaks and instability. If you notice damage, you have a couple of options: you can purchase a flange repair kit that fits inside the existing flange, or you can replace the flange entirely (this requires removing the closet bend, which is more involved). Most minor damage can be addressed with a repair kit, which is the easier route.
Also check that your new toilet’s mounting holes align with the existing closet bolts. If they don’t, you’ll need to adjust the bolts or use an offset flange kit. Most standard toilets fit standard flanges, but it’s worth confirming before proceeding.
Installing the Wax Ring and Bolts
The wax ring creates a watertight seal between your toilet and the drain pipe. It’s a simple component but absolutely critical to preventing leaks and odors.
Setting Up the Bolts
Most wax rings come with bolts included, or you can use your existing closet bolts if they’re in good condition. Insert the bolts through the flange holes so they stand upright. Some bolts have a plastic sleeve that keeps them spaced correctly. Make sure they’re positioned so your toilet’s mounting holes will align with them.
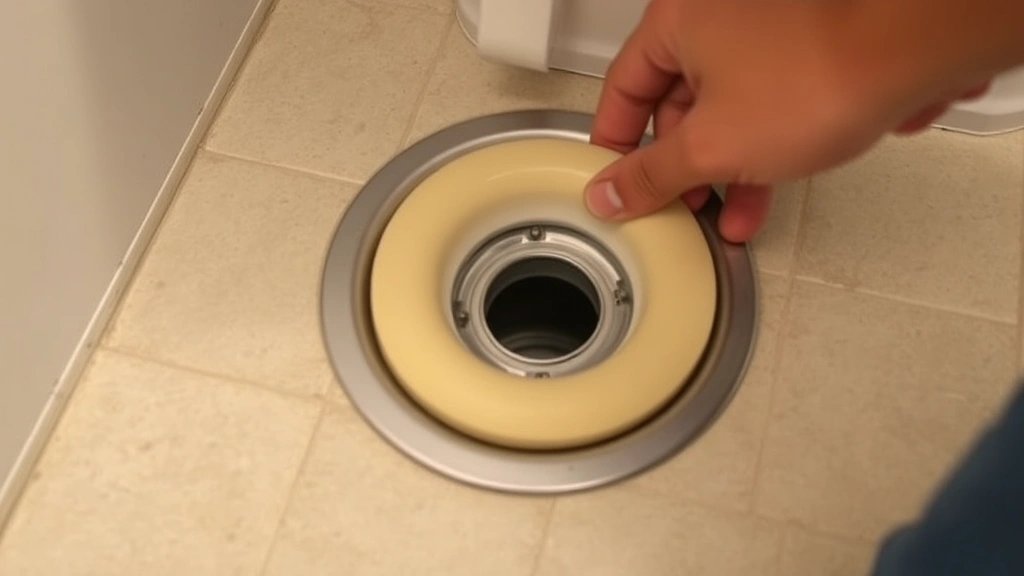
Installing the Wax Ring
This is where many DIYers feel uncertain, but it’s genuinely simple. Take your wax ring (it looks like a hockey puck made of wax) and press it firmly onto the flange opening. The wax should cover the entire flange and create a complete seal. If your wax ring has a plastic horn (a protrusion), this horn should point downward into the drain opening. Press firmly all around the perimeter to ensure good contact.
Some people prefer warming the wax ring slightly by holding it in warm water for a few seconds; this makes it more pliable and easier to seat properly. Others install it at room temperature without issue. Both approaches work fine.
Positioning Your New Toilet
Now comes the moment of truth—lowering your new toilet onto the wax ring. This requires care and precision to avoid damaging the wax ring or misaligning the bolts.
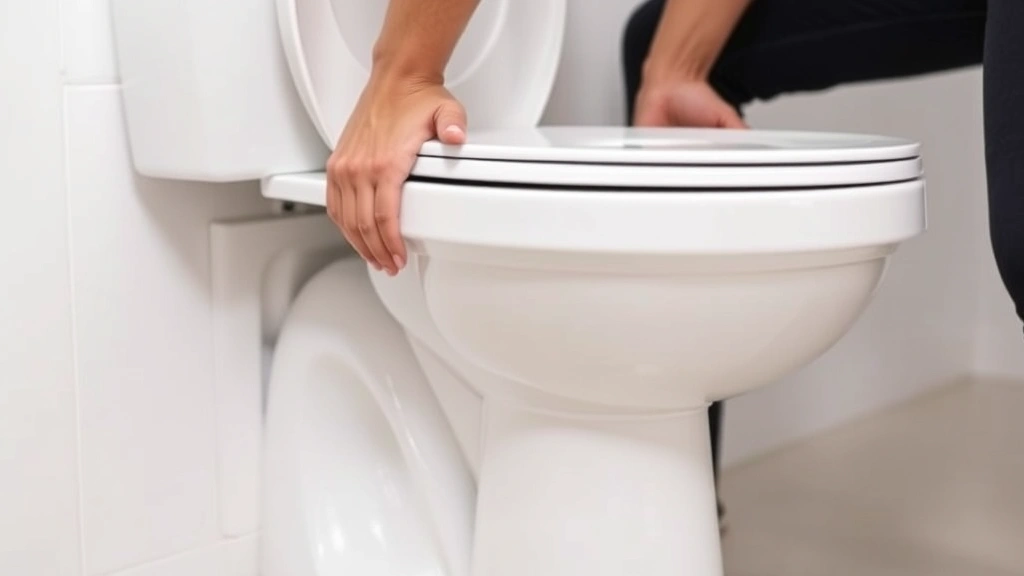
Align and Lower Carefully
Position the toilet over the flange so the mounting holes align with the bolts. Have a helper guide you if possible. Slowly lower the toilet straight down, guiding the bolts through the mounting holes. Don’t force it; if the bolts aren’t sliding in smoothly, stop and realign. Once the toilet is resting on the wax ring, check that it’s roughly level. You can make fine adjustments later.
Check for Rocking
Sit on the toilet gently and rock slightly side to side. There should be minimal movement. If the toilet rocks significantly, you likely have an uneven floor. This is where shims come in handy. Lift the toilet slightly on one side and insert shims under the base until the toilet sits firmly without rocking. Once level, push down firmly on the toilet in all areas to ensure the wax ring compresses evenly.
Securing Bolts and Final Adjustments
With the toilet positioned correctly, it’s time to secure those bolts. This step requires a gentle touch—over-tightening can crack the porcelain or distort the toilet base.
Hand-Tighten First
Thread the washers and nuts onto the bolts by hand. Get them snug, but don’t use your wrench yet. This hand-tightening step helps ensure even pressure across both sides of the toilet.
Use Your Wrench Carefully
Now use your adjustable wrench to tighten the nuts. The key here is balance—tighten one side slightly, then tighten the opposite side by the same amount. This alternating pattern ensures even compression of the wax ring. You want the toilet firmly secured but not cranked down with maximum force. If the toilet stops rocking and feels solid, you’ve likely tightened enough. A good rule of thumb is to tighten until the nuts are snug, then add a quarter turn more. If you hear the porcelain cracking, you’ve gone too far.
Cut and Cap the Bolts
Once tightened, the bolts will likely stick up above the nuts. Using a hacksaw or bolt cutter, cut them flush or slightly above the nuts. Then reinstall the decorative bolt caps to hide the hardware. Some people prefer to caulk around the base of the toilet at this point, which looks finished and helps prevent debris from getting under the toilet base. Use silicone caulk rather than paintable caulk for better longevity.
Reconnecting Water Supply and Testing
You’re almost done. The final steps involve reconnecting water and ensuring everything works properly. This is where you discover whether your installation is successful.
Reconnect the Water Line
Attach the flexible water supply line to the inlet valve at the bottom of the tank. Hand-tighten the connection first, then use your wrench to snug it up further. Don’t over-tighten—you just need it secure enough not to leak. Turn the shut-off valve counterclockwise to restore water supply to the toilet. Water should begin filling the tank.
Adjust the Fill Level
Most modern toilets have an adjustable fill mechanism. As the tank fills, observe the water level. It should stop about an inch below the top of the overflow tube (the hollow pipe in the center of the tank). If it’s too high or too low, adjust the fill valve according to your toilet’s manual. This is an important step because improper fill levels affect flushing performance and water efficiency.
Test the Flush
Flush the toilet and observe the water flow and refill cycle. The flush should be powerful and complete, and the tank should refill within a reasonable time (usually 30 seconds to a minute). If the flush is weak or incomplete, you may have an issue with the fill level or the flapper. If water is running constantly, you likely have a fill valve problem.
Check for Leaks
Look underneath the toilet base where it meets the floor. Dry the area completely with a towel, then check again after 15 minutes. You should see no water. Check the connection where the water supply line meets the valve. It should be completely dry. If you see any leaks, tighten the connection slightly. If water appears under the toilet base after the first flush, you may have a wax ring seal issue, which would require removing and reinstalling the toilet.
Common Installation Issues and Solutions
Even with careful work, sometimes issues arise. Here’s how to handle the most common problems.
Toilet Rocks or Feels Unstable
This typically means an uneven floor or improper bolt tightening. Place shims under the base where gaps exist, then re-tighten bolts evenly. If the floor is severely uneven, you might need additional shims or a leveling compound.
Water Leaks from Under the Toilet
This indicates a failed wax ring seal. You’ll need to remove the toilet and reinstall it with a new wax ring. While frustrating, it’s a fixable problem. Ensure you’re pressing the wax ring firmly onto the flange before lowering the toilet.
Weak or Incomplete Flush
Check the fill level first—if water isn’t reaching the proper height, adjust the fill valve. Also ensure the flapper (the rubber disk that covers the drain) is sealing properly. If these adjustments don’t help, you may have an obstruction in the trapway (internal passages). A plunger or plunging technique for unclogging might solve it, though this is rare in a brand-new toilet.
Continuous Running Water
This usually means the fill valve isn’t shutting off properly or the flapper isn’t sealing. Check that nothing is blocking the flapper from closing completely. If the problem persists, the fill valve may be defective and require replacement.
Bolts Won’t Tighten or Keep Loosening
If bolts spin without tightening, the nut may be stripped or the bolt itself damaged. You may need to replace the closet bolts with new ones, which requires removing the toilet again. This is rare but happens occasionally with older bolt sets.
For more detailed guidance on toilet maintenance and repair, check out This Old House’s bathroom guides, which offer comprehensive plumbing information. You might also appreciate Family Handyman’s toilet installation resources for additional perspectives. Home Depot also provides installation guides and product information for various toilet models.
Frequently Asked Questions
How long does it take to install a toilet?
A typical installation takes one to three hours, depending on your experience level and whether complications arise. Removing the old toilet usually takes 30-45 minutes, and installing the new one takes another 30-60 minutes. The rest of the time involves adjustments, testing, and cleanup.
Can I reuse the old wax ring?
No, always use a new wax ring. Old wax rings have lost their pliability and won’t create a proper seal. This is one area where cutting corners leads to leaks and costly repairs down the road.
Do I need a plumber’s license to install a toilet?
No. Toilet installation is a straightforward task that doesn’t require special licensing in most areas. However, some jurisdictions require licensed plumbers for certain work. Check your local building codes before starting.
What if my toilet is still leaking after installation?
First, check all water supply connections and tighten if needed. If water is leaking from under the toilet base, the wax ring seal has failed. You’ll need to remove the toilet, install a new wax ring, and reinstall. Water leaking from inside the tank indicates an internal component failure, which might be a manufacturing defect—contact the manufacturer for a replacement.
Should I caulk around the toilet base?
Caulking is optional but recommended. It creates a finished appearance and prevents debris from accumulating under the toilet. Use silicone caulk, which remains flexible and lasts longer than paintable caulk. Leave a small gap at the back for moisture drainage.
How do I know if my flange needs replacement?
If the flange is cracked, broken, or severely corroded, it needs replacement. Minor damage can often be addressed with a repair kit. If you’re unsure, a repair kit is usually your first attempt before committing to full flange replacement.
Can I install a toilet without turning off the main water supply?
You should always turn off the water at the shut-off valve behind the toilet. If that valve doesn’t work properly, then turn off your home’s main water supply. Never skip this step—you’re asking for a water disaster if you do.
What’s the difference between a wax ring and a rubber seal?
Wax rings are traditional and very reliable. Rubber seals (sometimes called waxless rings) are a modern alternative that some prefer because they’re reusable and easier to work with. Both work well; choose based on your comfort level and preference.
Is it normal for the toilet to be wobbly during installation?
A slight amount of wobble while you’re positioning it is normal. Once the bolts are tightened and the toilet is fully seated on the wax ring, any significant wobbling indicates an uneven floor or improper installation. Use shims to level it properly.
Can I install a different style toilet in place of my old one?
As long as the new toilet’s base fits the existing flange and mounting holes, yes. Standard toilets all use the same flange size (4 inches), so most replacements are straightforward. Unusual toilet shapes or sizes might require flange adjustment, but this is rare.
Related Posts

How Long to Boil Lobster Tails: Cooking Guide

How Long to Fly from New York to London? Travel Times
