
How to Clean Grapes: Simple and Effective Method
How to Clean Grapes: Simple and Effective Method
There’s something satisfying about reaching into a bowl of perfectly clean grapes on a warm afternoon. Yet many people overlook this simple step, tossing unwashed grapes straight from the produce section into their mouths or directly onto a serving platter. The truth? Those seemingly pristine grapes have traveled through multiple hands, sat in storage facilities, and accumulated dust, pesticide residue, and bacteria along the way. Cleaning grapes properly takes just a few minutes and makes a noticeable difference in both taste and safety.
The good news is that cleaning grapes doesn’t require fancy equipment or complicated techniques. Whether you’re prepping a snack for yourself, creating an impressive fruit platter for guests, or storing grapes for the week ahead, mastering this basic kitchen skill ensures your fruit is genuinely ready to eat. This guide walks you through several effective methods, from the simplest approach to more thorough techniques, so you can choose what works best for your situation.
Beyond just rinsing, understanding how to properly clean grapes helps extend their shelf life and reduces the risk of foodborne illness. Let’s explore the most practical and efficient ways to get your grapes spotlessly clean.
Why Cleaning Grapes Matters
Before diving into the how-to, it’s worth understanding the why. Grapes are grown in vineyards where they’re exposed to soil, insects, and environmental contaminants. During harvest, they’re handled by multiple workers, transported in bins, and stored in warehouses before reaching your local grocery store. Each step introduces potential bacteria, fungi, and residual pesticides to the fruit’s surface.
The CDC has documented several grape-related foodborne illness outbreaks over the years, making proper cleaning a legitimate health concern—not just a preference. Additionally, many commercial grapes are treated with sulfites or other preservatives to extend shelf life, which you’ll want to remove before eating.
Beyond safety, cleaning grapes improves their flavor and texture. A thin layer of dust or residue can dull the natural sweetness and crisp bite of fresh grapes. Once you’ve tasted properly cleaned grapes, the difference becomes immediately apparent. The flavor is brighter, and the mouthfeel is noticeably fresher.
If you’re also interested in maintaining produce quality, you might find our guide on how to clean strawberries helpful, as similar principles apply to delicate fruits. The technique varies slightly depending on the fruit, but the underlying goal—removing contaminants while preserving texture—remains constant.
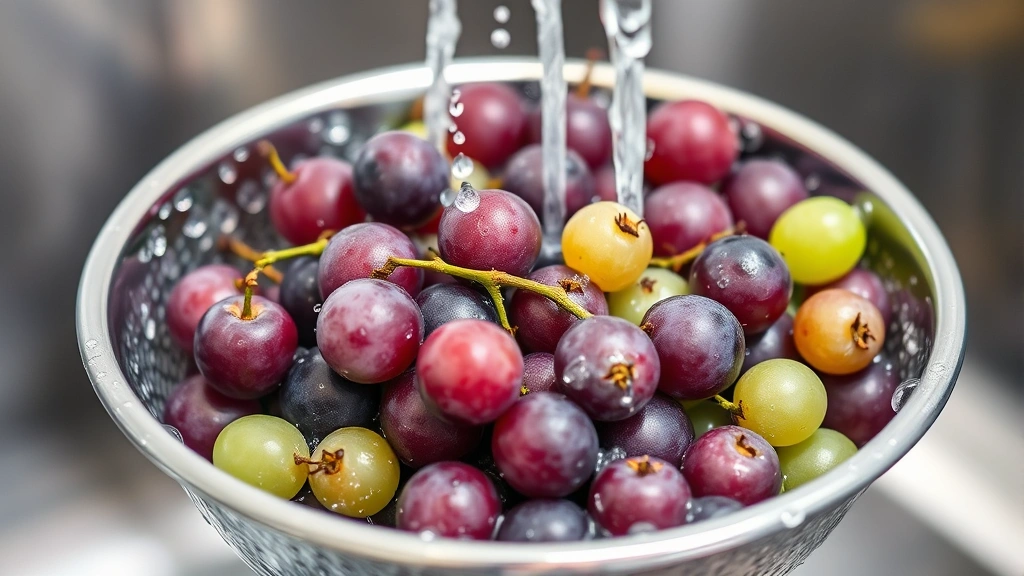
The Basic Water Rinse Method
For everyday cleaning, the simple water rinse is often sufficient and takes less than two minutes. This method works wonderfully when you’re planning to eat grapes immediately or when you want a quick refresh before serving.
What You’ll Need:
- A colander or fine-mesh strainer
- Cool running water
- A clean kitchen towel or paper towels
Step-by-Step Process:
- Place grapes in a colander: Rather than rinsing grapes in your hands (which doesn’t provide thorough coverage), transfer them to a colander. The holes allow water to circulate around each grape.
- Rinse under cool running water: Hold the colander under cool—not cold—running water. Gently move the grapes around with your fingers to ensure water reaches all surfaces. Spend about 30-45 seconds on this step.
- Check for debris: Look for any remaining dirt or debris stuck between grapes. If you spot any, use your thumb to gently rub the affected grape under the water stream.
- Drain thoroughly: Shake the colander gently to remove excess water. Let it sit in the sink for a minute to allow water to drain completely.
- Pat dry: Transfer grapes to a clean kitchen towel and gently pat them dry. Excess moisture can promote mold growth during storage.
This basic method removes surface dust and most contaminants. For grapes you’re eating immediately, this is often all you need. However, if you want extra assurance or are storing grapes for several days, consider one of the more thorough methods below.
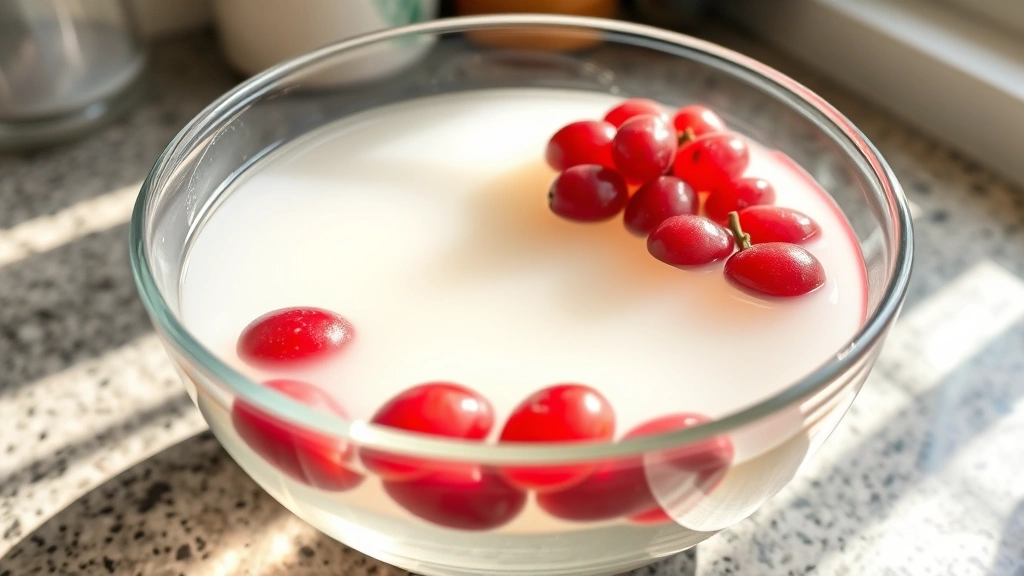
The Vinegar Solution Approach
A vinegar rinse is slightly more involved than plain water but significantly more effective at removing bacteria and residual pesticides. The acidity of vinegar breaks down waxy coatings and kills surface microorganisms without requiring any harsh chemicals.
What You’ll Need:
- White vinegar or apple cider vinegar
- A large bowl or container
- Water
- A colander
- Clean kitchen towels
Step-by-Step Process:
- Create the vinegar solution: Fill a large bowl with three parts water to one part vinegar. For example, three cups of water mixed with one cup of white vinegar creates an ideal cleaning solution. This ratio is strong enough to be effective but mild enough not to damage the grapes.
- Submerge the grapes: Place your grapes directly into the vinegar solution. Let them soak for approximately 5-10 minutes. The vinegar will work to break down surface residues and kill bacteria.
- Swish gently: Occasionally swish the grapes around in the solution with your hand. This helps the vinegar solution reach all surfaces.
- Transfer to colander: Using your hand or a slotted spoon, transfer the grapes to a colander. Don’t pour the entire bowl into the strainer, as this can bruise delicate grapes.
- Final rinse: Rinse the grapes thoroughly under cool running water for 30-45 seconds. This removes any vinegar smell or taste.
- Dry completely: Pat the grapes dry with a clean kitchen towel. Make sure they’re completely dry before storage, as moisture promotes mold.
The vinegar method is particularly useful if you’re storing grapes for more than a few days, as it extends shelf life by reducing bacterial growth. Many professional kitchens use this exact technique for produce preparation.
Using Baking Soda for Deep Cleaning
For the most thorough cleaning possible, a baking soda solution offers excellent results. Baking soda is mildly abrasive yet gentle on fruit, and it’s particularly effective at removing waxy coatings and pesticide residues. This method is ideal if you’re concerned about pesticide exposure or if your grapes appear particularly dusty.
What You’ll Need:
- Baking soda
- A large bowl
- Water
- A soft vegetable brush (optional but helpful)
- A colander
- Clean kitchen towels
Step-by-Step Process:
- Mix the baking soda solution: In a large bowl, combine one tablespoon of baking soda with two cups of water. Stir until the baking soda is fully dissolved. The solution should look like slightly cloudy water.
- Add grapes: Place your grapes into the baking soda solution and let them soak for 12-15 minutes. This longer soak time allows the baking soda to break down waxy coatings more effectively than vinegar alone.
- Gentle agitation: After about 5 minutes of soaking, use your hand to gently agitate the grapes. If you have a soft vegetable brush, you can use it to gently brush individual grapes, though this step is optional.
- Drain and rinse: Transfer the grapes to a colander and rinse thoroughly under cool running water for a full minute. You want to ensure all baking soda residue is removed.
- Secondary rinse: Consider doing a second quick rinse to be absolutely certain no baking soda remains on the fruit.
- Dry thoroughly: Pat the grapes completely dry with a clean kitchen towel. Any residual moisture can lead to mold growth.
This method is your best bet for organic grapes or if you’re particularly concerned about pesticide residues. It’s also excellent before serving grapes to young children or anyone with compromised immune systems. If you’re similarly cautious about other produce, our guide on how to keep apples from turning brown includes additional food safety tips worth reviewing.
Storing Clean Grapes
Once you’ve cleaned your grapes, proper storage ensures they remain fresh and delicious for as long as possible. The timing of cleaning relative to storage matters significantly.
Best Storage Practices:
- Dry before storing: This is crucial. Excess moisture is the primary cause of mold growth on grapes. Ensure grapes are completely dry before placing them in storage containers.
- Use airtight containers: Store cleaned grapes in airtight containers or resealable plastic bags. This prevents moisture loss while protecting them from absorbing odors from other foods in your refrigerator.
- Keep in the coldest section: Store grapes in the back of your refrigerator where it’s coldest, typically in a vegetable drawer or on a lower shelf. The ideal temperature is between 32-35°F.
- Don’t wash before long-term storage: If you plan to store grapes for more than a week, it’s actually better to wait and wash them just before eating. The cleaning process can accelerate deterioration during extended storage.
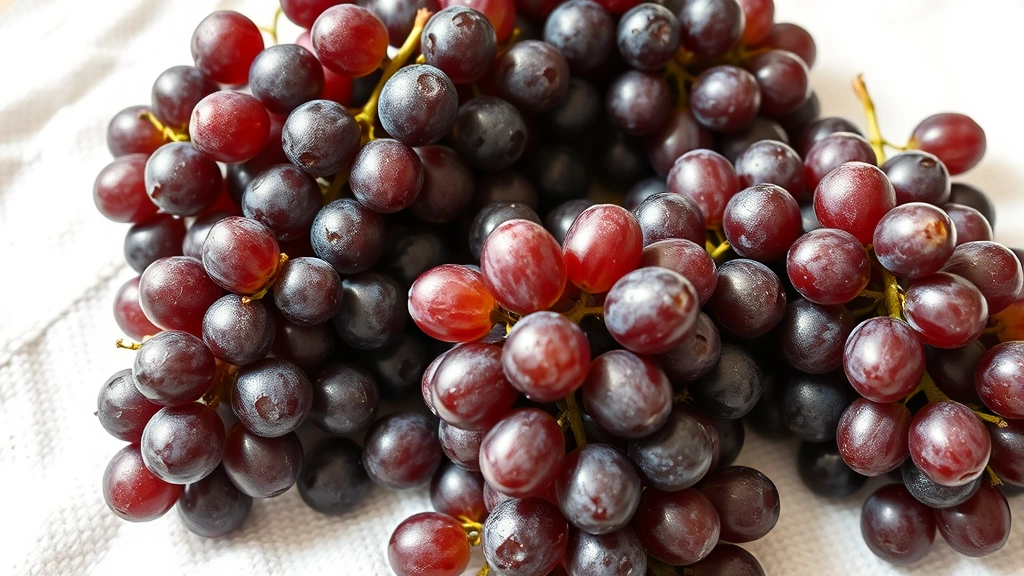
- Leave some on the vine: If your grapes came in a bunch, leaving some attached to the stem during storage helps them stay fresher longer.
Properly stored clean grapes can last 1-2 weeks in the refrigerator. If you notice any grapes developing mold or shriveling, remove them immediately to prevent the issue from spreading to adjacent fruit.
Best Drying Techniques
Drying grapes properly is perhaps the most overlooked step in the cleaning process, yet it’s absolutely critical for preventing mold and extending shelf life. Different situations call for different drying approaches.
The Kitchen Towel Method: This is the most common approach. After your final rinse, gently place grapes on a clean kitchen towel in a single layer. Pat them dry by pressing down gently with another clean towel. Avoid rubbing, which can damage the delicate skin.
The Paper Towel Method: For those who prefer disposable options, high-quality paper towels work well. Lay grapes on paper towels and gently press another layer on top. Paper towels absorb moisture quickly, making this an efficient option.
The Air-Dry Method: Place cleaned grapes on a clean, dry kitchen towel and allow them to air-dry at room temperature for 15-20 minutes before refrigerating. This method works particularly well if you have time and want to ensure absolutely complete dryness.
The Salad Spinner Method: If you have a salad spinner, this is actually one of the most effective drying methods. Place grapes in the spinner basket and spin for 30-45 seconds. The centrifugal force removes water far more effectively than towel drying alone. This method is particularly useful if you’re cleaning a large quantity of grapes.
The key principle across all methods: the drier your grapes, the longer they’ll stay fresh. Invest the extra 2-3 minutes in thorough drying, and you’ll notice a significant difference in how long your grapes remain mold-free.
Frequently Asked Questions
Can I clean grapes with dish soap?
Absolutely not. Never use dish soap on grapes or any produce intended for eating. Dish soap is designed to remove grease and isn’t formulated for consumption. Even tiny residues can leave an unpleasant taste and potentially cause digestive upset. Stick to water, vinegar, or baking soda solutions—all are food-safe and effective.
How long can I store cleaned grapes?
Properly cleaned and dried grapes stored in an airtight container in the coldest part of your refrigerator typically last 7-14 days. If you used the vinegar or baking soda method, they may last slightly longer due to the antimicrobial properties of these solutions. However, uncleaned grapes actually last slightly longer, so if you’re planning to store grapes for extended periods, consider cleaning them just before eating.
Should I remove grapes from the stem before cleaning?
It depends on your preference and storage timeline. Grapes left on the stem tend to stay fresher longer, so if you’re storing them for more than a few days, keep them attached. However, if you’re eating them immediately or prefer the convenience of pre-separated grapes, you can remove them before cleaning. Just ensure you’re still thorough about rinsing each individual grape.
Why do my grapes get moldy so quickly?
The most common cause is inadequate drying after cleaning. Even small amounts of residual moisture create ideal conditions for mold growth. Additionally, storing grapes in warm areas or in sealed containers without proper ventilation accelerates mold development. Ensure grapes are completely dry, store them in the coldest part of your refrigerator, and check them regularly for any signs of mold.
Are organic grapes different to clean?
Organic grapes still need cleaning despite the absence of synthetic pesticides. They’re still exposed to soil, dust, and bacteria during growth and handling. In fact, some people prefer the baking soda method for organic grapes, as it removes natural waxy coatings that can harbor bacteria. The cleaning process is essentially identical regardless of whether grapes are organic or conventionally grown.
Can I use bottled produce wash on grapes?
While commercial produce washes are generally safe, they’re unnecessary for grapes. Water, vinegar, and baking soda are all equally effective and significantly more economical. Additionally, some people report that commercial produce washes can leave a residue on delicate fruits like grapes. Stick with natural solutions unless you have specific reasons to prefer commercial products.
Should I clean grapes before or after removing them from the bunch?
Either approach works, though cleaning them while still on the stem is slightly easier and helps them stay fresher during storage. If you prefer pre-separated grapes, you can remove them before cleaning—just ensure you’re thorough about rinsing each individual grape. The choice comes down to personal preference and your intended use.
Related Posts

How Long to Boil Lobster Tails: Cooking Guide

How Long to Fly from New York to London? Travel Times
