

How to Make Ice Cream in a Gag: Step-by-Step Guide
How to Make Ice Cream in a Bag: The Ultimate Step-by-Step Guide
There’s something almost magical about watching ice cream transform before your eyes—and when you’re the one making it happen, the magic feels even more real. Making ice cream in a bag is one of those rare DIY projects that combines science, creativity, and pure deliciousness into one satisfying experience. Whether you’re planning a summer gathering, looking for a fun activity with kids, or simply craving homemade ice cream without the fancy equipment, this method delivers restaurant-quality results with minimal fuss.
The beauty of bag-based ice cream making lies in its simplicity and accessibility. You don’t need an ice cream maker, a churn, or any specialized kitchen gadgets. What you do need is a basic understanding of how temperature and agitation work together to create that creamy, smooth texture we all crave. This guide walks you through every step, from ingredient selection to the final scoop, ensuring your homemade ice cream turns out perfectly every single time.
Best of all? This method is endlessly customizable. You can experiment with different flavors, textures, and mix-ins to create something uniquely yours. Let’s dive into how to master this surprisingly sophisticated technique.
Understanding the Science Behind Bag Ice Cream
Before we jump into the practical steps, it’s worth understanding what actually happens when you make ice cream in a bag. The process relies on a fascinating principle called freezing point depression. When you combine salt with ice, the salt lowers the freezing point of the ice below 32°F (0°C), allowing it to absorb heat from your ice cream mixture much more effectively than regular ice alone.
The agitation component is equally crucial. As you shake and manipulate the bags, you’re constantly breaking up ice crystals that form within the mixture. This prevents large, grainy crystals from developing and instead creates those tiny, microscopic crystals that give ice cream its smooth, creamy mouthfeel. Without agitation, you’d end up with something closer to a frozen block than proper ice cream.
Temperature control is the third pillar of this process. The ideal ice cream mixture needs to reach approximately 0°F (-18°C) to freeze properly while maintaining its scoopable texture. Too warm, and it won’t freeze; too cold, and you risk over-freezing the outer edges while the center remains soft.
Essential Ingredients and Supplies
Let’s talk about what you’ll actually need to make this happen. For the ice cream itself, you’ll need a good base. Many people use a combination of heavy cream and whole milk as their foundation, which provides richness and proper texture. You’ll also want sweetener—sugar is traditional, though you can experiment with alternatives.
Your ingredient list should include:
- 1 cup heavy cream (or almond milk for a lighter version)
- 1 cup whole milk
- ½ cup sugar or sweetener of choice
- 1 teaspoon vanilla extract (or other flavorings)
- Salt for taste
For the freezing apparatus, gather:
- Two quart-sized ziplock bags (one for the mixture, one as a protective outer bag)
- One gallon-sized ziplock bag
- 4 cups of ice
- ½ cup rock salt (table salt works but rock salt is more effective)
- Gloves or a towel (the outer bag gets extremely cold)
- A timer
The double-bag method is essential here. The inner bag holds your ice cream mixture, while the outer bag creates a protective barrier and helps distribute cold more evenly. This prevents salt from contaminating your ice cream and makes the whole process more manageable.
Preparing Your Ice Cream Base
Your success starts with proper preparation of the ice cream base. Begin by combining your cream and milk in a bowl. If you’re using sour cream as part of your mixture for added tang, add it now in small quantities.
Follow these preparation steps:
- Pour 1 cup of heavy cream into a mixing bowl
- Add 1 cup of whole milk
- Stir in ½ cup of sugar until fully dissolved
- Add 1 teaspoon of vanilla extract and a pinch of salt
- Whisk the mixture thoroughly for about 2 minutes to ensure sugar is completely dissolved
- Taste the mixture and adjust sweetness if needed (remember, it will taste less sweet when frozen)
This preparation phase is crucial because undissolved sugar crystals create a grainy texture in the final product. Take your time whisking—you want a completely smooth, homogeneous mixture before it goes into the bag.
If you’re adding flavored elements like apple cider for a fall-inspired version or fruit purees, add these now and mix thoroughly. For chocolate ice cream, dissolve cocoa powder in a small amount of warm milk first, then add to your base.

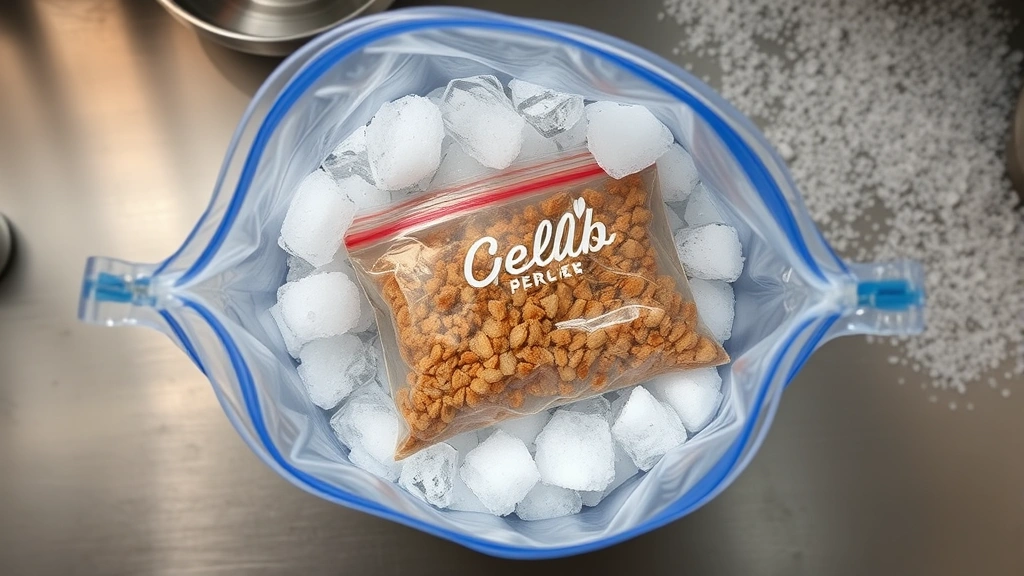
The Double-Bag Method Explained
Now for the critical assembly phase. This is where precision matters. Take your quart-sized ziplock bag and carefully pour your ice cream mixture into it. Leave about an inch of space at the top—you need room for the mixture to move around during the freezing process.
Seal this inner bag completely. We mean completely. Run your fingers along the seal multiple times to ensure there are no weak spots. Any leak here will result in a salty disaster.
Next, take your gallon-sized ziplock bag and fill it about halfway with ice. Pour your rock salt over the ice—roughly ½ cup for a gallon bag. The salt-to-ice ratio is important; too little salt and the temperature won’t drop enough, too much and you risk over-freezing the outer edges of your mixture.
Now place your sealed quart bag into the gallon bag on top of the ice and salt mixture. Add the remaining ice around and on top of the inner bag until it’s completely surrounded. Seal the gallon bag carefully.
Some people add a layer of newspaper or a towel around the gallon bag at this point. This provides insulation and makes handling the extremely cold bag more comfortable. Trust us—your hands will thank you.
The Freezing and Agitation Process
Here’s where the actual magic happens. You’re going to shake, massage, and manipulate this bag for approximately 5 to 7 minutes. This isn’t passive waiting time—this is active, engaged freezing.
The agitation process:
- Grab the bag firmly with both hands (wear gloves if the cold bothers you)
- Shake vigorously for 30 seconds
- Rotate the bag so different sides contact the ice
- Massage the outer bag to help distribute the cold
- Repeat this cycle for 5-7 minutes total
- Check the consistency every 2 minutes after the initial 3-minute mark
You’ll feel the mixture gradually thicken as you work. At first, it’s liquid. After a couple of minutes, it becomes slightly thicker. By the 5-minute mark, you’re looking for a soft-serve consistency—thick but still pourable.
The timing depends on several factors: room temperature, how cold your ice started, and how vigorously you’re shaking. On a hot summer day, you might need the full 7 minutes. On a cool day, you might be done in 5. This is where experience helps, but even first-timers usually get it right by the second batch.
One pro tip: if you’re making this with kids, turn it into a game. Pass the bag around, take turns shaking, and make it a team effort. Not only does this distribute the work, but it also keeps the energy level high and makes the whole experience more fun.
Flavor Variations and Creative Additions
The basic vanilla version is wonderful, but the real joy of homemade ice cream is experimentation. Once you’ve mastered the fundamental technique, you can create an endless array of flavors.
Classic flavor variations:
- Strawberry: Add ½ cup fresh strawberry puree and reduce vanilla to ½ teaspoon
- Mint chocolate chip: Add ½ teaspoon peppermint extract and fold in mini chocolate chips after freezing
- Coffee: Dissolve 2 tablespoons instant coffee in 2 tablespoons hot water, cool, then add to base
- Cookies and cream: Crush 5-6 cookies and fold in during the final minute of shaking
- Salted caramel: Drizzle caramel sauce into the base and swirl gently before freezing
For seasonal variations, consider incorporating savory elements sparingly—a pinch of cardamom for fall spice, or a hint of lavender for spring elegance. The key is restraint; you want to enhance, not overpower.
Mix-in timing matters. Hard elements like chocolate chips or cookie pieces should be added during the final 30 seconds of shaking when the mixture is nearly frozen. Softer additions like fruit purees can go in earlier. Experiment to find what works best for your preferences.
Troubleshooting Common Issues
Even with perfect technique, sometimes things don’t go exactly as planned. Here’s how to handle common problems:
Issue: Ice cream won’t freeze
This usually means insufficient salt or inadequate agitation. Ensure you’re using rock salt (more effective than table salt) and that you’re shaking vigorously. Also, check that your inner bag is properly sealed—any leakage allows the mixture to mix with salty ice.
Issue: Grainy texture
Graininess indicates large ice crystals, which means either insufficient agitation or too-long freezing time. Shake more frequently and vigorously. Also, don’t let the ice cream sit in the bag after it reaches the desired consistency; transfer it to a container immediately.
Issue: Mixture too thick to scoop
You’ve over-frozen it. This happens less often than under-freezing, but if it occurs, let the bag sit at room temperature for 2-3 minutes before scooping, or transfer to a regular freezer for 10-15 minutes where it can soften slightly.
Issue: Salty taste in ice cream
Your inner bag leaked. Make sure you’re sealing it completely before placing it in the outer bag. Double-check the seal by running your finger along it multiple times.
Issue: Not sweet enough
Remember that cold temperatures dull our perception of sweetness. Always taste your base mixture before freezing and adjust accordingly. The frozen version will taste less sweet than the liquid base.
For detailed guidance on specific techniques, check out This Old House’s ice cream guide, which offers additional professional insights. Family Handyman also provides detailed instructions for various methods. For comprehensive ingredient information and alternatives, Home Depot’s DIY food projects section offers useful resources.
Frequently Asked Questions
Can I use table salt instead of rock salt?
You can, but rock salt works better. Rock salt has larger crystals that dissolve more slowly, maintaining the freezing temperature longer. Table salt dissolves quickly and doesn’t cool as effectively. If you only have table salt, use about 25% more by volume to compensate.
How long does homemade bag ice cream last?
Homemade ice cream is best enjoyed immediately after making, when the texture is optimal. If you need to store it, transfer it to an airtight container and keep it in your freezer for up to 2 weeks. However, it will gradually develop ice crystals and lose its smooth texture over time.
Can I make dairy-free ice cream using this method?
Absolutely. Substitute heavy cream and whole milk with coconut cream and coconut milk, or use almond milk combined with cashew cream. The freezing process works identically; you might need to add a stabilizer like cornstarch to achieve the proper texture.
What’s the ideal ratio of salt to ice?
A general rule is 1 part salt to 8 parts ice by volume. For a gallon bag with about 4 cups of ice, use ½ cup of rock salt. Adjust slightly based on ambient temperature and your desired freezing speed.
Why does my ice cream melt quickly after freezing?
Homemade ice cream lacks the stabilizers and emulsifiers found in commercial versions, so it melts faster. To extend scooping time, keep your serving bowl in the freezer for 10 minutes before using, and work quickly when serving.
Can I double the recipe?
Yes, but you’ll need to adjust your bag setup. Use two quart bags for the mixture (seal both), place them in a larger gallon bag with proportionally more ice and salt, and increase shaking time by 2-3 minutes to ensure even freezing.
Is there a way to make this less labor-intensive?
The shaking is part of the process, but you can make it more enjoyable by turning it into a group activity. Pass the bag around, take turns, and make it social rather than a solo task. Some people use a washing machine on the gentle cycle (sealed in a pillowcase) as an alternative to hand-shaking, though this is less reliable.
What if I want to add alcohol to my ice cream?
Alcohol lowers the freezing point of the mixture, so your ice cream will freeze more slowly or not at all if you add too much. Limit alcohol to no more than 1-2 tablespoons per batch, and expect to shake for an additional 2-3 minutes.
Related Posts

How Long to Boil Lobster Tails: Cooking Guide

How Long to Fly from New York to London? Travel Times
