
How to Uninstall Valorant: Step-by-Step Guide
How to Uninstall Valorant: Step-by-Step Guide
Whether you’re freeing up storage space, taking a break from competitive gaming, or simply moving on to other interests, uninstalling Valorant is a straightforward process that most players can complete in just a few minutes. However, there’s more to a clean removal than simply deleting a folder—we’ll walk you through the proper methods to ensure every trace of the game is removed from your system.
Valorant, Riot Games’ popular tactical shooter, can occupy several gigabytes of storage space depending on your installation and any updates you’ve downloaded. If your gaming PC is running low on storage or you want to optimize your system’s performance, removing the game completely is often the best solution. The key is understanding that a proper uninstallation involves more than just dragging files to the trash.
This guide covers everything from the basic uninstallation process to advanced cleanup methods that will ensure Valorant is completely removed from your computer. We’ll also discuss what to do if you encounter issues during the removal process and provide tips for maintaining optimal system performance afterward.
Standard Uninstallation Through Windows
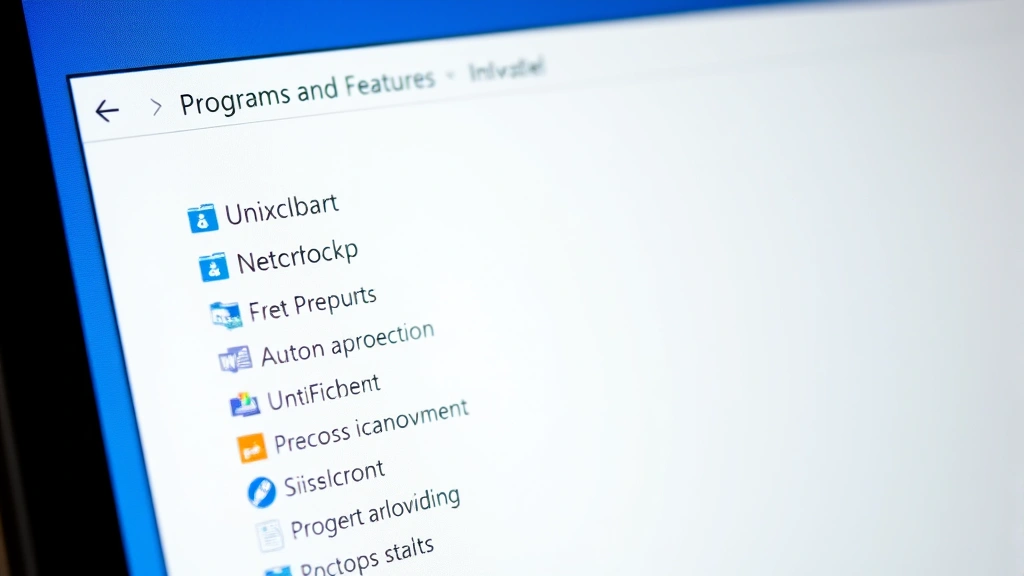
The most straightforward way to uninstall Valorant is through Windows’ built-in uninstall feature. This method works for most users and removes the game along with its associated files and shortcuts. Start by clicking the Windows Start menu and searching for “Control Panel.” Once you’ve opened it, navigate to “Programs” and then “Programs and Features.”
Scroll through the list of installed applications until you find Valorant. Click on it once to select it, and you’ll see an “Uninstall” button appear above the list. Click this button, and Windows will prompt you to confirm the action. A confirmation dialog will appear asking if you’re sure you want to uninstall Valorant. Click “Yes” to proceed with the removal process.
The uninstallation wizard will then begin removing the game files. Depending on your system’s speed and the size of the installation, this process may take several minutes. During this time, you may see a progress bar indicating how far along the uninstallation is. Do not interrupt this process by restarting your computer or closing the window, as this could leave remnants of the game on your system.
Once the uninstallation completes, you’ll typically see a message confirming the removal was successful. At this point, Valorant will no longer appear in your Programs and Features list, and the main game files will be deleted from your system.
Using Riot Client to Remove Valorant
Since Valorant requires the Riot Client to run, you can also manage your game installation directly through the launcher. This method is often preferred by players who use multiple Riot Games titles, as it allows you to keep the launcher installed while removing only Valorant.
Open the Riot Client and log in with your account credentials. In the Riot Client, locate the Valorant game card or section. You should see an option that says “Uninstall” or a gear icon that opens settings. Click on the uninstall option. The client will ask for confirmation before proceeding with the removal. Confirm that you want to uninstall Valorant, and the process will begin immediately.
This method is particularly useful because it keeps your Riot account intact and allows you to reinstall Valorant later without any complications. Your game statistics, rank, and account information remain stored on Riot’s servers, so you won’t lose any progress if you decide to return to the game in the future.
The Riot Client will display a progress indicator showing the uninstallation status. Similar to the Windows method, you should avoid interrupting this process. Once complete, you’ll see a notification confirming that Valorant has been successfully removed from your system.
Manual File Deletion Method
For users who want complete control over the uninstallation process, manual file deletion offers the most thorough approach. This method requires a bit more technical knowledge but ensures that every file associated with Valorant is removed from your computer.
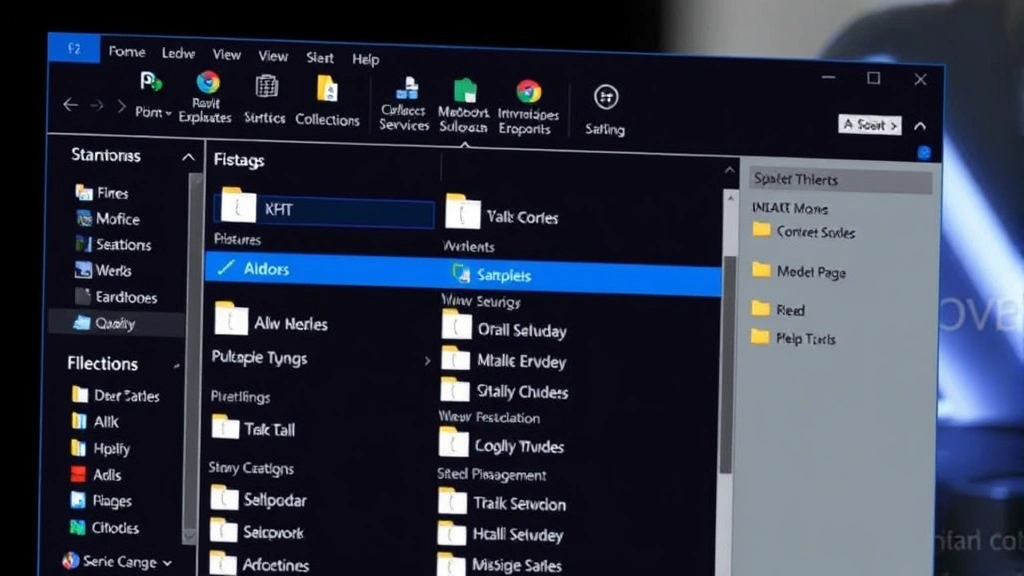
First, you’ll need to locate the Valorant installation folder. By default, Valorant is installed in your Riot Games directory, typically found at C:\Riot Games\VALORANT on Windows systems. Open File Explorer and navigate to this location. If you installed Valorant on a different drive or in a custom location, you may need to search for the folder instead.
Before deleting anything, it’s wise to back up important files if you have any custom configurations or screenshots you want to preserve. Once you’re ready, select the entire Valorant folder and delete it. You can do this by right-clicking the folder and selecting “Delete,” or by pressing the Delete key on your keyboard.
Beyond the main game folder, Valorant also stores configuration files and user data in other locations. Check your AppData folder by navigating to C:\Users\[Your Username]\AppData. Look for any folders related to Valorant or Riot Games and delete those as well. This step is crucial for a complete removal, as these files can take up additional storage space and may cause issues if you reinstall the game later.
Cleaning Registry and Leftover Files
Windows maintains a registry database that stores information about installed programs and system settings. Valorant entries in the registry can accumulate over time, and while they don’t significantly impact performance, removing them as part of a thorough cleanup is good practice. To access the Windows Registry, press Windows Key + R to open the Run dialog, then type “regedit” and press Enter.
Once the Registry Editor opens, use the search function (Ctrl + F) to look for “Valorant” or “Riot Games” entries. Be careful when editing the registry, as incorrect modifications can cause system issues. Only delete entries that are clearly related to Valorant or Riot Games. If you’re uncomfortable working with the registry, you can skip this step, as the game will still function properly without these registry entries being removed.
For a more automated approach to cleaning leftover files, consider using specialized software designed to uninstall programs thoroughly. Applications like software removal tools can scan your system for residual files and registry entries associated with Valorant, removing them automatically. These tools can be particularly helpful if you want to ensure nothing is left behind without manually searching through your system.
After removing registry entries, it’s also worth checking your temporary files folder. Navigate to C:\Windows\Temp and look for any Valorant-related files. Deleting these temporary files can free up additional storage space and ensure a completely clean system.
Troubleshooting Uninstallation Issues
Sometimes the uninstallation process doesn’t go smoothly. If you encounter errors or find that Valorant won’t uninstall through normal methods, several troubleshooting steps can help resolve the issue.
One common problem is that the uninstaller is blocked by another program or process. To fix this, close all other applications running on your computer, including background programs and antivirus software temporarily. Then attempt the uninstallation again. If your antivirus software is preventing the uninstallation, add the Valorant folder to your antivirus’s exclusion list before trying to uninstall.
If you’re still experiencing issues, you might want to check your PC temps to ensure your system isn’t overheating, which could cause processes to hang or fail. Overheating can sometimes interfere with system operations, including the uninstallation process.
Another troubleshooting step involves restarting your computer in Safe Mode. This minimizes the number of programs running and often allows the uninstaller to work without interference. To access Safe Mode on Windows 10 or 11, restart your computer and hold Shift while clicking the restart button. From the boot options, select “Troubleshoot,” then “Advanced Options,” and finally “Startup Settings.” Restart again and select Safe Mode from the list.
If the game files are locked by running processes, you can use the Command Prompt to force delete them. Open Command Prompt as Administrator and navigate to the Valorant installation folder using the “cd” command. Then use the “rmdir /s /q” command to force delete the folder. This method should only be used if other methods have failed, as it bypasses normal safety checks.
Post-Uninstallation Cleanup
Once you’ve successfully uninstalled Valorant, taking a few additional steps will ensure your system is optimized and running at peak performance. First, empty your Recycle Bin to permanently delete the game files from your storage drive.
Run a disk cleanup utility to remove temporary files and system cache that may have accumulated. You can access this through Windows by searching for “Disk Cleanup” in the Start menu. Select your primary drive and let the utility scan for temporary files. Check the boxes for categories you want to clean, such as temporary files and recycle bin, then click “Clean up system files.”
Consider running a complete system cleanup if you have other programs you haven’t used recently. This is a good opportunity to evaluate your installed applications and remove anything else that’s taking up valuable storage space.
Check your startup programs to see if any Valorant-related services are still attempting to launch when Windows starts. Open Task Manager (Ctrl + Shift + Esc), click the “Startup” tab, and look for any Valorant or Riot Games entries. If you find any, right-click them and select “Disable.” This will prevent them from running in the background and consuming system resources.
Finally, if you want to reinstall Valorant in the future, you can do so by downloading the launcher from Riot Games’ official website. Your account information and statistics will be preserved, allowing you to jump right back into the game whenever you’re ready.
Frequently Asked Questions
Will uninstalling Valorant delete my account?
No, uninstalling the game will not delete your account. Your account information, rank, statistics, and cosmetics are all stored on Riot Games’ servers. You can reinstall Valorant at any time and log back in with the same account to find everything exactly as you left it.
How much storage space will I free up by uninstalling Valorant?
Valorant typically takes up between 20-30 GB of storage space, depending on your region, the number of updates you’ve installed, and whether you have any additional game files. The exact amount may vary, but uninstalling the game should free up a significant amount of storage on your system.
Can I uninstall Valorant without uninstalling the Riot Client?
Yes, you can uninstall Valorant while keeping the Riot Client installed. If you use the Riot Client uninstall option, it will only remove Valorant and leave the launcher intact. This is useful if you play other Riot Games titles like League of Legends.
What should I do if the uninstaller is stuck or frozen?
If the uninstaller appears to be stuck, wait at least 10-15 minutes to see if it’s simply taking longer than expected. If it remains frozen, open Task Manager (Ctrl + Shift + Esc), find the uninstaller process, and click “End Task.” You can then try the uninstallation again or use the manual deletion method instead.
Is it safe to delete Valorant files manually?
Yes, it’s safe to manually delete Valorant files as long as you’re only deleting files related to the game. Make sure you’re deleting from the correct folder and not accidentally removing system files. If you’re unsure, use the standard uninstallation method through Windows or the Riot Client instead.
Will uninstalling Valorant improve my gaming performance?
Uninstalling Valorant itself won’t directly improve your gaming performance for other games, but freeing up storage space can help your system run more efficiently overall. Additionally, if Valorant background processes were running, removing them could free up RAM and CPU resources for other applications.
How do I reinstall Valorant after uninstalling it?
To reinstall Valorant, download the Riot Client from Riot’s official website, install it, log in with your account, and then download Valorant through the launcher. Your account will be ready to use immediately with all your previous progress intact.
Related Posts

How Long to Boil Lobster Tails: Cooking Guide

How Long to Fly from New York to London? Travel Times
