
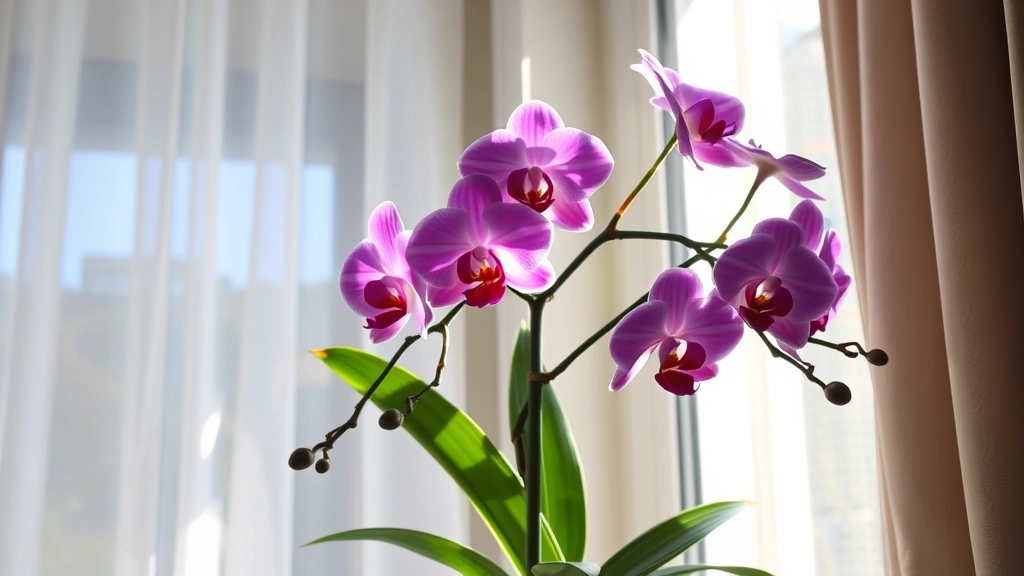
How to Care for an Orchid: Expert Guide
How to Care for an Orchid: Expert Guide
Orchids have a reputation for being finicky, temperamental plants that wilt at the mere suggestion of neglect. But here’s the truth: they’re not actually difficult to care for once you understand what they need. The real problem is that most people treat orchids like typical houseplants, when they’re actually quite different from the fiddle leaf figs and pothos sitting on your bookshelf.
Think of orchid care as learning a new language rather than following a recipe. Once you grasp the fundamentals—light, humidity, watering, and air circulation—you’ll find yourself with thriving, blooming orchids year after year. These exotic beauties aren’t asking for much; they’re just asking for the right conditions.
Whether you’ve received an orchid as a gift or you’re ready to expand your plant collection, this guide will walk you through everything you need to know to keep your orchids healthy and blooming. We’ll cover the essentials, troubleshoot common problems, and share insider tips that separate casual plant parents from orchid enthusiasts.
Light Requirements: The Foundation of Orchid Success
Light is the single most important factor in orchid care, and it’s where most people go wrong. Orchids need bright, indirect light to thrive—think dappled sunlight filtering through tree leaves in their natural tropical habitat. A south-facing or east-facing window is typically ideal, providing several hours of bright light without the harsh afternoon sun that can scorch leaves.
Different orchid varieties have slightly different light preferences. Phalaenopsis (moth orchids) prefer moderate light and can tolerate lower light conditions than other types. Cattleyas and dendrobiums, on the other hand, crave more intense light. If your orchid isn’t blooming, insufficient light is usually the culprit. You should be able to read a newspaper comfortably near your orchid’s location during the day.
Watch for visual cues. Healthy orchid leaves should be a vibrant green. If they’re turning dark green or brownish, your plant isn’t getting enough light. Conversely, if leaves are becoming pale or reddish, dial back the intensity. During winter months when natural light decreases, consider moving your orchids closer to windows or investing in a grow light positioned 6-12 inches above the plant.
Pro tip: Rotate your orchids every week or two to ensure even growth and prevent them from leaning toward the light source.
Watering Guide: The Most Common Mistake
Overwatering kills more orchids than any other single factor. This happens because most people water their orchids on a schedule, not based on actual need. Orchids aren’t like typical houseplants—they prefer to dry out between waterings, and their roots actually need air circulation to stay healthy.
The general rule: water when the potting media is nearly dry. Stick your finger about an inch into the media. If it feels moist, wait a few more days. If it feels dry, it’s time to water. For most orchids in typical home conditions, this translates to watering once a week during growing season and every 7-10 days during dormancy.
When you water, do it thoroughly. Water should flow through the drainage holes at the bottom of the pot. This flushes out accumulated salts and ensures the media is evenly hydrated. Always use room-temperature water—cold water can shock the roots. Many orchid enthusiasts prefer rainwater or distilled water since tap water often contains chlorine and minerals that can accumulate over time.
The pot and media type matter too. Orchids should be planted in pots with substantial drainage holes, typically in bark-based media rather than traditional potting soil. This allows air to circulate around the roots and prevents the soggy conditions that lead to root rot.
Seasonal adjustment: During cooler months when growth slows, reduce watering frequency. Winter dormancy is natural and actually necessary for many orchid varieties to produce flowers.
Humidity and Air Circulation: Creating the Right Environment
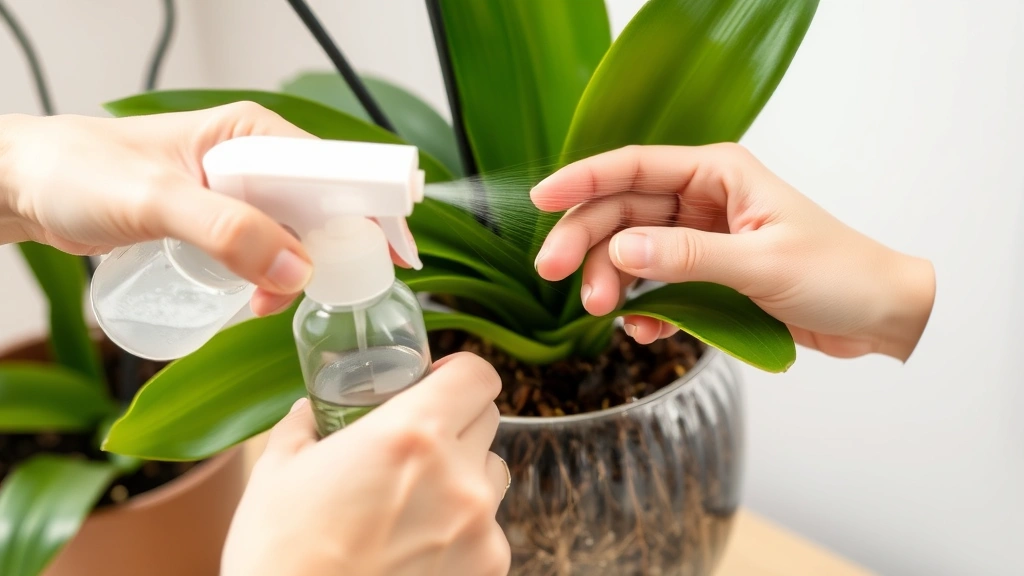
Orchids are tropical plants, so they appreciate humidity. Ideally, aim for 50-70% humidity. If your home is particularly dry, especially during winter, you’ll need to take steps to increase moisture around your plants. A humidity tray—a shallow tray filled with pebbles and water—works wonders. Place your orchid pot on the pebbles (not directly in the water), and as the water evaporates, it creates a humid microclimate.
Grouping orchids together also increases humidity naturally, as plants transpire moisture that benefits their neighbors. Misting leaves occasionally can help, though it shouldn’t be your primary humidity strategy. If you mist, do it in the morning so leaves dry quickly and prevent fungal issues.
Air circulation is equally important and often overlooked. Stagnant air promotes fungal and bacterial diseases. A gentle fan running a few hours daily makes a dramatic difference. It doesn’t need to be intense—just enough movement to keep air from becoming stale. Good air circulation also helps prevent pest infestations, like the spider mites that plague many indoor plants.
Avoid placing orchids in drafty locations or directly in front of air conditioning vents. Temperature fluctuations and dry, moving air can stress plants and prevent blooming.
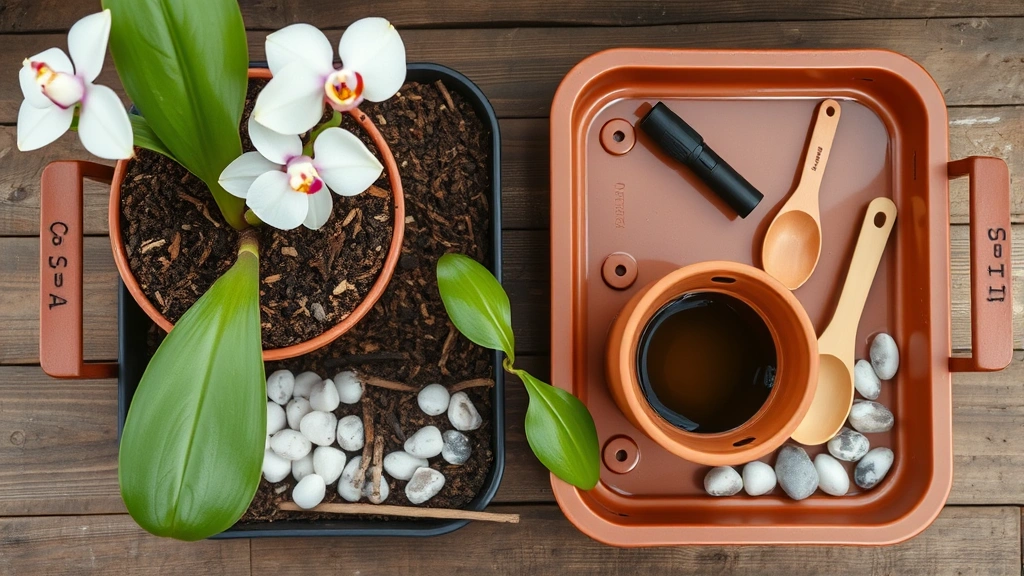
Potting Media and Repotting: Getting the Foundation Right
Standard potting soil is the enemy of orchid health. Instead, orchids need a chunky, bark-based medium that mimics their natural growing conditions. Most orchids are epiphytes—they grow on tree branches in nature, not in soil. Their roots need oxygen, and they’re adapted to dry quickly after rain.
Commercial orchid bark mixes work well and are readily available. Some growers add sphagnum moss to increase water retention slightly, or incorporate charcoal pieces to prevent bacterial growth. The key is achieving a balance: enough water retention to keep roots hydrated, but enough air space to prevent rot.
Repotting should happen every 1-2 years, ideally after flowering when new growth begins. Signs that repotting is needed include media breaking down into fine particles, the plant becoming top-heavy, or roots growing outside the pot. When repotting, gently remove the orchid from its current pot and carefully tease apart the root ball. Trim any dead or mushy roots with sterile scissors. Position the orchid at the same depth in the new pot—the base of the plant should sit just above the media level.
Fresh media is important because old media compacts over time, reducing air circulation. Even if the plant doesn’t technically need a larger pot, refreshing the media annually during spring is beneficial.
Temperature and Seasonal Care: Mimicking Natural Rhythms
Most common orchids prefer temperatures between 65-75°F during the day and 55-65°F at night. Many orchid varieties actually need this temperature drop to trigger blooming. This natural rhythm—warmer days and cooler nights—mimics their tropical home where temperatures fluctuate seasonally.
Avoid temperature extremes. Temperatures below 55°F or above 85°F stress orchids and can prevent flowering. Keep plants away from heating vents, radiators, and cold windows during winter. A consistent environment is more important than perfect conditions.
Seasonal changes should inform your care routine. During the growing season (typically spring and summer), orchids need more frequent watering, higher humidity, and regular feeding. During dormancy (fall and winter), reduce watering, lower humidity slightly, and stop or reduce fertilizing. This seasonal variation actually encourages blooming—many orchids won’t flower without experiencing a cooler, drier rest period.
If your orchid has stopped blooming, it might be suffering from a lack of seasonal variation. Try moving it to a cooler location for 4-6 weeks during fall, combined with reduced watering. This dormancy period often triggers the formation of flower spikes.
Fertilizing Your Orchids: Feeding Without Overdoing It
Orchids need nutrients, but they don’t need much, and they’re sensitive to salt accumulation from fertilizers. Use a balanced, diluted orchid fertilizer (something like 20-20-20) applied at quarter to half strength during the growing season. Many growers use the “weekly weakly” method: apply diluted fertilizer every week during active growth instead of a strong dose monthly.
During dormancy, reduce or stop fertilizing entirely. Orchids aren’t actively growing, so they don’t need nutrients, and excess fertilizer can damage resting roots. When growth resumes in spring, gradually reintroduce feeding.
Water quality matters when fertilizing. If you use tap water with high mineral content, fertilizer salts accumulate faster. Periodically flush the media with pure water to rinse out accumulated salts. This prevents fertilizer burn and keeps roots healthy.
Different orchid types may have slightly different needs. If you’re working with unusual varieties, research their specific requirements. Most common orchids, however, thrive with minimal feeding and respond well to the “less is more” approach.
Common Pests and Disease Management: Staying Vigilant
Indoor orchids are generally less susceptible to pests than outdoor plants, but problems do occur. Spider mites, mealybugs, scale insects, and thrips are the most common culprits. If you notice sticky residue on leaves, tiny moving dots, or white cottony clusters, inspect closely and take action quickly.
For minor infestations, isolate the affected plant and spray with insecticidal soap or neem oil. You might also learn techniques from our guide on how to get rid of spider mites, which applies to orchids as well. Repeat treatments every 7-10 days for 3-4 weeks to catch newly hatched pests.
Fungal and bacterial diseases typically result from poor air circulation, excessive humidity, or cold temperatures. Symptoms include dark spots on leaves, mushy stems, or a foul smell from the roots. If you notice these signs, improve air circulation immediately, reduce watering, and remove affected plant parts with sterile tools. In severe cases, repotting into fresh media may be necessary.
Prevention is always better than treatment. Maintain good air circulation, avoid wetting leaves excessively, and inspect new plants before bringing them home. Quarantine any plant showing signs of pest or disease problems for at least two weeks.
Propagation Techniques: Growing Your Collection
Once you’ve mastered basic orchid care, you might want to propagate your plants. Methods vary depending on orchid type. Some varieties produce keikis—baby plantlets that develop on flower spikes. When a keiki develops aerial roots about an inch long, carefully cut it from the mother plant and pot it in orchid media. Keep it warm and humid until it establishes itself.
Other orchids can be divided when repotting. Ensure each division has at least three pseudobulbs (the thick, bulbous stems). Some growers use a technique called backbulb propagation with sympodial orchids, where older pseudobulbs are separated and encouraged to produce new growth.
If you’re interested in expanding your collection beyond orchids, similar propagation principles apply to other houseplants. For instance, propagating pothos is straightforward and rewarding. You might also explore how to propagate snake plants or even propagating succulents to round out your indoor garden.
For most hobbyists, purchasing young plants or keikis from nurseries is more practical than attempting to propagate from seed, which requires sterile lab conditions and patience measured in years.
Frequently Asked Questions
How often should I water my orchid?
Most orchids need watering about once a week during the growing season, but this depends on your specific conditions. The best approach is checking the potting media—water when it’s nearly dry. Factors like humidity, temperature, pot size, and media type all influence frequency. During cooler months, reduce watering to every 7-10 days or even less frequently.
Why isn’t my orchid blooming?
The most common reasons for lack of blooming are insufficient light, inadequate temperature variation between day and night, or skipping the dormancy period. Orchids typically need 12-14 hours of bright, indirect light daily to produce flowers. Many varieties also require a cooler rest period (10°F cooler than daytime temperatures) for 4-6 weeks to trigger flower spike formation. Ensure your orchid is mature enough to bloom—young plants may take 2-3 years before producing flowers.
Can orchids survive in low light?
Some orchids, particularly Phalaenopsis, can tolerate lower light conditions better than others. However, even these varieties will bloom more reliably with brighter light. If your home has limited natural light, consider supplementing with a grow light positioned 6-12 inches above the plant. Low-light orchids will survive but may not flower regularly.
What should I do if my orchid’s roots are mushy?
Mushy roots indicate root rot, typically caused by overwatering or poor drainage. Remove the orchid from its pot, trim away any soft, blackened roots with sterile scissors, and repot into fresh orchid bark media. Improve watering practices going forward—allow the media to dry between waterings and ensure the pot has adequate drainage holes. If the rot is severe and most roots are affected, recovery may not be possible.
How do I know if my orchid needs repotting?
Repot your orchid when the potting media breaks down into fine particles (usually every 1-2 years), when roots are growing outside the pot, or when the plant becomes top-heavy. The best time to repot is after flowering concludes and new growth begins. Never repot a blooming orchid unless absolutely necessary, as the stress can cause flower drop.
Are orchids toxic to pets?
Good news: orchids are non-toxic to cats, dogs, and other common pets. They’re safe to keep in homes with curious animals. However, pets might damage the plant by knocking it over or nibbling on leaves, so position your orchid somewhere secure and out of reach if you have particularly mischievous pets.
How long do orchid flowers last?
This varies by variety, but orchid flowers typically last 2-3 months, and some can bloom for even longer. Phalaenopsis orchids are particularly impressive, often blooming for 3-6 months or longer. After flowers drop, don’t immediately discard the flower spike—if you cut it just above a node (the bump on the stem), it may produce a secondary flower spike. However, if the spike turns completely brown, remove it to encourage the plant to direct energy toward growth.
Related Posts

How Long to Boil Lobster Tails: Cooking Guide

How Long to Fly from New York to London? Travel Times
