
How to Care for Orchids: Expert Tips
How to Care for Orchids: Expert Tips for Thriving Plants
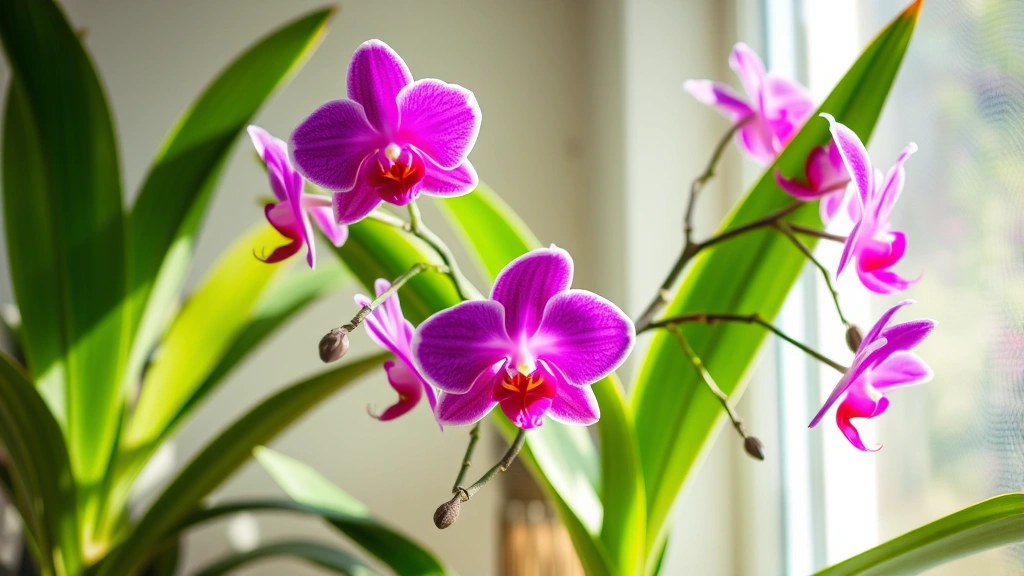
Orchids have a reputation for being finicky, temperamental divas of the plant world. But here’s the truth: they’re not actually that demanding once you understand what they need. These exotic beauties have captivated plant lovers for centuries, and with the right approach, you can absolutely master orchid care in your own home. Whether you’re a seasoned gardener or picking up your first orchid at a local nursery, this guide will walk you through everything you need to know to keep your plants healthy, vibrant, and blooming year after year.
The key to successful orchid care isn’t complicated—it’s about mimicking their natural tropical habitat as closely as possible. Most orchids you’ll encounter are epiphytic, meaning they naturally grow on tree branches in humid rainforests rather than in soil. This fundamental fact changes everything about how we approach their care, from watering schedules to potting mediums. Once you grasp this concept, you’ll stop fighting against nature and start working with it.
Think of caring for an orchid like learning a new language. The basics might feel foreign at first, but soon the rhythm becomes second nature. Before you know it, you’ll be confidently adjusting light levels, perfecting your watering technique, and anticipating your plant’s needs. Let’s dive into the essential strategies that will transform you into an orchid expert.
Getting Lighting Right
Light is arguably the single most important factor in orchid success. Most orchids need bright, indirect light to thrive—think of the dappled sunlight filtering through a rainforest canopy. Placing your orchid directly in harsh afternoon sun will scorch the leaves and damage the delicate blooms, but insufficient light means no flowers and weak growth.
The ideal location for most orchids is near an east or south-facing window where they receive gentle morning light. If you have a west-facing window, use a sheer curtain to filter the intense afternoon rays. North-facing windows typically don’t provide enough light unless you supplement with a grow light. Speaking of which, if natural light is limited in your space, investing in a full-spectrum LED grow light can be a game-changer. Position it about 6-12 inches above your plants for 12-14 hours daily.
Watch your orchid’s leaves for clues. Healthy orchid leaves should be medium green with a slight yellowish tint. If they’re dark green and the plant isn’t blooming, it’s probably getting too little light. If leaves turn reddish or appear bleached, reduce light exposure immediately. This visual feedback system is incredibly helpful once you learn to read it.
Mastering the Watering Schedule
Here’s where most orchid owners stumble: overwatering. The roots of orchids rot when sitting in stagnant water, which is why proper drainage and a thoughtful watering approach are absolutely critical. Unlike typical houseplants, orchids don’t want consistently moist soil—they prefer to dry out between waterings.
A good general rule is to water when the potting medium is nearly dry. Stick your finger into the medium; if it feels dry to the touch, it’s time to water. Most orchids need watering once weekly during the growing season, though this varies based on humidity, temperature, and your specific environment. In winter, many orchids enter a dormant period and need less frequent watering—sometimes just once every two weeks.
The method matters too. Water thoroughly until it drains from the bottom of the pot, then allow excess water to drain completely. Never let your orchid sit in standing water. Many orchid enthusiasts prefer the “soak method”—submerging the entire pot in room-temperature water for 10-15 minutes, then allowing it to drain. This ensures the bark medium is evenly moistened.
Use room-temperature or slightly warm water, never cold water straight from the tap. Chlorine and minerals in tap water can accumulate in the potting medium over time. If possible, use filtered water or collect rainwater. Pay attention to your orchid’s leaves too—they should look plump and firm, not wrinkled or drooping. Wrinkled leaves often indicate underwatering, while soft, mushy stems suggest overwatering.
Creating the Perfect Humidity Level
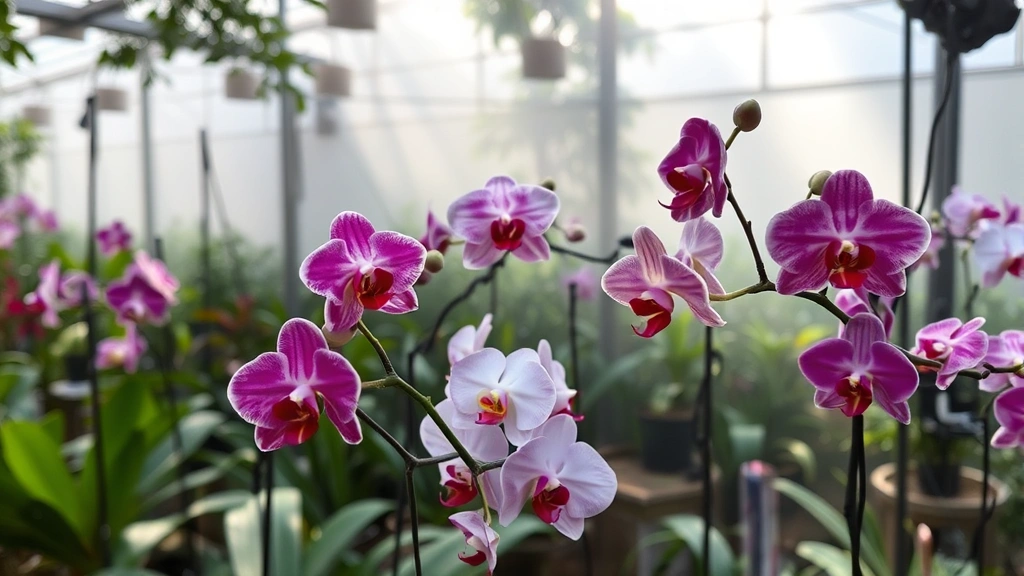
Orchids crave humidity—typically between 50-80%. Most homes sit around 30-50%, which is why creating a humid microenvironment around your orchids is essential. The good news is there are several simple strategies to boost humidity without turning your entire home into a tropical rainforest.
One of the easiest methods is grouping orchids together. Plants naturally release moisture through their leaves in a process called transpiration, so clustering them creates a more humid zone. You can also place orchids on a humidity tray—a shallow tray filled with pebbles and water. Set the pot on the pebbles (not directly in the water) so the plant benefits from the moisture rising below without root rot risk.
Misting can help temporarily, though it’s not a long-term solution. If you mist, do it in the morning and focus on the leaves rather than the flowers, which can develop fungal issues when too wet. A small humidifier placed near your orchid collection is genuinely one of the best investments you can make, especially if you’re growing multiple plants.
During winter when heating systems run constantly and humidity plummets, these strategies become even more important. Some orchid enthusiasts keep their plants in a bathroom where shower steam provides natural humidity boosts. Just ensure adequate air circulation—stagnant, humid air invites fungal and bacterial problems.
Choosing the Right Potting Medium
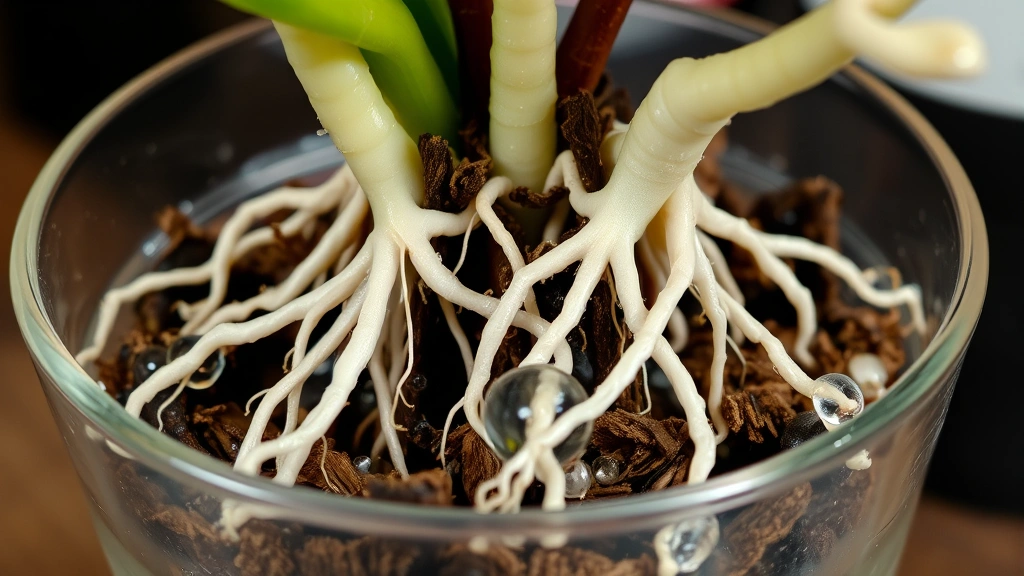
Never use regular potting soil for orchids. This is non-negotiable. Standard soil retains too much moisture and compacts over time, creating conditions where orchid roots rot. Instead, orchids need a chunky, well-draining medium that mimics their natural epiphytic environment.
The most common orchid potting medium is bark—typically fir or pine bark in various grades. Bark provides excellent drainage, allows air to reach the roots, and breaks down gradually over time. Many growers mix bark with other components like sphagnum moss, perlite, or charcoal to fine-tune moisture retention and drainage. A typical recipe might be 70% bark, 20% sphagnum moss, and 10% perlite.
If you’re just starting out, pre-made orchid bark mixes available at garden centers take the guesswork out of the equation. They’re formulated specifically for orchid success. The bark should be chunky enough that you can see light passing through when you look into the pot—this indicates proper air circulation.
The pot itself matters too. Orchids prefer containers with excellent drainage, so choose pots with multiple drainage holes. Many growers prefer clear plastic orchid pots because you can see the roots and check moisture levels easily. If you prefer the aesthetic of ceramic or decorative pots, use them as cache pots and keep the orchid in a drainage-friendly plastic pot nested inside.
Understanding Temperature Needs
Most commonly cultivated orchids prefer daytime temperatures between 65-75°F with nighttime temperatures 10-15 degrees cooler. This temperature differential actually triggers blooming in many orchid varieties, so maintaining this variation is important for getting flowers.
Avoid placing orchids near heating vents, air conditioning units, or cold drafts from windows. Sudden temperature swings stress plants and can cause buds to drop. If your home tends to be warm year-round, you might need to create a cooler environment artificially—perhaps a cooler room or basement during winter months.
Different orchid types have slightly different preferences. Phalaenopsis (moth orchids) and Paphiopedilums (lady’s slipper orchids) tolerate warmer conditions, while Cattleyas and Oncidiums often need that cooler nighttime period to bloom reliably. Research your specific orchid variety to fine-tune temperature conditions.
Humidity and temperature work together. In warmer temperatures, orchids need more frequent watering and higher humidity. In cooler conditions, their water needs decrease. This is why winter (when homes are cooler) naturally aligns with many orchids’ reduced watering needs.
Feeding Your Orchids
Orchids are not heavy feeders, but they do need nutrients to fuel growth and blooming. The key is fertilizing regularly but weakly rather than occasionally and heavily. A common approach is the “weekly weakly” method—applying diluted fertilizer every week at one-quarter to one-half the recommended strength.
Use a balanced fertilizer formulated for orchids, typically with an NPK ratio around 10-10-10 or 20-20-20. During the growing season, apply fertilizer with each watering. During dormancy or slower growth periods, reduce frequency to every other watering or skip fertilizing altogether. Some growers stop fertilizing in fall and winter to encourage the plant to rest and prepare for blooming.
Flush your orchid’s potting medium monthly with plain water to prevent salt and mineral buildup from accumulating fertilizer. This is especially important if you’re using tap water with high mineral content. Simply water thoroughly several times without fertilizer to rinse the medium.
Signs of over-fertilizing include salt crust on the potting medium surface, brown leaf tips, or slow growth despite good conditions. If this happens, repot into fresh medium to remove accumulated salts.
When and How to Repot
Orchids don’t need repotting as frequently as most houseplants—typically every 2-3 years or when the potting medium breaks down significantly. You’ll know it’s time when the bark has decomposed into fine particles, drainage has become sluggish, or the plant is growing out of the pot.
The best time to repot is right after blooming ends or during spring growth. Gently remove the orchid from its current pot and carefully loosen the roots. If roots are tightly wound or circling, gently tease them apart with your fingers—be careful not to break them, as orchid roots are somewhat brittle.
Trim any dead or mushy roots with sterile scissors, cutting just above the healthy tissue. Dead roots appear brown or black and feel hollow; healthy roots are firm and white or light green. Place fresh potting medium in the bottom of the new pot, position the orchid so the base sits at the surface level, then fill around with more medium. Press gently to secure, but don’t compact heavily.
Water lightly after repotting and hold off on fertilizing for about a month to allow the plant to recover. The orchid might look a bit stressed initially—this is normal. Avoid repotting during blooming or dormancy when the plant is less resilient.
Encouraging Blooms
Getting your orchid to rebloom is one of the most satisfying aspects of orchid care. Blooms don’t happen by accident; they require specific conditions. Most orchids need a combination of adequate light, appropriate temperature differential (cooler nights), and a slight rest period.
For many orchid varieties, reducing watering slightly and providing cooler temperatures (around 55-60°F at night) for 2-4 weeks triggers the blooming process. This mimics the dry, cool season orchids experience in nature. After this rest period, resume normal watering and maintain warmer daytime temperatures.
Patience is essential. Some orchids bloom reliably once yearly, while others might take 2-3 years before producing flowers again. This doesn’t mean something’s wrong—it often just means conditions haven’t aligned perfectly yet. Ensure you’re providing excellent light, appropriate humidity, proper nutrition, and the temperature variations your specific orchid type needs.
When flower spikes emerge, provide a stake or support structure so they grow upward rather than flopping under their own weight. As the spike develops, you can gently bend it into a graceful shape by gradually adjusting the stake position over time.
Troubleshooting Common Problems
Even with perfect care, orchids occasionally encounter issues. Understanding how to identify and address problems quickly prevents minor issues from becoming catastrophic.
Root Rot: The most common orchid killer, root rot results from overwatering or poor drainage. Symptoms include mushy stems, a foul smell from the potting medium, and leaves that yellow and drop despite adequate light. Treatment involves removing the orchid from its pot, trimming away all mushy roots, repotting into fresh medium, and adjusting your watering schedule.
Pests: Mealybugs, spider mites, and scale insects occasionally infest orchids. Inspect the undersides of leaves and the base of the plant regularly. Treat infestations with neem oil spray or insecticidal soap, following product instructions carefully. Isolate affected plants from your other plants to prevent spread.
Bud Blast: When flower buds drop before opening, it’s usually caused by temperature fluctuations, low humidity, or sudden environmental changes. Maintain consistent conditions and avoid moving the plant while buds are developing.
Yellow Leaves: This can indicate overwatering, poor drainage, nutrient deficiency, or insufficient light. Assess your care routine and adjust accordingly. A few lower leaves naturally yellowing and dropping is normal as the plant grows.
Leaf Spots: Brown or black spots with yellow halos often indicate fungal or bacterial infection. Remove affected leaves, improve air circulation around the plant, avoid wetting foliage, and ensure the potting medium isn’t staying too wet.
If you’re interested in expanding your plant collection through propagation, you might explore how to propagate succulents or other houseplants. Similarly, techniques from how to propagate snake plant guides can provide insights into plant reproduction. Many gardeners who master orchid care also enjoy how to propagate pothos, another popular houseplant. If you’re expanding beyond ornamental plants, you might also be interested in how to grow garlic, how to grow ginger, or how to grow carrots in your home garden.
Frequently Asked Questions
How often should I water my orchid?
Most orchids need watering once weekly during the growing season. Check the potting medium with your finger—water when it feels dry to the touch. In winter or during dormancy, reduce frequency to every 10-14 days. Always allow excess water to drain completely.
Can I grow orchids in regular potting soil?
No, regular potting soil retains too much moisture and will cause root rot. Use a specialized orchid potting medium made primarily of bark, or create your own mix with bark, sphagnum moss, and perlite. This ensures proper drainage and air circulation.
Why won’t my orchid bloom?
Lack of blooms usually results from insufficient light, inadequate temperature differential between day and night, or skipping the rest period many orchids need. Ensure 12-14 hours of bright, indirect light daily, maintain cooler nighttime temperatures, and provide a slight rest period with reduced watering in fall or winter.
How long do orchid blooms last?
Orchid flowers can last anywhere from a few weeks to several months depending on the variety and conditions. Phalaenopsis (moth orchids) often bloom for 2-3 months or even longer. Provide consistent care, avoid moving the plant while blooming, and keep temperatures moderate to extend bloom duration.
What should I do with the flower spike after blooming ends?
You can cut the spike at the base to encourage the plant to focus energy on growth and root development, or leave it intact if new buds might develop along the spike. Some orchid varieties produce multiple flowers along a single spike over time. If the spike turns brown or appears dead, remove it entirely.
Is it normal for orchids to go dormant?
Yes, many orchid varieties naturally enter a dormancy period, typically in fall or winter. During this time, growth slows, watering needs decrease, and the plant conserves energy. This rest period is actually necessary for many orchids to rebloom reliably. Reduce watering and fertilizing during dormancy but maintain appropriate light levels.
Can I use tap water for my orchids?
Tap water works, but it often contains chlorine and minerals that accumulate in the potting medium over time. Using filtered water, distilled water, or collected rainwater is ideal. If tap water is your only option, let it sit for 24 hours before using to allow some chlorine to evaporate.
How do I know if my orchid is getting too much light?
Leaves that appear bleached, reddish, or scorched indicate excessive light. Healthy orchid leaves should be medium green with perhaps a slight yellow tint. If you notice these signs, move the plant to a location with less direct sun or filter the light with a sheer curtain.
For additional expert guidance on orchid care, consult This Old House’s gardening section, which offers comprehensive plant care advice. Family Handyman’s orchid growing guide provides practical step-by-step instructions for beginners. Home Depot’s orchid care resources include product recommendations and care tips. The American Orchid Society website offers detailed beginner growing guides, and manufacturer instructions on your specific orchid variety are invaluable references.
Related Posts

How Long to Boil Lobster Tails: Cooking Guide

How Long to Fly from New York to London? Travel Times
