
How to Sharpen a Knife: Expert Guide
How to Sharpen a Knife: Expert Guide to Professional-Grade Results
A dull knife is more dangerous than a sharp one—counterintuitive, yes, but absolutely true. When your blade lacks edge, you’re forced to apply excessive pressure, which increases the likelihood of slips, accidents, and frustration. The good news? Sharpening a knife isn’t some mysterious culinary art reserved for professional chefs. With the right techniques and a bit of patience, you can restore your kitchen knives to razor-sharp condition and maintain them like a pro.
Whether you’re working with chef’s knives, paring knives, or utility blades, understanding the fundamentals of knife sharpening transforms how you cook, prepare ingredients, and handle your kitchen tools. Beyond just performance, a well-maintained knife demonstrates respect for your equipment and your craft—something that matters whether you’re a home cook or someone who takes their kitchen seriously.
This guide walks you through everything you need to know about sharpening knives, from selecting the right tools to mastering various techniques that professionals use daily.
Understanding Why Knives Lose Their Edge
Before diving into solutions, it helps to understand what happens to your blade over time. A knife’s edge consists of microscopic metal particles arranged in a precise V-shape. Every time you cut, chop, or slice, these particles bend, fold, or chip away slightly. It’s not that the blade becomes dull uniformly—rather, the edge becomes misaligned and develops microscopic imperfections.
Several factors accelerate this process. Cutting on hard surfaces like glass or marble boards destroys edges rapidly. Improper storage, where blades bang against other utensils, creates chips and bends. Even regular use on wood cutting boards—which are gentler than alternatives—gradually wears the edge down. Additionally, moisture and humidity can cause oxidation on steel, which interferes with cutting performance.
The type of steel in your knife also matters. Stainless steel holds an edge longer but requires more effort to sharpen. High-carbon steel, conversely, sharpens easily but dulls faster. German-style knives tend toward harder steel, while Japanese knives use harder, more brittle steel that takes an incredible edge but requires more careful handling.
The Main Sharpening Methods Explained
Several legitimate methods exist for sharpening knives, each with distinct advantages. Understanding your options helps you choose what fits your lifestyle and budget.
Whetstone Sharpening
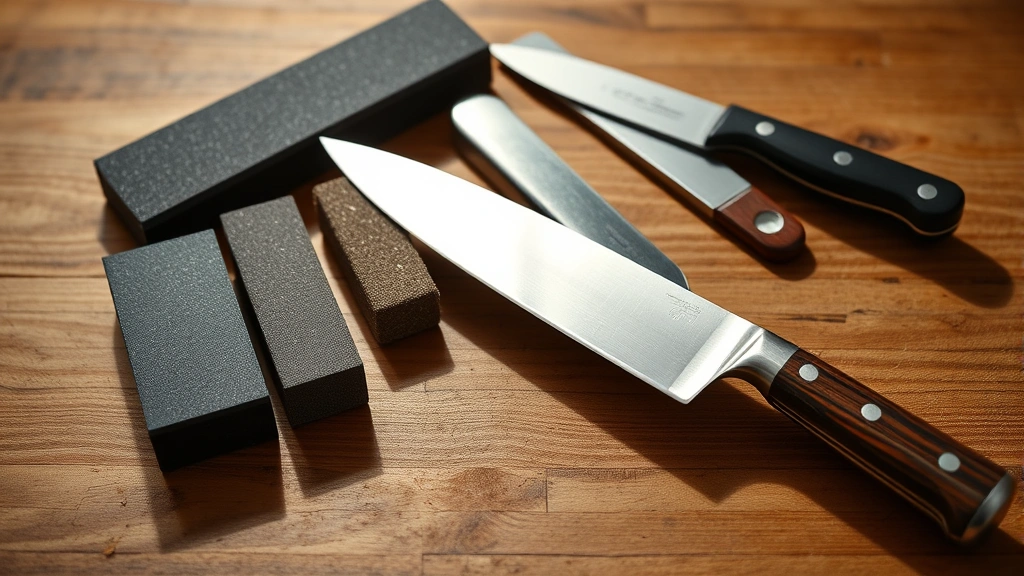
Whetstones remain the gold standard for serious knife enthusiasts. These rectangular stones come in various grits, from coarse (1000 grit) to fine (8000+ grit). The process involves running your blade across the stone at a specific angle, typically 15-20 degrees for Western knives and 10-15 degrees for Japanese knives. It requires practice, but once mastered, delivers superior results and costs very little per use.
Honing Steel
Despite common confusion, a honing steel doesn’t actually sharpen—it realigns the edge. Think of it as straightening bent fence posts rather than rebuilding them. You use it frequently between sharpenings, running your blade down the steel’s ridges. This maintains edge alignment and extends time between actual sharpenings.
Pull-Through Sharpeners
These handheld devices feature preset angles and slots for your blade. You simply pull your knife through, and the sharpener does the work. They’re convenient and beginner-friendly, though they remove more steel than necessary and don’t provide the control that experienced cooks prefer.
Electric Sharpeners
Electric models automate the process, making them accessible for those intimidated by manual methods. They work reasonably well on standard Western knives but can damage delicate Japanese blades. They also remove significant amounts of steel with each use.
Professional Sharpening Services
Sending knives to professional sharpeners makes sense for expensive or sentimental blades. They use industrial equipment and expertise to restore edges perfectly. However, this option costs more and requires waiting time.
Using Whetstones: The Gold Standard
Since whetstones offer the best results for home cooks, let’s dive deep into mastering this technique.
Choosing Your Whetstone
Whetstones come in various materials. Natural stones, quarried from specific regions, develop character over time but cost more. Synthetic stones offer consistency and affordability. For most home cooks, a combination stone with 1000 grit on one side and 6000 grit on the other covers all needs—you’ll use the coarse side occasionally and the fine side regularly.
Preparation and Setup
Start by soaking your whetstone in water for 10-15 minutes. This opens the stone’s pores and prevents it from absorbing moisture from your blade. Place the stone on a damp towel to prevent slipping during use. Position yourself comfortably—you’ll maintain this stance for several minutes.
Finding the Correct Angle
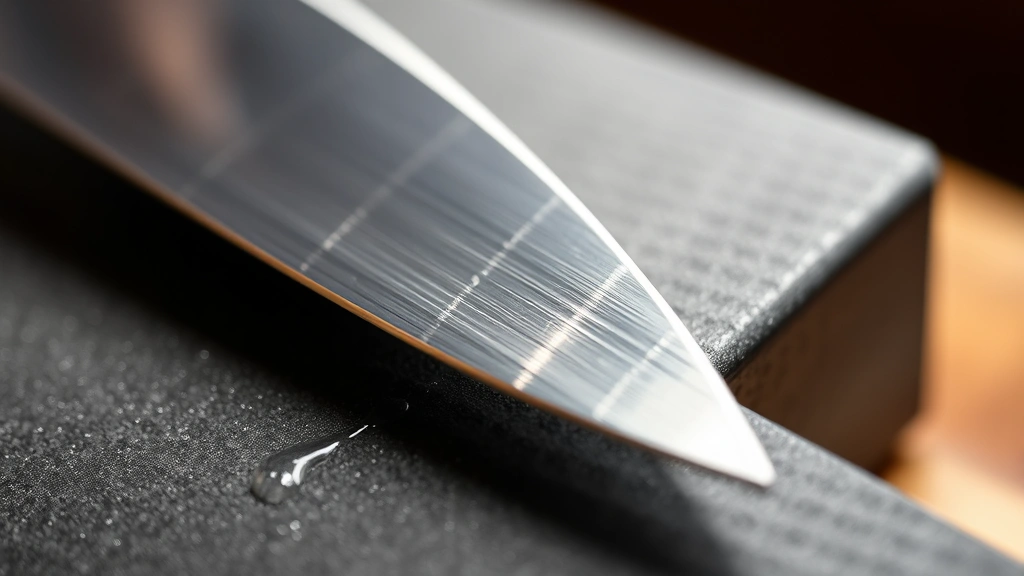
This is crucial. A 15-degree angle works for most Western chef’s knives. To find it, place your knife flat on the stone, then lift the spine slightly until you feel the blade making contact along its entire length. Imagine creating a small tent with your blade and the stone as the base.
Professional tip: If you’re unsure about angles, purchase an angle guide—a simple tool that clamps to your blade and keeps it consistent. Once you’ve practiced with a guide, you’ll develop muscle memory and won’t need it.
The Sharpening Motion
Place the blade’s heel (the thickest part near the handle) on the stone at your chosen angle. Using light to medium pressure, push the blade away from you in a smooth motion, simultaneously moving it laterally so the entire edge contacts the stone. Think of it as drawing the blade across the stone while moving it forward.
When you reach the blade’s tip, flip it over and repeat in the opposite direction. Most experts recommend 10-15 passes per side on a coarse stone, then 20-30 passes per side on a fine stone. The key is consistency—maintain your angle throughout.
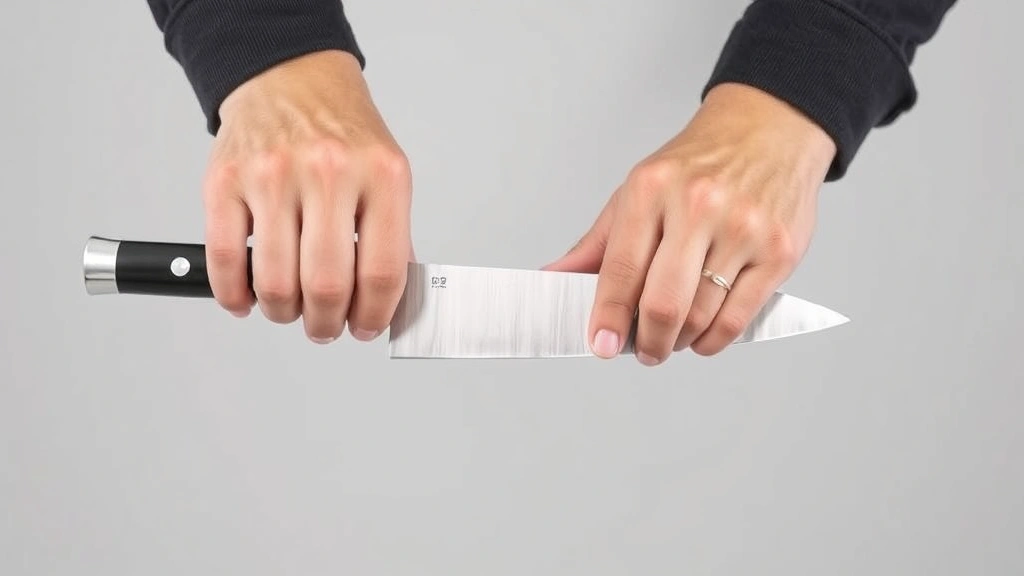
Checking Your Progress
After several passes, perform the paper test. Hold a sheet of paper vertically and try to slice it with your knife. A sharp blade cuts cleanly; a dull one tears or won’t cut at all. You’ll also notice a slight burr forming on the blade’s back side—this indicates you’ve reached the edge, which is good progress.
Once you’ve established a burr on both sides, switch to your fine stone and repeat the process, using fewer passes. This refines the edge and removes the burr, leaving you with a polished, razor-sharp blade.
Honing vs. Sharpening: Know the Difference
This distinction confuses many people, so let’s clarify. Sharpening removes metal to create a new edge. Honing realigns the existing edge without removing significant material. Both are necessary for optimal knife performance, but they serve different purposes.
Use your honing steel every few times you cook—perhaps 2-3 times per week for regular home cooks. This maintains edge alignment and extends the time between sharpenings. Actual sharpening happens less frequently, perhaps monthly for heavy users or quarterly for casual cooks.
The honing motion differs from sharpening. Draw your blade spine-first down the honing steel at approximately 15 degrees, then flip and repeat on the opposite side. Use light pressure and fewer passes—typically 5-10 per side. Think of it as a maintenance task rather than a restoration project.
When you notice your knife isn’t performing despite regular honing, it’s time to sharpen. This is when you return to your whetstone or preferred sharpening method.
Maintaining Your Knives Between Sharpenings
Smart maintenance habits prevent premature dulling and extend your knife’s lifespan significantly.
Cutting Board Selection
Always use wooden or plastic cutting boards. Never cut on glass, marble, granite, or ceramic surfaces—these destroy edges immediately. Among wood and plastic, softer woods like end-grain boards are gentler on blades than harder plastic. If you’re considering alternative cutting materials, stick with traditional options for your knives’ sake.
Proper Storage
Store knives in a knife block, on a magnetic strip, or with blade guards—never loose in a drawer where they bang against other utensils. Each impact damages the edge and creates chips. If you must store them in a drawer, use individual blade sheaths or wrap them in cloth.
Hand Washing Only
Never put quality knives in the dishwasher. The harsh detergent, high heat, and tumbling environment damage both the blade and handle. Wash by hand with warm soapy water immediately after use, then dry thoroughly.
Avoiding Hard Foods
While knives are designed for cutting, some foods are particularly hard on blades. Frozen items, bones (unless your knife is specifically designed for them), and nuts create excessive wear. When preparing chicken, ensure it’s properly thawed before cutting to avoid unnecessary stress on your blade.
Regular Honing
We mentioned this earlier, but it deserves emphasis. Using your honing steel regularly is the single most effective maintenance step. It takes 30 seconds and extends your sharpening intervals dramatically.
Common Mistakes and How to Avoid Them
Even experienced cooks make knife-sharpening mistakes. Here’s how to avoid the most common ones.
Inconsistent Angle
The biggest mistake beginners make is varying their angle during sharpening. This creates an uneven edge that won’t cut properly. Focus on maintaining your angle throughout the motion. Practice with a guide if necessary—there’s no shame in it.
Too Much Pressure
Many people assume harder pressure sharpens faster. Actually, it’s counterproductive. Light to medium pressure works better because it keeps the stone’s grit engaged with the blade. Hard pressure glazes the stone and wastes effort.
Insufficient Stone Preparation
Skipping the soaking step compromises results. Similarly, using a dry stone causes dragging rather than smooth sharpening. Wet your stone properly before each session.
Neglecting Honing Between Sharpenings
Some people sharpen obsessively while ignoring honing. This removes unnecessary material and shortens your knife’s lifespan. Develop a routine: hone frequently, sharpen occasionally.
Using Damaged Stones
Over time, whetstones develop grooves and hollows. A damaged stone can’t maintain consistent contact with your blade. Flatten your stones periodically using a flattening stone or sandpaper on a flat surface.
Mixing Methods Incorrectly
Don’t use a honing steel on a blade that needs actual sharpening—it won’t help. Similarly, don’t sharpen a blade that only needs honing; you’ll remove unnecessary material. Understand which your knife needs before proceeding.
For additional context on precision cutting, you might explore how professionals cut delicate fruits with sharp blades, which demonstrates why edge quality matters across different tasks.
Frequently Asked Questions
How often should I sharpen my knives?
This depends on usage frequency and blade quality. Home cooks typically sharpen every 1-3 months. Heavy users might sharpen monthly. The best indicator is performance—when your knife struggles to cut through paper or requires excessive pressure, it’s time to sharpen. Regular honing between sharpenings extends intervals significantly.
Can I sharpen serrated knives?
Serrated knives are challenging to sharpen at home because each tooth requires individual attention. Most people send serrated knives to professionals or replace them. Some specialized sharpening tools exist for serrated blades, but they’re expensive and require practice.
What’s the difference between 1000 and 6000 grit stones?
Lower grit numbers (1000-3000) are coarser and remove material quickly—use these for dull blades or to establish an edge. Higher grit numbers (6000+) are finer and refine the edge—use these for maintenance and creating a polished finish. Most home cooks benefit from a combination stone with both grits.
Is it bad to use a honing steel on a very dull knife?
Yes. A honing steel only realigns edges; it can’t restore severely dulled blades. Using it on a very dull knife wastes time. You need actual sharpening first, then honing for maintenance.
Can I sharpen knives on a coffee mug?
In emergency situations, the unglazed bottom of a ceramic mug can work temporarily—it’s abrasive enough to create a basic edge. However, this is rough and damages your blade. Use proper sharpening tools whenever possible.
How do I know if my knife is sharp enough?
The paper test is reliable: a sharp knife slices paper cleanly, while a dull one tears it. You can also test on tomatoes—a sharp knife cuts through skin without crushing. If you need to saw back and forth or apply excessive pressure, your knife needs sharpening.
Should I sharpen my knives before or after use?
Sharpen knives before using them, not after. You want to start with the sharpest blade possible. This maximizes cutting performance and minimizes the need for pressure, which is safer.
Can I sharpen a knife that’s chipped?
Small chips can be removed through sharpening on a coarse stone—you’ll remove material until the chip disappears. Large chips might require professional attention or replacement. When maintaining your kitchen tools, check for chips regularly to catch problems early.
What angle should I use for Japanese knives?
Japanese knives typically use 10-15 degree angles, which is sharper than Western knives’ 15-20 degrees. Check your specific knife’s recommendations, as some are double-beveled (both sides sharpened) while others are single-beveled (one side only).
Is it worth buying an expensive whetstone?
Natural stones can cost significantly more than synthetic alternatives. For home use, a good quality synthetic combination stone (around $30-50) performs excellently. Expensive stones are nice but unnecessary unless you develop a serious hobby or professional need.
Related Posts

How Long to Boil Lobster Tails: Cooking Guide

How Long to Fly from New York to London? Travel Times
