
Screenshot iPhone 16? Expert Tips Inside
How to Screenshot on iPhone 16: Expert Tips Inside
Taking screenshots on your iPhone 16 is one of the most useful features you’ll regularly use, whether you’re capturing important information, sharing moments with friends, or saving receipts for your records. Apple has refined the screenshot process over the years, and the iPhone 16 offers multiple methods to capture your screen content quickly and effortlessly. Understanding these various techniques will help you become more efficient with your device and ensure you never miss capturing what matters.
The iPhone 16 makes screenshotting intuitive with its physical buttons and gesture controls. Unlike older iPhone models or other devices like how to screenshot on an HP notebook, the iPhone 16 combines hardware buttons with software intelligence to deliver a seamless experience. Whether you prefer the traditional button combination or the newer gesture method, this guide will walk you through every option available to you.
Physical Button Method for iPhone 16 Screenshots
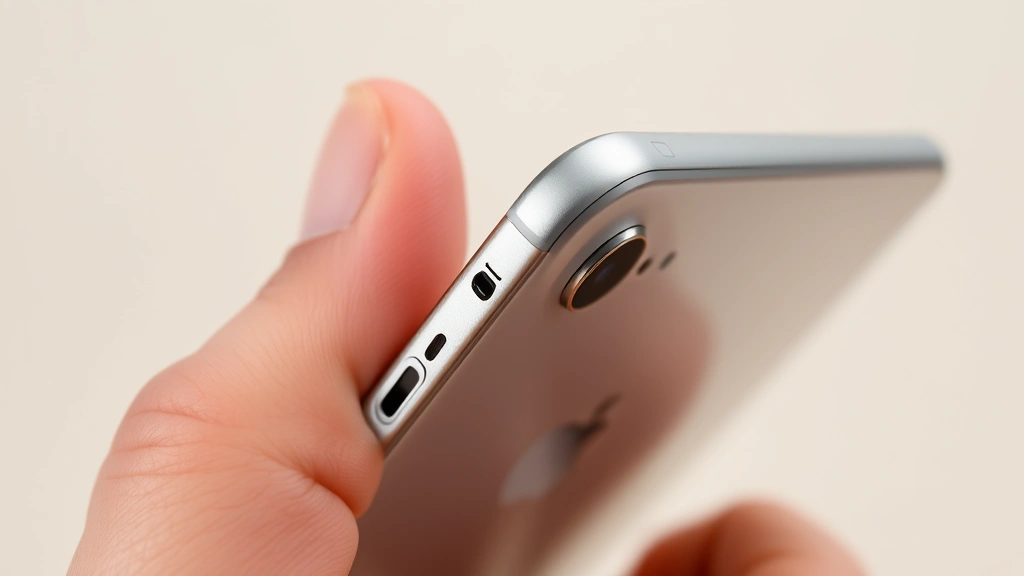
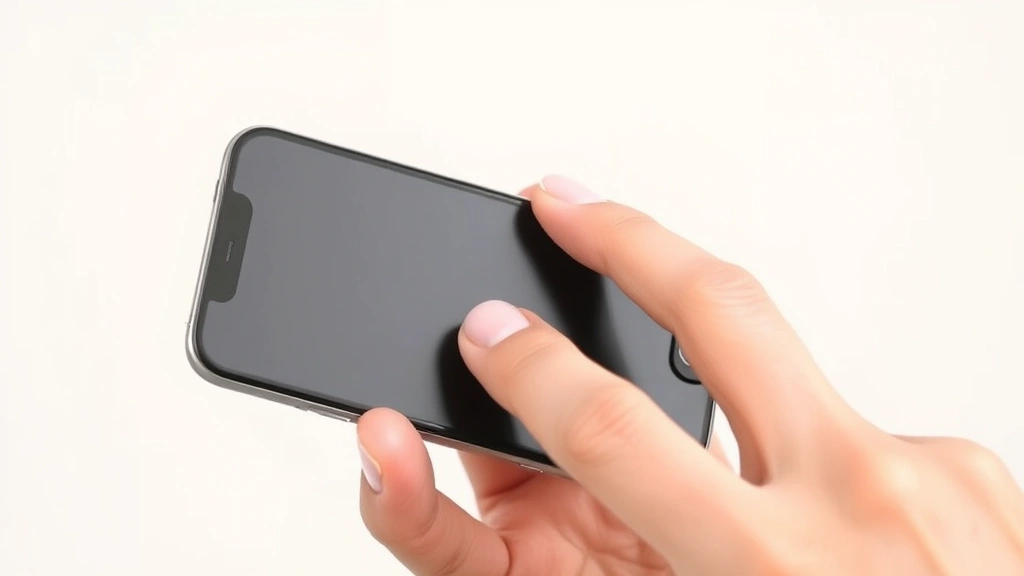
The most straightforward way to take a screenshot on your iPhone 16 involves using the physical buttons on the side of your device. This method has been the standard for iPhone users for years and remains one of the most reliable ways to capture your screen. The process is simple: simultaneously press the Side button (also called the power button) and the Volume Up button. Hold them together for just a moment, and your iPhone will capture whatever is currently displayed on your screen.
To execute this properly, locate the Side button on the right edge of your iPhone 16 and the Volume Up button directly above it on the same side. Press both buttons at exactly the same time with equal pressure. You’ll feel a slight haptic feedback vibration, and you’ll hear a camera shutter sound (unless your device is on silent mode). This audio and tactile feedback confirms that your screenshot has been successfully captured. The entire process takes less than a second, making it incredibly quick for capturing fleeting moments or important information.
One advantage of the physical button method is its reliability. Since you’re using hardware buttons, there’s no reliance on software gestures or settings, making it work consistently regardless of what app you’re using or what’s currently displayed on your screen. This method works when taking screenshots of your home screen, within apps, during video calls, or even when viewing full-page content that requires scrolling.
Using Side Button and Volume Up Combination
Understanding the exact positioning and timing of the Side button and Volume Up combination is crucial for consistent success. The iPhone 16’s button placement is ergonomic, with the Side button positioned at a comfortable height for your thumb when holding the device naturally. The Volume Up button sits directly above it, creating a natural target area for your fingers.
When you press these buttons together, your iPhone 16 immediately captures the current screen state. Unlike some other devices where you might need to learn how to screenshot on a Dell laptop with different key combinations, the iPhone 16 keeps things simple and consistent. The beauty of this method is that it works identically whether you’re right-handed or left-handed, though left-handed users might find it slightly more comfortable to use their left hand’s fingers to access these buttons.
For users who prefer a more hands-free approach or who have difficulty using the physical buttons, Apple has incorporated alternative methods into iOS that provide equal functionality. These alternatives ensure that everyone can take screenshots regardless of their physical abilities or preferences. The flexibility built into the iPhone 16’s screenshot system demonstrates Apple’s commitment to accessibility and user choice.
Back Tap Feature Explained
One of the most innovative screenshot methods available on iPhone 16 is the Back Tap feature. This accessibility feature allows you to perform actions by tapping on the back of your iPhone with your fingers. To set up Back Tap for screenshots, you’ll need to navigate to your device’s Settings app and enable this feature through the Accessibility menu.
Here’s how to configure Back Tap for screenshots:
- Open the Settings app on your iPhone 16
- Navigate to Accessibility
- Scroll down and select Touch
- Select Back Tap
- Choose either Double Tap or Triple Tap based on your preference
- Select Screenshot from the available actions
- Confirm your selection and exit Settings
Once you’ve configured Back Tap, you can take screenshots by simply tapping the back of your iPhone twice (or three times, depending on your settings). This method is particularly useful if you have limited access to the side buttons or prefer a more discreet way to capture your screen. The Back Tap feature works with your device in any orientation and doesn’t require remembering which buttons to press.
The Back Tap feature is part of Apple’s broader commitment to making technology accessible to everyone. It’s especially helpful for people with limited hand mobility, arthritis, or other conditions that make using physical buttons challenging. Even if you don’t have accessibility needs, many users find Back Tap to be a convenient and innovative way to interact with their iPhone 16.
Screenshot Preview and Quick Actions
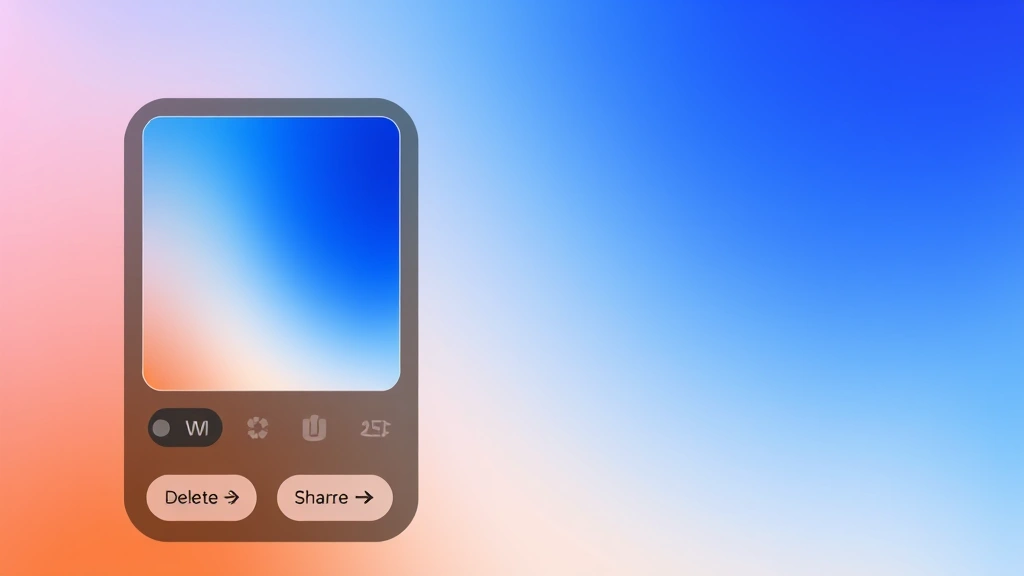
After you take a screenshot using any method, your iPhone 16 displays a preview thumbnail in the bottom-left corner of your screen. This preview appears for a few seconds and provides immediate feedback that your screenshot was successful. More importantly, this preview thumbnail is interactive and opens a menu of quick actions you can perform on your screenshot before it’s saved.
When you tap the preview thumbnail, you’ll see several options:
- Edit – Opens the screenshot in the built-in editing tools
- Delete – Removes the screenshot if you don’t want to keep it
- Save to Files – Saves the screenshot to a specific location in the Files app
- Share – Instantly shares your screenshot via Messages, Mail, or other apps
- Copy – Copies the screenshot to your clipboard for pasting elsewhere
This immediate preview system is one of the most user-friendly aspects of taking screenshots on iPhone 16. You can review what you captured before it’s permanently saved, make edits, or share it right away without navigating through your Photos app. If you don’t interact with the preview, it will automatically save to your Photos app after a few seconds.
Editing and Annotating Your Screenshots
The iPhone 16 includes powerful built-in editing tools that allow you to mark up, annotate, and modify your screenshots before saving or sharing them. These tools are accessed through the preview thumbnail or by opening a saved screenshot in the Photos app and selecting Edit.
Available editing tools include:
- Markup Tools – Draw, write, or add shapes directly on your screenshot
- Text – Add text boxes with custom fonts and colors
- Signature – Insert your digital signature
- Magnifier – Highlight specific areas of your screenshot
- Loupe – Create a zoomed-in view of a portion of your image
- Color Picker – Select specific colors from your screenshot
To access these tools, tap the preview thumbnail immediately after taking a screenshot and select Edit. The markup toolbar will appear at the bottom of your screen, providing easy access to all annotation features. You can use different colors, line weights, and opacity levels to customize your annotations. These editing capabilities make it easy to create annotated screenshots for tutorials, documentation, or communication with others.
Many professionals use iPhone 16’s screenshot editing features for work purposes. Teachers can annotate student work, designers can markup design concepts, and business professionals can highlight important information in documents. The ability to edit before saving ensures your final screenshot conveys exactly what you intended.
Organizing and Finding Your Screenshots
By default, all your screenshots are automatically saved to the Photos app in the Screenshots album. This dedicated album makes it easy to find all your captured images in one organized location. You can access your Screenshots album by opening the Photos app, tapping the Albums tab, and scrolling down to find the Screenshots album.
To keep your screenshots organized, consider these strategies:
- Create custom albums for different projects or purposes
- Use descriptive names when saving screenshots to Files app
- Tag screenshots with keywords for easier searching
- Regularly review and delete screenshots you no longer need
- Back up important screenshots to iCloud or other cloud services
Your iPhone 16 also offers powerful search functionality within the Photos app. You can search for screenshots by date, location, or content. The visual search feature can identify objects or text within your screenshots, making it possible to find specific captures even if you don’t remember exactly when you took them.
For users who need more sophisticated organization, the Files app provides additional storage options. You can save screenshots directly to specific folders, creating a custom filing system that works with your workflow. This is particularly useful for professionals who need to maintain organized archives of screenshots for documentation or reference purposes.
Troubleshooting Screenshot Issues
While taking screenshots on iPhone 16 is generally reliable, you may occasionally encounter issues. Understanding how to troubleshoot common problems will help you maintain consistent screenshot functionality.
Screenshots not saving: If your screenshots aren’t being saved, check your iCloud Photo Library settings. Ensure you have sufficient storage space on your device. If space is limited, your iPhone may not be able to save screenshots. Also verify that your Photos app settings allow screenshots to be saved to your library.
Back Tap not responding: If your Back Tap feature isn’t working, ensure it’s properly enabled in Settings > Accessibility > Touch > Back Tap. You may need to adjust your tapping location or force to get the feature to register. Some protective cases can interfere with Back Tap functionality.
No sound or haptic feedback: Check whether your device is in silent mode. The ring/silent switch on the side of your iPhone 16 controls whether you hear the camera shutter sound. Even in silent mode, you should feel haptic feedback, which confirms your screenshot was taken.
Screenshot appearing blurry: This typically indicates the screenshot was taken while your device was processing. Try waiting a moment for apps to fully load before taking your screenshot. Also ensure your screen is clean, as dirt or smudges can affect how screenshots appear.
If you continue experiencing issues, you can restart your iPhone 16 or visit an Apple Store for technical support. The screenshot functionality is deeply integrated into iOS, and restarting usually resolves most software-related problems.
Advanced Screenshot Techniques
Beyond basic screenshots, iPhone 16 offers advanced capture techniques for power users. Full-page screenshots allow you to capture content that extends beyond your current view. When you take a screenshot in Safari or certain apps, you’ll see an option to capture the entire page. This creates a single image of the complete webpage, even if it spans multiple screens.
To take a full-page screenshot in Safari:
- Take a regular screenshot using the button combination
- Tap the preview thumbnail
- Select Full Page at the top of the editing screen
- Tap Done to save the full-page version
Another advanced technique involves using Siri to take screenshots. You can create voice commands through Siri Shortcuts that combine screenshot capture with other actions like automatically saving to a specific folder or sending to a contact. This automation is particularly useful for workflows that involve frequent screenshot capture.
Screen recording is another powerful feature related to screenshots. While slightly different from static screenshots, screen recording captures video of everything happening on your screen. Access this through Control Center by swiping down from the top-right corner and tapping the record button. Screen recording is invaluable for creating tutorials, documenting bugs, or sharing how-tos with others.
For users interested in more detailed comparisons of screenshot methods across devices, you might explore how other platforms handle this task, such as how to rotate screen on Windows or how to right click on Chromebook, which may provide different perspectives on screen capture technology.
You can also explore how to flip computer screen techniques, which can be useful if you need to rotate or reorient your screenshots after capturing them. Understanding multiple platforms helps you become more versatile with digital content capture across different devices.
For official Apple guidance on all screenshot features, visit Apple’s official support page for taking screenshots and screen recordings. This resource provides comprehensive information directly from Apple about all screenshot and screen recording features available on iPhone 16.
Additional resources from reputable tech publications can enhance your understanding. MacRumors provides detailed guides and updates about iPhone features, while The Verge offers in-depth technology reviews and tutorials. These resources complement official Apple documentation with practical insights from technology experts.
FAQ
Can I take a screenshot without the Side button?
Yes, you can use the Back Tap feature by tapping the back of your iPhone 16. You can also use Siri by saying “Take a screenshot,” or set up custom Siri Shortcuts that capture screenshots through voice commands or automated workflows.
Where are my screenshots saved?
Screenshots are automatically saved to your Photos app in a dedicated Screenshots album. You can also manually save them to the Files app or other cloud storage services. All screenshots are timestamped, making them easy to locate by date.
Can I edit screenshots after they’re saved?
Absolutely. Open any screenshot in the Photos app, tap Edit, and use the markup tools to make changes. You can add annotations, draw, write text, and apply various effects. Your edits can be saved as a new version or replace the original.
Why isn’t my Back Tap working?
Ensure Back Tap is enabled in Settings > Accessibility > Touch > Back Tap. Some protective cases may interfere with the feature. Try tapping in different locations on the back of your device and with varying pressure. If problems persist, restart your iPhone 16.
Can I take screenshots of my entire screen including the notch area?
Yes, the standard screenshot captures your entire visible screen, including the notch area. The iPhone 16’s screenshot function automatically includes all active display content in your capture.
How much storage do screenshots use?
A typical screenshot uses between 100 KB to 2 MB of storage, depending on your screen brightness, the complexity of what’s displayed, and your device’s color settings. Full-page screenshots use more storage than standard screenshots.
Can I share screenshots directly from the preview?
Yes, tap the preview thumbnail after taking a screenshot and select Share. You can immediately send your screenshot via Messages, Mail, AirDrop, or any other sharing method available on your device.
Related Posts

Superscript in Google Docs: Expert Tips

Strikethrough in Excel: Easy Steps for Beginners
