
HP Notebook Screenshot? Easy Steps Revealed
How to Screenshot on an HP Notebook: Easy Steps Revealed
Taking a screenshot on your HP notebook is one of the most fundamental digital skills you’ll need, whether you’re capturing important information, sharing feedback with colleagues, or documenting issues for technical support. Despite its simplicity, many HP users don’t realize they have multiple methods available to capture their screen, each suited to different situations and preferences.
In this comprehensive guide, we’ll walk you through every method to screenshot on an HP notebook, from the quickest keyboard shortcuts to built-in Windows tools that offer advanced editing capabilities. You’ll discover which technique works best for your specific needs and learn professional tips that will save you time and frustration.
The Print Screen Key Method
The most traditional approach to capturing your HP notebook screen is using the Print Screen key, often labeled as PrtScn or Print Scrn on your keyboard. This method has been around for decades and remains one of the most reliable ways to grab a full screenshot of everything currently displayed on your monitor.
To use this method, locate the Print Screen key on your HP notebook keyboard. On most models, you’ll find it in the upper right area of the keyboard, often sharing space with other function keys. Press the key once, and your entire screen will be captured and copied to your clipboard. You won’t see any visual confirmation that the screenshot was taken—this is normal behavior.
After pressing Print Screen, you’ll need to paste the image somewhere. Open any image editing application like Paint, or launch a document program like Microsoft Word. Once the application is open, use the keyboard shortcut Ctrl + V to paste your screenshot. The image will appear in the application, ready for you to save, edit, or share with others.
One important note: if your HP notebook has a dual-monitor setup, the Print Screen method captures both screens. This can be useful for documenting your entire workspace, but if you only need one screen, you may want to consider alternative methods discussed in this guide.
For HP notebooks running Windows, you can also try Alt + Print Screen to capture only the active window rather than the entire screen. This is particularly helpful when you have multiple applications open and want to focus on just one window’s contents.
Using Windows Snipping Tool
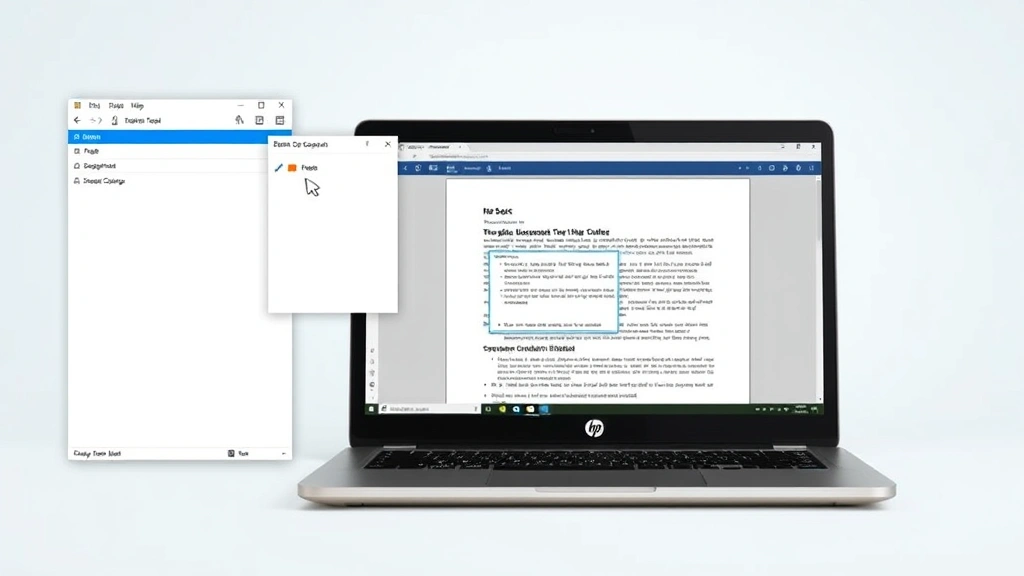
The Windows Snipping Tool is a built-in utility that provides more control than the simple Print Screen method. This tool allows you to select exactly which portion of your screen you want to capture, making it ideal when you only need a specific area rather than the full display.
To access the Snipping Tool on your HP notebook, click the Windows Start button and type Snipping Tool in the search box. When the application appears in the results, click it to launch the program. The Snipping Tool window will open, displaying several options for how you want to capture your screen.
You’ll see different snip modes available:
- Free-form Snip: Draw an irregular shape around the area you want to capture
- Rectangular Snip: Drag to create a rectangular selection box
- Window Snip: Click on a specific window to capture only that application
- Full-screen Snip: Capture your entire screen at once
Select your preferred mode, then follow the on-screen instructions. For rectangular snips, click and drag from one corner to the opposite corner to define your capture area. Once you release the mouse, your selection will appear in the Snipping Tool editor, where you can annotate it with a pen or highlighter before saving.
The Snipping Tool automatically saves your screenshot to your clipboard, but you can also save it as a file directly. After capturing, click File and then Save As to choose a location and filename for your screenshot. This method is particularly useful when you need to document information for sharing via email or messaging.
Many users prefer the Snipping Tool over the basic Print Screen method because it gives them the ability to select precisely what they want to capture without wasting time cropping images afterward. This efficiency gain is especially noticeable when you’re taking multiple screenshots throughout your day.
Snip and Sketch Feature
If you’re using Windows 10 or Windows 11 on your HP notebook, you have access to an even more powerful tool called Snip and Sketch. This modern replacement for the older Snipping Tool offers a more streamlined interface and additional features that make screenshot management easier.
The quickest way to access Snip and Sketch is using the keyboard shortcut Windows Key + Shift + S. When you press this combination, your screen will dim slightly, and a toolbar will appear at the top. This toolbar contains options for different snipping modes, similar to the traditional Snipping Tool.
After you take a screenshot with Snip and Sketch, a notification will appear in the lower right corner of your screen. Click this notification to open your screenshot in the Snip and Sketch editor. Here you’ll find powerful editing tools including:
- Pen and highlighter tools for drawing or emphasizing areas
- Eraser function to remove unwanted marks
- Crop tool to adjust your selection
- Undo and redo buttons for mistake correction
The editor also allows you to immediately share your screenshot or save it to a specific location. You can copy it directly to your clipboard, save it as a PNG file, or open it with another application. This flexibility makes Snip and Sketch the preferred choice for many professionals who need to process screenshots quickly.
One advantage of Snip and Sketch over the older Snipping Tool is that it integrates better with Windows’ cloud services. You can save your screenshots directly to OneDrive, making them accessible from any device. This feature is invaluable if you work across multiple HP notebooks or need to access your screenshots from your smartphone.
Game Bar Screenshot Option
You might be surprised to learn that your HP notebook has a screenshot feature specifically designed for gaming called the Xbox Game Bar. Even if you’re not a gamer, this tool is available to all Windows users and offers some unique advantages for capturing screenshots quickly.
To open the Game Bar on your HP notebook, press Windows Key + G. A gaming overlay will appear on your screen, displaying various widgets and controls. Look for the camera icon in the toolbar—this is your screenshot button. Click it to capture your current screen immediately.
The Game Bar also supports the keyboard shortcut Windows Key + Alt + Print Screen for even faster screenshot capture. This method bypasses the Game Bar overlay entirely and captures your screen directly. Your screenshot will be automatically saved to your Videos folder in a subfolder called Captures.
The advantage of using Game Bar for screenshots is that it automatically saves your images in a dedicated location, making them easy to find later. You don’t have to navigate through your file system or deal with clipboard management. The screenshots are saved as PNG files, which maintain excellent quality while keeping file sizes reasonable.
Game Bar also includes a video recording feature if you ever need to capture video content from your HP notebook screen. While this guide focuses on static screenshots, it’s worth knowing that this tool offers more versatility than you might initially expect.
Keyboard Shortcuts Comparison
Understanding the various keyboard shortcuts available on your HP notebook will help you choose the fastest method for your situation. Different scenarios call for different approaches, and knowing all your options ensures you can work efficiently.
Here’s a comprehensive breakdown of the most useful keyboard shortcuts for taking screenshots on an HP notebook:
- Print Screen (PrtScn): Captures entire screen to clipboard. Requires manual pasting into an application.
- Alt + Print Screen: Captures only the active window to clipboard. Useful when multiple applications are open.
- Windows Key + Shift + S: Opens Snip and Sketch for selective screen capture with immediate editing capabilities.
- Windows Key + G: Opens Xbox Game Bar for quick screenshot capture with automatic saving.
- Windows Key + Alt + Print Screen: Captures screen using Game Bar and automatically saves to Videos/Captures folder.
For most users, Windows Key + Shift + S represents the best all-around choice because it combines speed with flexibility. You get the ability to select exactly what you want to capture, plus immediate access to editing tools, all without extra steps.
If you’re in a hurry and don’t need editing capabilities, Windows Key + Alt + Print Screen is unbeatable because it automatically saves your screenshot without requiring any additional actions. You can find your screenshot in your Captures folder immediately after pressing the keys.
For detailed work that requires precise selection and annotation, the traditional Snipping Tool accessed through the Start menu remains valuable. It offers the most control and the most comprehensive feature set, though it requires slightly more time to launch compared to keyboard shortcuts.
Editing and Saving Your Screenshots
Once you’ve captured your screenshot, you’ll often want to edit it before sharing or storing it. Your HP notebook includes several built-in applications that make this process straightforward, and you can also use third-party tools for more advanced editing.
The simplest built-in option is Paint, which comes with every Windows installation. To edit your screenshot in Paint, paste your image using Ctrl + V, then use the drawing tools to highlight areas, add text, or crop the image. While Paint is basic, it’s perfect for simple annotations and quick edits.
For more sophisticated editing, consider using the Photos app built into Windows 10 and Windows 11. This application offers more advanced cropping tools, brightness and contrast adjustments, and the ability to remove backgrounds. Open your screenshot in Photos to access these features.
When saving your screenshot, you’ll need to choose an appropriate file format. PNG format is generally recommended because it preserves image quality without compression. JPEG format creates smaller files but may reduce quality, particularly if your screenshot contains text. BMP format maintains maximum quality but creates very large files.
Organize your screenshots into dedicated folders to keep your computer tidy. Create a folder structure like Documents/Screenshots/2024 to make it easy to locate specific screenshots later. This organization system becomes invaluable when you’re managing hundreds of screenshots over time.
If you’re taking screenshots for professional purposes, consider using a dedicated screenshot management application. These tools automatically organize your screenshots, add timestamps, and make them searchable. They’re particularly valuable for professionals in IT support, design, or documentation roles.
For more information about managing digital files and organization on your HP notebook, check out the FixWise Hub Blog for comprehensive how-to guides. You might also find it helpful to review our guide on how to screenshot on a Dell laptop if you work with multiple notebook brands.
FAQ
Where do screenshots automatically save on my HP notebook?
Screenshots taken with Windows Key + Alt + Print Screen (Game Bar method) automatically save to your Videos folder in a subfolder named Captures. Other methods copy screenshots to your clipboard, requiring you to manually paste and save them. You can change the default save location in Game Bar settings if desired.
Can I take a screenshot of just one window on my HP notebook?
Yes, you can use Alt + Print Screen to capture only the active window, then paste it into an application like Paint. Alternatively, use Snip and Sketch or the Snipping Tool and select the Window Snip mode to capture a specific application window.
What’s the best file format for saving screenshots?
PNG format is generally best for screenshots because it preserves quality without compression and handles text clearly. JPEG creates smaller files but may reduce quality. Use BMP only if you need maximum quality and have plenty of storage space.
Can I edit my screenshot immediately after taking it?
Yes, using Snip and Sketch (Windows Key + Shift + S) allows you to edit immediately after capture. The editor opens automatically with drawing tools, crop functions, and markup options available right away.
How do I share a screenshot quickly?
Take your screenshot using Snip and Sketch, then click the share icon in the editor. You can copy it to your clipboard for pasting into emails or documents, or use the built-in sharing options to send directly to cloud services or messaging applications.
Is there a way to capture my entire screen including multiple monitors?
Yes, the basic Print Screen (PrtScn) key captures all connected monitors. If you only want one monitor on an HP notebook with dual displays, use Snip and Sketch to manually select just the area you need.
Related Posts

Superscript in Google Docs: Expert Tips

Strikethrough in Excel: Easy Steps for Beginners
