
How to Remove Window Tint: Step-by-Step Guide
How to Remove Window Tint: A Complete Step-by-Step Guide
Window tint removal doesn’t have to be a nightmare—whether you’re ditching that dark film because it’s peeling, your car’s heading to a new owner, or you simply want a fresh look. What seems like a straightforward task can actually hide some pitfalls if you’re not careful. The good news? With the right approach, patience, and a few basic tools, you can remove window tint cleanly without damaging your glass or leaving behind stubborn residue.
The process varies depending on how old your tint is, what type was applied, and whether you’re working on automotive windows or your home. Some tint peels away like a dream, while other applications seem determined to stay put. We’ll walk you through every scenario, from the easiest removal methods to the nuclear options when nothing else works.
Why Remove Window Tint?
People remove window tint for surprisingly varied reasons. Maybe your car’s tint is showing signs of wear and damage, fading to a cloudy purple or peeling at the edges. Others find that regulations in their state have tightened, making their previously legal tint now illegal. Some simply prefer the unobstructed view, while others are selling their vehicle and the new owner wants the tint gone.
Professional tint removal can cost anywhere from $100 to $400 depending on your vehicle and how many windows need treatment. That’s a solid reason to tackle it yourself if you have the time and patience. The satisfaction of doing it right—without scratching your glass or leaving adhesive ghosts—is genuinely rewarding.
Tools and Materials You’ll Need
Before you start peeling, gather these essentials:
- Heat source: Heat gun or hair dryer (heat gun works faster)
- Scraper: Plastic or rubber scraper, plastic squeegee, or old credit card (never use metal)
- Ammonia solution: Window cleaner with ammonia, or DIY mix of ammonia and water
- Spray bottle: For applying liquid solutions
- Newspaper or plastic sheeting: To protect surrounding surfaces
- Gloves: Rubber or nitrile to protect your hands
- Rags or paper towels: Microfiber cloths work best
- Steamer (optional): A garment steamer can work wonders on stubborn tint
- Rubbing alcohol: For final adhesive cleanup
- Soapy water: Plain dish soap and water for initial cleaning
The beauty of this project is that most of these items are already in your home. You’re not investing in specialty equipment unless you want to.
Method 1: The Heat and Peel Technique
This is the most straightforward approach and often works beautifully on older, already-peeling tint or tint that’s been exposed to lots of sun.
Step 1: Prepare Your Workspace
Park your car in a sunny spot if possible, or work indoors with good lighting. Lay down newspaper around the window to catch any debris. If you’re working on home windows, place plastic sheeting on surrounding surfaces and furniture.
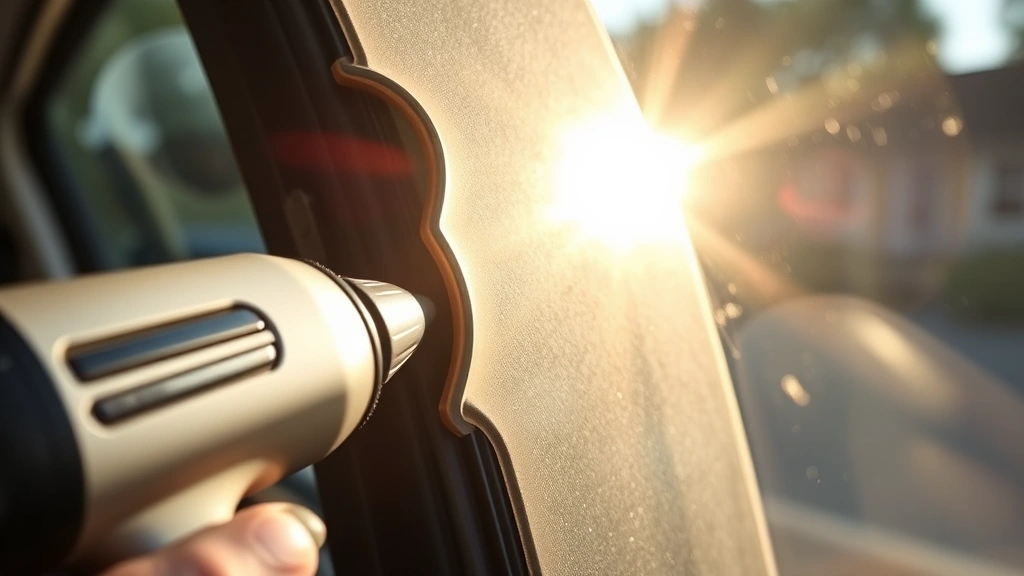
Step 2: Apply Heat
Set your heat gun to medium heat and hold it 4-6 inches from the window. Move it slowly and deliberately across the tint, spending 30-45 seconds per section. The goal is warming the adhesive without overheating the glass. If you’re using a hair dryer, this will take longer but still works—just be patient. You’ll notice the tint beginning to curl at the edges as it heats.
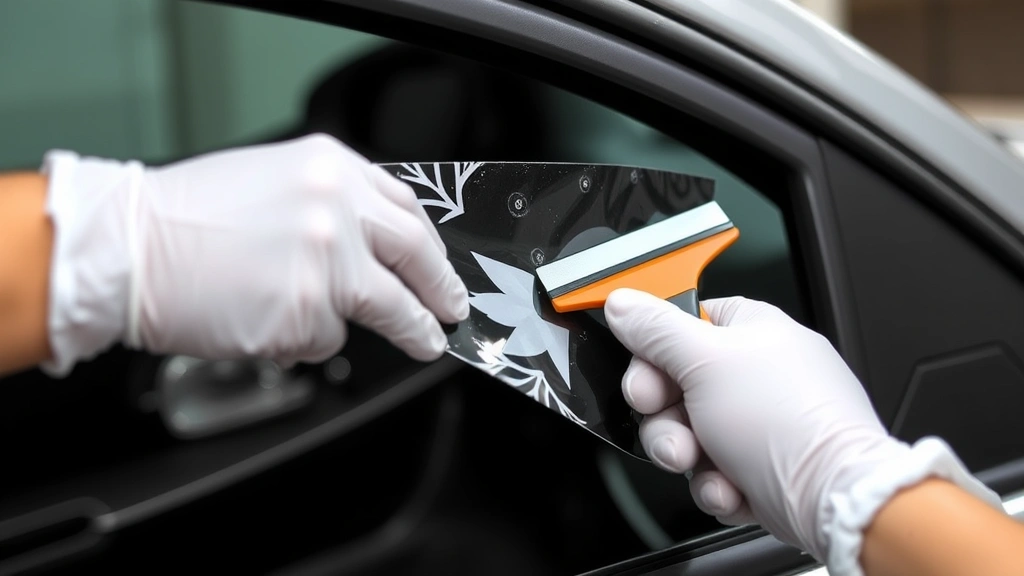
Step 3: Begin Peeling
Once you see the edges starting to lift, use your plastic scraper to gently pry up a corner. Grab the lifted edge with your fingers and slowly peel. If it resists, apply more heat. The key here is slow and steady—rushing causes the film to tear into tiny pieces, which is frustrating. A slow peel might take several minutes per window, but you’ll remove the film in large sheets.
Step 4: Remove Remaining Adhesive
After the film is gone, you’ll likely have adhesive residue. Spray the window with your ammonia solution and let it sit for a few minutes. Then use your scraper to gently remove the sticky remnants. This is where patience really matters—aggressive scraping can scratch glass.
Method 2: The Ammonia Solution Approach
This method is perfect for tint that’s already slightly peeling or if you prefer a less heat-intensive approach.
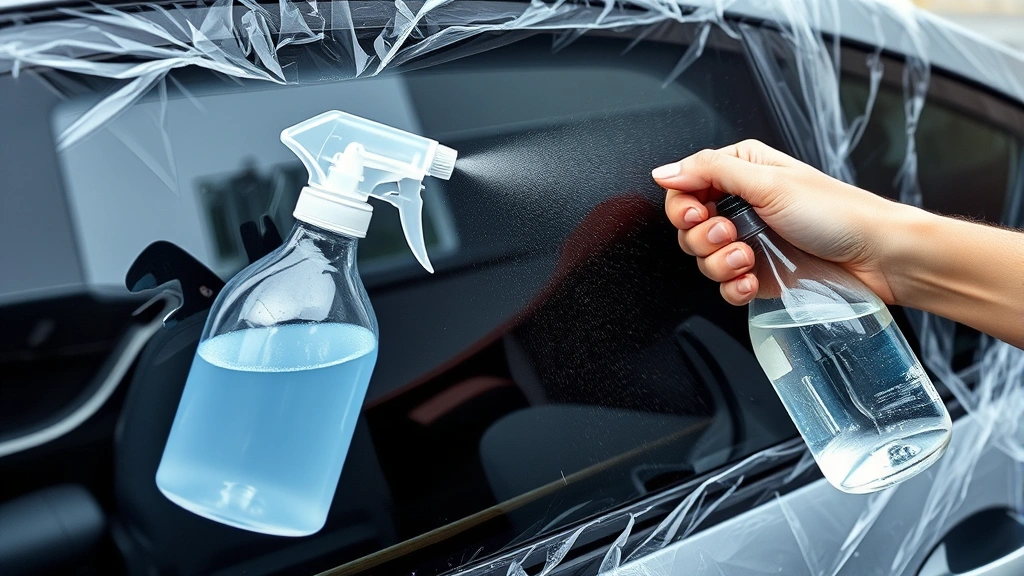
Preparation and Application
Mix equal parts household ammonia and water in a spray bottle. If using commercial window cleaner, make sure it contains ammonia (check the label). Spray the entire window generously, saturating the tint film. If you can, apply the solution to both sides—exterior and interior. This dual-sided approach accelerates the process.
Cover the window with plastic bags or plastic wrap to keep the solution from evaporating. Leave it for 15-20 minutes. This gives the ammonia time to break down the adhesive bond. During this waiting period, you might notice the film starting to bubble slightly—that’s exactly what you want.
Peeling and Scraping
After the wait, carefully peel back a corner of the film. If it resists, reapply ammonia solution and wait another 5-10 minutes. Once you can peel it, work slowly. The ammonia has weakened the adhesive, but you’re still fighting against months or years of baking in the sun.
For stubborn sections, this is where understanding adhesive removal techniques becomes valuable. The same principles that work for super glue removal apply here—patience, the right solvent, and gentle pressure.
Method 3: The Steamer Method
If you have access to a garment steamer, this method is surprisingly effective and gentler on your glass than direct heat guns.
How to Use a Steamer
Fill your steamer with water and allow it to heat up according to instructions. Hold the steamer nozzle about 3-4 inches from the window and apply steam in slow, circular motions. The moist heat penetrates the film differently than dry heat, often working faster. After 1-2 minutes of steaming, test the edges with your plastic scraper.
The advantage of this method is that the moisture helps prevent dust and small film particles from becoming airborne—they stick to the moisture instead. It’s also less likely to damage tinted windows that might be sensitive to direct, concentrated heat.
Keep a spray bottle of water nearby to mist the window as you work. This maintains moisture and helps the peeling process. Work in small sections, steaming and peeling methodically across the entire window.
Dealing with Stubborn Residue
Sometimes, despite your best efforts, adhesive residue remains. This is completely normal and doesn’t mean you’ve failed.
Rubbing Alcohol Method
Soak a cloth in rubbing alcohol and press it against the residue for 30-60 seconds. The alcohol begins dissolving the adhesive. Then gently rub the area in circular motions. You’ll notice the residue starting to ball up and come away from the glass. This might take several applications, but it works reliably.
Commercial Adhesive Removers
Products like Goo Gone work well on tint adhesive, though they have a strong smell. Apply according to the product instructions, typically letting it sit for several minutes before wiping. Always test on a small area first to ensure it doesn’t damage your trim or interior surfaces.
The Razor Blade Approach (Carefully)
If you’re confident with a razor blade, you can use one at a 45-degree angle to scrape residue from glass. This requires a delicate touch—too much pressure and you’ll scratch the glass. Many people prefer the safer plastic scraper method even if it takes longer.
Finishing Touches and Cleanup
Once you’ve removed the film and adhesive, your work isn’t quite finished. Proper cleaning your car windows after tint removal reveals the true result and removes any haze or residue.
Final Glass Cleaning
Use a quality glass cleaner and microfiber cloth to polish the window thoroughly. You might be surprised how much haze or film remains even after removing the tint. Two or three passes with a clean cloth usually eliminates it completely.
For stubborn haze, try the proper technique for cleaning car windows, which involves specific wipe patterns to avoid streaking. Crumpled newspaper actually works better than paper towels for streak-free results—an old-school trick that genuinely works.
Interior and Exterior Check
Walk around your vehicle or building and inspect from different angles. Sunlight hitting the glass at various angles reveals any remaining adhesive spots you might have missed. These are usually easy to address with another round of rubbing alcohol.
Trim and Weatherstripping
Check that no adhesive residue got onto your rubber trim or weatherstripping. If it did, clean it gently with a soft cloth and mild soap solution. Aggressive cleaning of rubber trim can damage it, so take your time here.
If you’re also planning other car maintenance, this is an excellent time to handle it. rotating your tires while you’re already doing window work means you’re maximizing your time under the vehicle.
Frequently Asked Questions
How long does window tint removal typically take?
For a single window using the heat and peel method, expect 20-45 minutes depending on how well the tint cooperates. An entire car (4-6 windows) might take 2-4 hours. The ammonia method is slower but potentially less labor-intensive. Patience matters more than speed here.
Will removing tint damage my glass?
Not if you’re careful. Using plastic scrapers, avoiding excessive heat, and taking your time prevents damage. Metal scrapers and aggressive scraping are what causes scratches. If your glass is already compromised, extreme heat or cold could potentially cause cracking, but normal room-temperature removal is safe.
What’s that purple haze on my window after tint removal?
That’s usually adhesive residue or a protective coating that was under the tint. This clears up with proper cleaning using glass cleaner and microfiber cloths. Occasionally, it indicates the tint is breaking down, which happens to very old film.
Can I remove window tint from house windows the same way?
Yes, the methods are identical. Home window tint is typically thinner and sometimes easier to remove than automotive film. Use the same heat, ammonia, or steamer methods. Just be careful around frames and trim, which can be more delicate than car trim.
Is there a best time of year to remove window tint?
Warm weather is ideal because heat works better and the adhesive is more pliable. However, avoid extremely hot days where the glass itself becomes too hot to touch comfortably. A moderate, sunny day in spring or fall is perfect. Avoid cold weather when adhesive becomes brittle and more likely to shatter into fragments.
What if my tint won’t come off at all?
Try combining methods—heat followed by ammonia solution, or steaming followed by alcohol. Sometimes the film was applied with an exceptionally strong adhesive. If it’s truly stubborn, a professional removal service might be worth the cost rather than spending 8 hours fighting it yourself.
Can I reapply new tint over old residue?
Not successfully. Professional tinters will refuse to apply new tint over old adhesive. It creates bubbles, uneven application, and premature peeling. Always remove the old adhesive completely before applying new film.
Will heat guns damage my car’s trim or weatherstripping?
Potentially, if you’re not careful. Keep the heat gun focused on the glass itself, not the rubber trim. Move it constantly to avoid concentrating heat in one spot. If you’re nervous about trim damage, use a hair dryer instead—it’s slower but safer.
Related Posts

How Long to Boil Lobster Tails: Cooking Guide

How Long to Fly from New York to London? Travel Times
