
Remove Rust from Metal? Expert Tips Inside!
How to Remove Rust from Metal: Expert Tips and Proven Methods
Rust is one of the most common problems homeowners and DIY enthusiasts face when dealing with metal surfaces, tools, and fixtures. Whether it’s your favorite garden tools, vintage furniture, automotive parts, or structural elements around your home, rust can compromise both aesthetics and functionality. The good news is that removing rust doesn’t always require expensive professional services or complete replacement of the affected items.
In this comprehensive guide, we’ll walk you through proven methods to eliminate rust from various metal surfaces, from light surface rust to heavy corrosion. You’ll learn which techniques work best for different situations, what materials you’ll need, and how to prevent rust from returning. By the end, you’ll have the knowledge to tackle rust removal projects with confidence.
Understanding Rust and Why It Forms
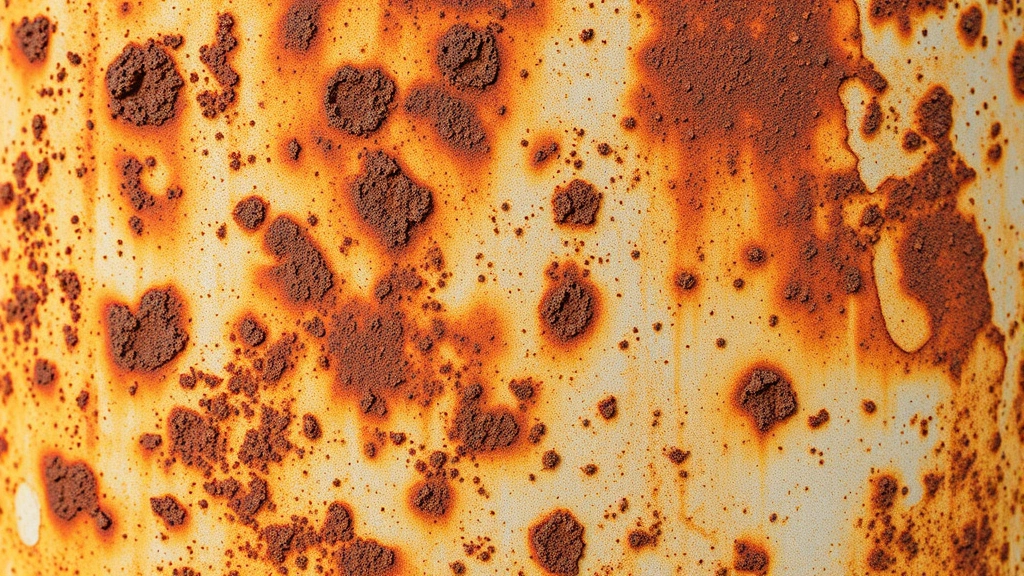
Before diving into removal techniques, it’s important to understand what rust actually is and how it develops. Rust is iron oxide, which forms when iron or iron-containing metals come into contact with oxygen and moisture. This chemical reaction creates a reddish-brown coating that gradually eats away at the underlying metal if left untreated.
Several factors accelerate rust formation: high humidity, salt exposure (particularly near ocean environments), temperature fluctuations, and contact with acidic substances. Understanding these triggers helps you choose the most effective removal method and implement preventative measures afterward. Different metals react differently to rust—for example, if you’re dealing with specific materials, you might want to explore our guide on how to remove rust from cast iron, which requires specialized care.
The severity of rust falls into three categories: surface rust (light orange discoloration), moderate rust (pitting and flaking), and severe rust (deep pitting and structural compromise). Each category requires different approaches, which we’ll cover in detail below.
Tools and Materials You’ll Need
Having the right tools and materials before starting makes the rust removal process significantly more efficient and safe. Here’s a comprehensive list of what you might need:
- Safety equipment: Work gloves, safety glasses, dust mask or respirator, and steel-toed boots
- Wire brushes: Hand-held wire brushes and wire wheel attachments for power drills
- Grinding and sanding tools: Angle grinders, orbital sanders, and various grit sandpaper (80, 120, 220)
- Chemical removers: Commercial rust converters, phosphoric acid products, and penetrating oils
- Natural alternatives: White vinegar, baking soda, lemon juice, and salt
- Protective coatings: Primer, paint, wax, and oil-based sealants
- Cleaning supplies: Wire wool, steel wool, brushes, and rags
- Power tools: Cordless drill with various attachments, angle grinder, and bench grinder
Consider checking your local home improvement retailer for specialized rust removal products and safety equipment before you begin your project.
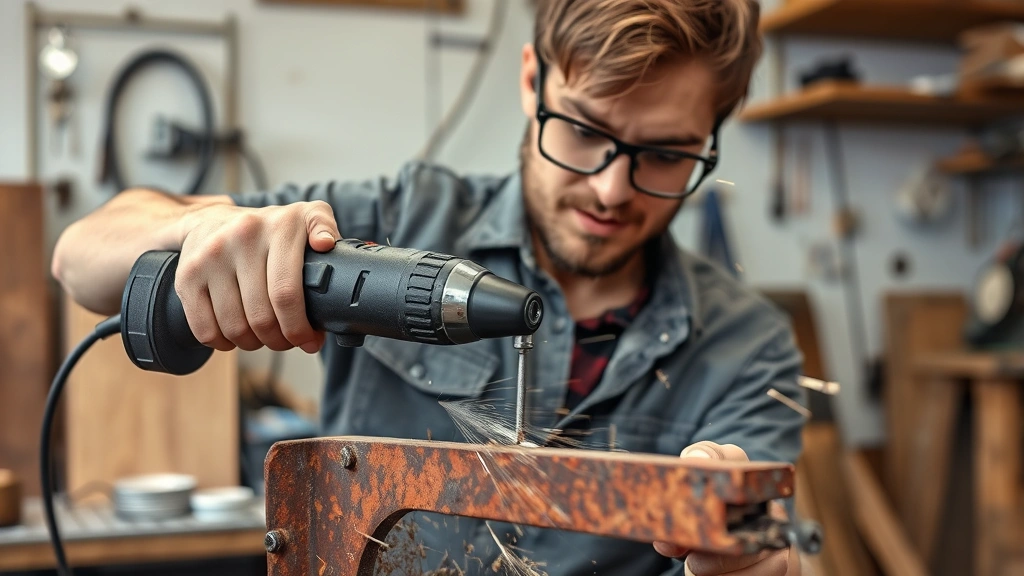
Method 1: Wire Brush and Elbow Grease
This is the simplest and most accessible method for light to moderate surface rust. It requires minimal investment and no chemicals, making it ideal for small projects or delicate items.
Steps:
- Put on your safety glasses and work gloves to protect against flying rust particles
- Use a hand-held wire brush and scrub the rusted area in circular motions with firm pressure
- For larger areas, attach a wire wheel brush to your cordless drill and work systematically across the surface
- Continue until most rust is removed and bare metal is visible
- Wipe clean with a damp cloth and dry thoroughly
- Apply protective coating immediately to prevent new rust formation
This method works best on items like garden tools, outdoor furniture, and metal fixtures. The main advantage is that you have complete control over the pressure applied, which is important for items with thin metal or delicate surfaces. However, it’s time-consuming for large areas and won’t penetrate deep rust pits.
Method 2: Chemical Rust Removers
Commercial rust removers offer efficient, targeted solutions for various rust severities. These products typically contain phosphoric acid or chelating agents that convert rust into a stable compound.
Popular chemical options include:
- Phosphoric acid converters: These products chemically convert rust into a stable surface that can be painted over
- Penetrating oils: Products like WD-40 or similar penetrating oils can help loosen rust and provide temporary protection
- Naval jelly: A traditional phosphoric acid product effective on light to moderate rust
- Rust dissolver: Industrial-strength products designed for heavy corrosion
Application process:
- Clean the area with a wire brush to remove loose rust and debris
- Read the product instructions carefully, as application methods vary
- Apply the chemical remover using a brush or spray applicator
- Allow the recommended contact time (usually 15 minutes to several hours)
- Scrub with a brush or steel wool to aid in rust removal
- Rinse thoroughly with water and dry completely
- Apply primer and protective coating
Chemical removers are particularly effective for intricate items where mechanical methods might cause damage. Always work in well-ventilated areas and follow safety instructions, as many contain harsh chemicals. For more detailed information on similar cleaning processes, see our article on how to clean jewelry, which uses comparable techniques for delicate items.
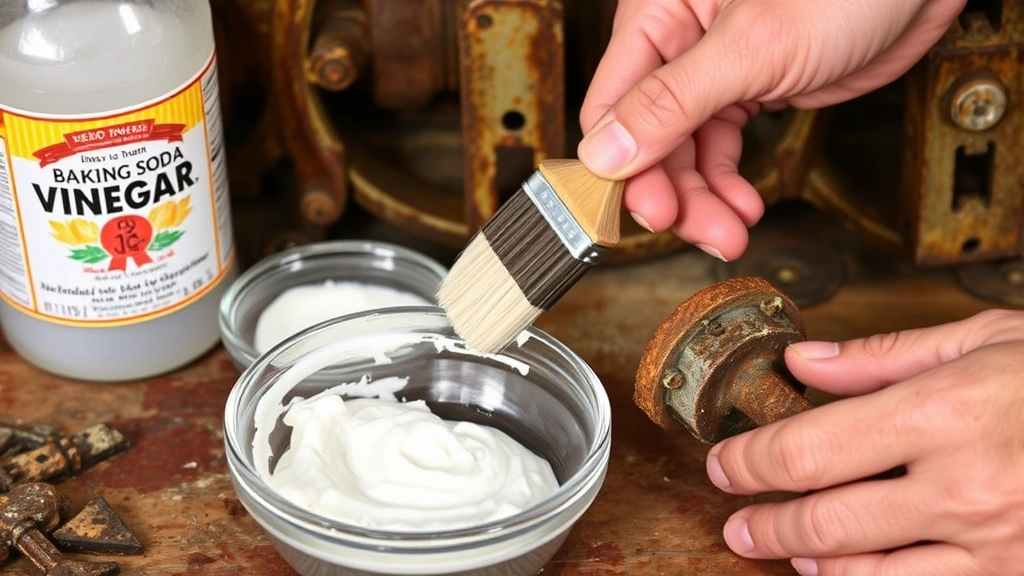
Method 3: Vinegar and Baking Soda
If you prefer natural, non-toxic solutions, vinegar and baking soda are surprisingly effective for light rust removal. This method is safe for indoor use and poses no chemical hazards.
Vinegar method:
- Soak the rusted item in white vinegar for 24 hours (for small items)
- Remove from vinegar and scrub with a wire brush or steel wool
- For larger surfaces, spray vinegar generously and let sit for 30 minutes
- Scrub with a brush and repeat if necessary
- Rinse with water and dry thoroughly
Baking soda paste method:
- Mix baking soda with water to create a thick paste
- Apply the paste directly to rusted areas
- Let sit for 15-30 minutes
- Scrub with a brush or steel wool
- Rinse and dry completely
You can also combine both ingredients: soak in vinegar first, then apply baking soda paste for enhanced results. This approach works wonderfully for tools, small hardware, and items you plan to store indoors. The acetic acid in vinegar reacts with rust oxide, making it easier to remove mechanically. While slower than chemical products, it’s gentler on the environment and your skin.
Method 4: Electrolysis for Severe Rust
For heavily rusted items with significant pitting, electrolysis provides a powerful solution that removes rust without damaging underlying metal. This method is ideal for valuable antiques, vintage tools, or items with intricate details.
What you’ll need:
- A plastic container large enough to hold your item
- Distilled water
- Washing soda (sodium carbonate)
- Stainless steel electrode or rebar
- DC power supply (12-volt battery charger works well)
- Wires and clamps
Setup and process:
- Fill the container with distilled water and dissolve washing soda (1 tablespoon per gallon)
- Submerge the rusted item and attach the negative clamp to it
- Attach the positive clamp to the stainless steel electrode
- Position the electrode in the water without touching the item
- Connect to your DC power supply at 12 volts
- Allow the process to run for 12-48 hours depending on rust severity
- Monitor progress periodically
- Once rust is removed, rinse thoroughly and dry immediately
- Apply protective coating within hours
Electrolysis works by reversing the oxidation process at a molecular level. It’s particularly effective because it doesn’t remove base metal, only the rust layer. This method requires more setup but yields exceptional results for treasured items. For comprehensive home improvement guidance, visit This Old House, which offers detailed electrolysis tutorials.
Method 5: Grinding and Sanding
For structural metal items, heavy rust, or when you need rapid results, grinding and sanding offer aggressive rust removal. This method is best for items where metal loss is acceptable or where you’re preparing surfaces for welding or restoration.
Grinding approach:
- Wear a full face shield, safety glasses, and respirator
- Use an angle grinder with a grinding wheel attachment
- Work at a 15-30 degree angle to the surface
- Make multiple passes until all rust and discoloration are removed
- Wipe clean and inspect for remaining rust
- Switch to sanding for a smooth finish
Sanding approach:
- Start with 80-grit sandpaper for heavy rust
- Progress to 120-grit for moderate rust removal
- Finish with 220-grit for a smooth, paint-ready surface
- Use an orbital sander for efficiency on flat surfaces
- Hand sand edges and detailed areas
- Vacuum dust and wipe with a tack cloth
Grinding creates significant dust and spark hazards, so proper safety equipment is non-negotiable. This method works excellently for automotive restoration, large structural pieces, and items destined for repainting. The aggressive action removes not just rust but also provides surface profile for primer adhesion.
Preventing Future Rust
Once you’ve successfully removed rust, preventing its return is crucial. Prevention is always easier and more cost-effective than dealing with rust repeatedly.
Protective coating strategies:
- Paint and primer: Apply rust-inhibiting primer followed by quality metal paint for long-lasting protection
- Wax and oil: Regular application of wax or oil maintains protection on tools and outdoor items
- Powder coating: Professional powder coating provides durable, attractive finishes for metal items
- Clear sealant: Transparent protective sealants preserve metal appearance while providing protection
Environmental controls:
- Store metal items in dry locations with low humidity
- Use silica gel packets or moisture-absorbing containers for enclosed storage
- Keep items away from salt spray and corrosive chemicals
- Ensure proper ventilation in storage areas
- Cover outdoor items during extended periods of non-use
Regular maintenance:
- Inspect metal items periodically for early rust signs
- Clean items regularly to remove moisture and contaminants
- Touch up paint or coating if damage occurs
- Keep tools dry and clean after use
For related maintenance advice, check out our guide on how to remove grease stains from clothes, which teaches similar protective cleaning principles. Additionally, Family Handyman provides excellent resources on metal maintenance and protection.
Proper storage is your strongest defense against rust. Keep outdoor furniture covered, store tools in dry conditions, and consider using desiccant packets in metal toolboxes. For items in humid climates, a small dehumidifier in your storage area can make a significant difference in rust prevention.
FAQ
What’s the fastest way to remove rust?
Angle grinding is the fastest mechanical method, removing rust in minutes to hours depending on severity. For chemical speed, commercial rust converters work within 24 hours. However, speed often trades off with precision—choose based on your item’s value and sensitivity.
Can I remove rust without damaging the underlying metal?
Yes. Electrolysis, chemical converters, and vinegar soaking remove rust without significant base metal loss. Mechanical methods (grinding, sanding) do remove some metal, so use them cautiously on thin or valuable items.
Is it safe to use vinegar on all metals?
Vinegar is generally safe for iron and steel but may affect other metals. Test on a small area first. Avoid prolonged vinegar soaking on aluminum or copper, as it can cause pitting.
How long does rust prevention last?
Duration depends on the protective coating and environment. Paint typically lasts 3-5 years, while powder coating can last 10-15 years. Oil and wax require reapplication every 6-12 months.
What’s the difference between rust converter and rust remover?
Rust removers eliminate rust completely, while converters chemically transform rust into a stable compound. Converters are faster and better for items you’ll paint; removers give better results if you want bare metal appearance.
Can I prevent rust on outdoor metal furniture?
Yes. Regular cleaning, protective coating application, and covering during non-use seasons significantly reduce rust risk. Store furniture indoors during winter or rainy seasons for maximum protection.
What should I do if rust has created holes in the metal?
If rust has created structural damage or holes, the item may be beyond repair. For minor pitting, you can fill with epoxy putty before repainting. For significant structural compromise, replacement may be necessary.
Is it worth removing rust from old tools?
Absolutely. Removing rust restores functionality and extends tool life significantly. Even vintage tools can provide years of reliable service after proper rust removal and maintenance.
For more DIY home improvement tips and guides, explore our comprehensive resource center with step-by-step instructions for countless household projects. Whether you’re tackling rust or other maintenance challenges, you’ll find practical advice backed by expert knowledge.
Related Posts

Superscript in Google Docs: Expert Tips

Strikethrough in Excel: Easy Steps for Beginners
