
How to Propagate Pothos: Expert Guide
How to Propagate Pothos: Expert Guide to Growing Your Trailing Vines
If you’ve ever admired a lush pothos plant cascading from a shelf or climbing a moss pole, you’ve probably wondered how to create more of that green magic without spending a fortune at the nursery. The truth? Propagating pothos is so ridiculously easy that even if you’ve killed every plant you’ve ever owned, you can master this. Seriously, pothos might be the most forgiving plant on the planet, and propagating it feels almost like cheating because it works so well.
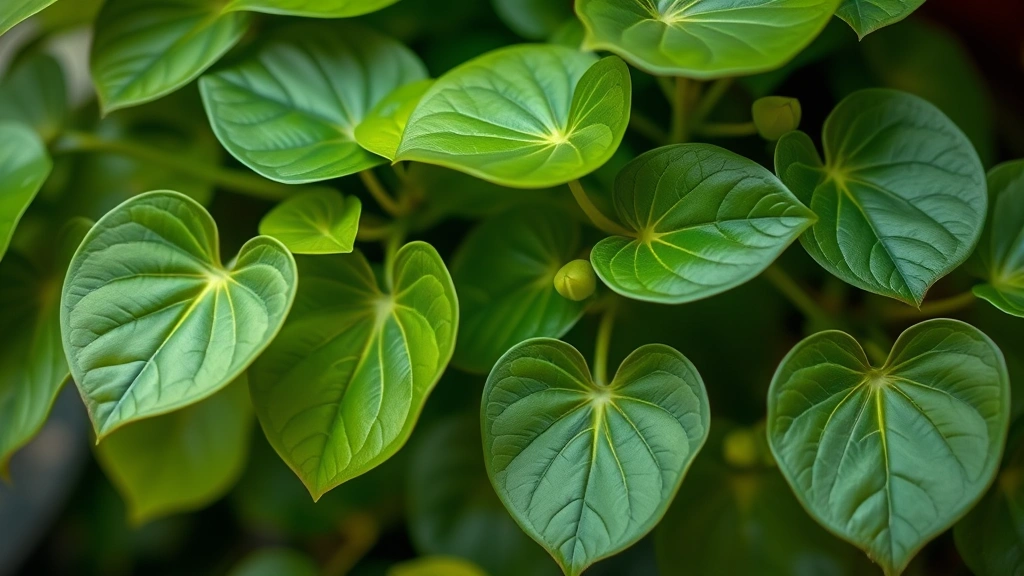
Pothos, also known as devil’s ivy, has earned its reputation as the ultimate beginner’s plant for good reason. It thrives in neglect, tolerates low light, and bounces back from almost anything you throw at it. But here’s where it gets even better: propagating pothos is faster and more reliable than most other houseplants. Whether you’re looking to fill your home with trailing greenery, share cuttings with friends, or simply experiment with a new hobby, this guide will walk you through everything you need to know.
The beauty of pothos propagation lies in its simplicity. You don’t need fancy equipment, special hormones, or a green thumb blessed by botanical gods. All you need is a healthy parent plant, clean scissors, water or soil, and a little patience. Let’s dive into the specifics.
Why Propagate Pothos?
Before we jump into the how, let’s talk about the why. Propagating pothos offers several compelling reasons beyond just wanting more plants. First, it’s incredibly cost-effective. Instead of buying new pothos plants for every room in your home, you can generate dozens from a single mature plant. Second, it allows you to rejuvenate an older, leggy plant by cutting it back and using those cuttings to create bushier, fuller versions.
There’s also something deeply satisfying about watching tiny roots emerge from a cutting and transform it into a full plant. It connects you to the growth process in a way that simply purchasing a finished plant never can. Plus, propagated pothos make excellent gifts for friends and family—they’re conversation starters and living reminders of your generosity.
If you’re interested in expanding your propagation skills beyond pothos, you might enjoy exploring other plant propagation projects. The fundamental techniques overlap with many houseplants, and once you master pothos, you’ll have the confidence to experiment with more challenging species.
When to Propagate Pothos
Timing matters, though pothos is forgiving enough that you can propagate it almost year-round. That said, spring and early summer are ideal because your plant is in active growth mode. During these seasons, cuttings root faster and new plants establish more vigorously. The longer daylight hours and warmer temperatures create optimal conditions for root development and new leaf growth.
You can propagate during fall and winter, but expect slower rooting times and a slightly higher failure rate. If your home is particularly cold or has limited natural light during winter, it’s worth waiting until spring. That said, if you’re using artificial grow lights or keeping your home consistently warm, winter propagation works just fine.
The best time to take cuttings from your parent plant is in the morning when the stems are turgid and full of moisture. Avoid cutting in the evening or when your plant looks stressed from lack of water. Healthy, hydrated stems root more reliably than stressed ones.
Water Propagation Method
Water propagation is the most popular method for pothos, and for good reason—it’s visually rewarding and requires minimal supplies. You’ll watch roots develop in real-time, which makes the process feel magical. Here’s how to do it right.
Step 1: Take Your Cuttings
Using clean, sharp scissors or pruning shears, cut 4-6 inch sections of pothos vine. Each cutting should have at least two to three nodes—those little bumps on the stem where leaves emerge. Nodes are where roots will develop, so they’re absolutely crucial. You can take longer cuttings if your parent plant is large; just aim for at least two nodes on each piece.
Make your cuts at a 45-degree angle about a quarter-inch below a node. This angle increases surface area and helps with water absorption. Remove any leaves that would sit below the waterline to prevent rot and bacterial growth. You can leave the top leaves intact—they’ll photosynthesize and fuel root development.
Step 2: Prepare Your Water
Fill a glass, jar, or vase with room-temperature water. Tap water works fine for most people, though if you’re concerned about chlorine or have particularly hard water, you might consider using how to make distilled water at home for your cuttings. Change the water every three to five days to prevent bacterial buildup and keep oxygen levels high. Stagnant water is the enemy of happy roots.
Step 3: Place Cuttings in Water
Insert your prepared cuttings into the water so the nodes are fully submerged. The leaves should be above the waterline. If you’re working with multiple cuttings, you can place several in the same container, but make sure they’re not crowded—air circulation matters. Some people like to use a propagation station with a rooting hormone, but honestly, pothos doesn’t need it. These plants are aggressive rooters.
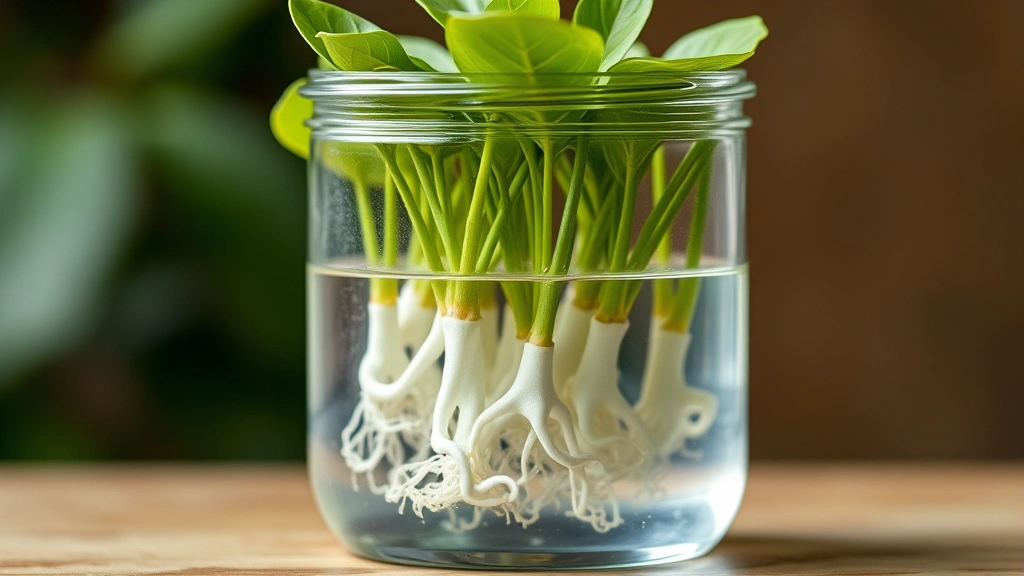
Step 4: Wait for Roots
Here’s where patience becomes your best friend. Most pothos cuttings develop visible roots within 1-2 weeks. You’ll see tiny white bumps forming at the nodes, which eventually become full root systems. Keep the water consistently fresh, place your cuttings in bright, indirect light, and resist the urge to constantly fiddle with them.
Once roots are about an inch long, you can either continue growing the cutting in water indefinitely or transfer it to soil. Some people prefer keeping pothos in water permanently—it’s less messy and requires less maintenance. Others prefer soil because it feels more like traditional gardening.
Soil Propagation Method
If you prefer the traditional route of soil propagation, pothos is equally accommodating. This method works particularly well if you want to eventually transition your plants to hanging baskets or containers with other plants.
Preparing Your Medium
Use a well-draining potting mix—something like a basic indoor plant mix or a mixture of peat moss and perlite in equal parts. The key is drainage; pothos roots hate sitting in soggy soil. Fill a small pot, seed tray, or propagation tray with your medium and lightly moisten it before inserting cuttings.
Inserting Cuttings
Following the same cutting preparation as the water method, insert your cuttings about an inch into the soil, making sure at least one node is buried. The nodes are where roots will emerge, so burying them increases your success rate. You can use a rooting hormone here if you want—it speeds up the process slightly—but again, pothos doesn’t strictly need it.
Creating Humidity
Cover your propagation tray with a clear plastic dome or plastic wrap to create a humid microclimate. This reduces water loss and encourages faster rooting. Make sure there’s some air circulation; poke a few holes in the plastic or remove it for an hour daily to prevent mold and fungal issues.
Watering and Light
Keep the soil consistently moist but not waterlogged. Check daily and water when the top half-inch feels dry. Place your cuttings in bright, indirect light—a north or east-facing window works beautifully. Direct afternoon sun can stress young cuttings, so avoid that.
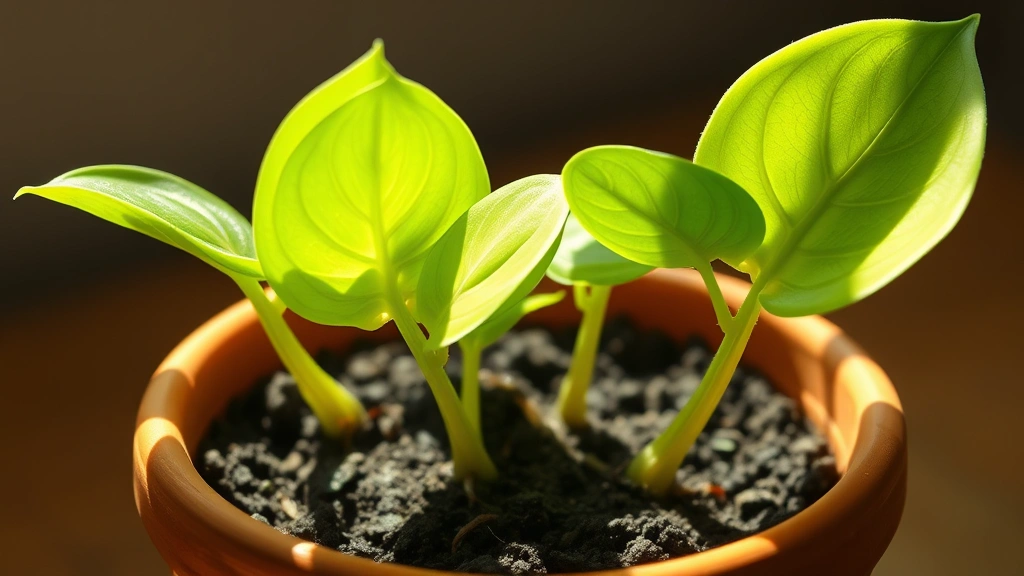
Rooting typically takes 2-3 weeks in soil, slightly longer than water propagation. Once you see new growth emerging from the top, you know roots have established and you can gradually remove the humidity cover.
Caring for Your New Plants
Once your propagated pothos have developed roots and are showing signs of growth, they’re ready for normal care. This transition period is crucial for establishing healthy, vigorous plants.
Transitioning Water-Rooted Cuttings to Soil
If you started in water, you can move your rooted cuttings to soil once roots are about an inch long. Acclimate them gradually by placing them in soil and keeping it slightly wetter than usual for the first week. This prevents transplant shock. After a week, gradually reduce watering frequency to normal levels.
Alternatively, many people keep water-propagated pothos in water permanently. This works great if you use a clear container and change the water regularly. The roots adapt well to hydroponic conditions.
Light Requirements
Pothos is famously tolerant of low light, but your young propagations will establish faster with bright, indirect light. Avoid direct sun, which can scorch tender new leaves. Once established, your pothos can handle anything from bright indirect light to moderate shade.
Watering Schedule
Water when the top inch of soil feels dry. Pothos prefers to dry out slightly between waterings—this is far preferable to overwatering, which causes root rot. If you’re propagating during winter or in a humid environment, water less frequently.
Humidity and Temperature
Pothos thrives in normal household humidity and temperatures between 65-75°F. It can tolerate cooler conditions, but growth slows. Avoid placing your new plants near heating vents or cold drafts from windows.
Fertilizing
Wait about a month before fertilizing your propagated cuttings. Once they’re established, feed monthly during growing season (spring and summer) with a diluted balanced fertilizer. You can reduce feeding during fall and winter when growth naturally slows.
Common Problems and Solutions
Even though pothos is forgiving, a few issues can arise during propagation. Here’s how to address them.
Cuttings Rotting Instead of Rooting
This typically happens when water is stagnant or soil is too wet. If you’re using water propagation, change it more frequently—every 2-3 days instead of weekly. If using soil, improve drainage by adding more perlite to your mix or using a shallower container that dries faster. Remove any rotting cuttings immediately to prevent spreading decay.
Slow or No Root Development
If roots aren’t appearing after three weeks, check your light levels first. Insufficient light slows rooting dramatically. Move your cuttings to a brighter location. Also verify that you’ve included nodes on your cuttings—roots only emerge from nodes. If temperature is below 60°F, rooting will be slow; warm things up if possible.
Yellowing Leaves
Yellow leaves on propagating cuttings usually indicate either overwatering or insufficient light. Check soil moisture and reduce watering if needed. Increase light exposure. Sometimes a single yellowed leaf is normal as the cutting redirects energy to root development; don’t panic about one or two.
Leggy Growth After Rooting
If your new pothos becomes tall and sparse with large gaps between leaves, it’s stretching toward light. Move it closer to a brighter window or provide supplemental grow lights. Once you pinch back the growth tip, the plant will become bushier and fuller.
Fungal or Bacterial Issues
If you notice a fuzzy growth or slime on your water propagation, change the water immediately and clean the container thoroughly. Reduce humidity if you’re using a propagation dome. Better air circulation prevents most fungal problems.
Frequently Asked Questions
How long does it take to propagate pothos?
Roots typically develop within 1-2 weeks in water and 2-3 weeks in soil. However, this varies based on temperature, light, and the health of your parent plant. Warmer temperatures and brighter light speed up the process.
Can you propagate pothos from a single leaf?
Technically, a single leaf can develop roots, but it won’t grow into a full plant. Leaves lack nodes, which are required for generating new stems and leaves. Always include at least one node per cutting for successful propagation.
Do you need rooting hormone for pothos?
No, pothos is an aggressive rooter and doesn’t require rooting hormone. That said, using it won’t hurt and might speed things up slightly. If you do use it, follow package directions and use a light hand—too much hormone can actually inhibit rooting.
Can you propagate pothos from leaves in water?
As mentioned above, single leaves will root but won’t develop into plants. You need at least one node per cutting. A leaf with a node attached will grow roots and eventually produce new stems and leaves.
How many cuttings can you take from one pothos plant?
You can take as many cuttings as your plant can handle without becoming severely depleted. A healthy, mature pothos can usually afford to lose 20-30% of its growth without suffering. If your plant is smaller, take just a few cuttings and let it recover before taking more.
What’s the difference between water and soil propagation for pothos?
Water propagation is faster, more visually rewarding, and requires less maintenance. Soil propagation more closely mimics natural conditions and may produce plants that transition better to traditional potting. Both methods work equally well; choose based on your preference.
Can pothos propagate in soil without rooting hormone?
Absolutely. Pothos roots readily in soil without any additives. Rooting hormone speeds things up slightly but isn’t necessary. A well-draining potting mix and consistent moisture are more important than hormone.
How do you know when propagated pothos are ready to pot up?
For water propagations, wait until roots are about an inch long. For soil propagations, look for new growth emerging from the top—this indicates roots have established. You can also gently tug on the cutting; if there’s resistance, roots have likely developed.
Can you propagate pothos year-round?
Yes, though spring and summer are ideal. Winter propagation works but takes longer because of cooler temperatures and reduced light. If your home is warm with good lighting, winter propagation is fine.
What’s the best container for water propagation?
Any clean glass or jar works. Clear containers let you monitor root development, which is half the fun. Avoid containers with narrow openings that make it hard to change water. A simple drinking glass works perfectly.
How often should you change water during propagation?
Change water every 3-5 days. More frequent changes (every 2-3 days) are better if your water gets cloudy or develops an odor, both signs of bacterial growth. Fresh water provides oxygen and prevents rot.
Can you propagate multiple cuttings in the same container?
Yes, but avoid overcrowding. Space cuttings so leaves don’t touch and air can circulate. Overcrowding increases humidity and disease risk. A general rule: if leaves are touching, you have too many cuttings in that container.
Related Posts

How Long to Boil Lobster Tails: Cooking Guide

How Long to Fly from New York to London? Travel Times
