

Merge 2 Cells in Excel? Pro Tips Inside
How to Merge 2 Cells in Excel: Pro Tips Inside
Merging cells in Excel is one of the most practical formatting techniques you’ll use when creating professional spreadsheets, reports, and data presentations. Whether you’re designing a title row, creating section headers, or organizing complex data layouts, knowing how to merge cells efficiently can transform the appearance and readability of your worksheets. This comprehensive guide walks you through every method—from the simplest approach to advanced techniques that save time on repetitive tasks.
Cell merging combines two or more adjacent cells into a single larger cell, which is especially useful when you want to center a title across multiple columns or create visually organized data tables. While the basic process takes just a few clicks, understanding the nuances—like handling data loss, unmerging cells, and using alternative methods—makes you a more proficient Excel user.
What Happens When You Merge Cells in Excel
Before merging cells, it’s crucial to understand what Excel does during the process. When you merge multiple cells, Excel combines them into a single cell that spans the original dimensions. The content from the top-left cell is retained, while data in other cells involved in the merge is deleted. This is the most important consideration—merging cells causes permanent data loss unless you copy the information elsewhere first.
Excel offers several merge options that control how content is handled and aligned. The standard merge centers content across the merged area, while other options preserve alignment or keep content at the beginning of the cell. Understanding these variations helps you choose the right approach for your specific needs. When you later split merged cells in Excel, the data doesn’t reappear in the original individual cells—it remains in the top-left position.
Merged cells can sometimes cause issues with sorting, filtering, and formula calculations. Excel may restrict certain operations when merged cells are present in your data range. Being aware of these limitations helps you plan your spreadsheet structure more effectively and avoid frustration later.
Step-by-Step Guide: Merge 2 Cells Using the Ribbon
The ribbon method is the most intuitive way to merge cells for most Excel users. Here’s the complete process:
- Select the two cells you want to merge. Click on the first cell, then hold Shift and click on the second cell. Both cells should now be highlighted in blue. If you’re merging horizontally adjacent cells, you can also click and drag across them.
- Open the Home tab if you’re not already on it. The Home tab contains most formatting options, including cell merging tools.
- Locate the Merge & Center button. In the Alignment group (typically in the middle-right section of the Home tab), you’ll find a dropdown arrow next to the merge icon. Click this dropdown to reveal your merge options.
- Choose your merge type:
- Merge & Center: Combines cells and centers the content horizontally and vertically
- Merge Across: Merges cells in the same row while keeping content left-aligned
- Merge Cells: Combines cells without centering (keeps original alignment)
- Verify the result. Your two cells are now merged into one larger cell. The content from the top-left cell appears in the merged area.
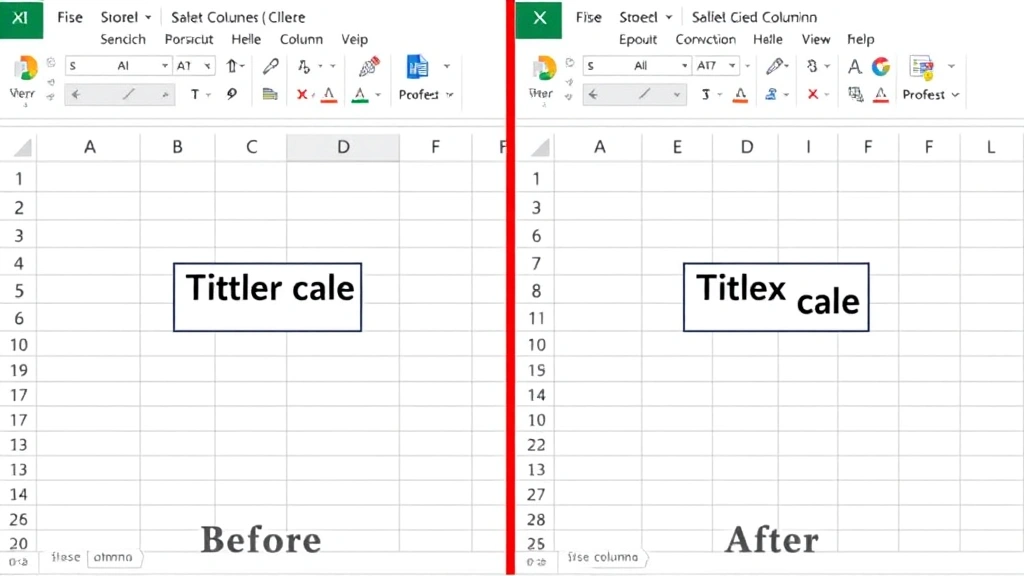
For most title rows and headers, the Merge & Center option provides the most professional appearance. This option automatically adjusts both horizontal and vertical alignment, creating a polished look that works well in business documents and formal reports.
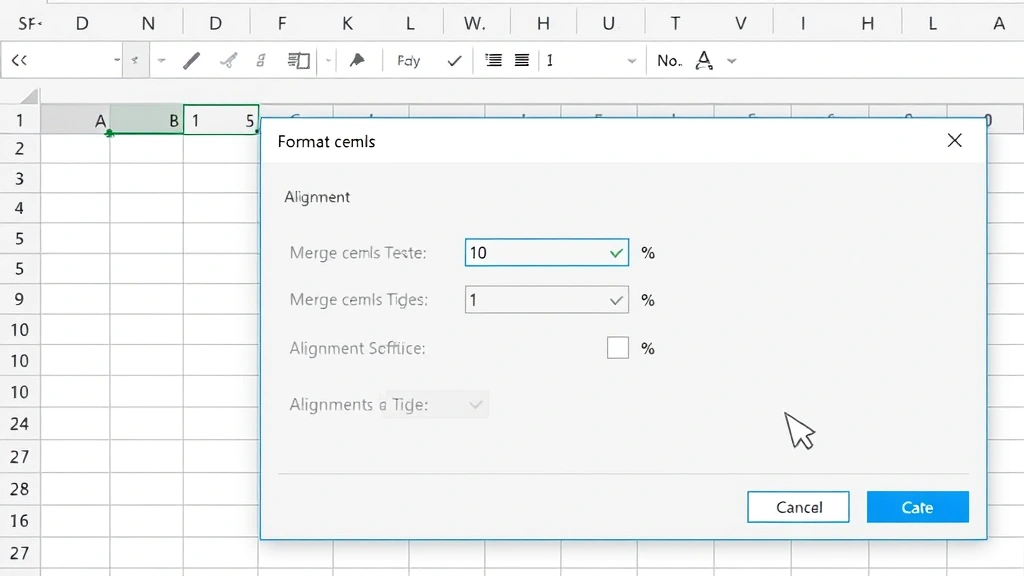
Using the Format Cells Dialog for Advanced Merging
The Format Cells dialog provides more control over merge behavior and is particularly useful when you need to customize alignment settings beyond the basic ribbon options. Follow these steps:
- Select your two cells using the same method described above.
- Right-click on the selection to open the context menu.
- Choose “Format Cells” from the menu options.
- Navigate to the Alignment tab in the Format Cells dialog box.
- Check the “Merge cells” checkbox in the lower portion of the Alignment tab.
- Adjust text alignment settings as needed:
- Horizontal alignment (Left, Center, Right, Fill)
- Vertical alignment (Top, Center, Bottom, Justify)
- Text wrap options for longer content
- Click OK to apply the merge with your custom settings.
This method is particularly valuable when you want to merge cells while maintaining specific alignment that differs from the standard options. You can also enable text wrapping simultaneously, which prevents content from overflowing into adjacent cells and keeps your spreadsheet organized.
Keyboard Shortcuts and Quick Methods
If you frequently work with merged cells, learning keyboard shortcuts dramatically improves your workflow. While Excel doesn’t have a single universal keyboard shortcut for merging, you can create custom shortcuts through the Quick Access Toolbar or use Alt key combinations:
Quick Access Toolbar Method: Right-click the Merge & Center button on the Home tab, select “Add to Quick Access Toolbar,” then assign a custom keyboard shortcut. This allows you to merge cells with a single key combination after selecting your cells.
Alt Key Navigation: Press Alt to reveal key tips above the ribbon buttons. Then press the corresponding key combination for the merge option you want. This varies by Excel version but typically involves Alt + H + M for merge options.
For users working with templates or repetitive spreadsheet layouts, consider using combine cells in Excel techniques with FixWise Hub’s comprehensive guides to automate your workflow. These methods save considerable time when creating multiple similar documents.
Merging Cells with Formulas and Data
Working with formulas in merged cells requires careful planning. When you merge cells containing formulas, Excel retains only the formula from the top-left cell. Any formulas in the other cells are deleted. Here’s how to handle this situation:
Before merging cells with formulas:
- Copy the formula results to a safe location if you need to preserve them
- Note which formula is most important (typically the top-left cell’s formula)
- Delete or consolidate unnecessary formulas before merging
- Consider whether merging is necessary—sometimes formatting without merging achieves similar visual results
Best practice for formulas: Rather than merging cells that contain active formulas, create your formulas in separate cells, then merge cells containing only static text or final results. This approach maintains formula integrity and makes your spreadsheet easier to modify later.
When you need data from multiple cells in a merged area, use the freeze rows in Excel feature instead of merging. Freezing panes keeps headers visible while scrolling without the data loss associated with merging.
Unmerging Cells and Fixing Common Issues
If you need to reverse a merge or fix problems with merged cells, Excel provides straightforward unmerging tools:
- Select the merged cell you want to unmerge.
- Go to Home tab > Merge & Center dropdown in the Alignment group.
- Click “Unmerge Cells” to separate the merged area back into individual cells.
- Verify the result. The content returns to the top-left position, and the cells are now separate.
Common issues and solutions:
Issue: “Cannot use that command on overlapping ranges.” This error occurs when you try to perform operations (like sorting or filtering) on data containing merged cells. Solution: Unmerge the cells first, then apply the operation.
Issue: Data appears misaligned after unmerging. When you unmerge cells, content stays in the original top-left cell, leaving other cells empty. Solution: Manually redistribute content or use formulas to populate the unmerged cells.
Issue: Merged cells prevent column width adjustments. Merged cells sometimes resist width changes. Solution: Select the merged cell, then adjust width through the Format menu rather than dragging column borders.
For more complex cell manipulation, explore how to hide columns in Excel as an alternative to merging when you want to organize data without combining cells.
Best Practices for Professional Spreadsheets
Creating professional-looking spreadsheets involves more than just merging cells. Consider these best practices:
Use merging strategically: Merge cells only for titles, headers, and section breaks. Avoid merging cells within data ranges where sorting, filtering, or calculations might occur. This keeps your spreadsheet functional while maintaining visual appeal.
Combine with other formatting: Enhance merged cells with font sizing, bold formatting, background colors, and borders. These elements draw attention to important information without relying solely on merging.
Maintain consistency: If you merge cells for section headers, merge all similar headers the same way. Consistent formatting creates a polished, professional appearance throughout your document.
Consider mobile and print formats: Merged cells can create layout issues when spreadsheets are printed or viewed on smaller screens. Test your document in different formats before finalizing.
Document your structure: If others will use your spreadsheet, explain which cells are merged and why. Include a legend or notes about your formatting choices, especially if merging affects sorting or filtering capabilities.
Test before large-scale application: When applying merging to multiple sections, test on a small area first. This prevents time-consuming corrections if the result doesn’t match your expectations.
For comprehensive spreadsheet design guidance, visit Microsoft Office Support for official documentation and advanced techniques. Additionally, Extend Office provides creative solutions for complex Excel challenges, and Ablebits offers productivity tools and tutorials for Excel users.
FAQ
Can I merge more than 2 cells at once?
Yes, Excel allows you to merge any rectangular selection of cells. Select a range larger than 2 cells and follow the same merging process. You can merge 2×2, 3×3, or any rectangular arrangement of cells. The same data loss rules apply—only content from the top-left cell is retained.
Will merging cells affect my formulas?
Yes, merging cells containing formulas will delete all formulas except the one in the top-left cell. Always copy important formula results before merging, or restructure your spreadsheet to keep formulas in separate unmerged cells and merge only the results or static text.
How do I merge cells without centering the content?
Use the “Merge Cells” option (not “Merge & Center”) from the Merge & Center dropdown menu. This merges the cells while preserving the original text alignment. You can also use the Format Cells dialog to customize alignment independently of the merge action.
Can I merge cells in Excel Online?
Yes, Excel Online supports cell merging with the same basic functionality as desktop Excel. The Merge & Center button appears in the Home tab ribbon. However, some advanced formatting options may be limited in the online version.
What’s the difference between merging and centering across cells?
Merging combines cells into one larger cell, while “Center Across Selection” (an older Excel feature) centers content across multiple cells without actually merging them. Merging is the modern standard and provides better formatting control.
Why can’t I sort or filter data with merged cells?
Excel restricts sorting and filtering operations when merged cells are present in the data range because the merged structure conflicts with the row-by-row or column-by-column organization these features require. Unmerge cells before applying sorts or filters, then remerge if needed.
How do I unmerge cells without losing data?
Before unmerging, the data is already in the top-left cell only. Unmerging simply returns the cells to separate status with content remaining in the top-left position. If you need content distributed across unmerged cells, manually enter it or use formulas after unmerging.
Related Posts

Superscript in Google Docs: Expert Tips

Strikethrough in Excel: Easy Steps for Beginners
