
How to Make Wine: A Step-by-Step Guide
How to Make Wine: A Step-by-Step Guide for Home Enthusiasts
There’s something genuinely magical about transforming simple fruit juice into wine. It’s part chemistry, part art, and entirely rewarding. Whether you’re drawn to the romance of winemaking or simply curious about what happens in that bottle, learning how to make wine at home is more achievable than you might think. You don’t need a vineyard or fancy equipment—just patience, attention to detail, and a willingness to let nature do most of the heavy lifting.
Winemaking has captivated humans for thousands of years, and the fundamental process remains surprisingly straightforward. Yeast consumes sugar, produces alcohol, and creates flavor compounds along the way. What makes it interesting is the endless variation in ingredients, techniques, and timing. From your first batch of simple fruit wine to experimenting with different grape varieties or flavor profiles, there’s genuine depth to explore.
This guide walks you through everything you need to know to start your winemaking journey at home. We’ll cover equipment, ingredients, the fermentation process, and troubleshooting tips. By the end, you’ll have the knowledge to create your own bottles of wine, whether you’re working with grapes, berries, or other fruits.
Essential Equipment and Setup
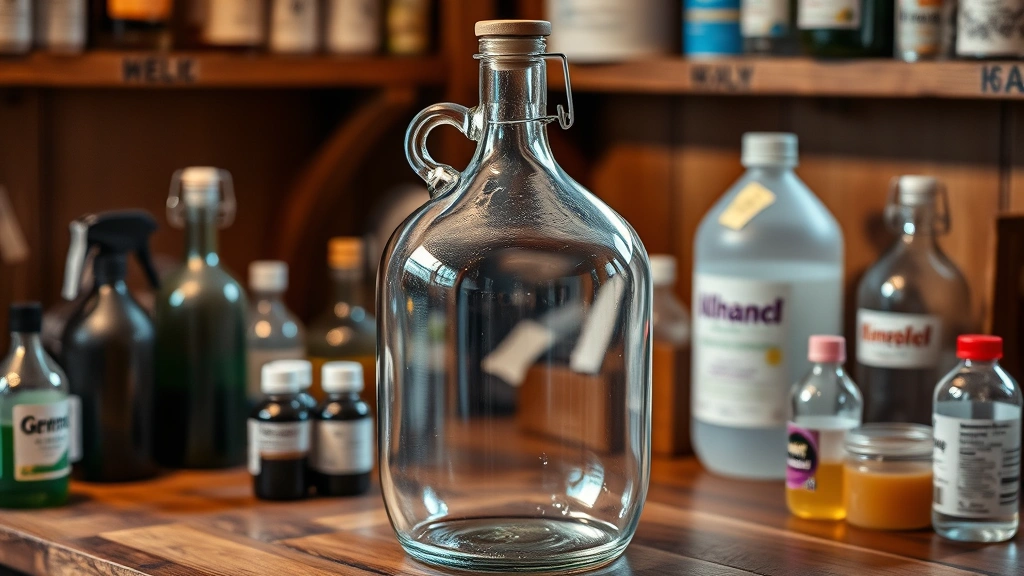
Before you pour a single drop of juice, you’ll need to gather the right equipment. The good news is that basic winemaking doesn’t require an expensive investment. Most of what you need is probably available at home improvement stores or online retailers specializing in winemaking supplies.
Start with a fermentation vessel—a glass carboy or food-grade plastic bucket works perfectly. You’ll want something between 1 and 5 gallons depending on your batch size. A carboy is ideal because the glass is inert and you can watch fermentation happening, which is genuinely satisfying. Add an airlock to the top of your vessel; this allows carbon dioxide to escape while preventing outside air from entering. You’ll also need a rubber bung to fit your carboy and the airlock itself.
Sanitation is absolutely critical. Invest in a proper sanitizer designed for winemaking—one-step oxygen-based cleaner or iodine-based solutions work well. You’ll use this liberally on every piece of equipment that touches your wine. Any contamination can ruin your entire batch, so don’t skip this step. A large stainless steel spoon for stirring, a hydrometer to measure sugar content and track fermentation progress, and a siphon with tubing for transferring wine between vessels are all essential tools.
You’ll also want glass bottles for storage, corks or screw caps, a corking tool if using traditional corks, and labels for organization. Many people find it helpful to keep a winemaking journal to track batches, dates, adjustments, and tasting notes. This simple habit transforms your winemaking from casual experimentation into a learnable skill where you can identify what works and what doesn’t.
Consider storing your fermentation setup in a cool, dark place—a basement, closet, or wine fridge is ideal. Temperature stability matters more than absolute coldness. Fluctuating temperatures can stress your yeast and produce off-flavors. Most winemaking happens best between 60-75°F, though different yeasts have different preferences.
Choosing Your Ingredients
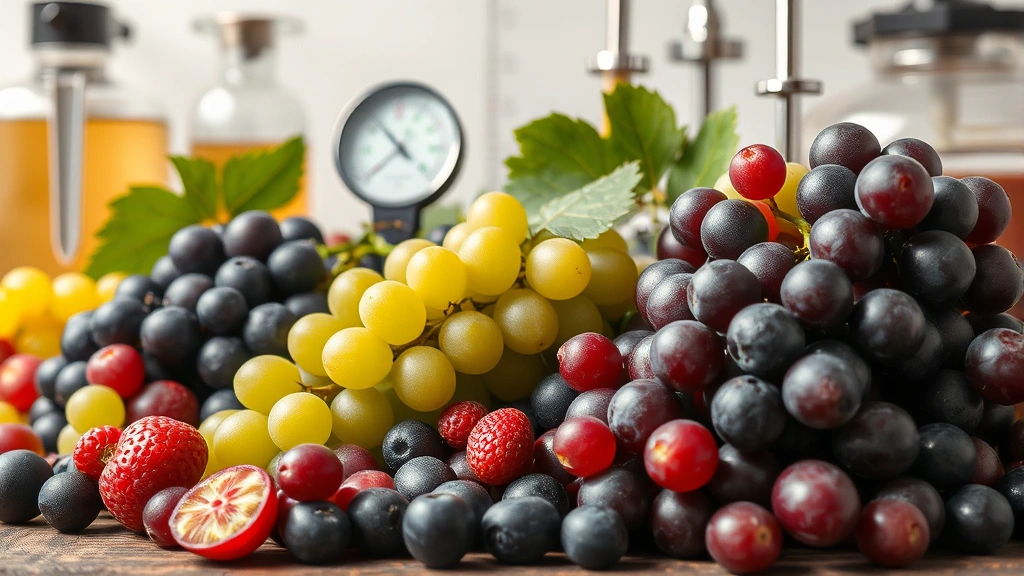
The foundation of any wine is fruit juice and sugar, but the specific ingredients you choose dramatically impact the final product. Fresh grapes are traditional, but don’t feel limited—many people successfully make wine from berries, stone fruits, melons, and even honey (which technically creates mead, but follows similar principles).
If you’re making grape wine, you have two main options: fresh grapes or concentrate. Fresh grapes from a local vineyard or farmers market offer complexity and authenticity, though you’ll need access to quality fruit. Grape concentrate, available from winemaking suppliers, provides consistency and is more forgiving for beginners. You can also explore making fruit wines like apple cider if you prefer experimenting with orchard fruits.
Sugar content matters significantly. Wine needs enough sugar to ferment and produce adequate alcohol content—typically 12-15% ABV. Your hydrometer measures sugar content in specific gravity or Brix. Most winemakers aim for a starting gravity between 1.090 and 1.100, which provides enough fermentable sugar while maintaining balance. You can adjust sugar levels by adding honey, table sugar, or concentrated juice.
Yeast selection deserves serious consideration. Wine yeast differs fundamentally from bread or beer yeast. Different wine yeast strains produce different flavor profiles and have varying alcohol tolerances. Red wine yeasts typically ferment at warmer temperatures and produce fuller flavors, while white wine yeasts work well at cooler temperatures and create crisper profiles. Reputable winemaking suppliers provide detailed descriptions of each yeast strain’s characteristics.
Beyond the basics, consider adding nutrients. Yeast nutrient contains nitrogen and minerals that help yeast thrive and ferment cleanly. Tannin powder adds structure to lighter wines. Acid blend adjusts pH and tartness. These additions aren’t strictly necessary for simple wines, but they significantly improve results, especially when working with less-than-perfect fruit.
Water quality matters too. If your tap water is heavily chlorinated, use filtered or bottled water. Chlorine can interfere with fermentation and create off-flavors. Many winemakers use filtered water as a standard practice, and it’s a small investment that protects your entire batch.
The Fermentation Process
Now we get to the heart of winemaking. Fermentation is where sugar transforms into alcohol, and it’s both a science and an art. Here’s the step-by-step process for successful home winemaking.
Preparation and Sanitation: Before you begin, sanitize every piece of equipment that will contact your wine. Soak items in your sanitizing solution for at least 15 minutes, then rinse thoroughly with clean water. Don’t skip this—contamination is the enemy of good wine.
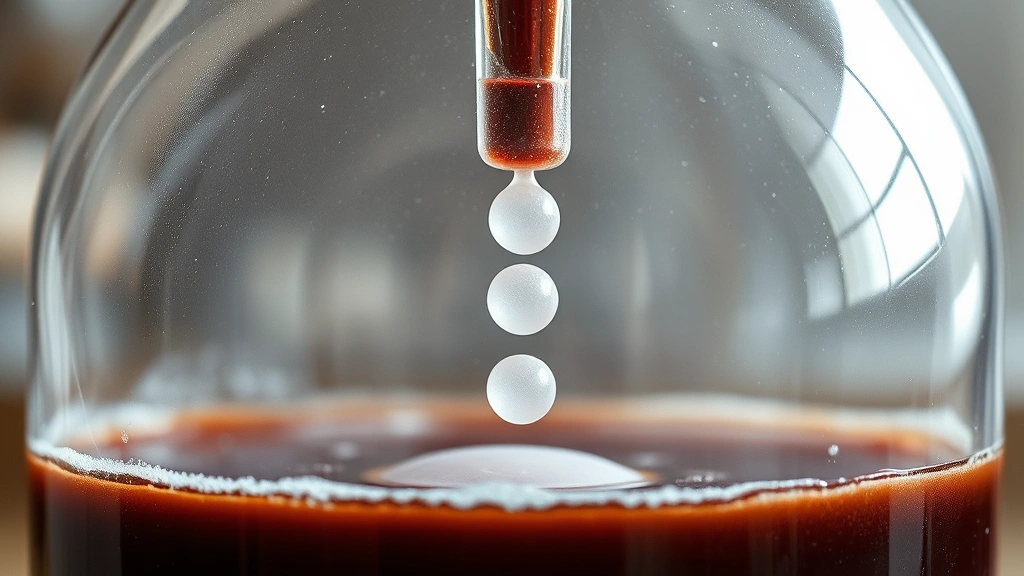
Juice Preparation: If using fresh grapes, crush them to break the skins and release juice. If using concentrate or commercial juice, dilute according to package instructions. Check your sugar content with the hydrometer and adjust if necessary. You want a starting gravity around 1.090-1.100. Add any nutrient, acid, or tannin adjustments at this stage.
Yeast Inoculation: Rehydrate your wine yeast according to package directions—typically dissolving it in warm (not hot) water for 15-30 minutes before adding to your must (the juice and fruit mixture). This gives yeast a gentle start. Pitch the rehydrated yeast into your prepared juice.
Primary Fermentation: Cover your fermentation vessel loosely for the first 24 hours to allow vigorous fermentation without splashing out. After 24 hours, fit your airlock securely. You should see active bubbling within 24-48 hours—this is yeast doing its job. Primary fermentation typically lasts 5-14 days depending on yeast strain, temperature, and fruit type. The more vigorous the activity, the faster fermentation progresses.
During this phase, monitor temperature daily. Keep it stable within your yeast’s preferred range. If your basement gets cold at night, consider wrapping your carboy in blankets or using a heating belt. Temperature swings stress yeast and produce off-flavors.
Racking and Secondary Fermentation: Once primary fermentation slows significantly (less than one bubble every few seconds through the airlock), it’s time to rack—siphon the clear wine off the sediment (called lees) into a clean, sanitized carboy. This removes dead yeast and prevents off-flavors from developing. Use a siphon carefully to avoid aerating the wine.
Secondary fermentation happens in this new carboy over several weeks. It’s quieter than primary fermentation but still important for flavor development and clarity. Keep the airlock fitted to prevent contamination. Some winemakers rack again after 2-3 months if significant sediment accumulates.
Maturation and Clarification: After fermentation completes (your hydrometer shows the same reading for several days, typically around 0.990-1.000), your wine needs time to clarify and mature. This typically takes 3-6 months minimum, though many wines improve with a year or more of aging. During this time, keep your carboy in a cool, dark place with the airlock fitted. You can rack periodically to remove accumulated sediment.
Similar to how maintaining a sourdough starter requires consistent attention, winemaking demands regular monitoring and care. Check your wine monthly for signs of problems—off-odors, mold, or unusual discoloration warrant investigation.
Bottling and Storage
Bottling is the exciting moment when your wine transitions from carboy to bottle. This requires cleanliness and care to ensure your finished wine stays fresh and delicious.
Pre-Bottling Preparation: Before bottling, ensure your wine has completely finished fermenting. Use your hydrometer to confirm the gravity has stabilized. The wine should also be clear or nearly clear. If it’s still cloudy, wait longer or consider using fining agents like gelatin or egg whites to help clarification.
Bottling Process: Sanitize all bottles, corks, and equipment. Use your siphon to carefully transfer wine from the carboy into bottles, leaving about an inch of headspace at the top. This small air gap is important for cork expansion and proper sealing. Avoid splashing and aerating as much as possible.
Corking and Capping: If using traditional corks, use a corking tool to insert them firmly into bottle necks. The cork should sit flush with or slightly below the rim. If using screw caps, simply twist them on securely. Label your bottles with the wine type, vintage date, and any other relevant information. This simple step prevents confusion later and documents your winemaking journey.
Storage Conditions: Store finished wine on its side if using cork closures (this keeps the cork moist and prevents it from drying out and shrinking). Screw-cap bottles can be stored upright. Keep wine in a cool, dark place—ideally 45-65°F with minimal temperature fluctuation. A wine fridge is ideal, but a basement closet works perfectly well. Light, especially UV light, degrades wine and creates off-flavors.
Most homemade wines are best consumed within 1-3 years, though well-made wines with good acid structure can age longer. Unlike fine wines that improve significantly with age, most home winemaking projects taste their best relatively fresh. That said, the satisfaction of opening a bottle you made yourself months or years earlier is genuinely special.
Common Problems and Solutions
Even experienced winemakers encounter issues occasionally. Here are the most common problems and how to address them.
Fermentation Won’t Start: If 48 hours pass without activity, several factors might be responsible. Temperature is the most common culprit—yeast prefers warmth. Move your carboy to a warmer location. Alternatively, your juice might be too acidic or have residual sulfites preventing fermentation. Check pH and consider adding yeast nutrient. As a last resort, pitch fresh yeast.
Fermentation Stopped Too Early: Your wine might taste sweet and unfinished if fermentation halts prematurely. This usually means yeast ran out of nutrients, faced temperature stress, or the alcohol level became inhibitory. You can restart fermentation by adding more yeast nutrient and pitching fresh yeast, but success isn’t guaranteed.
Off-Odors or Flavors: Vinegary smells suggest acetobacter contamination. Once established, this is essentially irreversible—proper sanitation prevents this. Sulfur or rotten egg smells typically indicate stressed yeast and usually resolve with aeration and time. Moldy or musty odors suggest contamination and usually mean discarding the batch.
Cloudiness That Won’t Clear: Some wines naturally take longer to clarify. Give it time—several months of settling often works wonders. If you’re impatient, fining agents like gelatin, isinglass, or pectinase can help. Follow package directions carefully.
Excess Sediment: Heavy sediment accumulation is normal, especially with fruit wines. Rack periodically to remove it. If sediment is minimal, you can simply leave it and be careful when pouring, similar to how you’d store onions carefully to prevent damage—careful handling prevents disruption.
For authoritative guidance on specific issues, consult American Homebrewers Association resources, which often address winemaking concerns alongside beer fermentation. This Old House also features excellent home fermentation guides, and Home Depot carries comprehensive winemaking supply guides that help troubleshoot common issues.
Many winemakers find that joining local winemaking clubs or online communities provides invaluable support. Experienced winemakers love sharing knowledge and helping troubleshoot specific problems based on their own experience.
Frequently Asked Questions
How long does it take to make wine?
The timeline varies significantly based on your approach. Primary fermentation typically takes 5-14 days, secondary fermentation adds 3-8 weeks, and maturation can last 3-12 months or longer. Most homemade wines are ready to drink within 6-9 months, though some benefit from longer aging. Patience is genuinely rewarded in winemaking.
Do I need special equipment to start?
You can begin with basic items: a glass carboy, airlock, rubber bung, sanitizer, hydrometer, and siphon. These items typically cost $50-100 total. Many winemaking kits bundle everything you need for around $100-150. You don’t need expensive equipment to make excellent wine—consistency and cleanliness matter far more than fancy gear.
Can I make wine with store-bought juice?
Absolutely. Commercial fruit juices work well, though they’re often pasteurized and may have additives. Choose juice without preservatives or sorbates, which inhibit yeast. Avoid juices with added artificial sweeteners. Pasteurized juice ferments just fine—the heat kills naturally occurring microbes but doesn’t affect your ability to pitch wine yeast.
What alcohol content should my wine have?
Most table wines contain 12-15% alcohol by volume. You control this through sugar content—more sugar produces more alcohol, up to your yeast’s alcohol tolerance (typically 15-18% depending on strain). Lower alcohol wines around 10-11% are lighter and crisper, while higher alcohol wines are bolder. Adjust based on your preference and yeast specifications.
Can I reuse wine bottles from store-bought wine?
Yes, absolutely. Clean and sanitize them thoroughly. Remove any labels and residual wine, then soak in sanitizing solution. Wine bottles are designed for storage, so they work perfectly for your homemade wine. Colored glass (green or brown) actually protects wine from light damage better than clear glass, making recycled bottles ideal.
Is winemaking sanitation really that important?
Yes. Sanitation is genuinely the difference between excellent wine and vinegar. Unwanted bacteria and wild yeast are everywhere—in the air, on surfaces, in water. Proper sanitation kills these contaminants before they ruin your batch. It’s not complicated, just consistent. Sanitize everything, rinse thoroughly, and you’ll prevent most problems.
What’s the difference between wine and fermented dairy products?
Wine fermentation uses yeast to convert sugar into alcohol, while dairy fermentation typically uses bacteria to create lactic acid. The organisms, chemistry, and end products differ significantly. Both are fermentation, but the processes and results are distinct. Wine is alcoholic and typically acidic, while fermented dairy is tangy and creamy.
Can I make wine in my kitchen?
You can, though a cool, dark location like a basement or closet is preferable. Temperature stability matters more than any specific location. Kitchens tend to have temperature fluctuations from cooking and appliances, which stresses fermentation. If your kitchen is consistently cool and dark, it can work, but monitor temperature carefully.
How do I know if my wine went bad?
Bad wine typically shows obvious signs: vinegary or acetone smells, fuzzy mold on the surface, cloudiness that doesn’t clear after months, or unusual discoloration. Small amounts of sediment are normal and don’t indicate problems. If you’re uncertain, open a bottle and taste a small amount. Trust your senses—bad wine tastes distinctly unpleasant.
Should I add sulfites to my wine?
Sulfites are optional for home winemakers. They act as preservatives and prevent oxidation and bacterial contamination. Many winemakers add small amounts of potassium metabisulfite at bottling for stability. However, many successful home winemakers skip them entirely, especially if they plan to consume wine relatively quickly. Research your preference and follow proper dosing if you choose to add them.
The beauty of home winemaking is that it’s forgiving enough for beginners yet complex enough to keep experienced winemakers learning and experimenting. Your first batch might not be perfect—that’s genuinely okay. Each batch teaches you something valuable. Keep notes, stay consistent with sanitation, and you’ll progressively improve. Before long, you’ll be confidently discussing fermentation temperatures and yeast strains with fellow enthusiasts, and your friends will be asking where you buy your wine when you serve them your homemade bottles. That’s the real reward of learning how to make wine at home.
Related Posts

How Long to Boil Lobster Tails: Cooking Guide

How Long to Fly from New York to London? Travel Times
