
Whip Heavy Cream? Simple Homemade Recipe
How to Make Whipped Cream from Heavy Cream: Simple Homemade Recipe
Making whipped cream at home is one of the easiest and most rewarding kitchen skills you can master. Whether you’re topping a slice of pie, decorating a dessert, or adding a luxurious finish to hot chocolate, homemade whipped cream beats store-bought versions every single time. The process takes just a few minutes, requires minimal ingredients, and transforms heavy cream into a cloud-like delicacy that will impress family and guests alike.
Unlike commercial whipped cream loaded with stabilizers and preservatives, your homemade version contains only pure cream, sugar, and vanilla—ingredients you can pronounce and trust. This guide walks you through everything you need to know about whipping cream to perfection, from selecting the right ingredients to troubleshooting common mistakes. You’ll learn professional techniques that work with electric mixers, hand whisks, and even jar-shaking methods.
Essential Ingredients and Equipment
The beauty of making whipped cream lies in its simplicity. You need just three basic ingredients: heavy whipping cream, sugar, and vanilla extract. Heavy whipping cream contains at least 36% butterfat, which is crucial for achieving that fluffy texture. Regular heavy cream may work, but whipping cream produces superior results with better volume and stability.
For the sweetener, granulated white sugar works perfectly, but you can also experiment with powdered sugar, which dissolves faster and creates a smoother texture. Some bakers prefer powdered sugar because it contains cornstarch, which helps stabilize the whipped cream. Vanilla extract adds warmth and depth—pure vanilla tastes noticeably better than imitation, though both work. The proportions are straightforward: one cup of heavy whipping cream, two tablespoons of sugar, and half a teaspoon of vanilla extract creates a standard batch.
Temperature matters significantly when whipping cream. Cold cream whips faster and holds its shape better than room-temperature cream. Before starting, chill your mixing bowl and beaters in the freezer for at least 15 minutes. This simple step dramatically improves your results and reduces whipping time by several minutes.
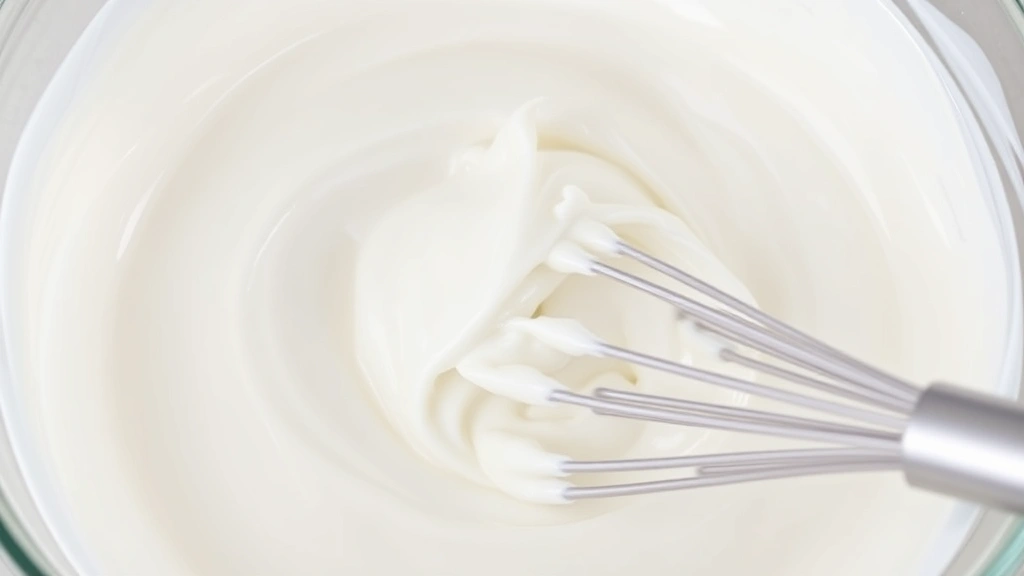
Equipment options range from basic to high-tech. An electric hand mixer is the most popular choice—it’s fast, reliable, and requires minimal effort. A stand mixer with the whisk attachment works beautifully for larger batches. If you prefer manual methods, a balloon whisk and some elbow grease will eventually produce whipped cream, though it takes considerably longer. For a fun, zero-electricity option, place cream in a jar with a tight-fitting lid and shake vigorously for about five minutes. This method works surprisingly well and engages kids in the process.
Before you begin whipping, ensure all equipment is scrupulously clean and dry. Any trace of grease or water can interfere with the whipping process and prevent proper volume development. This is especially important if you’re reusing bowls or beaters.
Step-by-Step Instructions
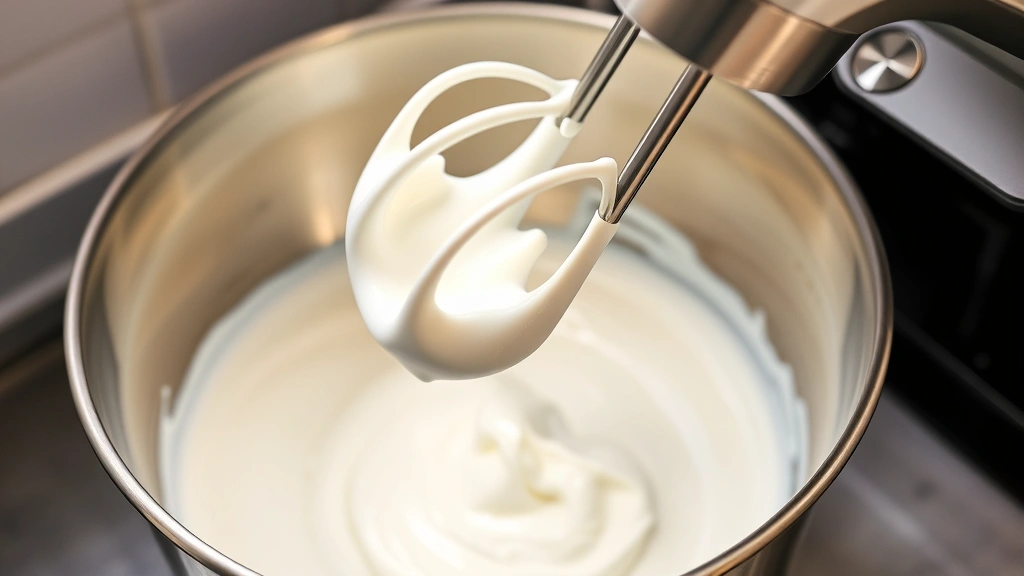
Follow these straightforward steps to create perfect whipped cream every time. First, pour one cup of cold heavy whipping cream into your chilled mixing bowl. If using an electric mixer, start on medium speed. The cream will begin to thicken almost immediately as air gets incorporated into the fat molecules.
Within 30 to 60 seconds, the cream reaches the soft peaks stage. At this point, peaks form when you lift the beaters but collapse back into the mixture. This stage is ideal if you prefer a lighter, more pourable consistency. Many people use soft-peak whipped cream for topping hot beverages because it blends smoothly into the heat.
Continue mixing for another 30 to 60 seconds to reach medium peaks. The peaks now hold their shape better but still have a slight droop at the tips. This is the sweet spot for most dessert applications—it’s fluffy, stable, and holds its shape beautifully on cakes and pies.
If you prefer very stiff peaks, keep mixing for another 30 seconds. The cream becomes very thick, and peaks stand straight up without drooping. However, be careful not to overmix, as this can transform whipped cream into butter. Once you reach your desired consistency, stop immediately and add your sweetener and vanilla extract. Mix gently for just 5 to 10 seconds to incorporate the flavorings without overworking the cream.
The entire process from start to finish takes approximately two to four minutes with an electric mixer, depending on cream temperature and mixer speed. Hand whisking takes 10 to 15 minutes of continuous effort. The jar-shaking method requires about five minutes of vigorous shaking, which provides excellent exercise while you wait.

Professional Tips for Perfect Results
Professional pastry chefs follow specific techniques that guarantee excellent whipped cream every single time. First, always start with the coldest cream possible. Some chefs even chill the beaters and bowl overnight in the freezer. This extra-cold setup reduces whipping time and produces greater volume.
Use the correct mixer speed. Starting too high can create lumps and uneven incorporation. Begin on medium or medium-low speed, then increase to medium-high once the cream begins to thicken. This gradual approach produces a smoother, more uniform texture than starting on high speed.
Add sugar and vanilla at the right moment. If you add them too early, they can interfere with the whipping process. Wait until you’ve reached soft peaks, then add the flavorings and mix gently. This timing ensures the sugar dissolves properly while maintaining maximum volume.
Monitor texture changes carefully by lifting the beaters periodically. Watch how the cream clings to the beaters and observe the peaks that form. This visual feedback helps you stop at exactly the right moment before overwhipping occurs.
If you’re making whipped cream ahead of time, stabilize it properly. You can add one tablespoon of cream cheese, one tablespoon of mascarpone, or one-quarter teaspoon of unflavored gelatin (dissolved in water first) to help the cream hold its shape for several hours. This technique is especially useful for cakes and elaborate desserts that require advance preparation.
For the smoothest texture, sift powdered sugar before adding it to the cream. This eliminates lumps and creates a silkier final product. Alternatively, dissolve granulated sugar in the vanilla extract before adding it to the cream.
Flavor Variations and Customizations
While classic vanilla whipped cream is timeless, countless variations elevate desserts and drinks. Chocolate whipped cream starts with the same base but adds two tablespoons of unsweetened cocoa powder and an extra tablespoon of sugar. Sift the cocoa powder before adding it to prevent lumps. This variation pairs beautifully with berry desserts and chocolate cakes.
Coffee whipped cream incorporates one tablespoon of instant espresso powder dissolved in the vanilla extract before mixing into the cream. This sophisticated flavor complements chocolate desserts and enhances the taste of tiramisu and coffee-flavored treats.
Cinnamon whipped cream adds one-half to one teaspoon of ground cinnamon to the cream with the sugar and vanilla. This warm spice works wonderfully on apple desserts, pumpkin pie, and sweet potato dishes. Try pairing it with our guide on how to make ginger tea for autumn-inspired beverages.
Maple whipped cream replaces granulated sugar with two tablespoons of pure maple syrup and uses maple extract instead of vanilla. This variation is exceptional on pecan pie, French toast, and waffles.
Citrus whipped cream incorporates the zest of one lemon, lime, or orange along with one tablespoon of juice from the same fruit. Add these ingredients with the sugar for bright, refreshing flavor that complements berry tarts and light desserts.
Liqueur-infused whipped cream adds one-quarter to one-half teaspoon of liqueur such as Kahlúa, Grand Marnier, or Bailey’s Irish Cream. These sophisticated variations work beautifully for adult desserts and special occasions.
Honey whipped cream replaces granulated sugar with two tablespoons of honey, creating a naturally sweet option with subtle floral notes. This version pairs wonderfully with fresh fruit and Greek-inspired desserts.
Storage and Make-Ahead Strategies
Homemade whipped cream stores in the refrigerator for up to two days in an airtight container. Place plastic wrap directly on the surface before covering with the lid to minimize moisture loss and prevent the cream from absorbing odors from other foods. If separation occurs during storage, gently stir the whipped cream back together or whip it for a few seconds with a whisk.
For longer storage, freeze whipped cream on a baking sheet in dollop-sized portions. Once frozen solid, transfer the dollops to a freezer bag where they’ll keep for up to three months. This method works particularly well if you want pre-portioned servings for future desserts. Thaw frozen whipped cream in the refrigerator for about 30 minutes before serving, though the texture will be slightly softer than freshly whipped cream.
If you’re planning a large gathering, make whipped cream the morning of your event. Stabilize it with cream cheese or mascarpone as mentioned earlier, and it will maintain its shape throughout the day. Keep it refrigerated in an airtight container until serving time.
An alternative strategy involves making a stabilized version that can sit at room temperature for brief periods. Add one tablespoon of softly whipped cream cheese or one-quarter teaspoon of gelatin (bloomed in water and cooled) during the whipping process. This creates a more forgiving version that holds up better during outdoor events or warm gatherings.
Troubleshooting Common Problems
Whipped cream won’t whip: This typically indicates that your cream isn’t cold enough or contains insufficient butterfat. Ensure you’re using heavy whipping cream (at least 36% butterfat) and that everything is properly chilled. Start over with cold equipment and cold cream from the refrigerator.
Whipped cream turns grainy or lumpy: This occurs when you’ve overwhipped the cream or started with cream that was already partially separated. Prevent this by stopping as soon as you reach your desired consistency. If it happens, you can sometimes salvage the batch by adding a splash of cold milk and gently whisking, though the texture won’t be perfect.
Whipped cream becomes butter: Continued mixing after the stiff-peak stage causes the fat globules to break down and separate from the liquid, creating butter. Watch carefully as you approach the desired consistency and stop immediately once peaks form properly. If this happens, save the byproduct—you’ve essentially made fresh butter, which is delicious on bread.
Whipped cream collapses after a few minutes: This indicates insufficient mixing or that you’ve used regular heavy cream instead of heavy whipping cream. Ensure you’re mixing long enough to reach proper peaks and using the correct product. Adding a stabilizer like cream cheese or gelatin also helps maintain structure.
Sugar doesn’t dissolve properly: Granulated sugar sometimes remains gritty in whipped cream. Prevent this by using powdered sugar, which dissolves faster, or by dissolving granulated sugar in the vanilla extract before adding it to the cream. Alternatively, add the sugar earlier in the whipping process when the cream is still thin and can incorporate it more thoroughly.
Whipped cream tastes watery: This suggests you haven’t whipped it long enough to incorporate sufficient air and develop proper structure. Continue mixing until you reach at least soft peaks, which should take two to three minutes with an electric mixer.
For additional kitchen guidance, check out our article on how to clean a coffee maker to maintain your kitchen equipment properly.
FAQ
Can I make whipped cream without sugar?
Yes, absolutely. Unsweetened whipped cream works beautifully as a topping for savory dishes, soups, and baked potatoes. The whipping process and technique remain identical—simply omit the sugar and vanilla extract. Some people add a pinch of salt instead for subtle flavor enhancement.
How long does homemade whipped cream last?
Properly stored in an airtight container in the refrigerator, homemade whipped cream keeps for up to two days. After this point, it may begin to separate or develop an off-flavor. Stabilized versions with cream cheese or gelatin may last slightly longer, up to three days.
Can I use whipping cream instead of heavy whipping cream?
Heavy whipping cream and whipping cream are slightly different products. Heavy whipping cream contains 36-40% butterfat, while whipping cream contains 30-36% butterfat. Both will whip, but heavy whipping cream produces superior volume and stability. If you only have whipping cream available, it will still work, but results may be slightly less impressive.
Is homemade whipped cream healthier than store-bought?
Homemade whipped cream contains only cream, sugar, and vanilla—no additives, preservatives, or stabilizers. Store-bought versions often contain ingredients like corn syrup, hydrogenated oils, and various gums. From a nutritional standpoint, both contain similar calorie and fat content, but homemade versions offer cleaner ingredients and superior taste.
Can I use a food processor to make whipped cream?
Food processors aren’t ideal for whipped cream because they incorporate air less efficiently than whisks or mixers, and it’s difficult to stop at exactly the right moment before overwhipping. However, they can work in a pinch. Use the pulse function and watch carefully to avoid turning your cream into butter.
What’s the difference between whipped cream and heavy cream?
Heavy cream is the liquid product straight from the dairy. Whipped cream is heavy cream that has been whipped with air, sugar, and flavorings to create a light, fluffy texture. The whipping process incorporates air bubbles into the fat, dramatically changing the volume and texture.
Can I make whipped cream in advance for a party?
Yes, you can make whipped cream up to two days in advance if you refrigerate it properly in an airtight container. For longer advance preparation, stabilize the cream with cream cheese or gelatin. Alternatively, freeze dollops of whipped cream and thaw them the morning of your event.
Why did my whipped cream turn into butter?
Overmixing causes the fat globule membranes to break down, separating the fat from the liquid and creating butter. This happens when you continue mixing well past the stiff-peak stage. Stop mixing as soon as you achieve your desired consistency to prevent this.
Related Posts

Superscript in Google Docs: Expert Tips

Strikethrough in Excel: Easy Steps for Beginners
