

How to Make Cake Flour: Expert Guide
How to Make Cake Flour: Expert Guide
There’s something magical about pulling a perfectly tender cake out of the oven—the kind with a delicate crumb that practically melts on your tongue. The secret? Often it comes down to one ingredient: cake flour. But here’s the thing—not everyone has a bag of cake flour sitting in their pantry at 10 PM when a baking emergency strikes. Maybe you’re out of it, maybe your local store is closed, or maybe you’re just curious about what makes this ingredient so special in the first place.
The good news? You can make cake flour at home with just two simple ingredients and about five minutes of your time. This isn’t some complicated kitchen hack reserved for professional bakers. It’s genuinely straightforward, and once you understand the science behind it, you’ll never stress about running out again. Better yet, homemade cake flour often costs less than store-bought versions and gives you complete control over the quality.
Whether you’re a seasoned baker looking to elevate your craft or someone who occasionally ventures into the kitchen to satisfy a sweet craving, knowing how to make cake flour is a game-changer. Let’s dive into everything you need to know.
What Is Cake Flour and Why Does It Matter?
Cake flour is a specialized baking ingredient that’s been milled to create an incredibly fine, delicate texture. Unlike all-purpose flour, which contains about 10-12% protein, cake flour typically has around 7-9% protein content. This lower protein percentage is crucial because protein develops gluten, and gluten creates structure. When you have less gluten development, your cakes become tender and light rather than dense and tough.
Professional bakers have long understood that using the right flour makes an enormous difference in the final product. Cake flour produces a more tender crumb, allows for better moisture retention, and creates that coveted silky texture that separates a mediocre cake from an exceptional one. It’s particularly important in delicate cakes like angel food, chiffon, or classic vanilla layer cakes where texture is absolutely paramount.
The chlorination process used in commercial cake flour production also plays a role—it bleaches the flour and modifies the starch, helping it absorb more liquid and fat. However, for home baking purposes, you don’t need to worry about replicating this exact process. A simple substitution method works beautifully and delivers results that rival store-bought versions.
The Key Difference Between Cake Flour and All-Purpose Flour
Understanding the distinction between these two flours helps explain why the conversion works so well. All-purpose flour is designed to be versatile—it works reasonably well for bread, cookies, cakes, and pastries. This versatility comes at a cost: it’s a compromise that doesn’t excel at any single task.
Cake flour, by contrast, is laser-focused on one job: creating tender, delicate baked goods. The lower protein content means less gluten formation, which translates directly into a more tender crumb. The finer particle size also contributes to a smoother batter and more uniform crumb structure in the finished cake.
When you make self-rising flour at home, you’re adjusting the leavening agents. Similarly, when you make cake flour, you’re adjusting the protein content and texture. Both processes involve simple ingredient substitutions that transform basic flour into something more specialized and purpose-driven.
How to Make Cake Flour: Step-by-Step Method
The beauty of this technique is its simplicity. You need just two ingredients: all-purpose flour and cornstarch. Here’s exactly how to do it:
What You’ll Need:
- All-purpose flour
- Cornstarch
- A measuring cup or kitchen scale
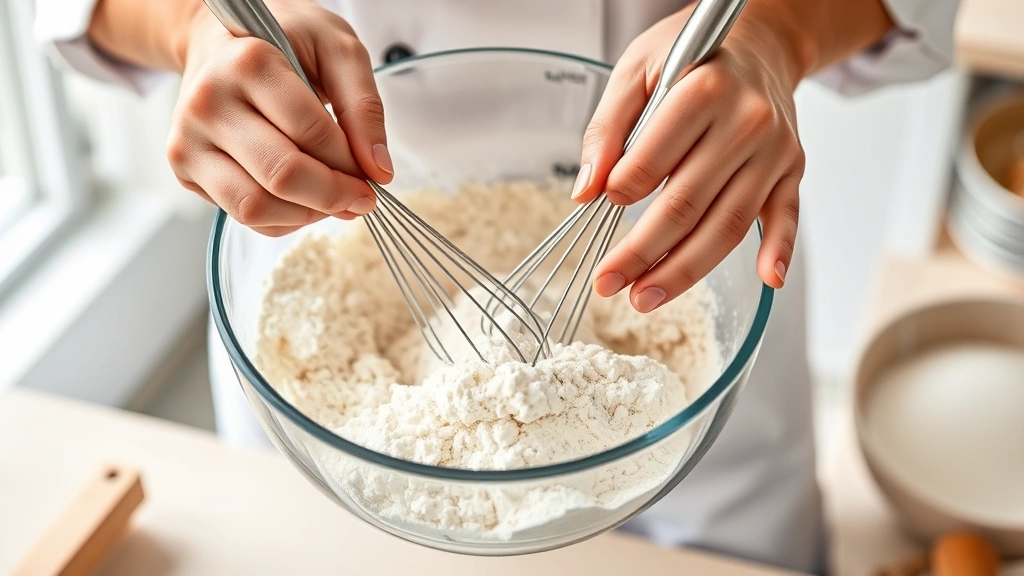
- A whisk or fork
- A fine-mesh sieve or flour sifter
- An airtight container for storage
The Process:
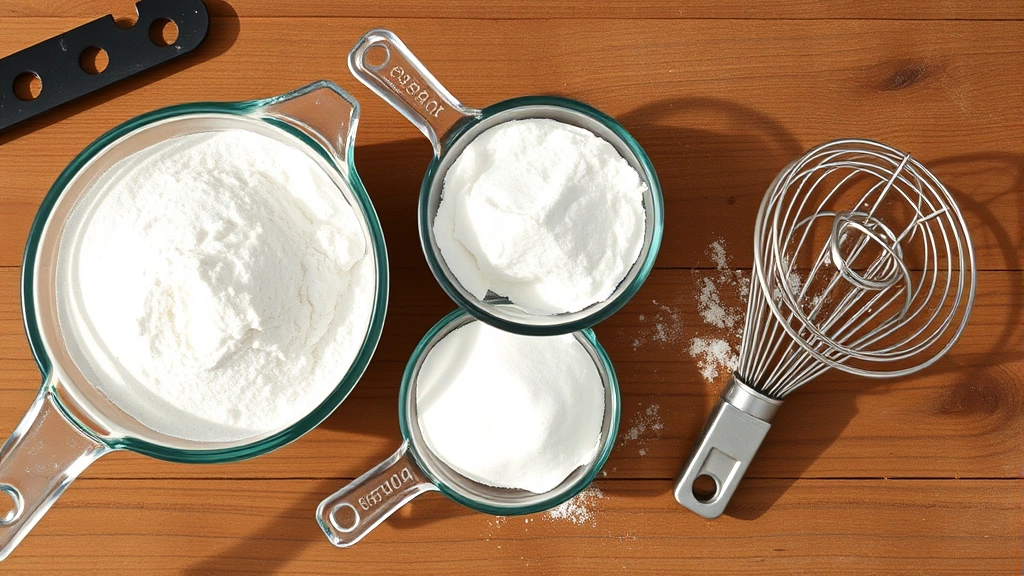
- Measure your flour. Start with one cup of all-purpose flour. If you’re using a measuring cup, spoon the flour into the cup and level it off with a knife—don’t scoop directly from the bag, as this compacts the flour and gives you more than you need. If you’re using a scale, measure out 120 grams of all-purpose flour.
- Remove two tablespoons. This is the critical step. Take out two tablespoons (about 15 grams) of the measured flour and set it aside. This reduction accounts for the lower protein content in cake flour.
- Add cornstarch. Pour two tablespoons (about 16 grams) of cornstarch into the remaining flour. The cornstarch replaces the flour you removed and further reduces the overall protein content while adding starch that mimics the chlorination process in commercial cake flour.
- Sift thoroughly. This is where many home bakers cut corners, but don’t skip it. Sift the flour and cornstarch together at least twice, ideally three times. This ensures complete and even distribution. Use a fine-mesh sieve or a proper flour sifter, and sift the mixture back and forth between two bowls.
- Store properly. Transfer your homemade cake flour to an airtight container and label it with the date. It will keep for several months in a cool, dry pantry.
That’s genuinely all there is to it. Five minutes from start to finish, and you have cake flour that performs just as well as anything you’d buy at the store.
Measurements and Ratios You Need to Know
The basic ratio is straightforward: for every cup of all-purpose flour, remove two tablespoons and replace it with two tablespoons of cornstarch. However, let’s break this down for different quantities so you can scale up or down as needed.
Common Conversions:
- 1 cup cake flour: 7/8 cup all-purpose flour + 2 tablespoons cornstarch
- 2 cups cake flour: 1 3/4 cups all-purpose flour + 1/4 cup cornstarch
- 3 cups cake flour: 2 5/8 cups all-purpose flour + 6 tablespoons cornstarch
- 4 cups cake flour: 3 1/2 cups all-purpose flour + 1/2 cup cornstarch
If you prefer working with grams (which is actually more accurate), the ratio is approximately 7 parts all-purpose flour to 1 part cornstarch by weight. So for 120 grams of cake flour, you’d use about 105 grams of all-purpose flour and 15 grams of cornstarch.
These measurements aren’t arbitrary—they’re based on the protein differential between cake flour and all-purpose flour. The cornstarch serves two purposes: it dilutes the protein content and adds starch that helps create a more tender crumb. Some bakers also use arrowroot powder as a substitute for cornstarch, which works almost identically.
Storage Tips for Homemade Cake Flour
Proper storage ensures your homemade cake flour stays fresh and performs consistently over time. Here are the best practices:
Container Selection: Use an airtight container made of glass, plastic, or metal. Mason jars work beautifully and let you see how much flour you have at a glance. Make sure whatever container you choose seals tightly to prevent moisture and air exposure.
Location Matters: Store your cake flour in a cool, dry place away from direct sunlight. A pantry or cupboard away from the stove or oven is ideal. Avoid the refrigerator unless your kitchen is particularly warm and humid, as temperature fluctuations can introduce moisture.
Shelf Life: Homemade cake flour typically stays fresh for three to four months. The cornstarch can occasionally absorb moisture over time, so if you notice any clumping, simply sift it again before using. For longer storage, you can refrigerate or freeze it in an airtight container for up to six months.
Labeling: Always label your container with the date you made the flour and the ingredients used. This helps you track freshness and provides a quick reference if someone else needs to use it.
If you’re someone who bakes regularly, consider making larger batches and storing them in multiple containers. This way, you always have cake flour on hand without needing to make it each time you bake.
Variations and Alternative Approaches
While the flour-and-cornstarch method is the most popular and reliable approach, there are other options worth considering depending on your situation and available ingredients.
Using Arrowroot Powder: Some bakers prefer arrowroot powder instead of cornstarch. The ratio remains the same: two tablespoons per cup of flour. Arrowroot produces a slightly lighter, more delicate crumb in some applications, though the difference is subtle. If you’re out of cornstarch but have arrowroot powder on hand, it’s an excellent substitute.
Bleached vs. Unbleached Flour: Commercial cake flour is typically bleached, which affects how it absorbs liquid. If you want to get even closer to store-bought cake flour, use bleached all-purpose flour as your base rather than unbleached. The bleaching process slightly modifies the starch, which mimics the chlorination used in commercial production.
For bakers interested in making other specialty flours at home, you might also explore how to make powdered sugar or create other baking essentials. Understanding these basic ingredient transformations empowers you in the kitchen.
Sifting Frequency: Some bakers sift the mixture only once, while traditionalists sift three times. For best results, aim for at least two siftings. This ensures even distribution and removes any lumps that might have formed during storage.
For Specialty Cakes: If you’re making angel food cake or chiffon cake, you might want to sift your homemade cake flour one additional time. These delicate cakes benefit from the finest possible flour texture. For sturdier cakes like pound cake or sheet cakes, standard sifting is sufficient.
Just like knowing how to make heavy cream from milk opens up culinary possibilities, understanding cake flour creation gives you flexibility in the kitchen. And if you ever need make brown gravy or other culinary staples, the same principle of ingredient understanding applies.
There’s also a technique called the “weight method” where professional bakers measure flour by weight rather than volume. If you have a kitchen scale, this approach is worth exploring. One cup of all-purpose flour weighs approximately 120 grams, while cake flour weighs about 115 grams. Using weight eliminates variables and produces more consistent results across multiple batches.
Frequently Asked Questions
Can I use homemade cake flour in any recipe that calls for cake flour?
Absolutely. Homemade cake flour performs identically to store-bought versions in virtually every recipe. Whether you’re baking a classic vanilla layer cake, a delicate chiffon creation, or a tender cupcake, your homemade version will deliver the same tender crumb and superior texture. The only exception might be commercial recipes that have been precisely calibrated for specific flour brands, but even then, differences are negligible.
What’s the difference between cake flour and pastry flour?
Pastry flour has a protein content (8-9%) that falls between all-purpose flour and cake flour, making it suitable for both tender cakes and pastries. Cake flour (7-9% protein) is specifically optimized for cakes and produces a more delicate result. For most home baking, cake flour is preferable when making cakes, though pastry flour can work in a pinch.
Can I make cake flour with self-rising flour?
Not really. Self-rising flour already contains leavening agents (baking powder and salt), which would interfere with your recipe’s balance. Stick with all-purpose flour as your base. However, if you’re interested in making specialty flours, you might explore how to make self-rising flour from scratch for other applications.
How much cake flour do I need for a standard two-layer cake?
Most two-layer cake recipes call for 2 to 2.5 cups of cake flour. This would require 1.75 to 2.2 cups of all-purpose flour plus 4 to 5 tablespoons of cornstarch. Make a bit extra if you’re planning multiple batches or want to have some on hand.
Does homemade cake flour expire?
Homemade cake flour has a shelf life of three to four months in a cool, dry pantry. The cornstarch can absorb moisture over time, potentially causing clumping. If this happens, simply sift the flour again before using. For extended storage, refrigerate or freeze in an airtight container for up to six months.
Can I substitute all-purpose flour for cake flour without adjusting anything?
You can, but your results won’t be as tender. All-purpose flour’s higher protein content creates more gluten, resulting in a denser crumb. If you’re in a pinch and must use all-purpose flour, reduce the amount by two tablespoons per cup to mimic cake flour’s lower protein content. However, making proper cake flour takes just minutes, so it’s worth doing right.
Is there a difference between homemade and store-bought cake flour?
The main difference is that commercial cake flour undergoes chlorination, which bleaches and modifies the starch. This process isn’t necessary for excellent home baking results. Your homemade version might produce marginally different results in very specific applications, but for 99% of recipes, they’re functionally identical. Many professional bakers who bake at home actually use the homemade method for convenience and cost savings.
What if I don’t have cornstarch?
Arrowroot powder works as an excellent substitute in a one-to-one ratio. Some bakers also report success with potato starch, though results can vary slightly. In a true emergency, you could use additional all-purpose flour reduced by two tablespoons per cup, though this won’t give you the exact same results as proper cake flour.
Related Posts

How Long to Boil Lobster Tails: Cooking Guide

How Long to Fly from New York to London? Travel Times
