
Create Email Group in Outlook? Easy Steps Inside
How to Create an Email Group in Outlook: Easy Steps Inside
Managing multiple email contacts can quickly become overwhelming, especially when you need to send the same message to several people regularly. Whether you’re coordinating with a project team, staying in touch with family members, or managing a community group, creating an email group in Outlook streamlines your communication process significantly. An email group, also known as a distribution list or contact group, allows you to send a single email to multiple recipients simultaneously without typing each address individually.
This comprehensive guide walks you through the entire process of creating and managing email groups in Outlook, whether you’re using the desktop application, web version, or mobile platform. We’ll cover everything from basic group creation to advanced management techniques, ensuring you can organize your contacts efficiently and boost your productivity. By the end of this article, you’ll be able to create professional email groups that save time and reduce the risk of accidentally leaving someone out of important communications.
Understanding Email Groups in Outlook
Before diving into the technical steps, it’s important to understand what email groups are and how they function within Outlook. An email group is essentially a saved list of contacts that you can reference by a single group name. When you send an email to the group, Outlook automatically distributes your message to every member included in that group. This feature proves invaluable for anyone who regularly communicates with the same collection of people.
Outlook offers different types of groups depending on your version and organizational setup. Standard contact groups are stored locally on your computer and sync across your devices. If you’re using Microsoft 365 or Exchange Server through your organization, you may have access to more advanced distribution lists that include additional features and permissions. Understanding which type of group you need helps ensure you choose the right creation method for your situation.
The benefits of using email groups extend beyond simple convenience. Groups help maintain consistency in your communications, reduce the chance of human error when addressing emails, and provide a clear organizational structure for your contacts. Whether you’re managing a FixWise Hub Blog communication network or coordinating with colleagues, email groups become an essential tool in your productivity arsenal.

Creating an Email Group on Desktop Outlook
Creating an email group in desktop Outlook is a straightforward process that takes just a few minutes. The steps vary slightly depending on whether you’re using Outlook 2021, Outlook 2019, or Outlook for Microsoft 365, but the fundamental process remains consistent. Let’s walk through the most common method for modern versions of Outlook.
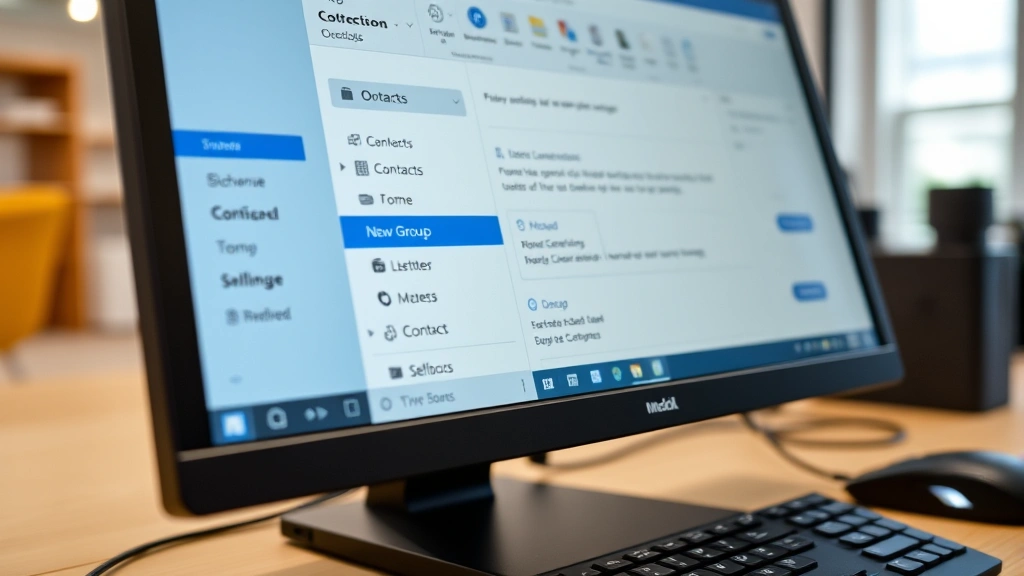
Step 1: Open Outlook and Navigate to Contacts
Launch your Outlook application and click on the “People” icon in the bottom left navigation bar. This opens your contacts folder where you can view all your saved contacts. If you don’t see the People icon, you may need to check your navigation pane settings to ensure the Contacts folder is visible.
Step 2: Create a New Group
Once you’re in the Contacts section, look for the “New Group” button in the toolbar at the top of the screen. In most versions of Outlook, this appears in the Home tab under the New section. Click this button to initiate the group creation process. Outlook will open a new contact group window where you can name your group and begin adding members.
Step 3: Name Your Group
The group creation window displays a field labeled “Group Name” at the top. Enter a descriptive name for your group that clearly indicates its purpose. Good naming conventions might include “Marketing Team,” “Monthly Newsletter Recipients,” “Family Updates,” or “Project Alpha Stakeholders.” A clear, descriptive name helps you quickly identify the correct group when sending emails and makes it easier to manage multiple groups.
Step 4: Add Members to Your Group
Below the group name field, you’ll see options to add members. Click the “Add Members” button to bring up your contact list. You can select members from your existing contacts by clicking on their names and then clicking “Add.” Hold down the Ctrl key while clicking to select multiple contacts at once, which speeds up the process when adding numerous members.
Step 5: Save Your Group
After adding all desired members, click the “Save and Close” button. Outlook stores your new group in your Contacts folder, and it’s now ready to use. You can verify the group was created successfully by checking your Contacts folder, where it should appear with a group icon next to its name.
Adding Members to Your Email Group
Adding members is where email groups become truly powerful. Outlook provides multiple methods for adding contacts to your group, allowing flexibility depending on your situation. Understanding these different approaches helps you build groups efficiently and ensures you don’t miss any important contacts.
Method 1: Adding Existing Contacts
The most common method involves selecting contacts from your existing contact list. When you click “Add Members” in the group creation window, Outlook displays your saved contacts. Simply select the individuals you want to include and click “Add.” This method works best when you’ve already built a comprehensive contact database and want to organize existing contacts into groups.
Method 2: Creating New Contacts Within a Group
If someone you want to add isn’t yet in your contacts, you can create a new contact directly within the group. Look for an option like “New Contact” or “Add” in the group member window. Enter the person’s name and email address, and Outlook adds them both to your contact list and the current group simultaneously. This approach saves time when building a new group with contacts you haven’t previously saved.
Method 3: Adding Contacts After Group Creation
You’re not limited to adding all members during initial group creation. Open an existing group from your Contacts folder, click “Add Members,” and add new contacts just as you would during creation. This flexibility allows your groups to evolve as your communication needs change. Many people add members gradually as they discover new contacts who should receive group communications.
Managing Contact Information
When adding members, ensure you have accurate email addresses for each person. Outlook validates email addresses during the addition process, catching many common formatting errors. If someone has multiple email addresses, choose the one they use most frequently for the type of communication your group handles. You can always edit group membership later if contact information changes.
Managing and Editing Your Groups
After creating your email groups, you’ll need to manage them effectively as your communication needs evolve. Outlook provides straightforward tools for editing groups, removing members, and maintaining organized contact lists. Regular maintenance ensures your groups remain accurate and functional.
Editing Group Membership
To modify an existing group, navigate to your Contacts folder and double-click the group you want to edit. The group window opens, allowing you to add new members by clicking “Add Members” or remove existing members by selecting their name and clicking “Remove Member.” Make changes as needed and click “Save and Close” to apply your modifications. This process takes only seconds and can be done at any time.
Renaming Groups
If you need to change a group’s name, open the group and look for the group name field at the top of the window. Clear the existing name and type a new one. This proves useful when group purposes change or when you want to adopt a more descriptive naming convention. Click “Save and Close” to apply the new name.
Deleting Groups
When a group is no longer needed, right-click on it in your Contacts folder and select “Delete.” Outlook removes the group but leaves all individual contacts intact, so deleting a group doesn’t remove people from your contact list. This distinction is important because it allows you to delete outdated groups without losing contact information.
Duplicating Groups
If you want to create a new group similar to an existing one, you can duplicate a group rather than starting from scratch. Right-click the group and look for a “Copy” or “Duplicate” option (availability depends on your Outlook version). This creates a copy of the group with all its members, which you can then rename and modify as needed. This approach saves significant time when creating multiple related groups.
Creating Groups in Outlook Web Access
If you use Outlook through your web browser rather than the desktop application, the process for creating email groups is slightly different but equally straightforward. Outlook Web Access, also called Outlook on the Web or OWA, provides a browser-based interface for managing your email and contacts.
Accessing Contacts in Outlook Web
Log into your Outlook Web account and click on the “People” icon in the bottom left corner of the screen. This opens your contacts interface. You’ll see your existing contacts displayed in a list format. If this is your first time in the contacts section, your list may be empty or contain only a few saved contacts.
Creating a New Group
Look for a button labeled “New Contact Group” or similar (exact wording varies by Outlook version). Click this button to open a new group creation form. Enter a name for your group in the “Group Name” field. This name should clearly describe the group’s purpose, as you’ll use it whenever sending emails to the group.
Adding Members in Outlook Web
Below the group name field, you’ll see an “Add Members” section. Click in the text field and begin typing a contact’s name or email address. Outlook displays matching contacts from your address book as you type. Click on the correct contact to add them to the group. Repeat this process for each member you want to include. This autocomplete feature makes adding members quick and reduces typing errors.
Saving Your Web Group
Once you’ve added all desired members, scroll down and click the “Create” or “Save” button. Outlook Web saves your group and returns you to your contacts list. Your new group now appears in your contact list and is ready to use for sending emails.
Key Differences from Desktop Outlook
While the end result is the same, Outlook Web uses a slightly different interface than desktop Outlook. The web version typically offers a cleaner, more streamlined experience, though desktop Outlook provides more advanced features for power users. Both versions keep your groups synchronized if you use both the web and desktop applications with the same email account.
Best Practices for Email Group Organization
Creating effective email groups extends beyond simply combining names. Following best practices ensures your groups remain useful, organized, and easy to manage over time. These strategies help you build a contact system that scales with your growing communication needs.
Use Clear Naming Conventions
Adopt a consistent naming system for your groups from the start. Consider organizing by department, project, purpose, or frequency. Examples include “2024 Marketing Campaign,” “Weekly Team Standup,” “Client Advisory Board,” or “Annual Conference Attendees.” Consistent naming makes it easier to find the right group quickly and helps new team members understand your organizational structure. If you manage many groups, you might even add a prefix like “DIST-” for distribution lists or “PROJ-” for project groups.
Document Group Purposes
Consider maintaining a simple spreadsheet or document listing each group’s purpose, creation date, and intended use. This documentation proves invaluable when you have dozens of groups and need to remember which one to use for a specific communication. It also helps if you share your calendar or delegate email management tasks to colleagues.
Review Groups Regularly
Set a quarterly or annual reminder to review your groups. Remove members who no longer need to receive group communications, add new members as appropriate, and delete groups that are no longer in use. Regular maintenance prevents your contact system from becoming cluttered with outdated groups and ensures members receive only relevant communications. This practice also helps maintain accurate contact lists across your organization.
Consider Permissions and Ownership
If you’re using organizational email groups through Microsoft 365, consider who should have permission to edit group membership and who should own each group. Assigning clear ownership prevents confusion about who can make changes and ensures accountability. In larger organizations, you might have a dedicated administrator who manages group membership to maintain consistency and security.
Separate Internal and External Groups
Create separate groups for internal team communications and external stakeholder communications. This separation helps prevent accidentally sending internal discussions to external parties and allows you to tailor message tone and content appropriately. It also simplifies security and compliance considerations, particularly in regulated industries.
Troubleshooting Common Issues
Even with careful setup, you may encounter occasional issues with email groups. Understanding common problems and their solutions helps you resolve issues quickly and maintain smooth communication.
Group Not Appearing in Contact List
If a newly created group doesn’t appear in your contacts, try closing and reopening Outlook. Sometimes the application needs to refresh to display new groups. If the group still doesn’t appear, verify that you clicked “Save and Close” when finishing group creation. Check that you’re looking in the correct folder—groups typically appear in your main Contacts folder, not in subfolders.
Email Bouncing Back from Group Recipients
If emails sent to a group fail to deliver to specific members, verify those members’ email addresses are correct. Check the group membership by opening the group and confirming all addresses are properly formatted. If an individual’s email address is incorrect, remove them from the group and add them again with the correct address. You might also check with the recipient to confirm they haven’t changed email addresses recently.
Members Not Receiving Group Emails
If group members report not receiving emails sent to the group, first confirm the email actually sent successfully. Check your Sent folder to verify the message appears there. Ask recipients to check their spam or junk folders, as group emails sometimes get filtered incorrectly. If emails consistently go to junk, work with your email administrator to whitelist the group address. Additionally, ensure all group members’ email addresses are active and haven’t been disabled.
Cannot Edit Existing Group
If you can’t edit a group you created, verify you have the necessary permissions. In organizational settings, only the group owner or administrators can modify group membership. If you’re not the owner, contact the group owner to request changes. In personal Outlook accounts, you should always have edit permissions for groups you create.
Syncing Issues Between Devices
If groups appear on one device but not another, ensure both devices are using the same email account and that sync is enabled. Sign out of Outlook on all devices and sign back in to force a full synchronization. This typically resolves most syncing issues. If problems persist, contact your email provider’s technical support team.
FAQ
Can I create a group from existing group members?
Yes, you can create a new group that includes members from an existing group. When creating a new group, simply select the same members you want to include. Some Outlook versions also allow you to duplicate an existing group, which automatically includes all its members in the new group.
Is there a limit to how many people can be in an email group?
For personal Outlook accounts, there’s typically no hard limit on group size. However, extremely large groups (hundreds or thousands of members) may encounter performance issues. For organizational distribution lists through Microsoft 365, consult your administrator about any applicable limits, as these can be configured based on organizational policy.
What happens if I delete a contact who’s in a group?
If you delete a contact who belongs to a group, the contact is removed from both your contact list and any groups they were part of. Outlook automatically handles this removal, so you don’t need to manually remove them from groups. However, if you’re unsure whether a contact should be deleted, consider just removing them from groups instead.
Can I send different emails to different group members?
No, when you send an email to a group, all members receive the same message. If you need to send different content to different people, create separate groups or send individual emails. Alternatively, you can use mail merge features if your email needs to include personalized information for each recipient.
How do I know if someone received an email sent to my group?
Outlook’s read receipts and delivery receipts can help, but they work on a per-recipient basis. When you send to a group, you’ll receive individual receipts from each member if they have read receipts enabled. Request read receipts when sending important group emails if you need confirmation of delivery and reading.
Can I create nested groups (groups within groups)?
Standard contact groups in Outlook don’t support true nesting, but you can achieve similar results by creating multiple related groups that share some members. For example, create a “All Staff” group and separate “Marketing Team” and “Sales Team” groups. Organizational distribution lists in Microsoft 365 may support more advanced nesting options—consult your administrator for details.
How do I share a group with colleagues?
In personal Outlook accounts, groups are stored locally and aren’t directly shareable. However, you can export your contacts and share them with colleagues. In organizational settings with Microsoft 365, distribution lists can be shared through your organization’s directory, and colleagues can add themselves to public groups. Contact your IT administrator for organizational sharing options.
Can I access my Outlook groups on mobile devices?
Yes, if you use the official Outlook mobile app and sign in with your email account, your groups will sync to your mobile device. You can use groups to send emails from your phone or tablet just as you would on a computer. Ensure you’re signed into the same email account on your mobile device as your computer.
Creating email groups in Outlook dramatically improves your communication efficiency and helps you stay organized. Whether you’re using the desktop application, web browser, or mobile device, the process remains straightforward and intuitive. Start by implementing groups for your most frequently contacted groups of people, then expand your system as you become more comfortable with the features. Combined with other productivity tools, email groups form the foundation of effective digital communication. For more insights on organizing your digital workspace, check out our comprehensive guide to personal organization systems.
Remember that email groups are living systems that benefit from regular maintenance and review. As your communication needs evolve, your groups should evolve with them. By following the best practices outlined in this guide and leveraging Outlook’s robust group features, you’ll build an email system that scales with your personal or professional growth. Start creating your first group today and experience the productivity benefits immediately.
Related Posts

Superscript in Google Docs: Expert Tips

Strikethrough in Excel: Easy Steps for Beginners
