
DIY Corsage: Step-by-Step Floral Guide
DIY Corsage: Step-by-Step Floral Guide
Creating a corsage by hand is a rewarding craft that transforms fresh flowers into a wearable work of art. Whether you’re preparing for a wedding, prom, homecoming, or special event, learning how to make a corsage gives you complete control over design, color coordination, and personalization. A handmade corsage costs significantly less than florist versions while delivering professional-quality results that impress guests and the wearer alike.
This comprehensive guide walks you through every step of corsage construction, from selecting the right flowers and materials to securing and finishing your creation. You’ll discover techniques used by professional florists, adapted for DIY enthusiasts with minimal floral experience. By the end, you’ll have the confidence to create stunning corsages for any occasion, customize designs to match specific themes, and even start a small side business if desired.
Essential Materials and Tools
Before starting your corsage project, gather quality materials and tools. Having everything prepared prevents mid-project interruptions and ensures clean, professional results. The right equipment makes the construction process smoother and produces corsages that last throughout your event.
Floral supplies you’ll need:
- Floral foam (wet foam for fresh flowers, dry foam for silk varieties)
- Floral tape (green or white, stretches as you wrap)
- Floral wire (18, 20, and 24-gauge for different stem sizes)
- Sharp floral scissors or knife (crucial for clean cuts)
- Greener branches (eucalyptus, ruscus, salal, or leather leaf)
- Corsage backing (plastic or metal base, optional)
- Decorative elements (ribbons, beads, pearls, or brooch pins)
- Water spray bottle (keeps flowers hydrated)
- Rubber bands or corsage clips (securing mechanism)
For a more detailed overview of crafting supplies and techniques, check out our FixWiseHub Blog – How-To Guides and Tutorials for additional creative projects. Quality tools make an enormous difference in your final product’s appearance and durability.
Selecting Your Flowers
Flower choice determines your corsage’s overall aesthetic, longevity, and structural integrity. Different blooms offer varying benefits, and understanding their characteristics helps you create designs that last through your entire event while maintaining visual appeal.
Best flowers for corsages:
- Roses – Classic, durable, available in countless colors, long-lasting
- Carnations – Budget-friendly, sturdy stems, excellent color range
- Orchids – Exotic, long-lasting, sophisticated appearance
- Spray roses – Multiple blooms per stem, fuller appearance
- Hypericum berries – Adds texture and visual interest
- Waxflower – Delicate, long-lasting, fills spaces beautifully
- Alstroemeria – Intricate petals, excellent filler flower
- Statice (limonium) – Adds airy texture, extremely long-lasting
Choose flowers based on your event’s formality level, color scheme, and available budget. Mixing focal flowers (larger blooms like roses) with secondary flowers (spray roses, waxflower) and filler flowers (statice, alstroemeria) creates visual depth and professional appearance. Fresh flowers purchased from local farmers markets or wholesale suppliers cost less than retail florist pricing while offering superior quality and freshness.
Consider the wearer’s preferences and allergies when selecting varieties. Some people prefer flowers without strong fragrances, while others want highly scented options. Ask ahead of time to ensure your corsage enhances rather than detracts from their experience.
Preparing Flowers and Greenery
Proper flower preparation extends corsage lifespan and ensures materials are ready for construction. Fresh flowers require conditioning before assembly, while greenery needs cleaning and hydration. This step is non-negotiable for professional results.
Preparation steps:
- Remove all leaves below the intended waterline to prevent bacterial growth and decay
- Re-cut stems at a 45-degree angle under running water, removing at least one inch
- Submerge flowers in room-temperature water for 2-4 hours before use
- Remove thorns from roses using a thorn stripper tool, working from bottom to top
- Straighten curved stems gently by hand or by wrapping in wet paper towels
- Check petals for damage, browning, or imperfections and remove affected outer petals
- Prepare greenery by removing lower leaves and submerging in water
- Pat flowers dry gently with paper towels before assembly to prevent slipping
Conditioning flowers hydrates them fully, extends vase life, and ensures petals remain firm and vibrant throughout your event. Never skip this step even if you’re working on a tight timeline—properly conditioned flowers make assembly easier and look significantly better.
Building the Corsage Structure
The structural foundation determines whether your corsage holds together beautifully or falls apart during wear. Understanding proper wiring and taping techniques ensures durability and professional appearance. This is where your corsage transforms from loose flowers into a cohesive, wearable piece.
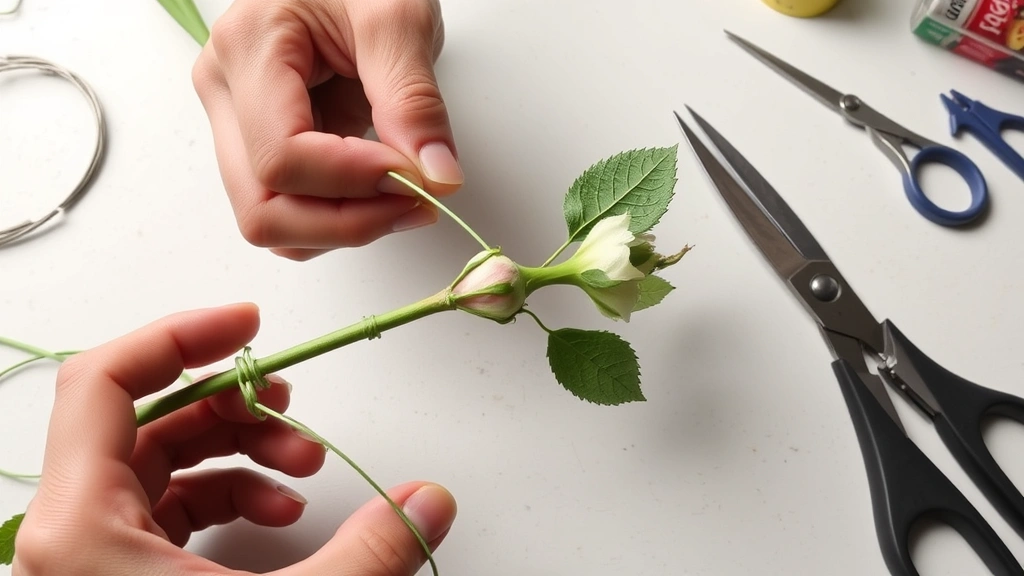
Wiring technique for individual stems:
- Insert floral wire (18 or 20-gauge) into the flower stem, pushing upward about two inches
- Bend wire gently at the flower base to create a hook shape for support
- Wrap the hook with floral tape, starting just below the flower head
- Continue wrapping downward at a 45-degree angle, covering both stem and wire
- Overlap tape slightly with each wrap for complete coverage and water-resistance
- Trim excess stem to 3-4 inches below the flower head
This technique, called “wiring and taping,” reinforces weak stems and creates uniformity. All stems in your corsage should be approximately the same length when finished, making assembly much easier.
Building the base structure:
- Cut floral foam into a small oval or rectangular piece (approximately 2×3 inches)
- Soak foam in water for 30 minutes if using fresh flowers (skip for silk)
- Insert greenery first, angling stems to create a foundation and establish the corsage’s shape
- Add focal flowers (your largest, most prominent blooms) at slight angles
- Fill gaps with secondary and filler flowers, turning the foam as you work
- Maintain balance by distributing colors and sizes evenly around the design
- Check all angles – the corsage should look beautiful from the front, sides, and back
Proper structure ensures your corsage maintains its shape throughout wear and photographs beautifully from multiple angles. Take time with this step rather than rushing; a solid foundation prevents reconstruction later.
Assembly and Wrapping Techniques
Once your floral design is complete, securing it to a wearable backing and wrapping it professionally transforms your creation into a finished corsage. This step requires attention to detail and proper material selection for comfort and durability.
Securing to a backing:
- Use a plastic corsage backing (available at craft stores) for traditional wrist-worn corsages
- Attach foam base to the backing using floral glue or hot glue gun
- Allow glue to dry completely before proceeding with wrapping
- Test stability by gently shaking the assembled piece to ensure nothing shifts
Wrapping and finishing:
- Cover the foam base completely with floral tape, pressing firmly to create a sealed, waterproof surface
- Wrap satin or silk ribbon around the corsage backing, covering all tape and floral foam
- Secure ribbon ends with a small piece of double-sided tape or corsage pin
- Create a bow from matching or complementary ribbon, attaching it to the side or top
- Add decorative elements like pearl sprays, beads, or small brooches if desired
- Attach corsage pin or clip to the backing for secure wearing
- Spray lightly with floral preservative to extend flower life
Professional wrapping creates a polished appearance that rivals florist-made corsages. Take your time with ribbon placement and ensure all raw edges are hidden. A well-wrapped corsage feels comfortable against clothing and looks intentional rather than hastily assembled.
Finishing and Preservation
Your corsage needs proper care to maintain its beauty throughout the event. Preservation techniques extend flower life and keep your creation looking fresh and vibrant from morning until evening.
Preservation methods:
- Mist corsage lightly with cool water 2-3 hours before wearing to hydrate flowers
- Store in a cool location (ideally 45-55°F) until the event begins
- Keep away from direct sunlight and heat sources that wilt flowers prematurely
- Avoid ethylene gas from ripening fruit – keep corsages far from bananas, apples, and other produce
- Don’t refrigerate with vegetables – ethylene from produce accelerates flower aging
- Mist again just before wearing for maximum freshness and hydration
- Apply floral preservative spray to extend life 2-3 additional days
Many people don’t realize that fresh corsages can last 5-7 days with proper care. This longevity allows you to create corsages several days before an event, reducing last-minute stress.
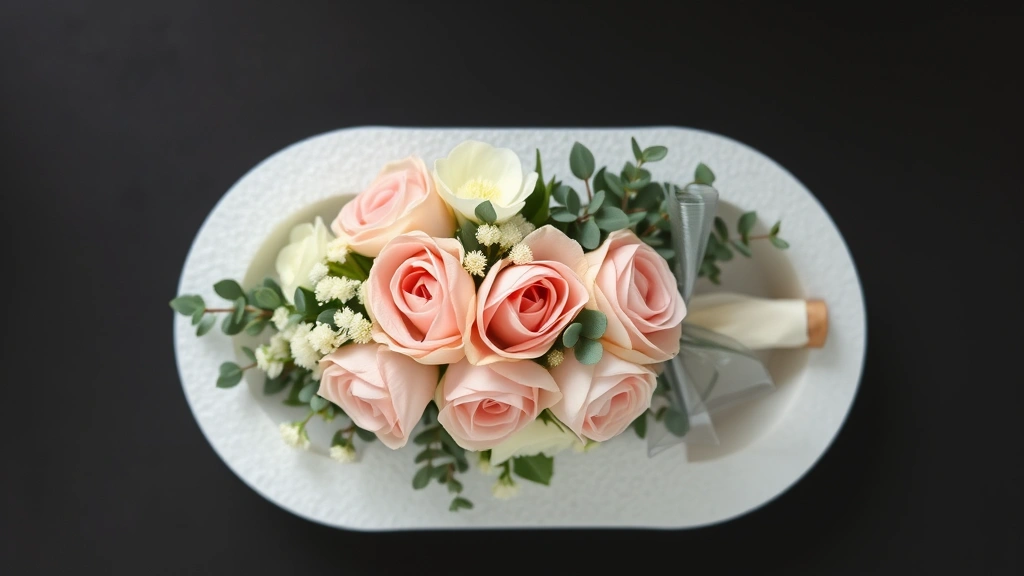
Design Variations and Styles
Corsage design possibilities are nearly endless, allowing customization for different events, aesthetics, and personal preferences. Understanding popular styles helps you create designs that match specific occasions and individual tastes.
Classic wrist corsage: The traditional style features a small floral arrangement attached to an elastic band or corsage backing, worn on the wrist. This style works for proms, weddings, and formal events. It typically measures 3-4 inches across and includes 3-5 focal flowers with greenery and filler.
Shoulder corsage: Larger arrangements (4-6 inches) designed to be pinned to the shoulder or bodice. This style makes a dramatic statement and works beautifully for formal weddings, mother-of-the-bride roles, or evening galas. Shoulder corsages require stronger structural support due to their size and weight.
Cascading corsage: Features flowers arranged in a downward-flowing style, creating an elegant, romantic appearance. This style requires careful wiring and taping to ensure flowers hang properly without drooping excessively. Cascading corsages work wonderfully for weddings and upscale events.
Minimalist modern style: Focuses on fewer, larger flowers with lots of negative space. This contemporary approach appeals to people who prefer understated elegance. A single focal flower with minimal greenery creates dramatic impact with clean lines.
Seasonal themes: Spring corsages feature pastels and light, airy flowers. Summer designs incorporate bright colors and tropical elements. Fall corsages showcase warm tones, burgundy, and bronze. Winter styles feature deep reds, whites, silvers, and metallic accents.
Budget-friendly options: Create stunning corsages using carnations, spray roses, and hypericum berries instead of premium flowers. These varieties cost significantly less while maintaining durability and visual appeal. For budget-conscious projects, visit our guide on preserving fresh materials to understand flower longevity.
Consider the wearer’s personality, event formality, and clothing color when designing your corsage. A corsage should complement rather than overwhelm the overall look. For formal black-tie events, elegant designs with sophisticated color palettes work best. Casual events allow for playful colors and experimental arrangements.
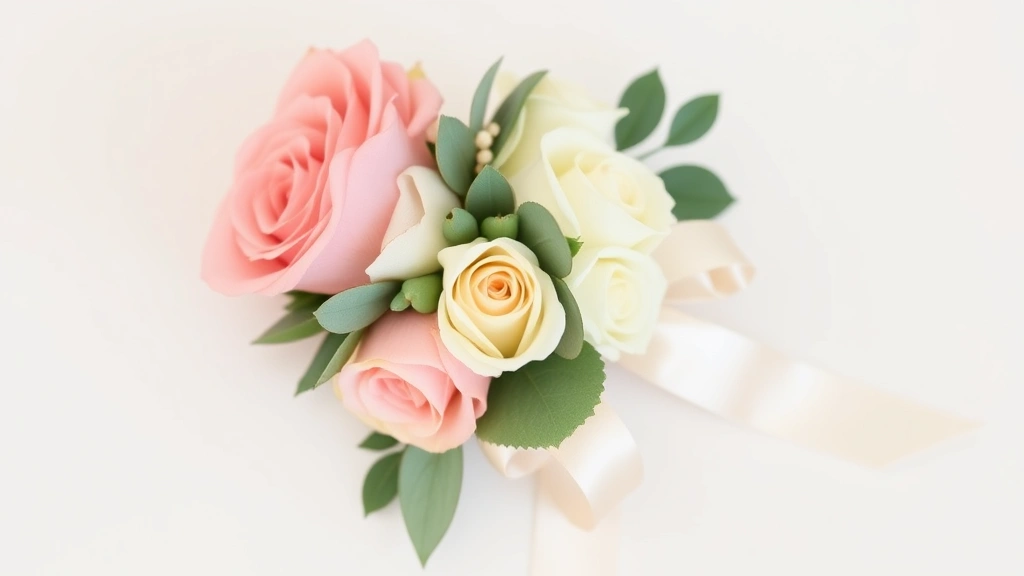
Color combinations that work beautifully:
- Blush pink, ivory, and sage green – romantic and timeless
- Deep burgundy, gold, and cream – luxurious and sophisticated
- Coral, peach, and white – cheerful and modern
- Purple, white, and silver – regal and elegant
- Red, white, and black – bold and striking
- Lavender, purple, and white – soft and romantic
When designing multiple corsages for a wedding party or event, maintain color consistency while allowing slight variations in flower placement and arrangement. This cohesion creates a polished, intentional appearance while avoiding identical, mass-produced looks.
FAQ
How long does a corsage last?
Fresh flower corsages typically last 5-7 days with proper care and hydration. Most remain beautiful throughout a single event (8-12 hours) without any special treatment. Storing corsages in cool conditions and misting them periodically extends longevity significantly. Silk corsages last indefinitely and can be stored and reused for future events.
Can I make a corsage the day before the event?
Yes, absolutely. In fact, creating corsages 1-2 days ahead reduces stress and allows flowers to acclimate to the floral foam. Store finished corsages in a cool location (45-55°F is ideal), away from direct sunlight and heat sources. Mist them lightly with water 2-3 times during storage. This advance preparation often results in fresher-looking corsages than rushing assembly on event day.
What’s the difference between corsages and boutonnieres?
Corsages are larger floral arrangements (3-6 inches) worn on the wrist or pinned to clothing. Boutonnieres are much smaller (1-2 inches), featuring a single flower or minimal blooms, designed to be worn in a lapel buttonhole. Boutonnieres use the same basic construction techniques as corsages but require less material and assembly time. Learn more about DIY floral projects and techniques to master both.
How do I prevent my corsage from wilting?
Proper flower conditioning before assembly is the most important prevention step. Re-cut stems, remove lower leaves, and submerge flowers in water for 2-4 hours before use. After assembly, mist corsages with cool water and store them in a cool location. Avoid direct sunlight, heat sources, and ethylene gas from ripening fruit. Floral preservative spray extends life significantly.
Can I use artificial flowers for corsages?
Yes, silk or artificial flowers create corsages that last indefinitely and never wilt. They’re perfect for people with flower allergies, for events where fresh flowers aren’t practical, or for corsages that need to be created far in advance. Use dry floral foam instead of wet foam when working with artificial flowers. The construction process is identical to fresh flower corsages.
What gauge wire should I use?
Wire gauge depends on flower stem thickness and weight. Use 18-gauge for thick, sturdy stems (roses, carnations). Use 20-gauge for medium stems (spray roses, alstroemeria). Use 24-gauge for delicate stems (waxflower, statice) and filler flowers. Having multiple gauges on hand allows you to select the appropriate wire for each flower type, ensuring proper support without damaging delicate stems.
How much does it cost to make a corsage?
DIY corsages typically cost $8-$20 depending on flower selection and design complexity. Florist-made corsages range from $15-$40 each. Buying flowers wholesale or from farmers markets reduces costs significantly compared to retail florist pricing. Creating corsages yourself saves 50-70% compared to professional florists while delivering comparable quality.
Do I need special training to make corsages?
No special training is required. Anyone can learn corsage construction by following step-by-step instructions and practicing basic techniques. Your first corsage may not be perfect, but subsequent attempts improve dramatically as you develop muscle memory and understand flower behavior. Most people create professional-quality corsages within 2-3 attempts.
Related Posts

Superscript in Google Docs: Expert Tips

Strikethrough in Excel: Easy Steps for Beginners
