
Make a Latte at Home: Barista Tips Included
How to Make a Latte at Home: Barista Tips Included
Making a café-quality latte at home is easier than you might think, and it’s a skill that pays dividends every single morning. Whether you’re tired of spending five dollars per cup at your local coffee shop or simply want to master the craft of espresso-based beverages, learning to make a latte at home transforms your kitchen into a personal café. With the right equipment, quality ingredients, and a few barista-approved techniques, you’ll be pulling shots and steaming milk like a professional in no time.
The beauty of making lattes at home is that you control every variable—the coffee bean origin, milk temperature, foam density, and even the presentation. Unlike store-bought lattes that may sit in a cup for several minutes, your homemade version is fresh and customized to your exact preferences. This comprehensive guide walks you through everything from selecting equipment to mastering latte art, complete with insider tips from professional baristas.
Essential Equipment for Home Latte Making
Before you can make a proper latte, you need the right tools. The most critical piece of equipment is an espresso machine. While prices range from budget-friendly to luxury models costing thousands of dollars, you don’t need to spend a fortune to make excellent lattes. An entry-level espresso machine with a steam wand will get you started, though serious enthusiasts often invest in semi-automatic or fully automatic machines for consistency and control.
Your espresso machine should include a group head (where the portafilter attaches), a steam wand for milk frothing, and ideally a pressure gauge showing 9 bars of pressure during extraction. This Old House recommends researching machines with good customer reviews and reliable warranties, as you’ll be using this equipment daily.
Beyond the espresso machine, you’ll need a burr grinder—this is non-negotiable. Blade grinders produce inconsistent particle sizes that compromise extraction quality. A burr grinder, whether flat-burr or conical-burr, grinds beans uniformly, which is essential for pulling consistent shots. Invest in a quality grinder; many baristas argue it’s more important than the espresso machine itself.
Additional essential equipment includes:
- Portafilter: The basket that holds ground coffee during extraction
- Tamper: A tool for compressing ground coffee evenly in the portafilter
- Milk pitcher: A stainless steel pitcher (typically 10-20 oz) with a pointed spout for pouring
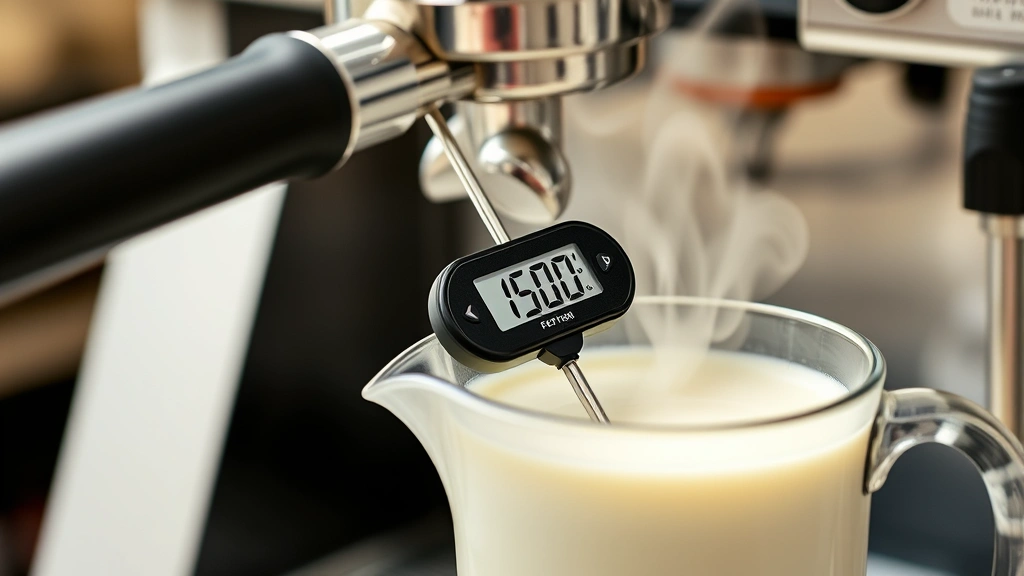
- Milk thermometer: Ensures you heat milk to the optimal 150-155°F range
- Digital scale: Measures coffee and water weight for consistency
- Knock box: A container for disposing of used espresso grounds
Many home baristas also appreciate a tamper mat to protect countertops and a distribution tool to level grounds before tamping. While these aren’t strictly necessary, they improve consistency and reduce mess.
Choosing the Right Coffee Beans
The coffee beans you select dramatically influence your latte’s flavor profile. For home espresso preparation, choose beans specifically labeled for espresso rather than light roast single-origin beans meant for pour-over coffee. Espresso blends typically combine multiple origins to create balanced flavor with sweetness, body, and crema.
Look for beans roasted within the past two to three weeks. Fresher beans produce better crema and more vibrant flavors. Most specialty coffee roasters print roast dates on their packaging, allowing you to make informed choices. Family Handyman emphasizes that investing in quality ingredients yields better results than cutting corners.
Medium to dark roasts work particularly well in lattes because their bold flavors stand up to steamed milk without getting lost. Light roasts can work, but require more finesse to prevent the milk from overwhelming delicate notes. If you’re new to home espresso, start with medium roasts from reputable roasters who specialize in espresso blends.
Store beans in an airtight container at room temperature, away from direct sunlight and heat sources. Never refrigerate or freeze beans, as moisture exposure damages the oils that create rich flavor and crema. Properly stored beans maintain peak quality for about four weeks after roasting.

Pulling the Perfect Espresso Shot
Pulling a proper espresso shot is where most home baristas struggle initially. The process requires precision and practice, but once you develop the muscle memory and understand the variables, it becomes second nature.
Step 1: Grind Your Coffee
Grind beans immediately before pulling your shot. For a standard double shot (two ounces of espresso), grind approximately 18-20 grams of coffee. The grind size should resemble fine sand—finer than drip coffee but coarser than powder. Your grinder’s espresso setting provides a good starting point, though you may need to adjust slightly based on extraction results.
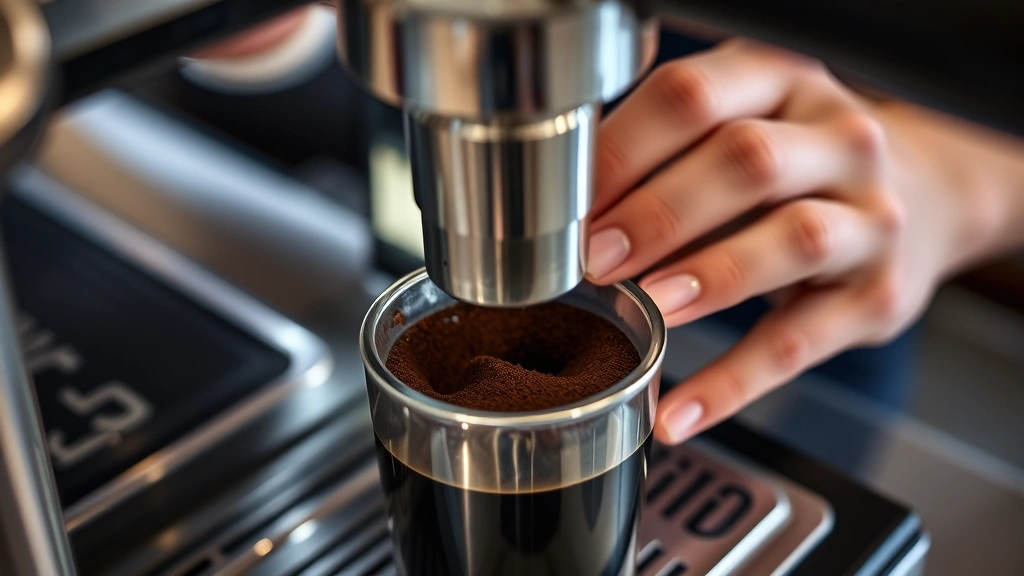
Step 2: Distribute and Tamp
Place the portafilter on a scale and tare it to zero. Add ground coffee until it reaches your target weight (typically 18-20 grams for a double shot). Use a distribution tool or your finger to break up clumps and level the coffee bed. This ensures even water flow during extraction.
Next, tamp the coffee firmly and evenly. Apply approximately 30 pounds of pressure—enough to compress the grounds without excessive force. The key is consistency: tamp straight down, apply even pressure across the entire puck, and maintain a level surface. An uneven tamp creates channels where water rushes through, resulting in under-extracted, sour espresso.
Step 3: Lock and Extract
Insert the portafilter into the group head with a slight twist, ensuring it’s locked firmly. Place your cup on the drip tray and start the pump. Water should begin flowing within a second or two. If it takes longer than three seconds, your tamp is too tight; if it’s immediate, your tamp is too loose.
A proper double shot takes 25-30 seconds to extract and produces approximately two ounces of espresso. The first drops should be dark and syrupy; as extraction continues, the stream lightens slightly. If your shot pulls too quickly (gushing), grind finer; if it pulls too slowly (dripping), grind coarser.
The perfect shot has a rich, caramel-colored crema layer on top—a thin, foamy head indicating proper extraction. Taste your shot: it should be balanced, slightly sweet, with no harsh bitterness or sour tang.
Steaming and Frothing Milk Like a Barista
Steaming milk is an art form that separates amateur lattes from professional-quality drinks. Many home baristas pull excellent shots but struggle with milk, so don’t feel discouraged if this takes practice.
Milk Selection
Whole milk produces the best results for lattes due to its fat content, which creates velvety microfoam and adds natural sweetness. Two-percent milk works reasonably well, though it produces less body. Skim milk creates more abundant foam but less creamy texture. For plant-based options, barista-blend oat milk performs best, followed by soy and almond varieties.
The Steaming Process
Fill your milk pitcher one-third to one-half full—never more, as milk expands during steaming. Purge the steam wand briefly by opening the valve for one second to release any water. This prevents water from diluting your milk.
Insert the steam wand tip just below the milk surface at a slight angle. This positioning creates a whirlpool that distributes heat evenly. Open the steam valve fully. You should hear a gentle hissing sound. If it’s too loud or your milk splashes, reposition the wand tip.
As milk heats, gradually lower the pitcher so the wand tip stays just below the surface. This creates aeration—tiny air bubbles that develop into microfoam. After about five seconds, you should notice milk volume increasing and hear the characteristic hissing sound. Continue this phase until milk reaches approximately 100°F (about 10 seconds total for a pitcher).
Now submerge the wand tip deeper into the milk and continue steaming until your thermometer reads 150-155°F. This is the ideal serving temperature—hot enough to properly combine with espresso but not so hot that it burns the milk’s natural sugars. Remove the wand immediately when you reach temperature.
The goal is creating microfoam—tiny, uniform bubbles that make the milk silky and pourable—rather than large, airy bubbles. Milk with proper microfoam has a glossy, paint-like appearance and pours smoothly without separating.
Cleaning the Steam Wand
Immediately after steaming, purge the wand into a small container of water, then wipe it clean with a damp cloth. Dried milk inside the wand creates blockages and off-flavors in future drinks. This habit prevents maintenance headaches and ensures consistent milk quality.
Assembling Your Latte
Now comes the moment of truth: combining your espresso and steamed milk into a cohesive latte. The assembly process is simpler than pulling the shot or steaming milk, but technique still matters.
Pour your freshly pulled double shot into a six-ounce cup. If using a larger cup, add more espresso—the standard ratio is one part espresso to three to four parts steamed milk. Hold your milk pitcher approximately six inches above the cup and pour steadily. Pour from the side initially to combine the espresso and milk gently, then move the pitcher closer as you continue pouring to create a thin layer of microfoam on top.
The final latte should have a creamy, unified appearance with a thin, glossy foam layer. If you see separated foam floating on top or visible espresso at the bottom, your milk temperature was off or your microfoam quality needs improvement—adjustments for next time.
Serve immediately. A latte begins cooling as soon as you pour it, and the longer it sits, the more the milk and espresso separate. That’s why café lattes taste better when consumed quickly—they’re at optimal temperature and texture.
Advanced Latte Art Techniques
Once you’ve mastered the fundamentals, latte art elevates your homemade lattes from good to impressive. Latte art requires only proper microfoam and practice; you don’t need special equipment.
The Rosetta Pattern
The rosetta (or leaf) is the foundational latte art design. Pour your milk from approximately six inches above the cup, positioning the pitcher’s spout slightly off-center. As milk fills the cup, the contrast between espresso and white milk creates a defined white stream. Slowly move the pitcher in a gentle, side-to-side motion while gradually moving it closer to the cup’s surface. This creates the characteristic leaf-like pattern. As the cup fills, draw the pitcher backward quickly to close off the design.
The Tulip Pattern
Tulips are created by pouring multiple stacked leaves instead of one continuous pattern. Begin pouring similarly to a rosetta, but instead of the side-to-side motion, make sharp, upward jabs with the pitcher. Each jab creates a separate petal. Build three to five petals on top of each other, then draw the pitcher backward to finish.
Practice Tips
Latte art requires consistent microfoam quality, proper milk temperature, and smooth pouring technique. Practice with non-dairy milk first—it’s more forgiving and less wasteful than repeatedly discarding failed attempts. Focus on creating good microfoam before worrying about patterns. Even without perfect art, a well-executed latte with beautiful crema and smooth milk integration tastes excellent.
Troubleshooting Common Latte Problems
Even experienced baristas encounter occasional issues. Here’s how to diagnose and fix common latte problems:
Sour or Thin Espresso
If your espresso tastes sour and thin, you’re under-extracting. This typically means your grind is too coarse, your tamp is too light, or you’re not tamping evenly. Grind finer, apply more pressure when tamping, or adjust your technique to ensure a level tamp. Your shot should take 25-30 seconds; if it’s pulling in under 20 seconds, extraction is too fast.
Bitter or Burnt Espresso
Over-extracted espresso tastes bitter and burnt. This means water is flowing too slowly through the puck. Grind coarser, reduce tamping pressure, or ensure your puck isn’t overly compressed. If your shot takes longer than 35 seconds, grind adjustment is needed. Also check that your machine’s temperature isn’t set too high.
Large Bubbles in Milk Instead of Microfoam
Large bubbles indicate you’re aerating too aggressively or for too long. During the aeration phase, keep the steam wand tip just barely below the surface and listen for gentle hissing. If you hear loud crackling, reposition the wand. Also ensure your milk isn’t too hot—if you’re aerating near 150°F, stop immediately.
Milk Separates in Your Latte
Separation occurs when milk temperature is too low or microfoam quality is poor. Ensure you’re heating milk to 150-155°F, not lower. Also check that your espresso is hot enough—if your machine’s temperature is off, even properly steamed milk may separate. Finally, verify that your microfoam is velvety and pourable, not full of large bubbles.
Weak Latte Flavor
If your latte tastes watered down or lacks coffee flavor, you might need more espresso. Standard ratios use one part espresso to three to four parts steamed milk, but you can adjust this to your preference. Some people prefer stronger lattes with a one-to-three ratio. Also verify that your espresso beans are fresh (roasted within three weeks) and your grind isn’t too coarse.
Inconsistent Results
Inconsistency usually stems from variables changing between shots. Use a digital scale to weigh coffee consistently, invest time in perfecting your tamping technique, and maintain your machine properly. Keep a notebook tracking grind settings, extraction times, and results. This data helps you identify patterns and make informed adjustments. Also, remember that consistency in technique applies to all skills, including espresso pulling.
FAQ
What’s the difference between a latte and a cappuccino?
Both drinks combine espresso and steamed milk, but proportions differ. A latte typically uses one part espresso to three to four parts steamed milk, creating a creamier, more milk-forward drink. A cappuccino uses equal parts espresso, steamed milk, and milk foam (roughly one-to-one-to-one), resulting in a stronger coffee flavor and thicker foam layer. Lattes are smoother and more approachable for milk-lovers; cappuccinos offer more pronounced coffee flavor.
Can I make a latte without an espresso machine?
Technically, yes, but the result won’t be a true latte. You could use a Moka pot to create concentrated coffee, then add steamed milk, though the pressure and crema won’t match espresso. Alternatively, use an Aeropress or French press to make strong coffee, but again, this produces a different drink. For authentic lattes with proper espresso, an espresso machine is necessary. Budget models under $200 exist and work reasonably well for home use.
How much should I spend on an espresso machine?
Entry-level machines cost $150-400 and work adequately for learning. Mid-range machines ($400-1,500) offer better temperature stability and pressure consistency. High-end machines ($1,500+) provide advanced features but aren’t necessary for excellent home lattes. More important than machine cost is investing in a quality grinder ($100-300+) and learning proper technique. Many experienced home baristas spend more on their grinder than their machine.
What’s the ideal milk temperature for lattes?
Heat milk to 150-155°F for optimal latte quality. This temperature is hot enough to properly combine with espresso while preserving milk’s natural sweetness. Temperatures below 150°F result in separation and weak flavor; temperatures above 160°F burn milk sugars, creating bitter notes. A simple milk thermometer ($10-20) removes guesswork and ensures consistency.
How long does freshly steamed milk stay good?
Steamed milk begins cooling immediately and should be used within 30 seconds for best results. After a minute, texture and temperature degrade noticeably. This is why café lattes taste better than those sitting in cups—they’re consumed at peak temperature and consistency. Always pour immediately after steaming.
Can I use cold milk for lattes?
No. Lattes by definition use steamed, hot milk. Cold milk creates a different drink (typically called a cold latte or iced latte, which uses chilled milk poured over espresso and ice). For traditional hot lattes, steaming is essential—it creates microfoam, increases milk volume, and properly combines with espresso.
Why does my crema disappear quickly?
Crema naturally dissipates as espresso cools and oxidizes. If crema disappears within seconds of pulling your shot, your extraction was likely too fast (grind too coarse, tamp too light, or insufficient distribution). Proper extraction produces crema that persists for one to two minutes. Also, ensure your espresso machine is at the correct temperature and producing proper pressure.
What’s the best way to store espresso beans?
Store beans in an airtight container at room temperature, away from sunlight, heat, and moisture. Avoid refrigerators and freezers—condensation damages beans. Properly stored beans remain fresh for four weeks after roasting. Buy smaller quantities more frequently rather than large amounts, ensuring you always use relatively fresh beans. Check the roast date when purchasing to verify freshness.
Related Posts

Superscript in Google Docs: Expert Tips

Strikethrough in Excel: Easy Steps for Beginners
