
How to Build a Pergola? Expert Tips Inside
How to Build a Pergola: Expert Tips Inside
A pergola is one of the most versatile outdoor structures you can add to your home. Whether you’re looking to create a shaded retreat for summer entertaining or add architectural interest to your backyard, a well-built pergola transforms your outdoor living space. This comprehensive guide walks you through every step of the process, from planning and material selection to installation and finishing touches.
Building a pergola might seem intimidating if you’ve never tackled a major DIY project before, but with proper planning and the right tools, most homeowners can complete this project over a weekend or two. The key is understanding the fundamentals of structural design, choosing quality materials, and following through with careful measurements and assembly.
Understanding Pergola Basics and Design
Before you start building, it’s essential to understand what makes a pergola different from other outdoor structures. A pergola consists of vertical posts connected by horizontal beams and cross-beams, creating an open-roof framework. Unlike a gazebo, which provides full weather protection, a pergola offers partial shade while allowing air circulation and light filtering.
When designing your pergola, consider the primary purpose. Will it serve as a shaded dining area, a garden feature, or a support structure for climbing vines? The intended use affects dimensions, beam spacing, and material choices. Most residential pergolas range from 8×8 feet to 12×16 feet, though you can customize dimensions to fit your space.
Visit This Old House for comprehensive pergola design inspiration and professional construction advice. Their resource library contains detailed plans and structural guidelines that align with modern building standards.
Materials and Tools You’ll Need
Selecting the right materials is crucial for durability and aesthetics. The most popular options include pressure-treated lumber, cedar, redwood, and composite materials. Each has distinct advantages:
- Pressure-treated lumber: Budget-friendly, rot-resistant, requires periodic staining
- Cedar or redwood: Naturally beautiful, naturally rot-resistant, more expensive, requires maintenance
- Composite materials: Low maintenance, weather-resistant, higher initial cost
For a typical 10×12-foot pergola, you’ll need approximately 12-16 posts (depending on spacing), horizontal beams, cross-beams, and fastening hardware. Purchase materials rated for outdoor use and consider your climate when selecting wood species.
Essential tools include a circular saw, drill-driver, level, measuring tape, square, and post-hole digger or auger. A miter saw makes crosscutting beams significantly easier and more accurate. Safety equipment like work gloves, safety glasses, and a dust mask are non-negotiable.
Check Family Handyman for detailed tool recommendations and techniques specific to outdoor construction projects.
Planning Your Pergola Location
Location determines both the functionality and longevity of your pergola. Evaluate sun exposure throughout the day—morning sun creates different shade patterns than afternoon sun. Consider proximity to your home, existing landscaping, and views you want to frame or block.
Check local building codes and zoning regulations before construction begins. Most municipalities require setback distances from property lines, and some areas mandate permits for structures exceeding certain dimensions. Visit your local building department’s website or contact them directly to understand requirements in your area.
Mark the footprint with string and stakes, then observe the area during different times of day. This helps you visualize how shade patterns change and whether the location truly meets your needs. Also consider wind patterns—exposed hilltops experience stronger winds that affect structural stability.
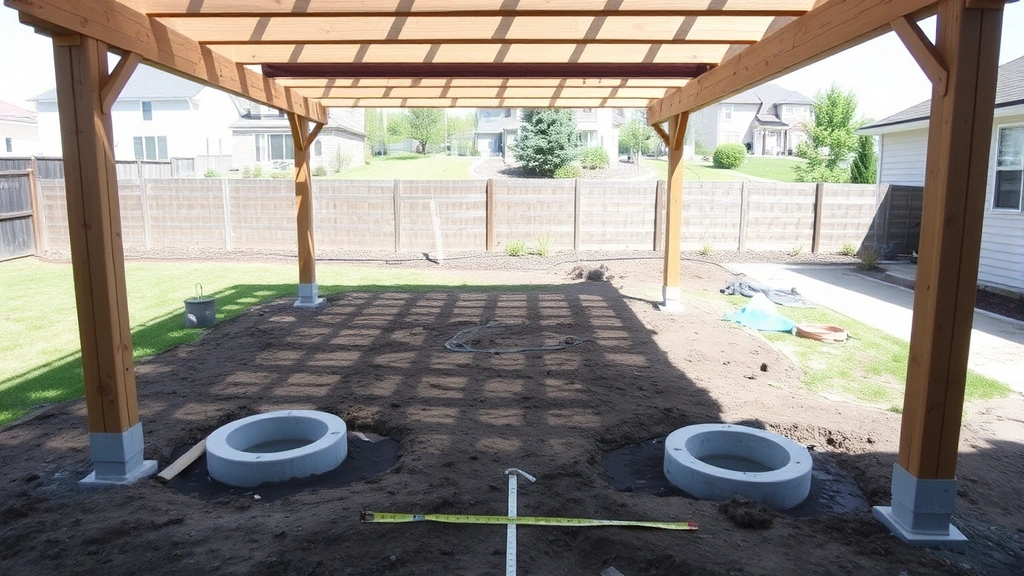
Building the Foundation
A solid foundation prevents settling, tilting, and structural failure. Post holes must reach below the frost line—typically 2-4 feet depending on your climate. Consult local building codes for your specific requirements.
Dig holes for each post using a post-hole digger or power auger. The diameter should be 10-12 inches for standard pergola posts. For a 10×12-foot pergola with 6-foot post spacing, you’ll typically need eight holes arranged in a rectangle pattern.
Once holes are dug, add 4-6 inches of gravel to each for drainage. Set posts in concrete to ensure they remain plumb and stable. Use a level to verify posts are perfectly vertical before concrete sets. Allow concrete to cure for 48 hours before proceeding with frame construction.
Pro tip: Use post sleeves or concrete footings designed for outdoor structures. These prevent direct wood-to-soil contact, extending post life significantly and reducing rot risk.
Constructing the Frame
Once your foundation is solid, begin constructing the frame. Install horizontal beams running the length of the pergola, connecting opposite posts. These beams should be securely bolted or fastened with galvanized hardware to prevent movement.
Use lag bolts or carriage bolts rated for outdoor use—stainless steel or galvanized options resist corrosion far better than standard fasteners. Drill pilot holes before inserting bolts to prevent wood splitting and ensure clean, professional-looking joints.
Check that beams are level and parallel using a 4-foot level and string lines. Uneven beams create visual problems and can cause water pooling on the roof structure. Make adjustments before permanently fastening all connections.
Cross-bracing adds diagonal support and enhances structural rigidity. Many builders include cross-braces between posts for added wind resistance and aesthetic appeal. These typically run at 45-degree angles and should be securely fastened at both ends.
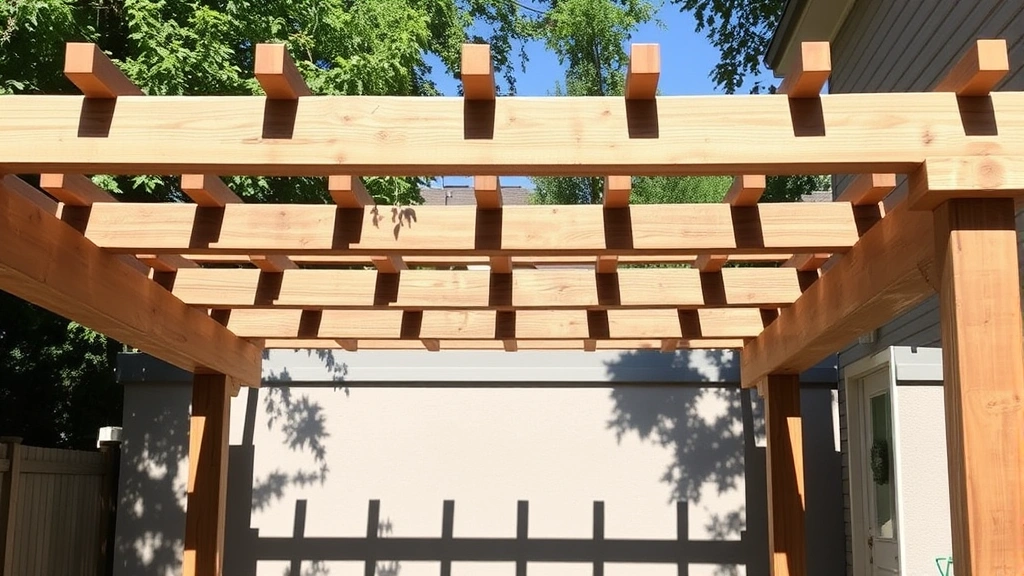
Installing the Roof Beams
The roof beams create the characteristic pergola appearance and provide partial shade. Space these beams 12-18 inches apart for moderate shade, or closer for denser coverage. Wider spacing provides more light and airflow.
Cut roof beams to length and create decorative end details if desired—tapered ends, rounded corners, or angled cuts add visual interest. Mark spacing points on the primary beams, then secure roof beams perpendicular to them using bolts, screws, or specialized connectors.
Ensure roof beams are level relative to each other. Water should drain naturally toward edges rather than pooling on the structure. Test slope by pouring water on the beams during construction—it should flow toward edges rather than collecting.
For enhanced functionality, consider adding a removable shade cloth system or retractable shade structure. These additions allow you to adjust shade levels based on weather and season without permanently altering the pergola structure.
Adding Finishing Touches
Once the structure is complete, finishing touches transform your pergola from functional to fabulous. Sand all exposed wood surfaces to eliminate splinters and create a smooth, professional appearance. This step is particularly important on surfaces where people will frequently touch or brush against the wood.
Apply exterior wood stain or sealant to protect against weathering and UV damage. Select products specifically formulated for outdoor use—these contain UV inhibitors and mildew-resistant properties. Follow manufacturer instructions for application and drying times. Plan for resealing every 2-3 years depending on climate and wood type.
Consider painting your pergola if you prefer a more polished look. Exterior paint provides excellent protection and allows endless color options to coordinate with your home’s exterior. Use primer designed for outdoor wood before applying paint—this ensures better adhesion and longevity.
Installing climbing plants like clematis, jasmine, or grapevines adds living shade and natural beauty. Train vines along the roof beams to create dappled shade patterns. Ensure plants have adequate support and water, particularly during establishment phases.
Add ambient lighting by installing solar lights along beams or stringing outdoor lights overhead. This extends usability into evening hours and creates an inviting atmosphere for outdoor entertaining. Use weather-resistant fixtures rated for outdoor installation.

Maintenance and Care Tips
Regular maintenance keeps your pergola looking beautiful and structurally sound for decades. Inspect the structure seasonally for signs of damage, rot, or insect activity. Early detection prevents minor issues from becoming costly repairs.
Clean debris from roof beams regularly, particularly in fall when leaves accumulate. Standing water and organic debris accelerate wood deterioration and promote mold growth. Use a soft brush and mild soap solution to clean surfaces without damaging finishes.
Check fasteners annually, particularly after severe weather. Wind, freeze-thaw cycles, and wood movement can loosen bolts and screws. Tighten any loose fasteners and replace corroded hardware with stainless steel alternatives.
Monitor wood for signs of rot, checking posts at ground level where moisture accumulation is most likely. Small areas of soft wood can sometimes be treated with wood hardener, but extensive rot typically requires post replacement. Address rot immediately to prevent structural compromise.
If you’re building in a challenging climate, consider upgrading to composite materials or specialty woods designed for extreme durability. These options require less frequent maintenance and provide excellent long-term value, particularly for larger structures.
For comprehensive maintenance guides and seasonal preparation tips, consult resources like Family Handyman’s outdoor structure guides, which provide detailed checklists and troubleshooting advice.
FAQ
How long does it take to build a pergola?
A typical 10×12-foot pergola requires 2-3 days for an experienced DIYer, including foundation work, frame construction, and finishing. First-time builders should allow 4-5 days. Foundation curing adds 2-3 additional days before full completion.
Do I need a permit to build a pergola?
Permit requirements vary by location. Most jurisdictions require permits for structures exceeding certain dimensions or height limits. Check with your local building department or planning office before starting construction. Obtaining permits ensures your structure meets safety codes and local regulations.
What’s the best wood for a pergola?
Cedar and redwood offer natural beauty and rot resistance but require regular maintenance. Pressure-treated lumber is budget-friendly and durable but requires periodic staining. Composite materials eliminate maintenance concerns but cost more initially. Choose based on your budget, climate, and maintenance preferences.
How much does a pergola cost to build?
A basic 10×12-foot pergola costs $800-$2,000 in materials for a DIY project, depending on wood selection. Composite or premium wood options increase costs to $2,500-$4,500. Professional installation adds $2,000-$5,000 in labor costs.
Can I attach a pergola to my house?
Yes, attaching a pergola to your house is possible and often desirable. Ensure the attachment point is structurally sound—typically bolted to rim joists or ledger boards. Follow local building codes for ledger attachment specifications. This configuration creates seamless indoor-outdoor transitions and reduces the number of foundation posts required.
How do I make my pergola more private?
Install lattice panels on sides, add shade cloth, plant climbing vines, or install outdoor curtains. These additions create visual screening while maintaining airflow. Combine multiple approaches for maximum privacy without creating a closed-in feeling.
Should I treat the wood before or after installation?
Apply initial stain or sealant after construction is complete but before final installation of attachments. This ensures all surfaces receive protection. Plan for resealing every 2-3 years with the pergola in place, focusing on high-traffic and weathered areas.
Related Posts

Superscript in Google Docs: Expert Tips

Strikethrough in Excel: Easy Steps for Beginners
